Your Organization Manages Updates on This PC: 6 Ways to Fix
Ensure that you are logged in as an admin to fix the issue
Key notes
- The Your organization manages updates on this PC message shows up even when you check eligibility of personal Windows computers.
- If you have a school or work account connected to your system, that could bring up this issue.
- You can resolve this problem by quickly changing some Group Policy Editor settings on Windows 10 or Windows 11.
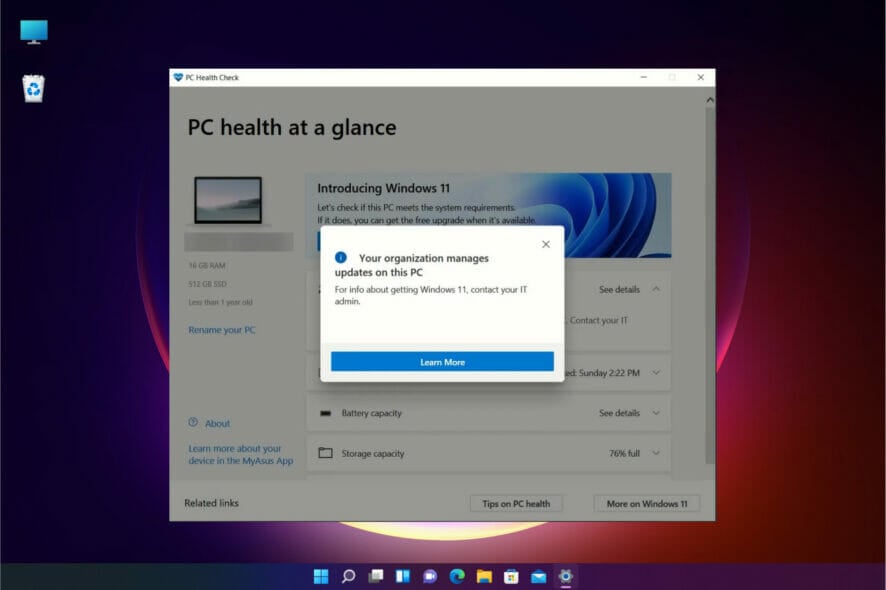
The Your organization must have just greeted you manages updates on this PC message despite using a personal computer. We will explore and prefer solutions to this error.
Users encountering this issue could not check their Windows computers’ eligibility through the PC Health Check software. They were left with no other option but to check the minimum requirements for Windows 11 manually.
What does Your organization manages updates on this PC mean?
If the PC Health Check app on your machine displays this message on the screen, it could be triggered by a few factors and could mean different things, including:
- Restricted admin rights – It simply means that you do not have the administrator rights of the PC or you are not logged in using the administrator account.
- You do not use a personal MS account – Using a Microsoft Family account, and a parent or caretaker is set as the primary system administrator would also trigger the message.
- Local accounts – On the flip side, using a local account on a Windows computer can also be the culprit behind this message since having a Microsoft account is a requirement for Windows 11.
Moreover, this issue can also present itself on Windows machines with linked business or educational accounts.
Though there are many possibilities of why this issue is presenting itself, you don’t need to be alarmed. Below are some quick and easy fixes that will definitely resolve the problem.
How can I fix the error: Your organization manages updates on this PC?
1. Use an administrator account
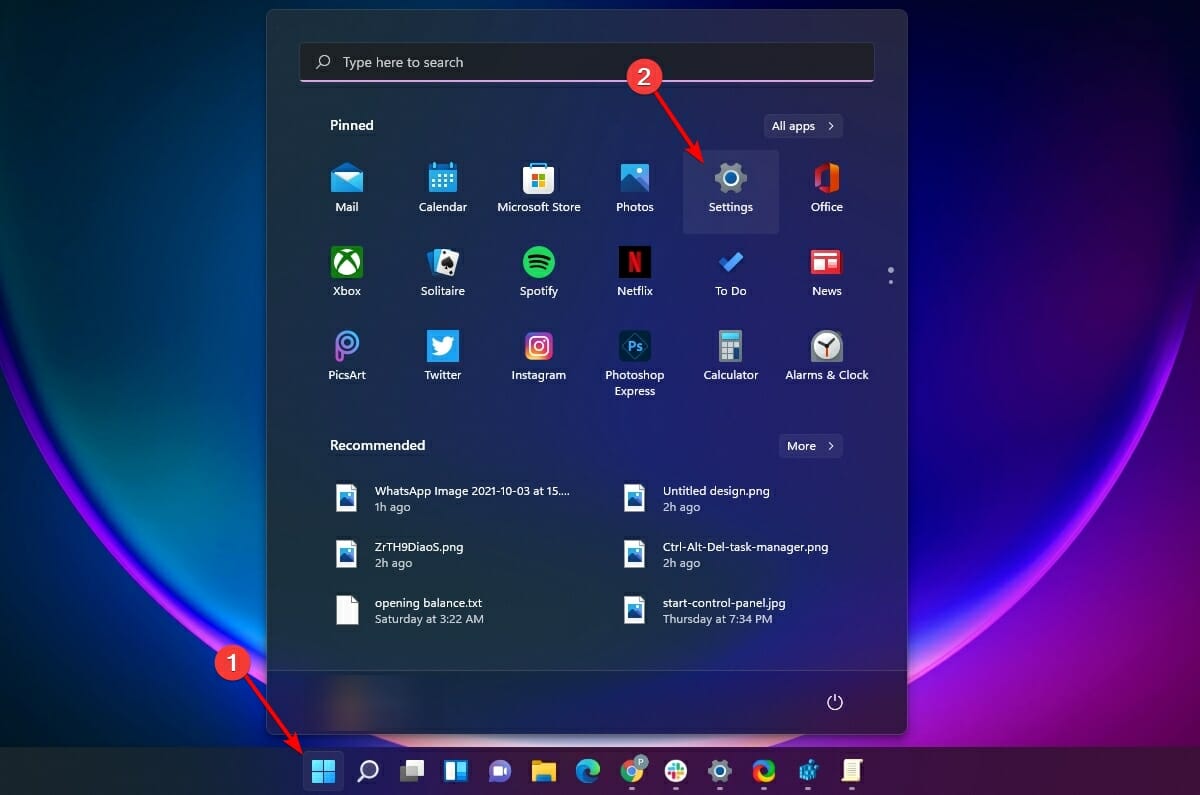
- Click on the Start Menu and choose the Settings option.

- Next, click on the Accounts tab present on the left panel of the Settings window. Then, click on the Your info tile present to the left of the window.
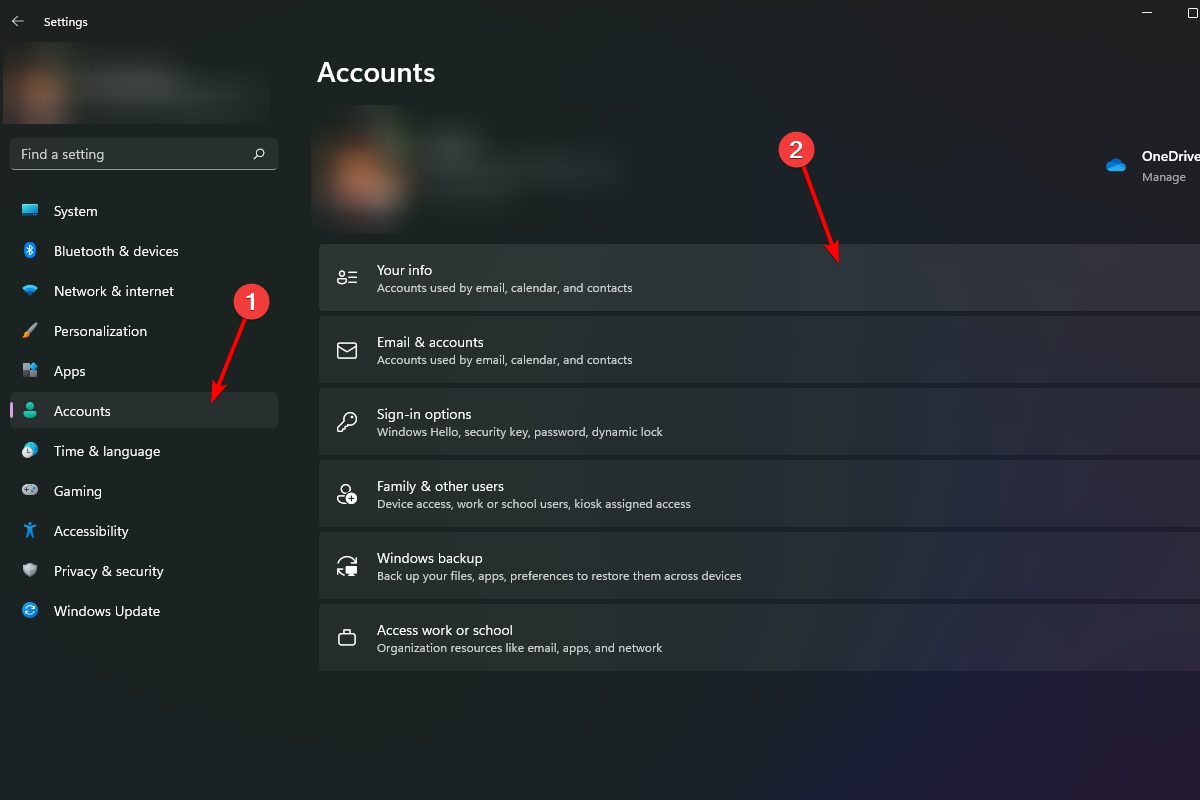
- After that, your account role will be mentioned right underneath your account name. It should be saying Administrator; if it is not, you need to contact your system administrator to get your account upgraded to an administrator or get credentials for the administrator account.

As mentioned earlier, this issue mostly means you are not running an administrator account. Thus, the first and foremost thing you should ensure is that you have an administrator account on the system or credentials for one.
Changing to an administrator account will most likely resolve the issue. If you are already logged in with an admin account, move on to the next solutions in the list.
2. Disconnect work or school account
- To disconnect work or school accounts, click the Start Menu icon on the taskbar and then choose the Settings option.

- Next, click on the Accounts tab present on the left panel of the screen and then head to the Access work or school tile situated on the left side of the window.

- After that, click on the Disconnect button present on the school or work account tile.
- Once you have disconnected the work or school account, restart your machine from the Start Menu and run the PC Health Check app. The issue of your organization managing updates on this PC should be solved.
3. Edit Windows Registry
- First, press Windows + R on your keyboard to use the Run command utility. Then, type regedit in the provided space and click the OK button. This will open a Registry Editor window on your screen.

- Next, navigate to the following key using the left panel on the Registry Editor window. You can also copy+paste the following text in the address bar:
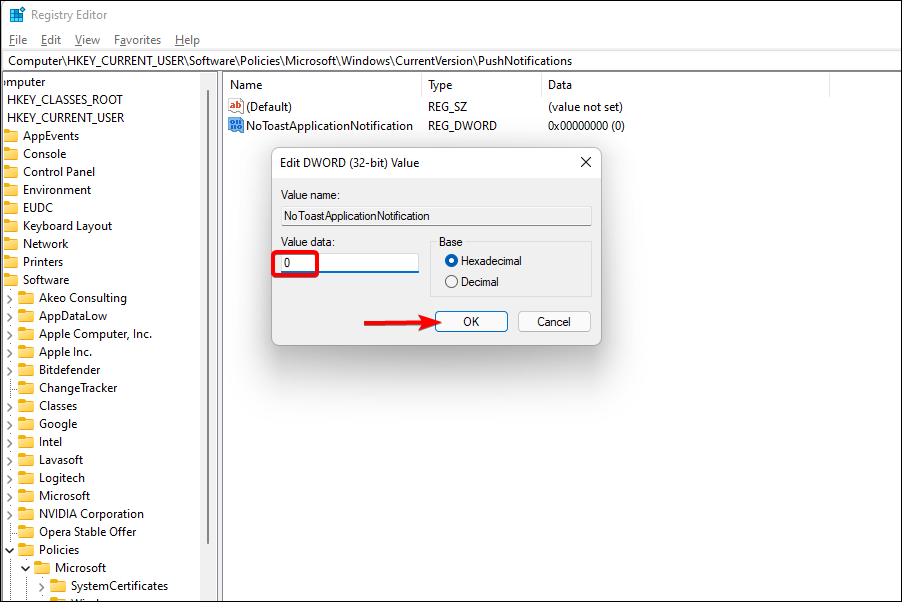
Computer\HKEY_CURRENT_USER\Software\Policies\Microsoft\Windows\CurrentVersion\PushNotifications
- Then, double-click on the NoToastApplicationNotification file. This will open an overlay pane on your screen.

- Now, enter 0 in the Value data: field and click on the OK button to confirm and close.
- Finally, restart the computer using the Start Menu and check if the issue with your organization manages updates on this PC has been resolved.

4. Change Group Policy Editor Settings
 NOTE
NOTE
- Press Windows + R on your keyboard to use the Run command utility. Then, type gpedit.msc and click on the OK button or hit Enter on your keyboard.

- Next, navigate to the following directory on Group Policy Editor. Now, from the right side of the window, locate and double-click on the Manage end user experience directory.
Computer Configuration/Admisistrative Templates/ Windows Components/ Windows Update
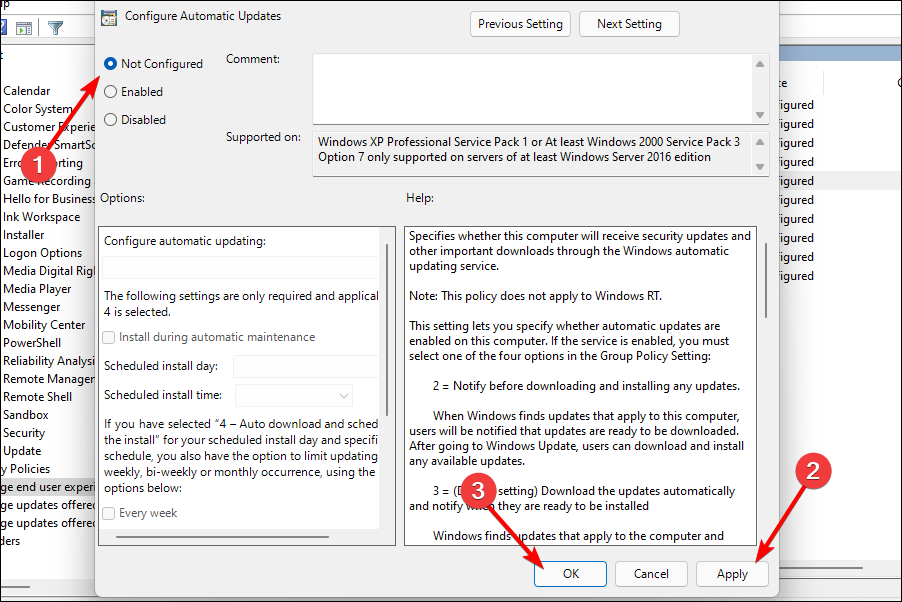
- Then, double-click Configure Automatic Updates.

- After that, select the Not Configured option by clicking on the radio button preceding it. Next, click Apply to confirm and click the OK button to close the window.
- Now restart your Windows machine and run the PC Health Check app to see if the issue with your organization manages updates on this PC has been resolved.

Since this solution requires a Group Policy Editor, it only applies to a certain pool of Windows users. Though for non-pro users, there are plenty of other reliable solutions.
5. Change Diagnostic data settings
- First, click on the Start Menu button from your computer’s taskbar and choose the Settings option from the flyout.
- Next, click on the Privacy & security tab from the window’s left sidebar. Then, click on the Diagnostic & feedback tile present to the right of your screen.

- After that, locate the Send optional diagnostic data section and then toggle the switch to the On position.

- Restart your PC and run the PC Health Check app. Your issue with your organization manages updates on this PC should be resolved by now.

If the issue presents itself due to insufficient data being sent to Microsoft, changing Diagnostic data will resolve the problem.
6. Enable telemetry
- To do so, press the Windows+R shortcut on your keyboard to bring up Run command utility. Then, type services.msc in the space provided and click on the OK button.

- Next, locate the Connected user experience and Telemetry option from the services window and double-click on it to open. This will open a separate window on the screen.

- Now, click on the drop-down menu situated adjacent to the Startup type field and select the Automatic option.

- Then, click on the Apply button to save the changes and click on the OK button to close the window.

- Now, reboot the Windows machine from the Start Menu and run the PC Health Check app.
There has also been a pool of users complaining about the non-accessibility of settings and the above-mentioned issue. If that’s also the case with you, check out issues with settings that your organization manages.
And that is it, Your organization manages updates on this PC, so it should no longer be an issue for you.
One of the similar errors caused by a corrupted security app or bad Windows Update is Your Virus and Threat Protection is Managed by Your Organization; read this to learn more about this problem.
If you still have questions or suggestions, do not hesitate to let us know using the comments section below, and we’ll get back to you as soon as possible.
Read our disclosure page to find out how can you help Windows Report sustain the editorial team. Read more


Improve this guide


User forum
2 messages