FIX: Windows 10 Update Failed Error 80072EE2
![]() 4 min. read
4 min. read
![]() Updated on
Updated on
Share this article

Improve this guide
Read our disclosure page to find out how can you help Windows Report sustain the editorial team Read more
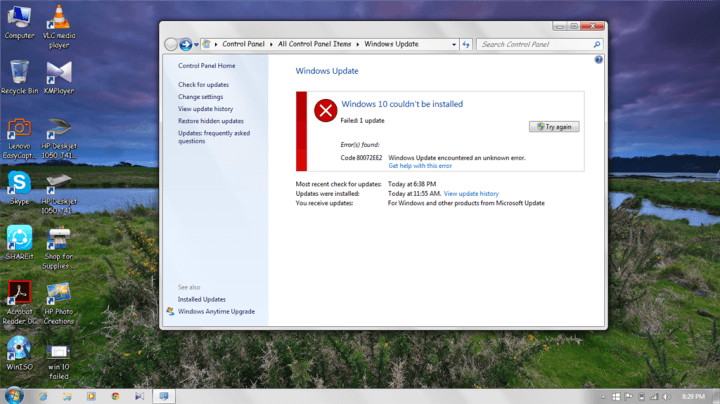
If you still didn’t download your free copy of Windows 10 you definitely should do it now! I hope the download process will be smooth.
Just in case anything goes wrong, I’m going to show you the solution for one of the most common errors which appear while a new Windows 10 update is downloading. Let’s talk about error 80072EE2.
This is how you can solve error 0x80072ee2
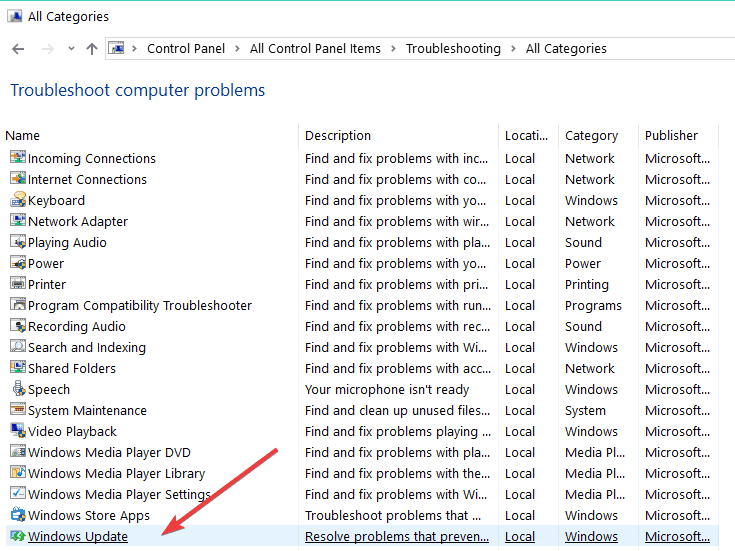
Solution 1 – Run the Windows Update Troubleshooter
Probably the simplest solution for this problem is running the Windows Update Troubleshooter. But I’m not sure how effective it is, so if it doesn’t solve the problem, go and try some other solutions listed below.
Here’s how to run the Windows Update Troubleshooter:
- Go to Search, type troubleshoot and open Troubleshooter
- Click on Fix problems with Windows Update under System and Security

- Wait for the wizard to complete the check and see if the problem is resolved.
Solution 2 – Use a third party repair tool
In order to fix this Windows update error, you can perform automatic repair using a specialized repair tool capable to fix Windows issues.
By choosing this software, it’s possible to run deep scans and find the system files or components that generate this kind of issue. Once detected, it will fix the issue automatically and restore your PC.
This being said, you will get a detailed report of what issues you need to repair and fix the corrupted software files efficiently.
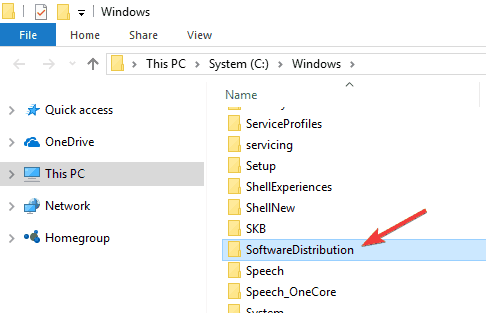
Solution 3 – Delete the Software Distribution folder
Probably the best solution and the solution that proved to be the most effective for the error 80072EE2 is deleting Software Distribution folder. So, here’s how to delete it safely:
- Go to C:WindowsSoftwareDistributionDownload folder and delete everything in it

- Now right click on the Start Menu button and open Command Prompt (Admin)
- Enter the following command and press Enter: exe/updatenow
- Go to Windows Update and check if the problem is solved
Solution 4 – Manually reset Windows Update components
If none of the above solutions helped you to solve the error 80072EE2 problem, you can try to reset Windows Update components manually. You can find the instructions for that on Microsoft’s page.
But I have to tell you that it’s a complicated process, so if you’re not sure what you’re doing, you should ask someone else for help. Also, don’t download fixing tools from that page, because they work on Windows 7 and Windows 8 only.
Solution 5 – Reset System’s Proxy Server
If your Windows 10 computer was recently infected with spyware or any kind of viruses, you should know that if you were using third-party software to remove them, that software might have modified some settings in Internet Explorer to use a proxy server. Here’s how you can reset the setting:
- Click on Start Button and type in the Search box “Command Prompt”
- Open Command Prompt and you need to type the following command “netsh winhttp import proxy source=ie”. (Without the quotes.)
- Restart your Windows 10 computer for the changes to take effect.
Some users confirmed that this solution worked. Maybe it will work for you as well.
Solution 6 – Change MTU settings
If you don’t know what MTU stands for, you should know that the Internet’s Transmission Control Protocol (TCP) uses the MTU to determine the maximum size of each packet in any transmission.
Also, If in your Windows 10 computer the MTU setting is not correctly set up, this can cause the 80072EE2 error. The good news is that there are not many occasions when this error occurred because of an MTU incorrect setting.
Anyway, there is a simple way to correct this. Here’s how:
- Click on Start Button and type in the Search box “Command Prompt”
- Type in “netsh interface ipv4 show subinterface” and press Press Enter.
- Type in “netsh interface ipv4 set subinterface “Local Area Connection” mtu=1458 store=persistent”. You should replace Local Area Connection with the name that appeared in the “Interface” column from steps 2-3 and press Enter key.
- Restart your computer and then test again.
That would be all, I hope at least one of these solutions helped you to solve the error 80072EE2.
If you have any other Windows 10-related issues you can check for the solution in our Windows 10 Fix section.