Fix 0x80070043 error on Windows with these simple solutions
5 min. read
Updated on
Read our disclosure page to find out how can you help Windows Report sustain the editorial team. Read more

Windows users report spending quite a few hours from their precious time trying to fix the 0x80070043 error with no result. Typically, this is caused by corrupted Windows system files and slows down the computer or opens the gate for other security issues.
Are you experiencing the 0x80070043 error too? The lines below contain some advanced troubleshooting solutions you can use to correct this behavior you’re encountering.
What can I do when getting the 0x80070043 error on Windows?
1. Use third-party software for registry errors
The most effective and timely solution would be to use a specialized third-party tool that addresses Windows Registry errors and focuses on repairing corrupted files.
This type of program has advanced cleaning features that can also boost your PC’s speed and performance.
2. Enable the Network Startup Local policy
- Firstly, hold down the Windows Key and R keyboard shortcut.
- Once you’re inside the Run dialog box, type gpedit.msc and press Enter to start the Group Policy Object Editor.
- If you’re prompted by the UAC window, click Yes to grant administrative privileges.
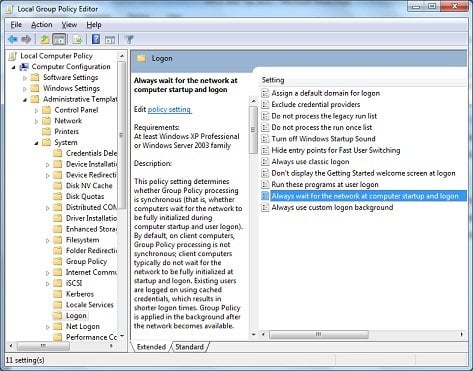
- Up next, expand Local Computer Policy > Computer Configuration > Administrative Templates from the right-hand side.
- Click on System.
- Then, click on Logon from the list of available options.
- While inside the Logon folder, you need to right-click Always wait for the network at computer startup and logon.
- Click Properties after that.
- On the Settings tab, click Enabled, then confirm.
- Finally, restart your computer and wait for the next startup to complete.
Before any other procedure, we advise you to select the option that says Always wait for the network to start when you start your computer and connect to the local policy option. To do this, proceed as described above.
3. Fire up an SFC scan
- Press Windows key + R. The Run dialog box will open.
- Next, type cmd and press Ctrl + Shift + Enter to open up an elevated Command Prompt.
- Then, select the Run as administrator option.
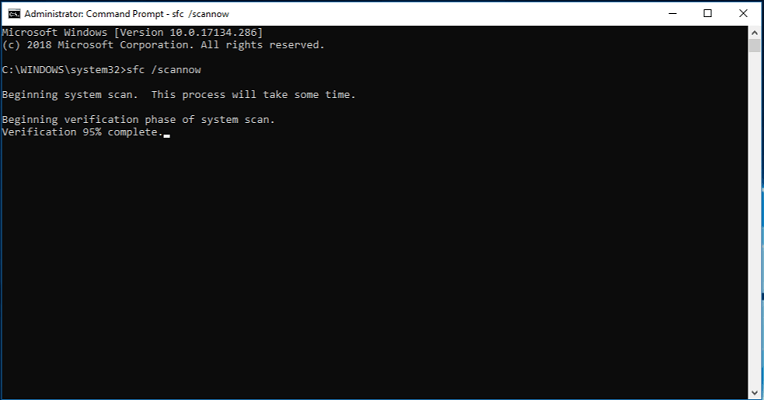
- After you’re inside the elevated Command prompt, type the following command, and then press Enter:
sfc /scannow - When you complete the steps, close the elevated Command Prompt and restart your computer. Check if the issue is resolved at the next system startup.
Note: Even if this is generally a harmless command, create a temporary full backup before proceeding since you’ll be making some important system changes. You may use one of the best local data backup software tools of the moment in that regard.
The sfc /scannow command can scan all protected system files, and replace corrupted files with a cached copy. However, if getting the message Windows Resource Protection did not find any integrity violations, this means that you do not have any missing or corrupted system files.
Continue to the next step to keep on troubleshooting the 0x80070043 error.
4. Use the DISM command tool
- Open Start.
- Search for Command Prompt and right-click the top result.
- When you see the User Account Prompt, you need to click Yes to grant admin privileges to the CMD window.
- At the next startup sequence, follow the first steps again to open up another elevated Command Prompt.
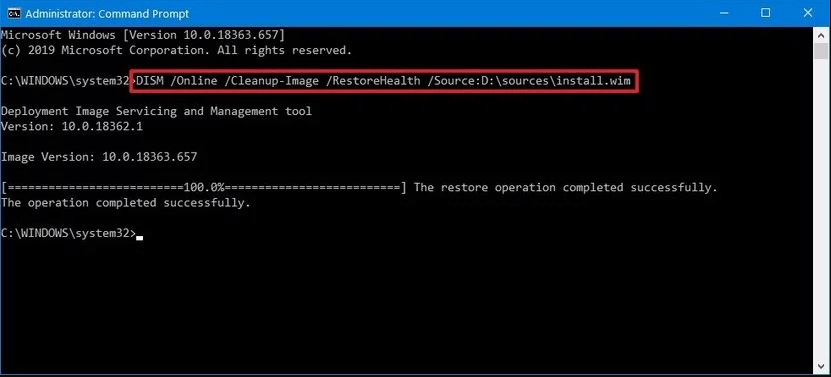
- Then, type the following command to initiate a DISM scan:
DISM /Online /Cleanup-Image /RestoreHealth - While the command is running, you might see the process stuck at 20 percent or higher. After a few minutes, the process will complete successfully.
- You may then restart your PC.
If it detects any problems, the Deployment Image Servicing and Management tool will connect to the Windows Update servers to download and replace the damaged files in the local image for Windows 10.
5. Clear the temp folder while in Safe Mode
- Power-cycle your computer.
- While getting to the initial login screen, click on the Power icon next.
- Then, press and hold the Shift key while clicking on Restart.
- During the next startup sequence, your computer will automatically restart inside the Troubleshoot menu. That’s your chance to click on Troubleshoot.
- Once you’re inside the Advanced Options menu, click on Startup Settings.
- Then, hit F5 to boot up in Safe Mode with Networking.
- Once the next startup sequence is finalized, you will be prompted by a slightly different login screen. Enter your Windows password to complete the startup procedure.
- Then, enter the Win + R keyboard shortcut.
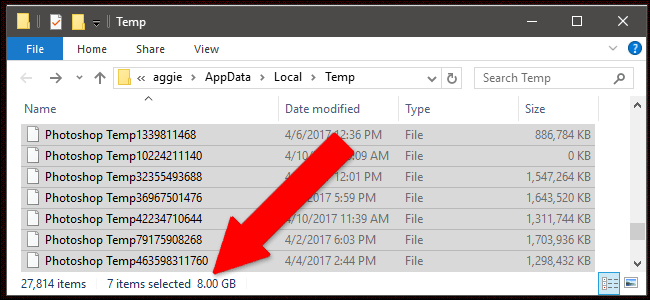
- Type %temp% and press Enter to open up the Temp folder.
- You may now select everything. Right-click on an item and choose Delete from the newly appeared context menu to delete every temporary file.
- Finally, restart your computer and see if the issue is resolved at the next computer startup.
If you’re still bothered by the 0x80070043 error, clearing the temp folder while in Safe Mode can be a great troubleshooting step too. Files whose extension is .tmp or .temp are created as a temporary work area by an application.
Typically, these files won’t cause any issues, but they can grow rapidly and you can never know when things get messy.
If you need help applying the above steps, don’t hesitate to leave a comment in the comments area below. That’s what we are here for.




User forum
0 messages