0x8007025d Error Fix: Windows Cannot Install Required Files
Everything you need to push the Windows installation through
4 min. read
Updated on
Read our disclosure page to find out how can you help Windows Report sustain the editorial team. Read more
Key notes
- If you are dealing with the 0x8007025d error on your PC, it might be because of issues with your PC memory.
- A quick and effective fix to this issue is to resize and format your HDD or SSD.
- Another excellent solution is to run the memory diagnostics tool.
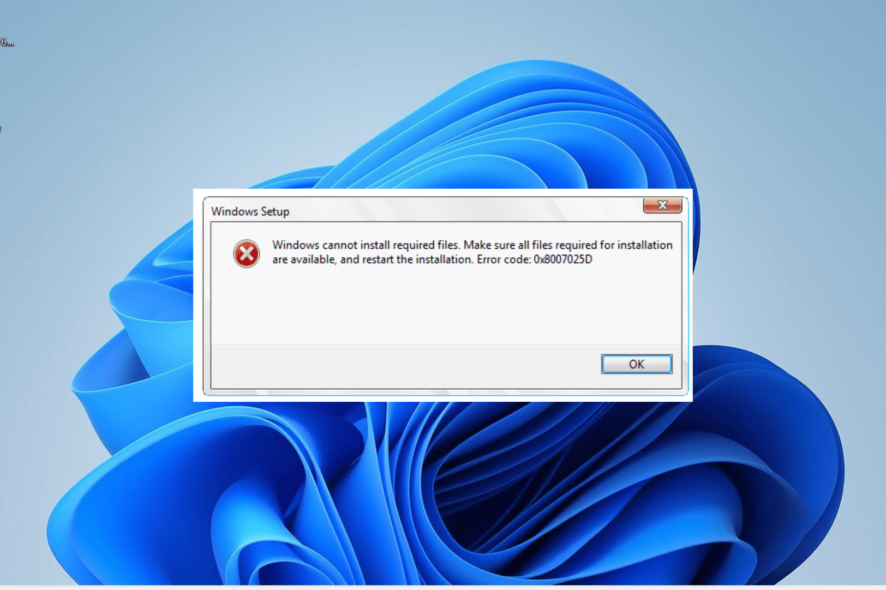
Windows installation, while easy, is not usually straightforward. And one of the prominent errors users report is Windows cannot install required files, accompanied by error code 0x8007025d.
This issue usually occurs when users try to perform a clean installation of their OS. Thankfully, it is not an issue without a fix, and we will show you how to get rid of it in this guide.
What is error code 0x8007025d?
The error code 0x8007025d is a stop code that usually shows up while users are performing a clean install of the operating system via USB. This error also occurs while updating Windows PC.
While there are a series of potential causes for this error, below are some of the common ones:
- Faulty memory: One of the most prominent causes of this error is faulty or wrongly partitioned memory. The solution to this is to reduce the memory size and format it.
- Faulty USB: If error code 0x8007025d is shown while trying to clean install Windows 10, it might be because of a corrupt USB flash drive or cable. You need to change the flash drive or cable, as the case may be.
- Corrupt update cache: Sometimes, the error code can be due to a faulty cache. Clearing these junk files should do the trick here.
How do I fix the error code 0x8007025d?
Before proceeding to the fixes in this section, below are some basic troubleshooting steps to try:
- Unplug all external devices.
- Use another USB.
- Download a new Windows ISO image file.
- Remove and reinstall SSD.
Should this fail to fix the error, you can now explore the solutions below:
1. Run memory diagnostics
- Power off your computer and power it on again. Shut it down forcibly (by pressing and holding the power button) when the manufacturer’s logo shows up. Repeat this twice to bring up the Advanced Startup page.
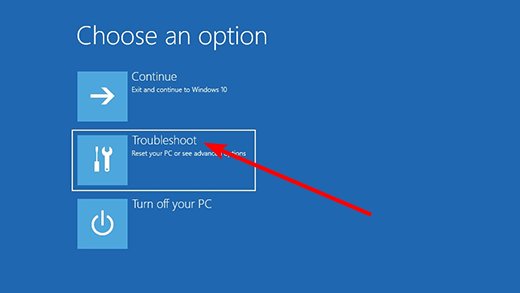
- Select the Troubleshoot option.
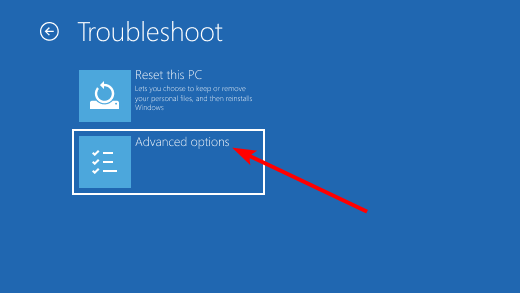
- Now, select Advanced options.
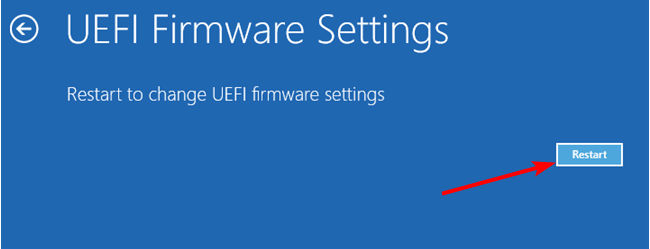
- Choose the UEFI Firmware Settings option.
- Next, click the Restart option.
- When your PC restarts and boots into BIOS, select the Diagnostics option.
- Finally, choose Memory Test, hit the Enter button, and wait for the diagnosis to complete.
In some cases, this error 0x8007025d can occur due to problems with your RAM. The solution to this is to run the memory diagnostic tool.
2. Reduce SSD or HDD size and format it
- Repeat steps 1 to 5 in solution 1 above.
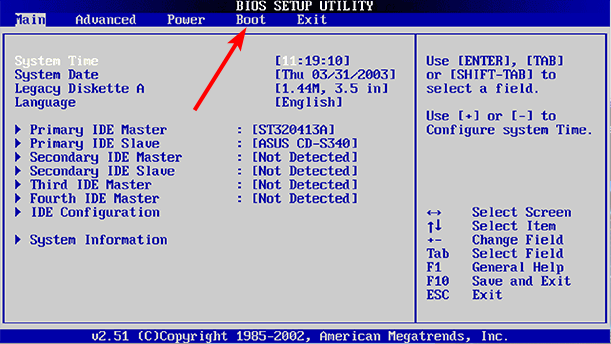
- Click the Boot or System Configuration tab and select Boot Options.
- Now, enable the Legacy support option.
- Click the Yes option to confirm the action and select Exit on the next page.
- On the Boot Manager page, select the USB hard drive (UEFI) option.
- Next, select your OS version.
- On the Windows Setup dialog, choose the custom option.
- Now, click the Apply option, and click the Format button on the next page to format the new and primary partitions.
- Finally, click the Next option and wait for the process to complete.
Sometimes, the 0x8007025d error can be caused by excessive space available on the partition you want to install Windows on. This extra space can get corrupted, leading to this error message.
The solution is to reduce the space and format your drive.
3. Disable antivirus
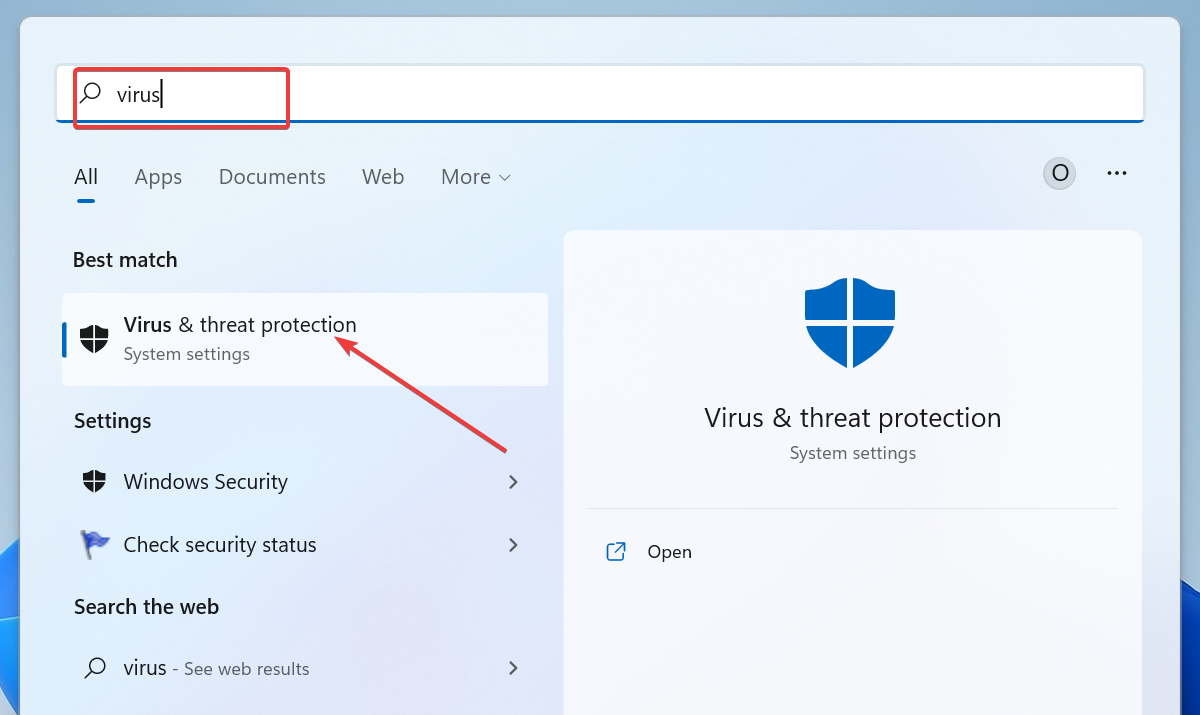
- Press the Windows key, type virus, and select Virus & threat protection.
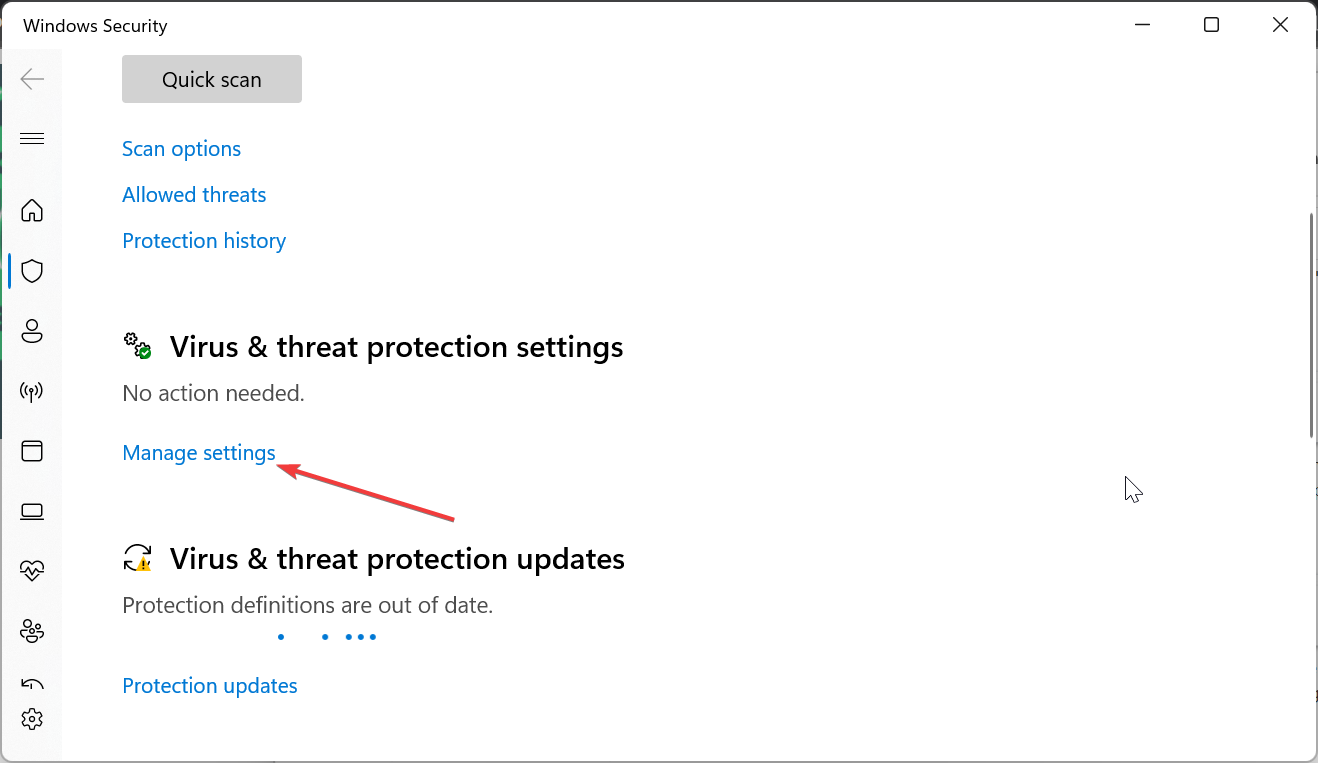
- Now, click the Manage settings.
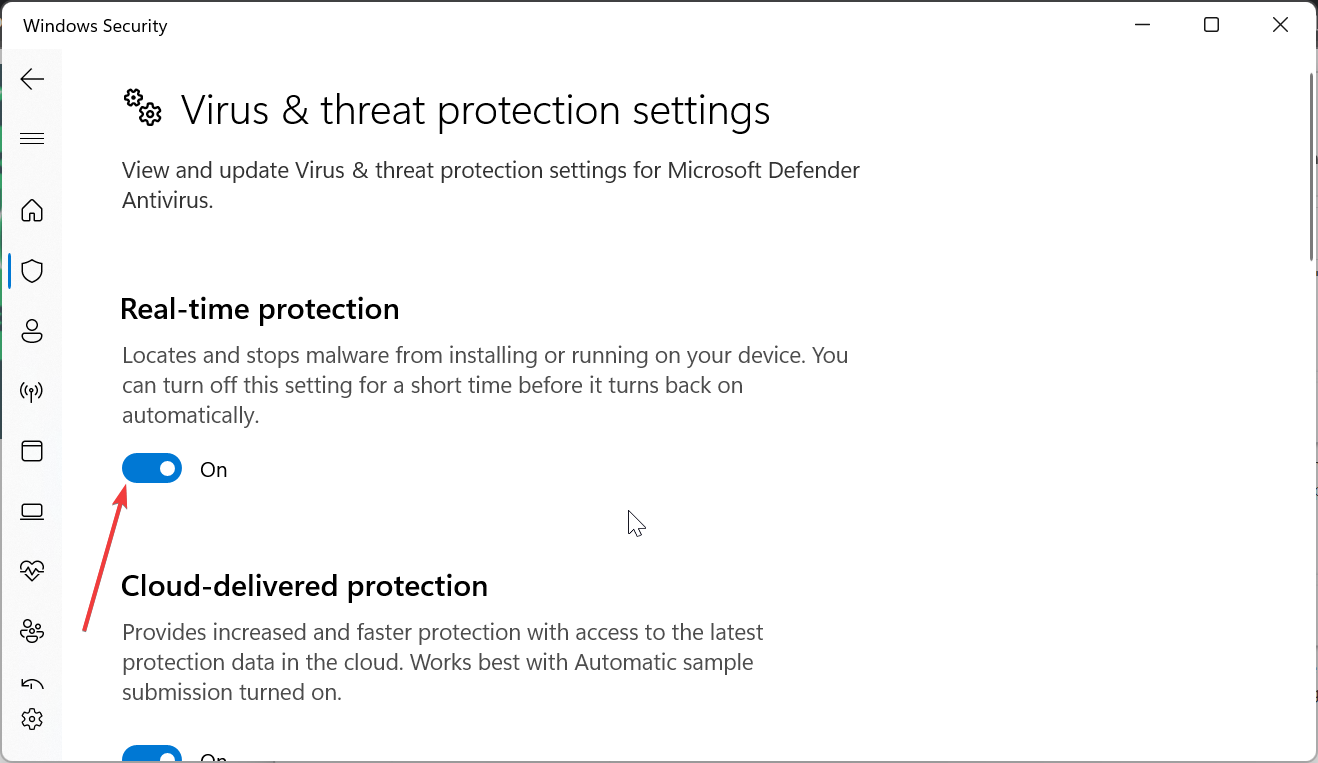
- Toggle the switch for Real-time protection backward to disable it.
- Finally, if you are using a third-party antivirus, right-click it, and select Disable or a corresponding option.
Some users have reported that the 0x8007025d error can be due to problems with their antivirus software. Disabling your antivirus software temporarily should do the trick here.
4. Run the Windows Update troubleshooter
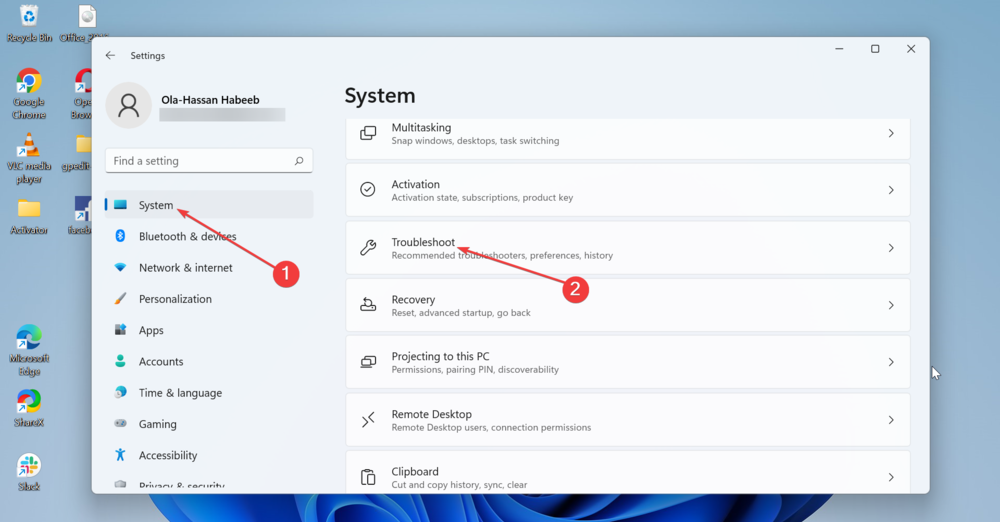
- Press the Windows key + I and select Troubleshoot in the right pane.
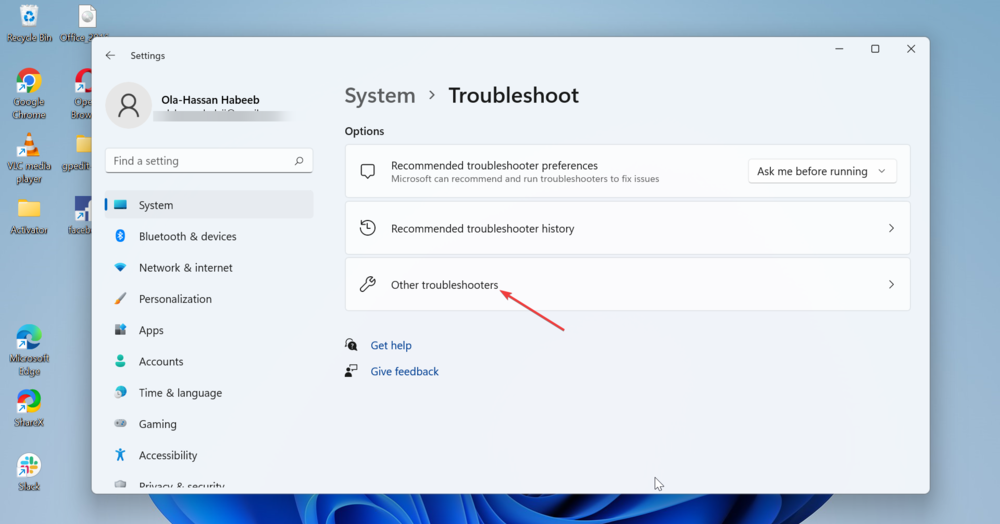
- Click the Other troubleshooters option.
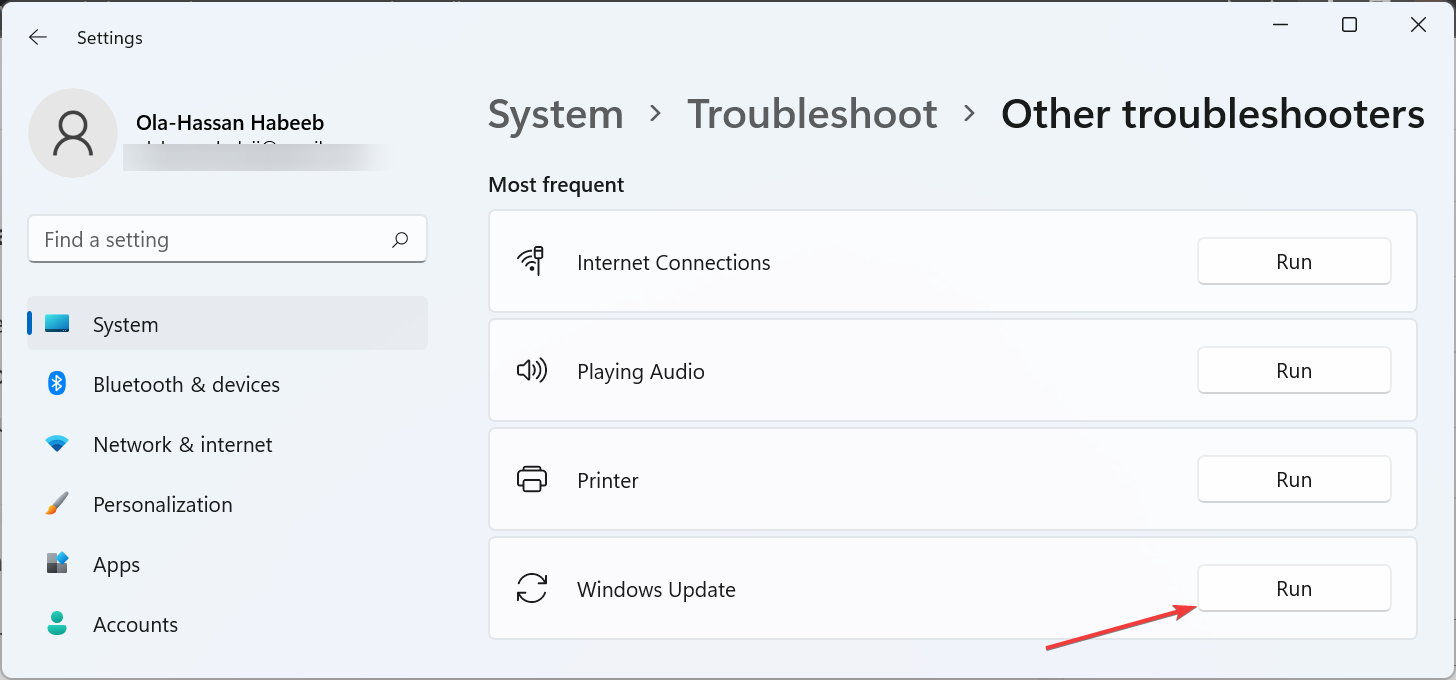
- Finally, click the Run button before the Windows Update option.
If you get the 0x8007025d error while trying to update your PC, it might be due to minor issues. Running the Windows Update troubleshooter should help diagnose and fix the issue.
With this, we can conclude this comprehensive guide on fixing the Windows cannot install required files issue on Windows 11 and 10. You should be able to get past the issue with problems by following the steps carefully.
If Windows 10 won’t install on your PC, check our detailed guide to fix the issue.
Feel free to let us know in the comments below if you encounter any issues applying our solutions.




User forum
0 messages