How to Delete Temporary Files in Windows 11 (Full Step-by-Step Guide)
![How to delete Temporary Files in Windows 11 [Complete Guide]](https://windowsreport.com/wp-content/uploads/2021/08/DELETE-TEMPORARY-FILES-1-1-886x590.jpg)
Knowing how to delete temporary files in Windows 11 is essential for keeping your PC running fast and clutter-free. This guide shows you every safe and effective way to remove temp files, from simple built-in tools to advanced cleanup options.
How can I delete temporary files in Windows 11?
Table of contents
- How can I delete temporary files in Windows 11?
- 1. Use the Settings menu
- 2. Try Disk Cleanup
- 3. Delete files from Temp Folder
- 4. Automatically clear Temporary Files with Storage Sense
- 5. Delete Prefetch Folder Contents
- 6. Clear Browser Cache
- 7. Manually Delete Files in C:\Windows\Temp
- 8. Delete Windows Update Cache (SoftwareDistribution Folder)
- 9. Disable Hibernation to Remove hiberfil.sys
- 10. Use Safe Mode to Delete Locked Temp Files
- 11. Automate Temp File Deletion with a Batch Script
- Wrapping up
1. Use the Settings menu
- Hit the Windows key, then open the Settings menu.
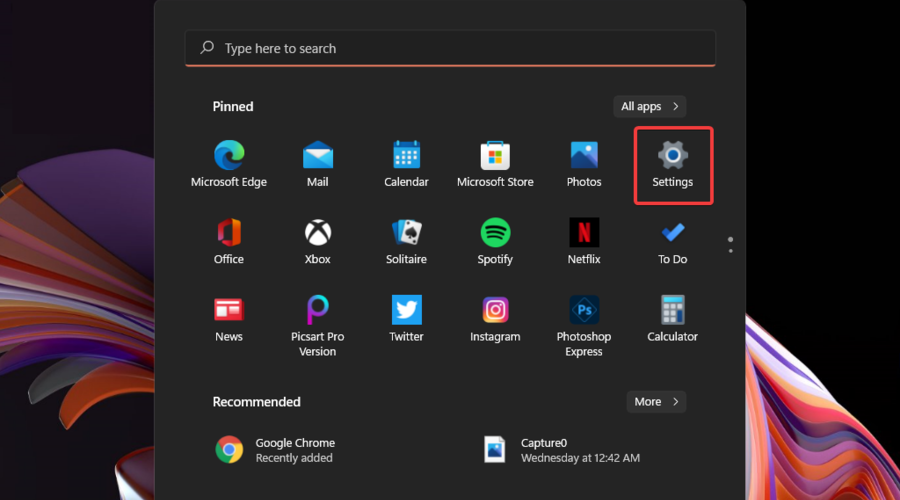
- Select the System section, then navigate to Storage.

- Click on the Temporary files section.

- Checkmark all the files you want to delete, then click on the Remove files button.

To delete temp files, you must have administrator access or else, you’ll get the folder access denied message.
2. Try Disk Cleanup
1. Press the Windows key on your keyboard.
2. Type Disk Cleanup in the search box that opens, and click on the result to open the app.

3. Checkmark the files you want to delete, then click on OK.

4. After, click on the Clean up system files button.

5. Select the files you want to delete, then click on OK.

6. To confirm the changes, click on the Delete Files button.

Disk Cleanup is a free disk cleaner that’s built into Windows 11, but if you want something more advanced, you can also try using automatic repair and optimization software.
3. Delete files from Temp Folder
3.1 With File Explorer
- Use the following keyboard shortcut: Windows + R.
- In the Run dialog box, type %temp%, then click OK.
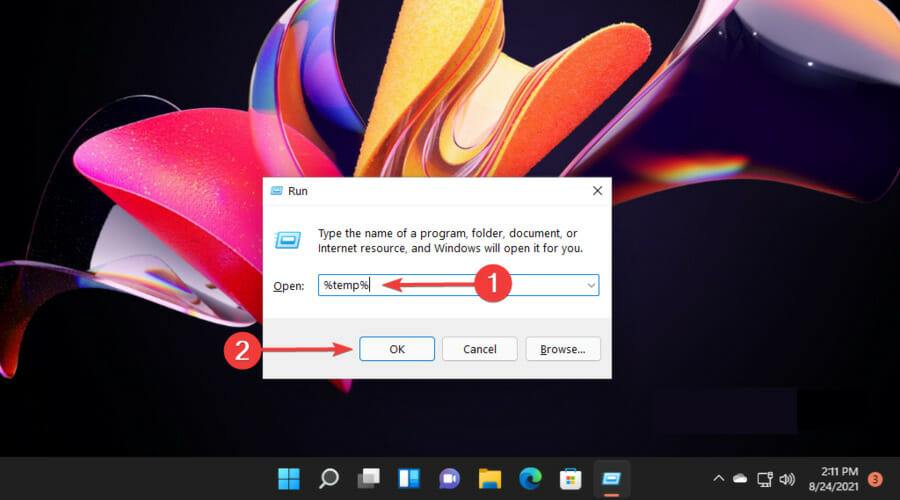
- Select the files you need to delete, then click on the Delete icon, marked as a trash.

3.2 With Command Prompt
- Press on the Windows key, type cmd, then choose to Run as administrator.

- Copy and paste the following command, then hit the Enter key:
del /q/f/s %TEMP%\* - Now all the temporary files that don’t require additional permissions will be deleted.

This is one of the fastest ways to perform a junk files cleanup, so don’t hesitate to try it.
4. Automatically clear Temporary Files with Storage Sense
- Navigate to the Storage page, from the Windows Settings menu.
- Look at the Storage Sense section, then make sure the toggle button is set on On.

- Now click on the Storage Sense section to customize various options.
- In the opened window, under Configure cleanup schedules, select the drop-down menus for each section, then select the desired options.

After enabling Storage Sense in Windows 11 and configuration, your temporary files will be automatically cleaned on your system as per the set schedule.
5. Delete Prefetch Folder Contents
- Press Windows + R to open the Run dialog.
- Type
prefetchand hit Enter. - If asked for permission, click Continue.
- Press Ctrl + A to select all files.
- Press Shift + Delete to permanently remove them.
- Skip any files in use.
6. Clear Browser Cache
For Microsoft Edge or Chrome:
- Open the browser.
- Press Ctrl + Shift + Delete.
- Check Cached images and files.
- Select All time as the time range.
- Click Clear now or Clear data.
For Firefox:
- Open Firefox and press Ctrl + Shift + Delete.
- Check Cache.
- Select Everything as the time range.
- Click OK to delete.
7. Manually Delete Files in C:\Windows\Temp
- Open File Explorer with Windows + E.
- Navigate to:
C:\Windows\Temp. - Press Ctrl + A to select all contents.
- Press Shift + Delete to remove them permanently.
- Skip any files in use or locked by the system.
8. Delete Windows Update Cache (SoftwareDistribution Folder)
- Press Windows + R, type
services.msc, and hit Enter. - Scroll to Windows Update, right-click it, and select Stop.
- Open File Explorer and go to:
C:\Windows\SoftwareDistribution\Download. - Delete all files in that folder.
- Return to services.msc, right-click Windows Update, and click Start.
9. Disable Hibernation to Remove hiberfil.sys
- Press Windows + X and select Terminal (Admin) or Command Prompt (Admin).
- Type this command and press Enter:
powercfg -h off - This disables hibernation and deletes the hidden
hiberfil.sysfile.
10. Use Safe Mode to Delete Locked Temp Files
- Press Windows + I to open Settings.
- Go to System > Recovery > Advanced startup.
- Click Restart now.
- On the blue screen, go to: Troubleshoot > Advanced options > Startup Settings > Restart.
- Press 4 or F4 to boot into Safe Mode.
- Once in Safe Mode, delete:
%temp%via RunC:\Windows\Tempprefetch
- Restart your PC normally.
11. Automate Temp File Deletion with a Batch Script
- Open Notepad.
- Paste this script:
@echo off
echo Deleting temp files...
del /s /f /q %temp%\*
del /s /f /q C:\Windows\Temp\*
del /s /f /q C:\Windows\Prefetch\*
rd /s /q %temp%
md %temp%
echo Done!
pause - Save it as
cleanup_temp.bat. - Right-click the file and choose Run as administrator.
FAQs
Yes, it’s completely safe. Temp files are non-essential and are mainly used for caching or setup processes.
You may free up storage space and improve performance. Some apps might recreate these files when needed, but no core system functions are affected.
Common locations include %TEMP%, C:\Windows\Temp, and the Prefetch folder.
Ideally, once every 1–2 weeks. You can automate this using Storage Sense or a batch script.
Yes. Use del /q/f/s %TEMP%\* in an elevated Command Prompt to quickly delete temp files.
Wrapping up
That’s all you need to know to safely and efficiently delete your temporary files in Windows 11.
If you encounter any problems, we have a guide on what to do if temporary files aren’t deleting, so be sure to check it out.
For any additional questions or thoughts, do not hesitate to leave a comment in the section below.
Read our disclosure page to find out how can you help Windows Report sustain the editorial team. Read more


Improve this guide


User forum
1 messages