5G Wi-Fi Keeps Dropping? Here's How to Fix it
Fast and uninterrupted connection is possible in 5G
Key notes
- If your 5GHz Wi-Fi connection keeps dropping, check for your router's firmware updates and switch out your Wi-Fi channel.
- Also, ensure your Network adapter has the latest drivers installed to rule out any compatibility issues.
- Keep reading to find out other ways you can maintain a steady connection on this band.

Everyone enjoys fast Internet speeds, hence why the 5G frequency is a favorite. Under the right circumstances, you should have a seamless connection with stability, but some users complain of the connection dropping often.
Network connection issues can happen to any frequency including the 2.4GHz, which is normal, but if it happens often, you may need to look into your configuration or see whether it’s time for a router upgrade.
Why does 5G Wi-Fi keeps disconnecting?
- There’s interference between your device and the router.
- There may be compatibility issues that often occur when you have upgraded your OS or device but have yet to update your router.
- The device doesn’t support 5G Wi-Fi.
- Your ISP (Internet Service Provider) may not be providing adequate bandwidth for you to use your 5G connection at full speed.
- If too many devices are connected to the same network, your Wi-Fi may keep disconnecting and reconnecting.
How can I fix my 5G Wi-Fi if it keeps dropping?
Before you begin, check off the following preliminary steps:
- Make sure that the device you are using can connect to the 5G network.
- If you have a newer router, check for firmware updates and reconfigure your network to use the 5GHz band.
- Forget the network and try again. You can also change the SSID and see if it works.
- Move your router from other devices such as the microwave and radio to prevent interference.
- Verify that you’re not on a limited bandwidth.
1. Run connection troubleshooters
1.1 Run the Network adapter troubleshooter
- Hit the Windows key and click on Settings.

- Click on System, then select Troubleshoot.
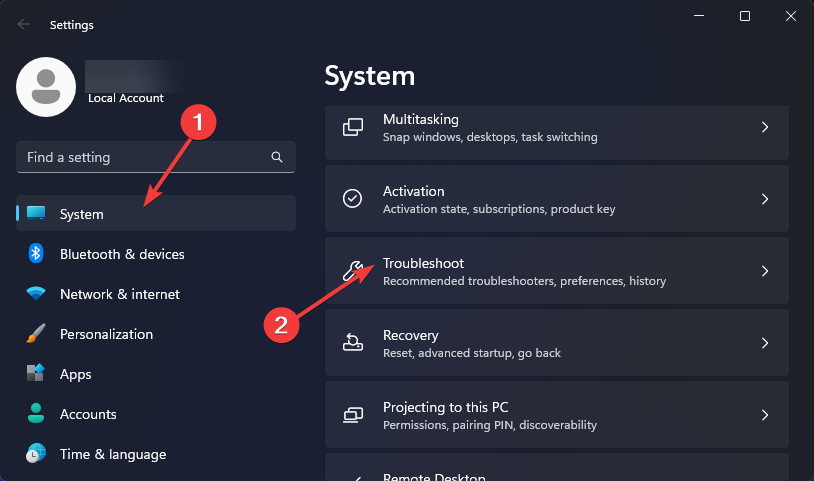
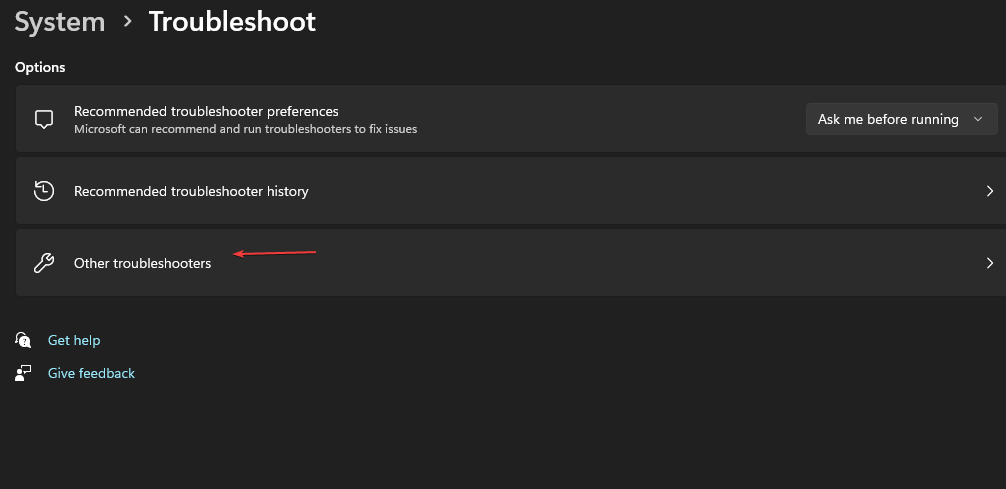
- Select Other troubleshooters.
- Locate the Network Adapter troubleshooter and click on the Run button next to it.

1.2 Run the Internet Connections troubleshooter
- Hit the Windows key and click on Settings.
- Go to System, and click Troubleshoot.

- Now click Other troubleshooters.

- Locate Internet connections, and click Run.
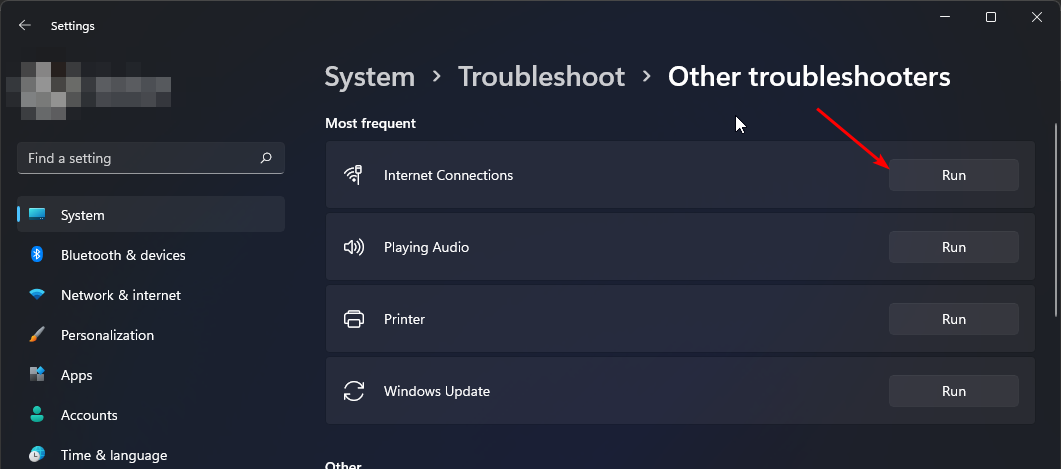
- Follow the onscreen prompts to complete the process.
If the built-in tools aren’t of much help, you can opt for Wi-Fi analyzers that can help pinpoint the network issues and help your router locate the best connection possible.
2. Change your router’s channel
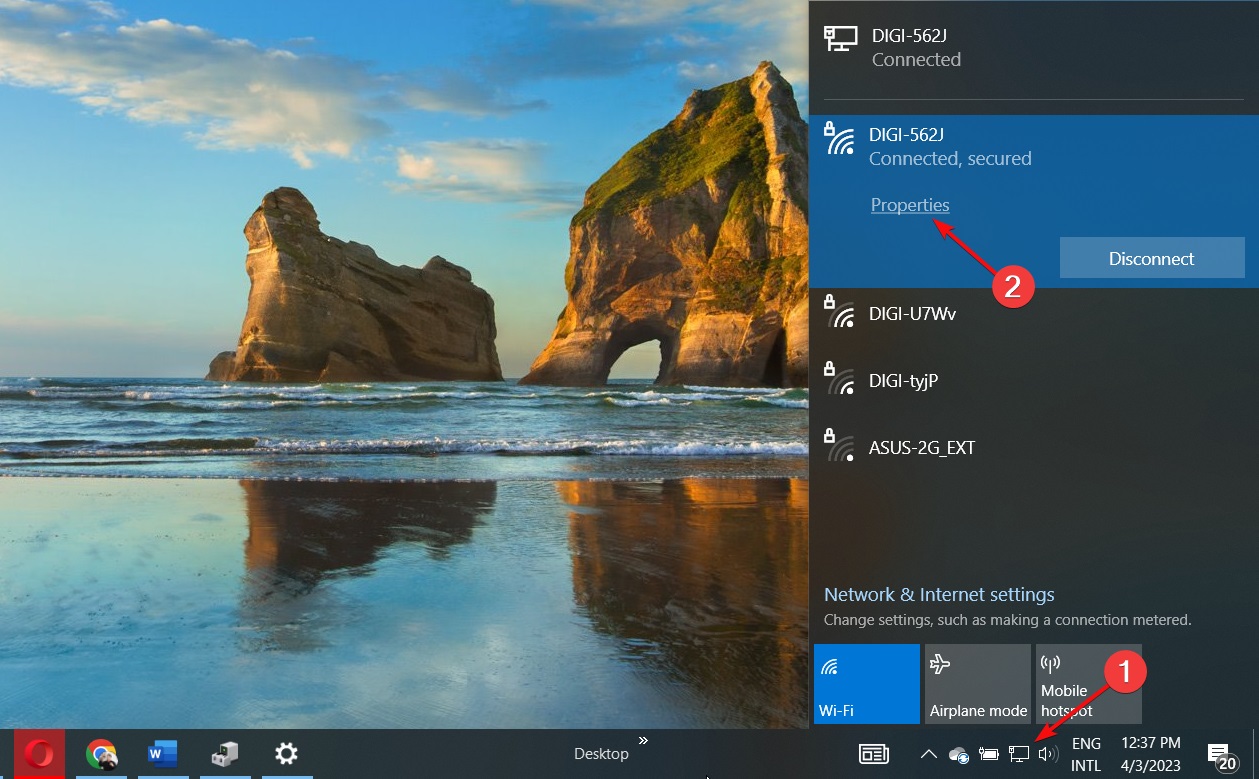
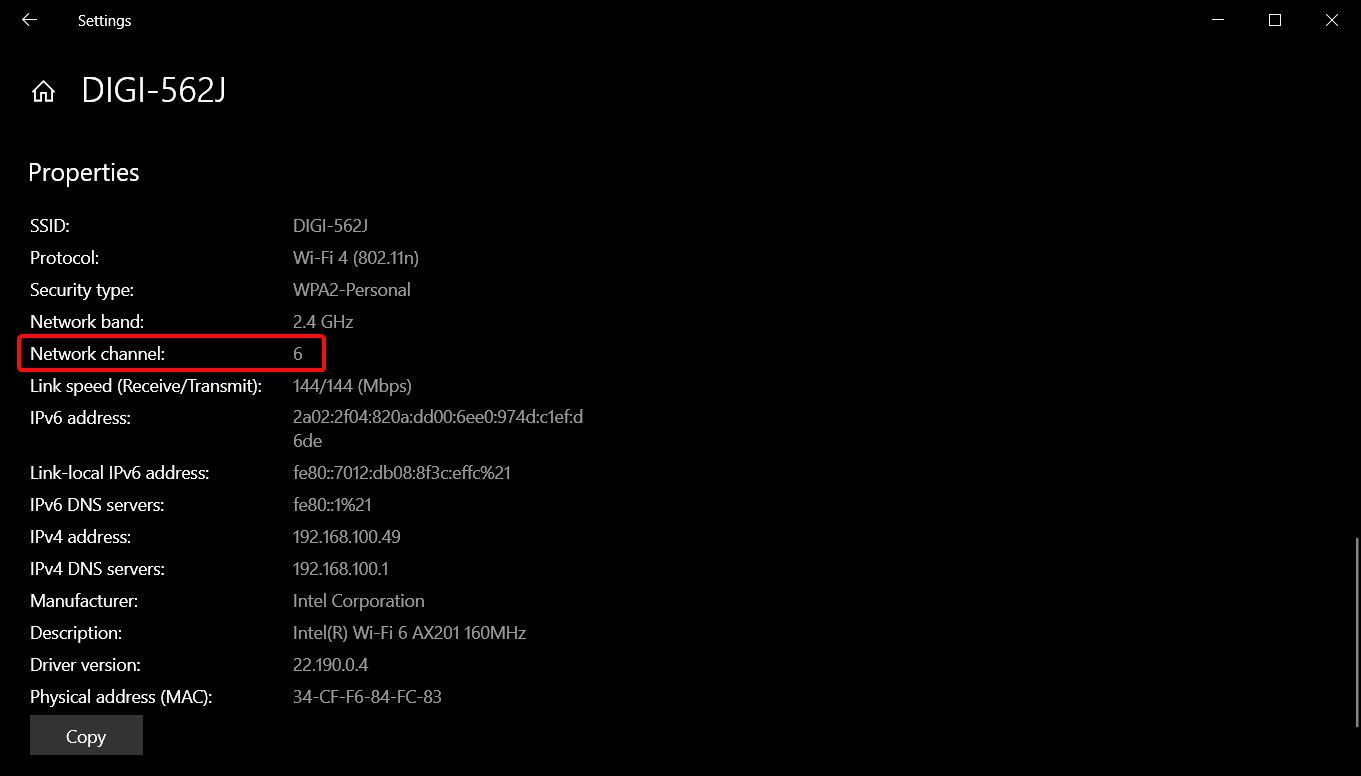
- Click on the Network icon on your taskbar, select your Wi-Fi connection, and click on Properties.
- Now, scroll down and you should see the Network channel for your Wi-Fi connection.
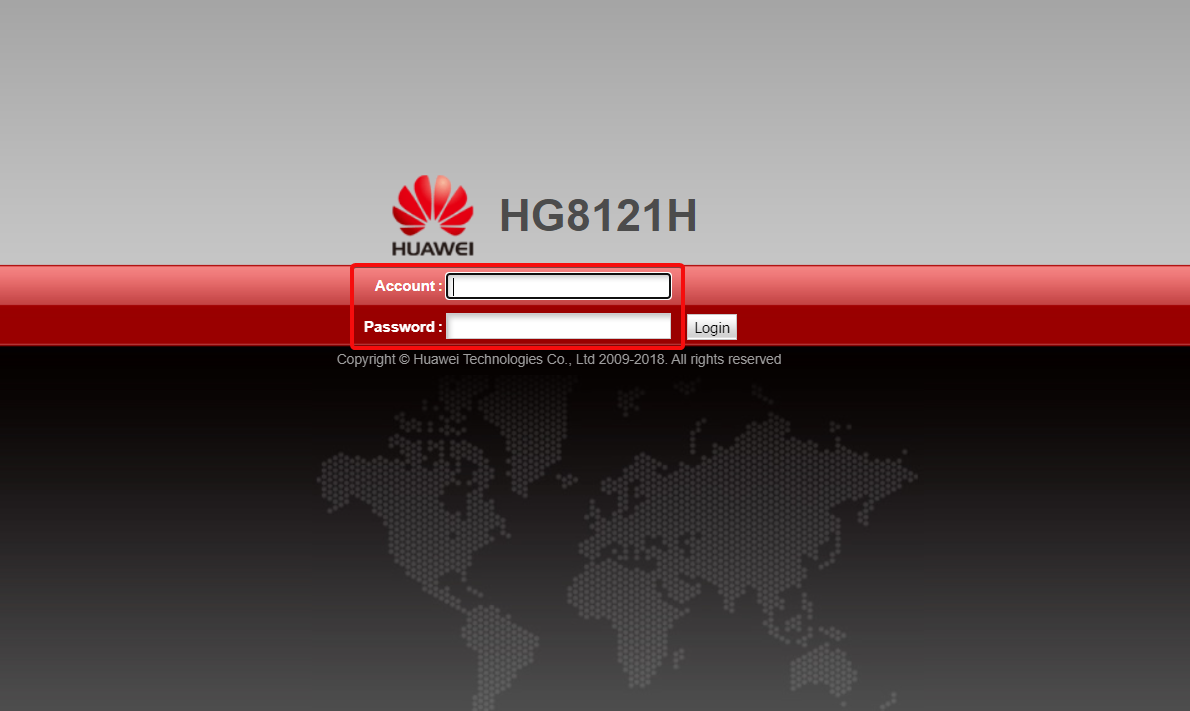
- Navigate to your browser and log into your router with the correct credentials. You can find that info on the router itself or on the manual of the router.
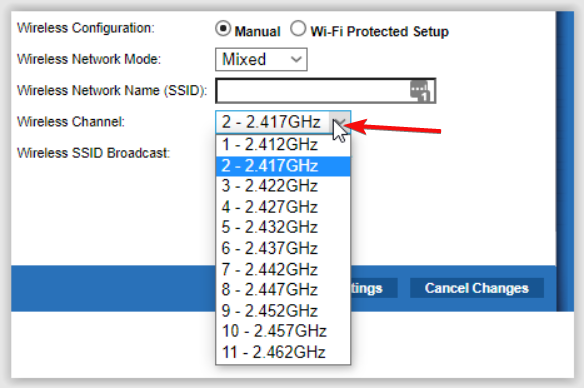
- Go to the Wireless settings of your router and change the router channel to a different one from the default.
And because manually configuring your Wi-Fi channels involves a lot of guesswork and switching back and forth, using a Wi-Fi scanner can help you connect automatically to the best channel and avoid disruptions.
3. Update your Network driver
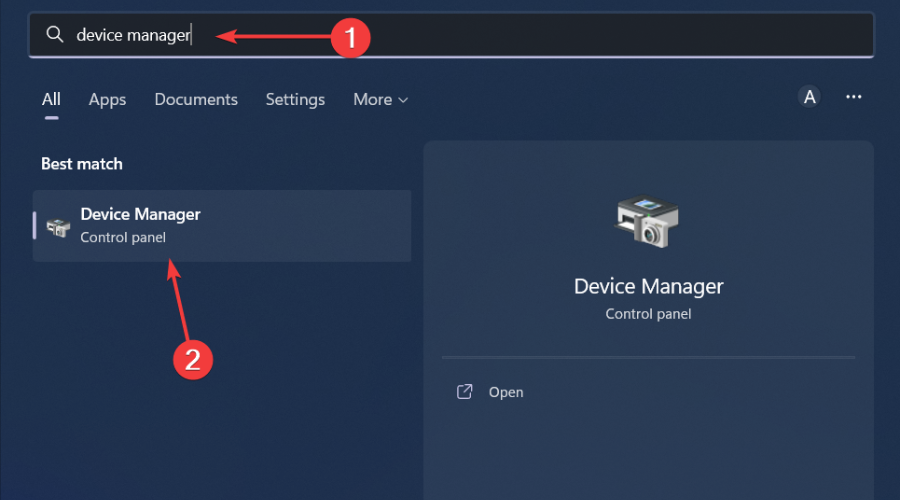
- Hit the Windows key, type Device Manager in the search bar, and click Open.
- Navigate to your Network adapter, right-click on it, and select Update driver.
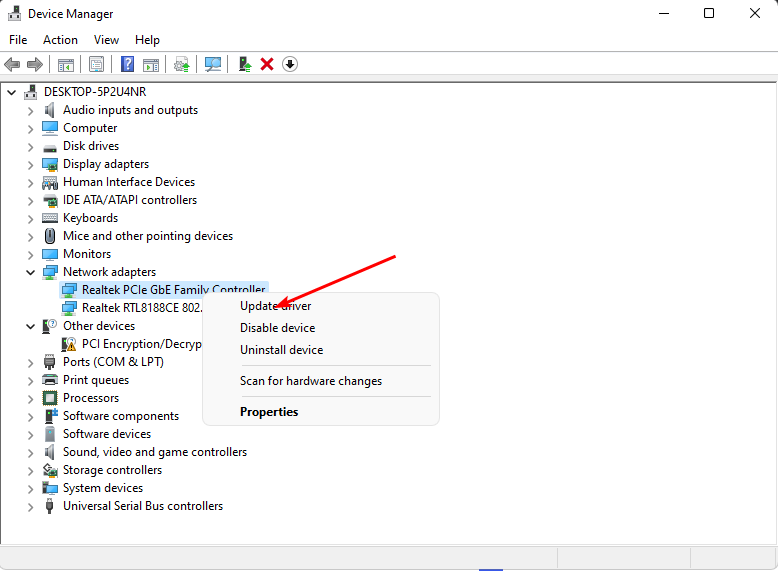
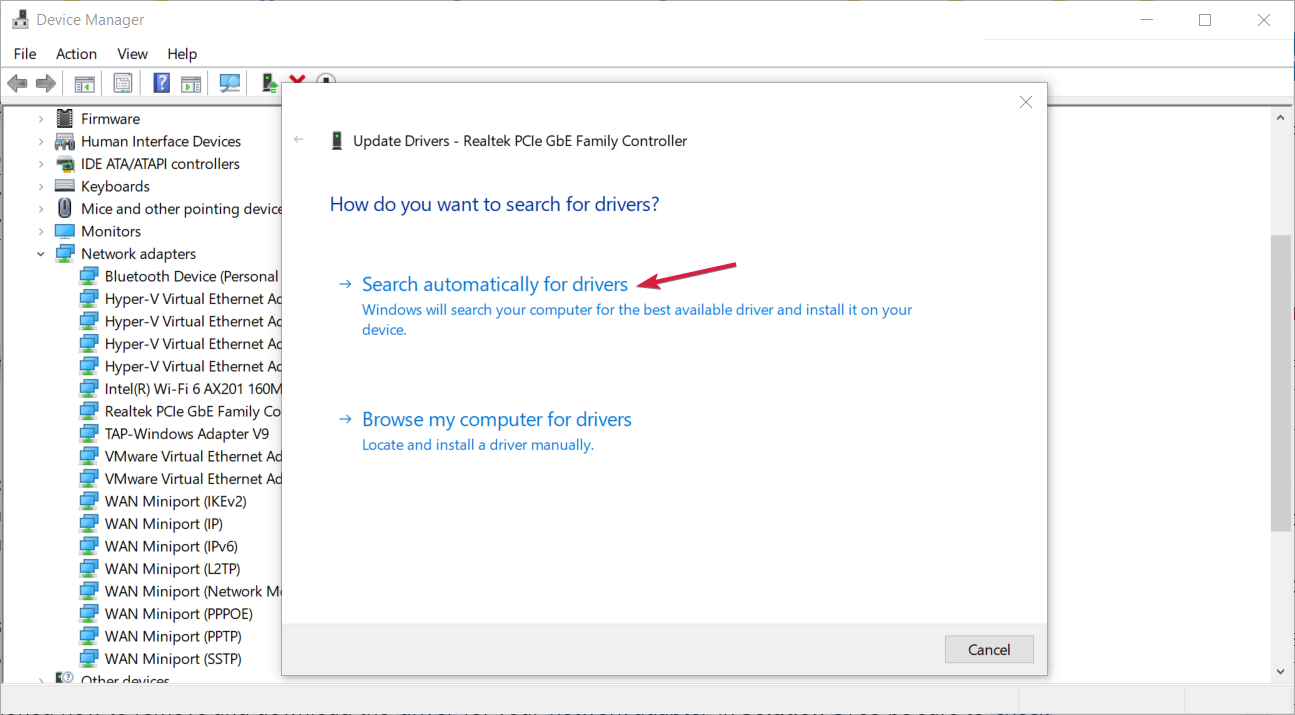
- Select Search automatically for updated drivers.
If you want, this process can be automated by using specially designed software, such as Outbyte Driver Updater. Not only that but you can always rest assured all your drivers are up to date.
This tool will scan your computer, find out-of-date, broken, or missing drivers, then it will download you proper and genuine replacements for them, all with just a few clicks.
⇒ Get Outbyte Driver Updater Here
4. Reinstall your Network drivers
- Click on the Start Menu icon, type Device Manager in the search bar, and click Open.
- Navigate to your Network adapter, right-click on it, and select Uninstall device.
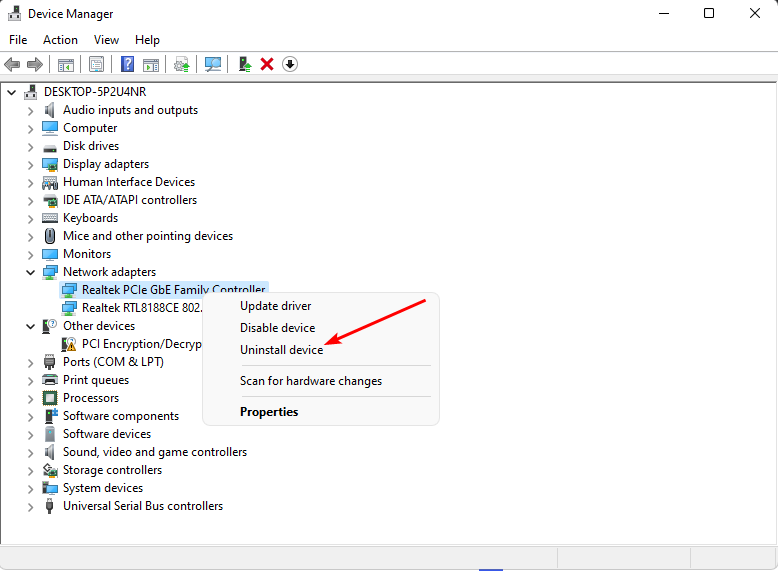
- Confirm Uninstall in the next confirmation dialog.
- Restart your PC, and your drivers will be automatically reinstalled.
5. Disable automatic driver updates
- Hit the Windows key, type in Control Panel in the search bar and click Open.
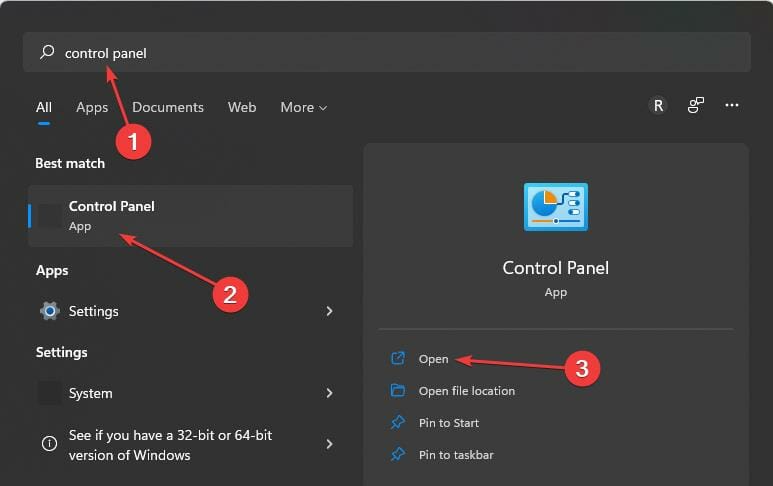
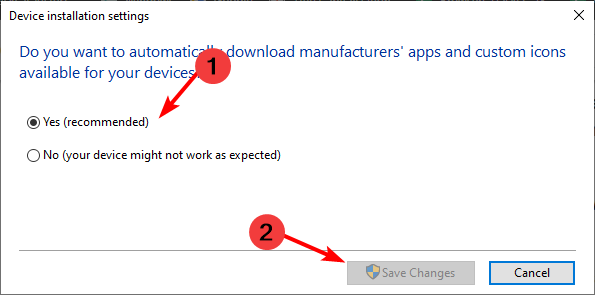
- Type Change device installation settings in the search bar and click to open.
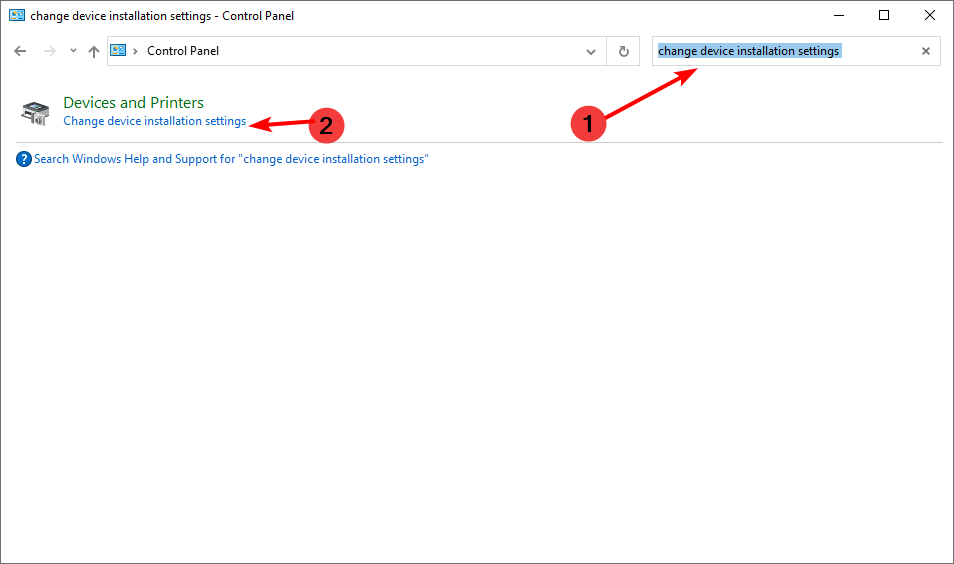
- Click on No to disable then hit Save changes.
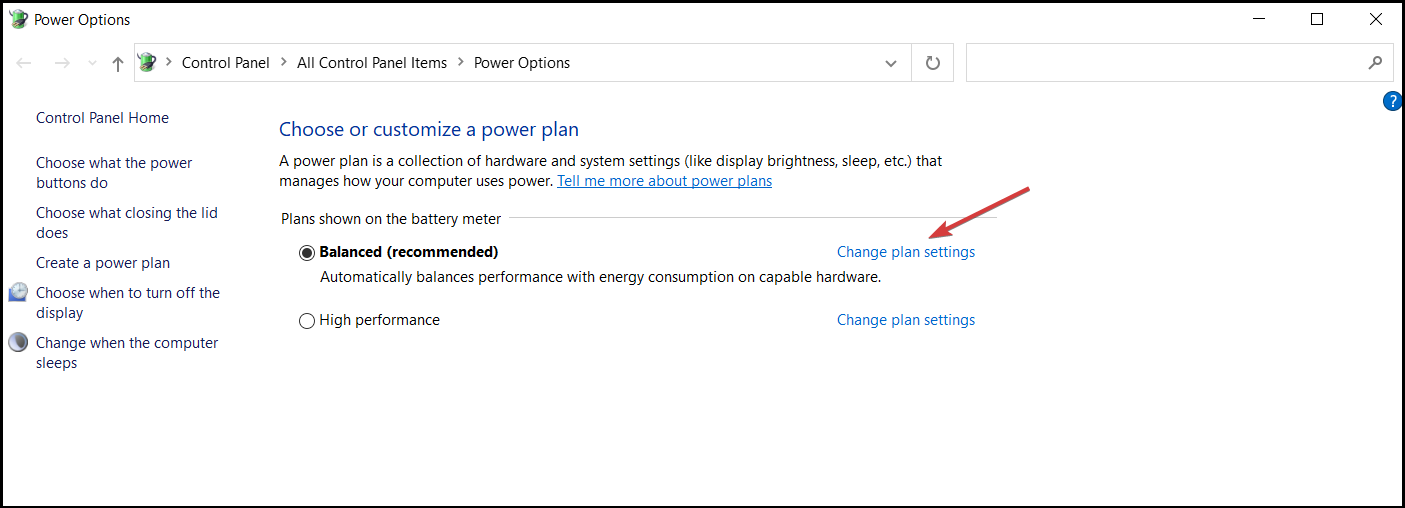
6. Set your Network card to the Maximum Performance mode
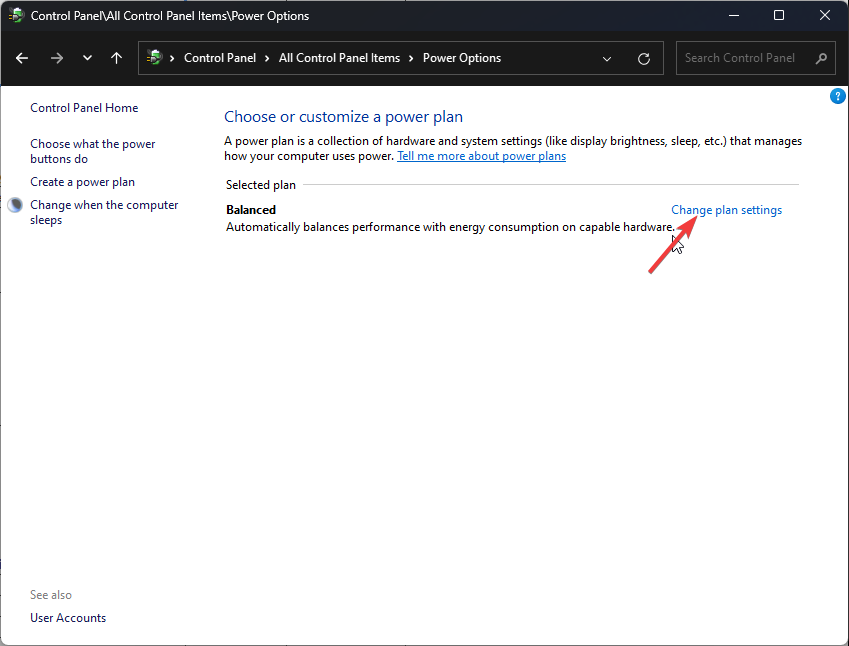
- Press Windows key + S and enter power plan. Now click on Choose a power plan.

- Once the Power Options window opens, locate your current plan and click Change plan settings.
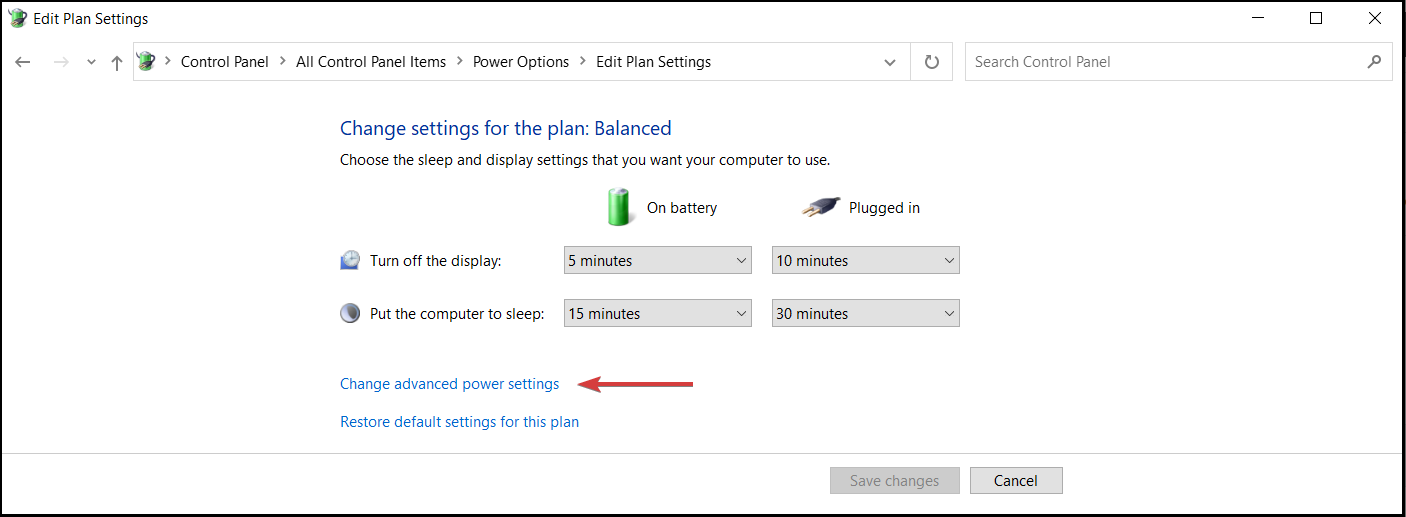
- Go to Change advanced power settings.
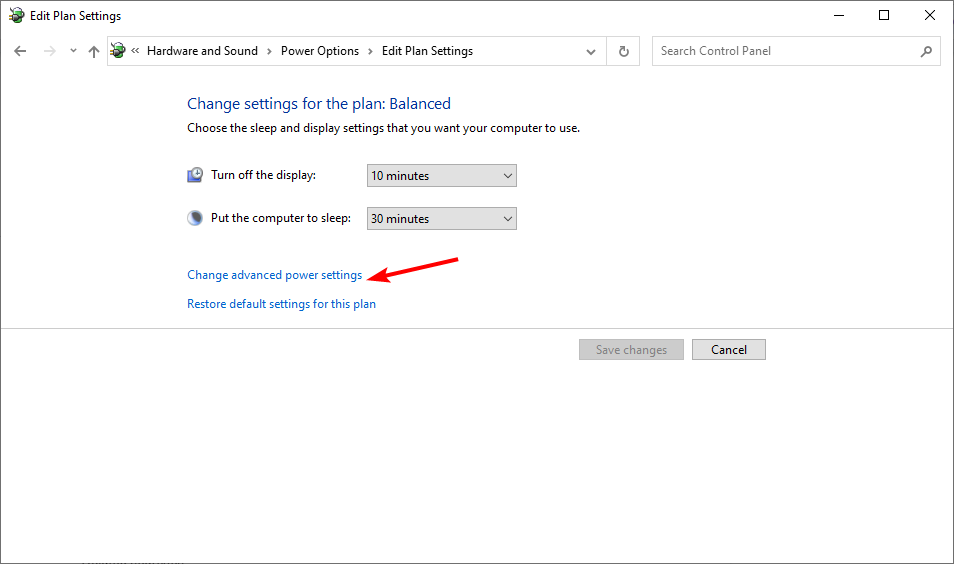
- Expand Wireless Adapter Settings, and set the Power Saving Mode to Maximum Performance.
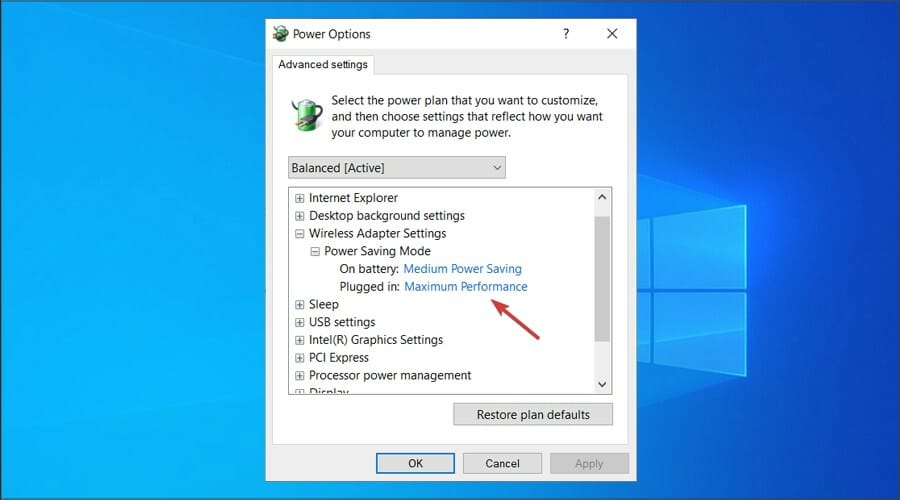
- Click Apply and OK to save the changes.
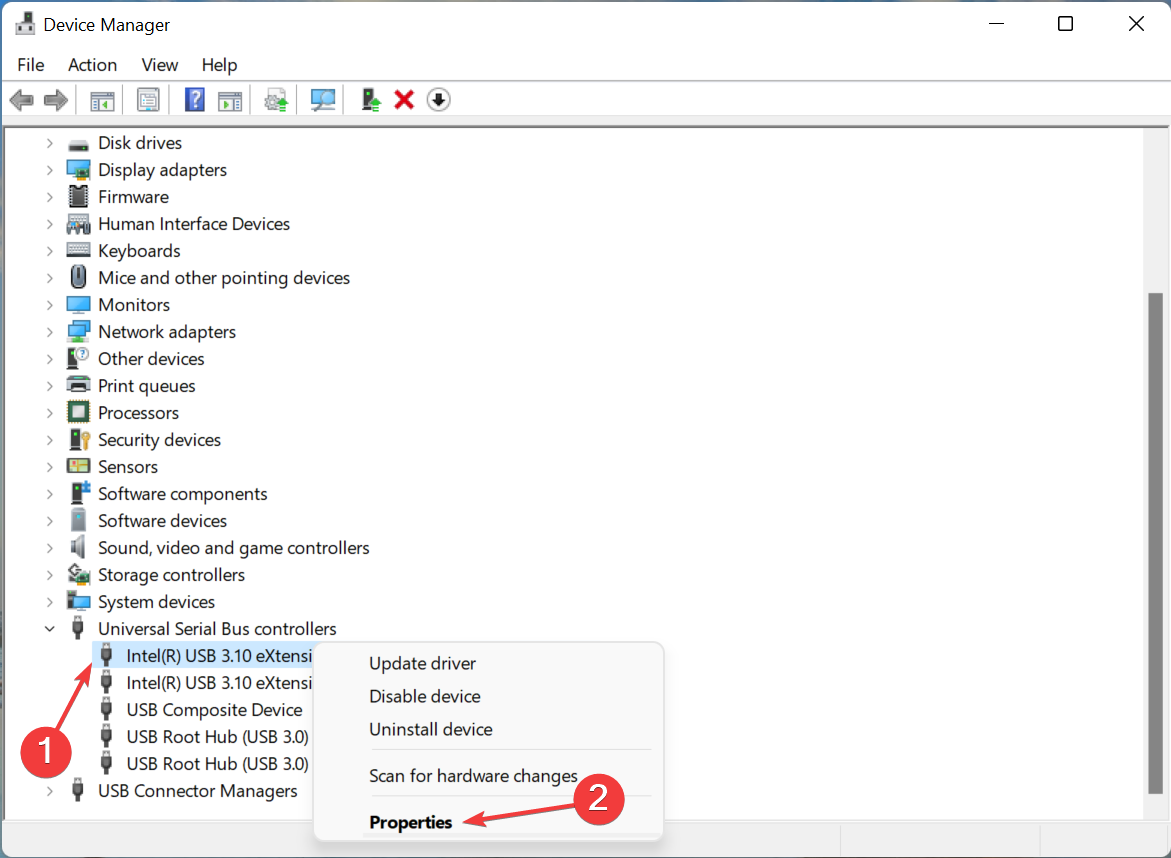
7. Change power settings for your Network card
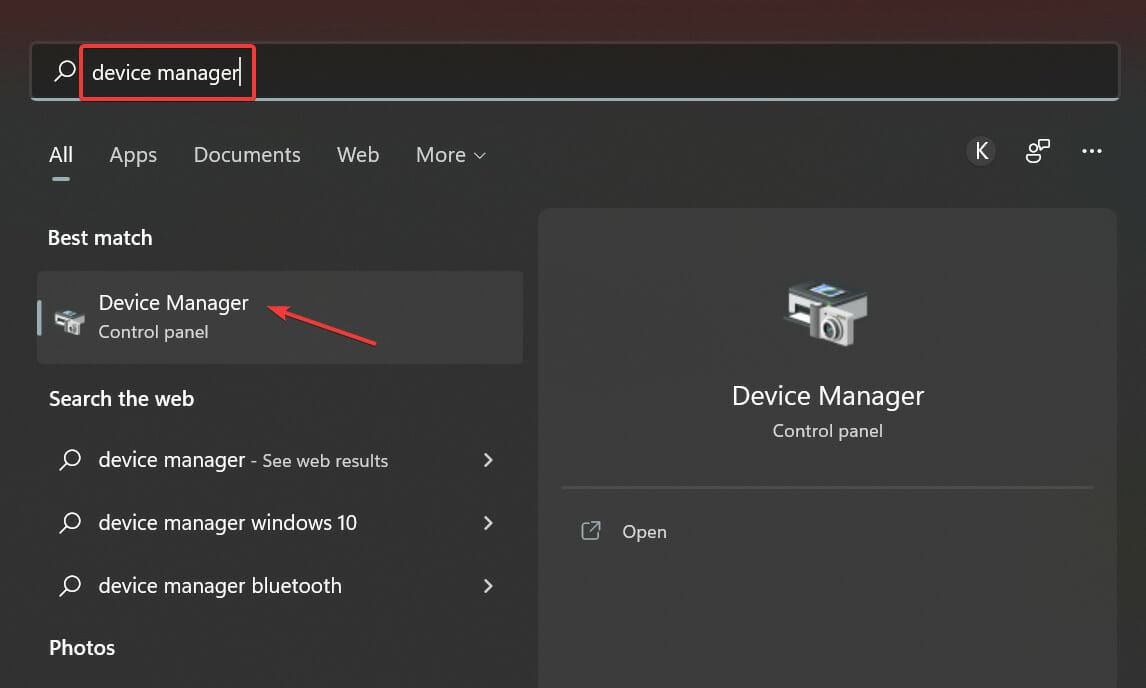
- Press Windows + S to launch the Search menu, enter Device Manager in the text field, and then click on the relevant search result.
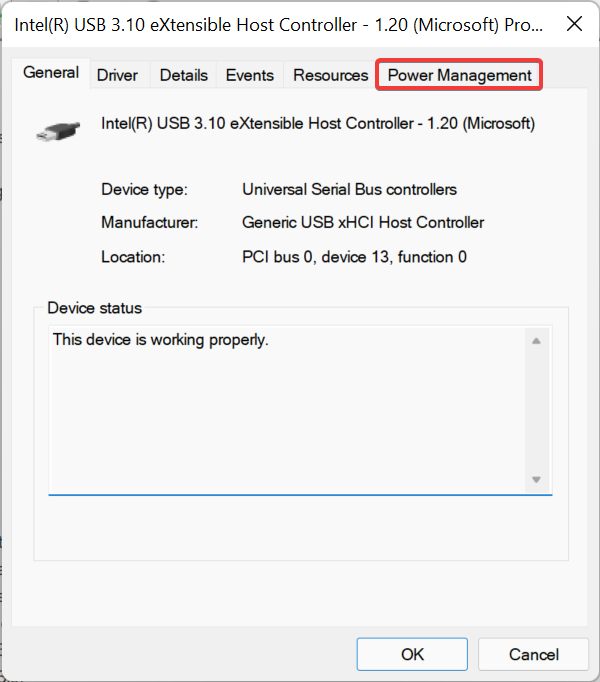
- Next, right-click on the problematic device and select Properties from the context menu.

- Navigate to the Power Management tab.
- Untick the checkbox for Allow the computer to turn off this device to save power and click on OK at the bottom to save the changes.
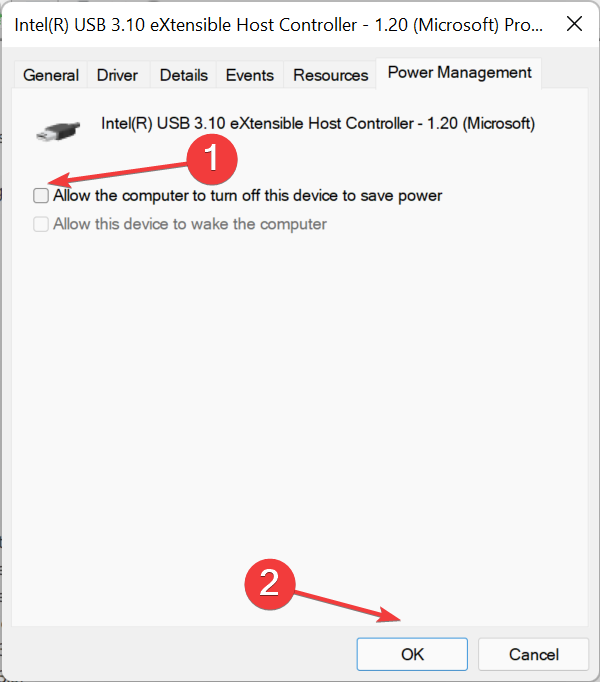
- Once done, restart the computer for the changes to come into effect.


8. Uninstall recent Windows update
- Press the Win + I keys to open the Settings menu.
- Click on Windows Update on the left pane.

- Select Update history on the right.

- Under Related settings, select Uninstall updates.

- Choose the recently installed update and hit the Uninstall button.

- Follow the on-screen prompts.
- Restart your PC and see if it helps.
9. Perform a Network reset
- Hit the Windows key and click on Settings.
- Navigate to Network & internet.
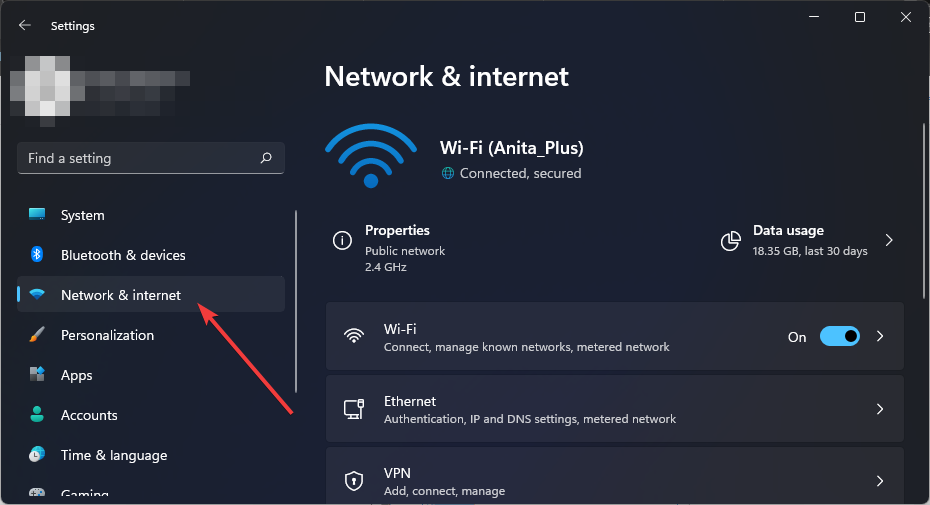
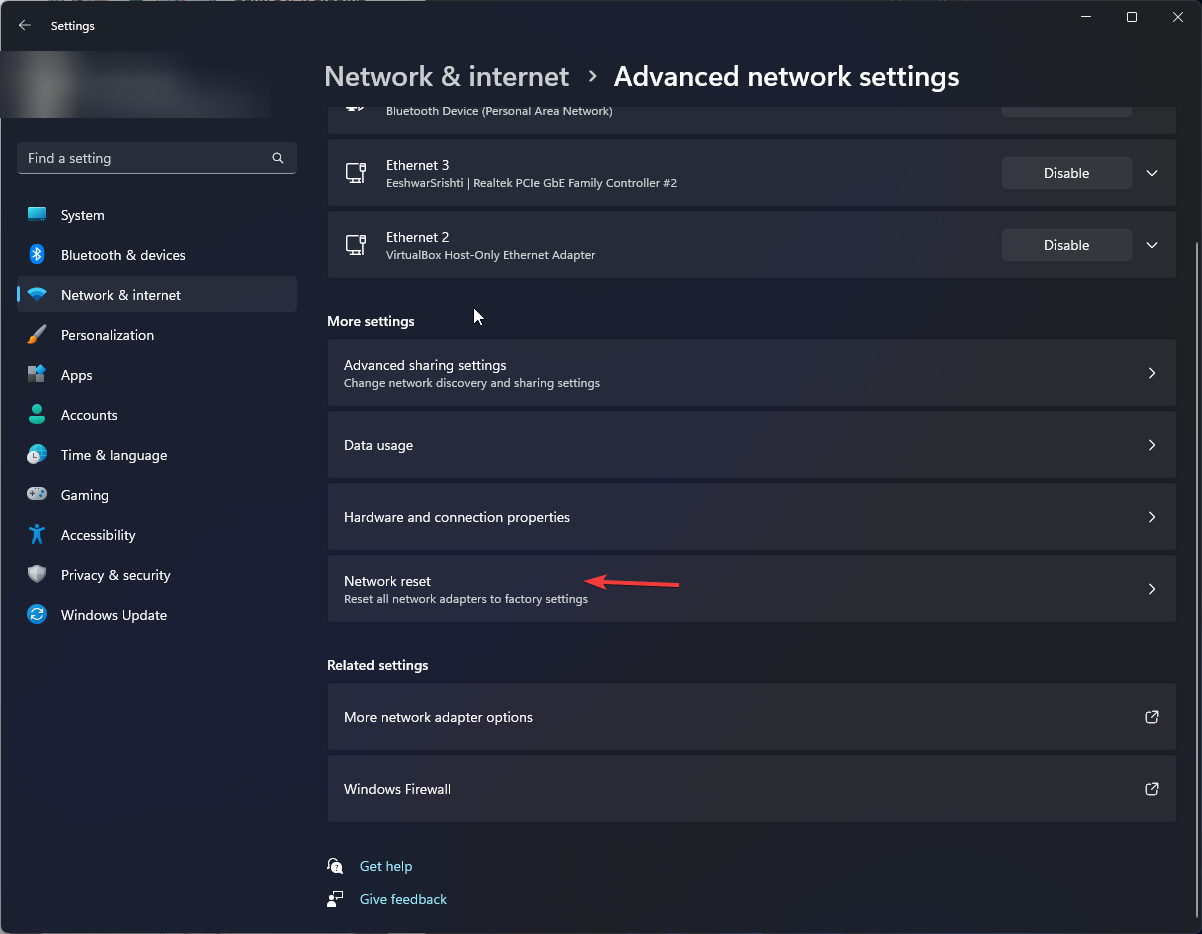
- Select Advanced network settings.
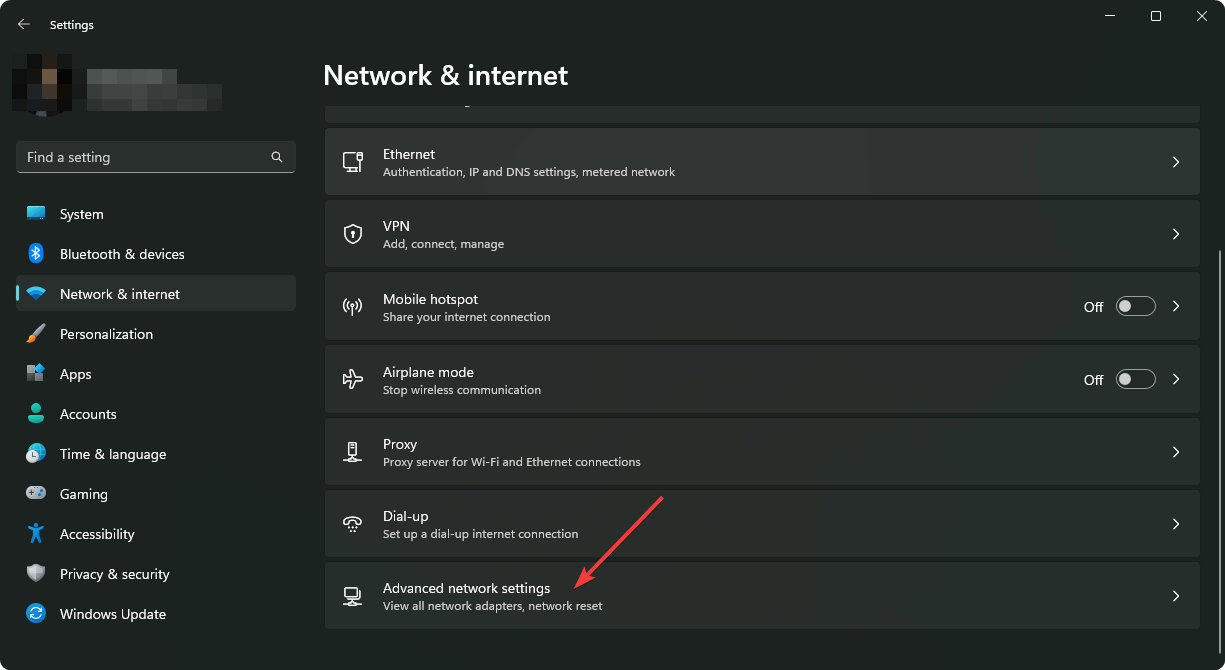
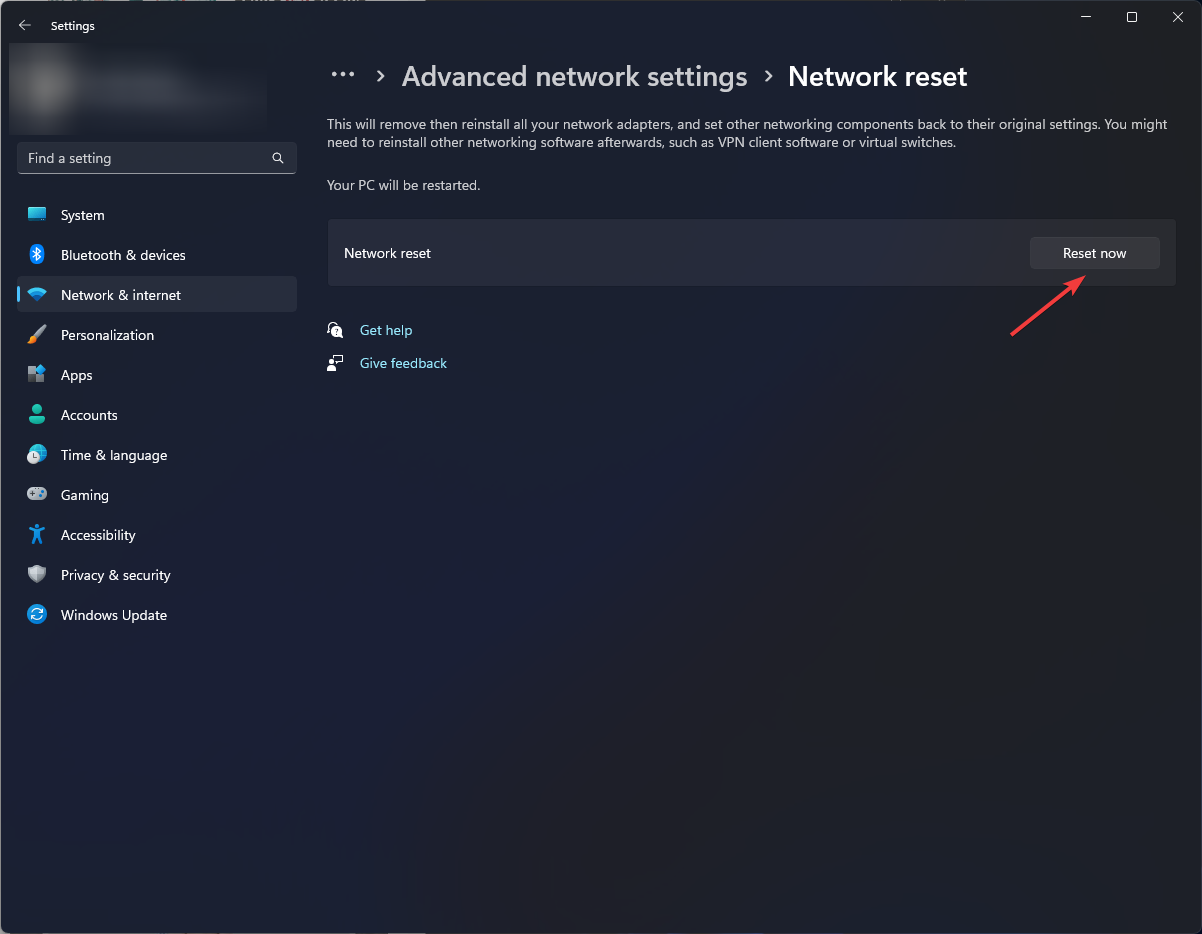
- Click on Network reset.
- Next, hit the Reset now button.
Fortunately, it’s not all that complicated to speed things up. With these tips and tricks, you can easily improve your 5G network, ensuring you can enjoy fast internet speeds without interruption.
From our observation, we found that most of the blame goes to the router. Even a 5GHz hotspot may be undiscoverable because of outdated drivers or incompatibility. In such cases, we recommend upgrading to a newer router.
Also, the devices you use should be compatible with the router’s standards and signal.
If you have any additional feedback about 5G Wi-Fi connectivity, please share it in the comments below.
Read our disclosure page to find out how can you help Windows Report sustain the editorial team. Read more


Improve this guide


User forum
0 messages