Windows Sandbox Cannot Be Installed: 5 Ways to Fix It
Quick ways to enable virtualization on Windows
3 min. read
Updated on
Read our disclosure page to find out how can you help Windows Report sustain the editorial team. Read more
Key notes
- Windows Sandbox, a lightweight desktop environment is only available for Windows Professional, Education, and Enterprise as of now.
- Each time you run Windows Sandbox, it’s like a clean installation of Windows.
- When you quit Sandbox, the changes made in the virtual environment are discarded.
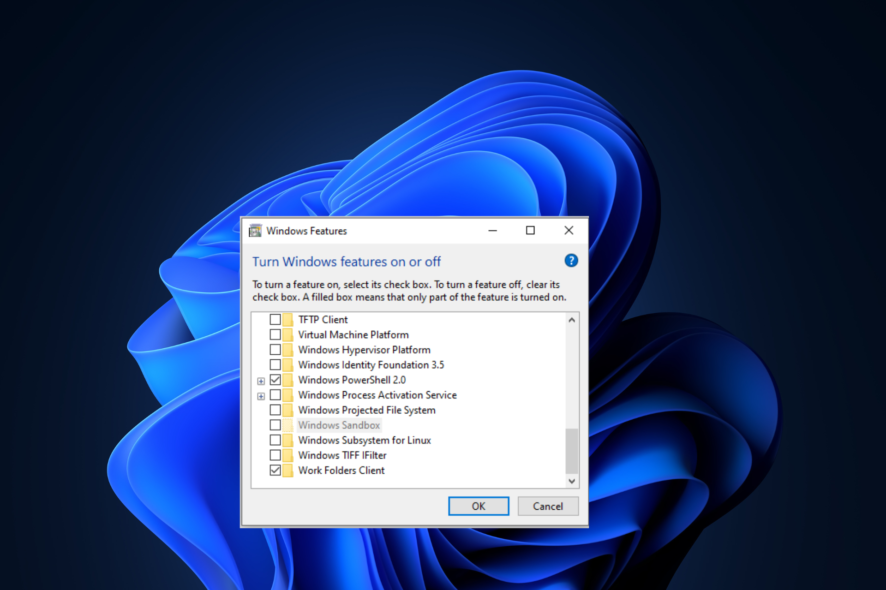
Can’t enable Windows Sandbox from the Control Panel as the option is greyed out? When you hover over the option, it says Windows Sandbox cannot be installed virtualization is disabled in the firmware. No need to panic; this could be fixed in no time.
This post will discuss how to resolve this error in five easy ways. Let’s start!
What are the minimum requirements to run Sandbox on Windows?
- Your machine should have either Windows 10 Pro, Education build 18305, or Enterprise. Windows Sandbox will not appear in the optional features if you have Windows Home Edition.
- Virtualization enabled in BIOS.
- Free disk space of at least 1 GB, preferably SSD.
- Minimum two cores (Four CPU cores with hyperthreading recommended).
- Minimum 4 GB RAM (8 GB RAM recommended).
- AMD64 or ARM64 architecture.
How can I fix Windows Sandbox cannot be installed error?
1. Check if your device supports virtualization
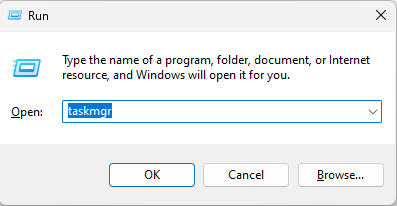
- Press Windows + R to get the Run console.
- Type taskmgr and press Enter.
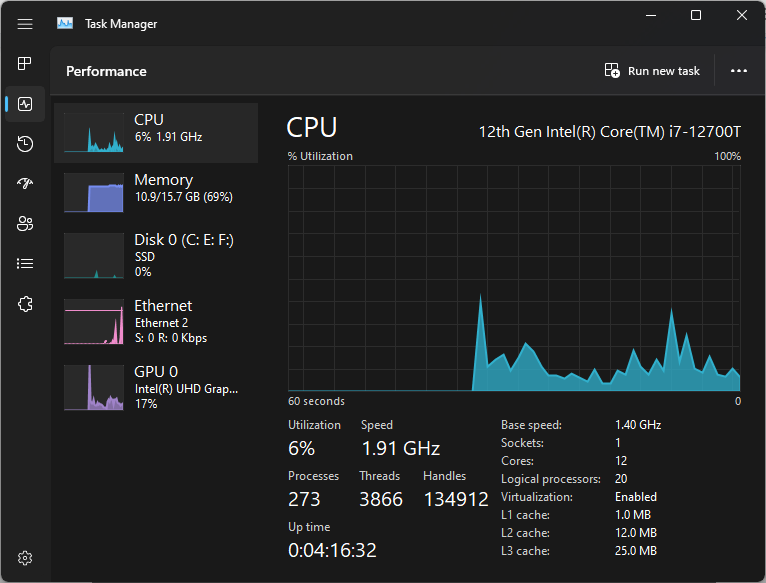
- Go to the Performance tab, click CPU and check the processor name from the top.
2. Check if virtualization is enabled
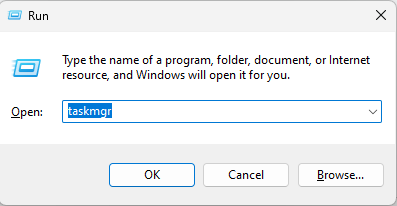
- Press Windows + R to get the Run console.
- Type taskmgr and press Enter.
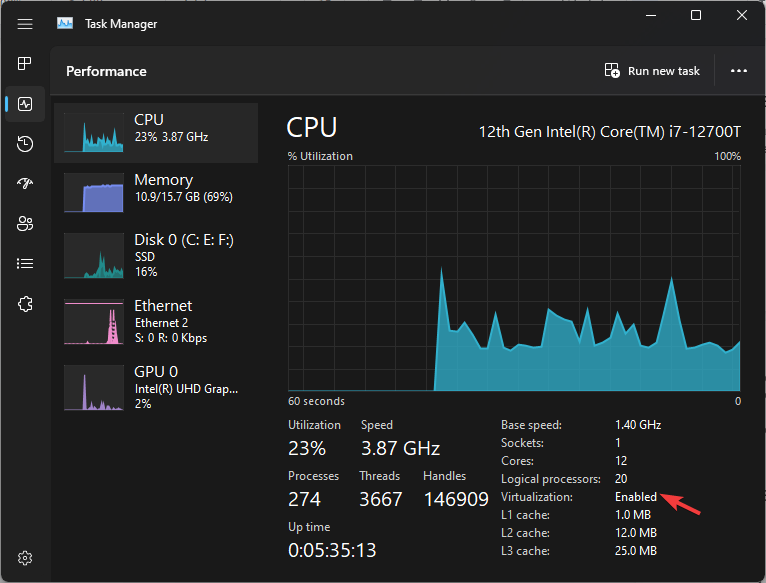
- Go to the Performance tab, and click CPU to check the Virtualization status under the CPU graph.
- You will see Enabled or Disabled beside Virtualization.
3. Enable hardware virtualization from BIOS
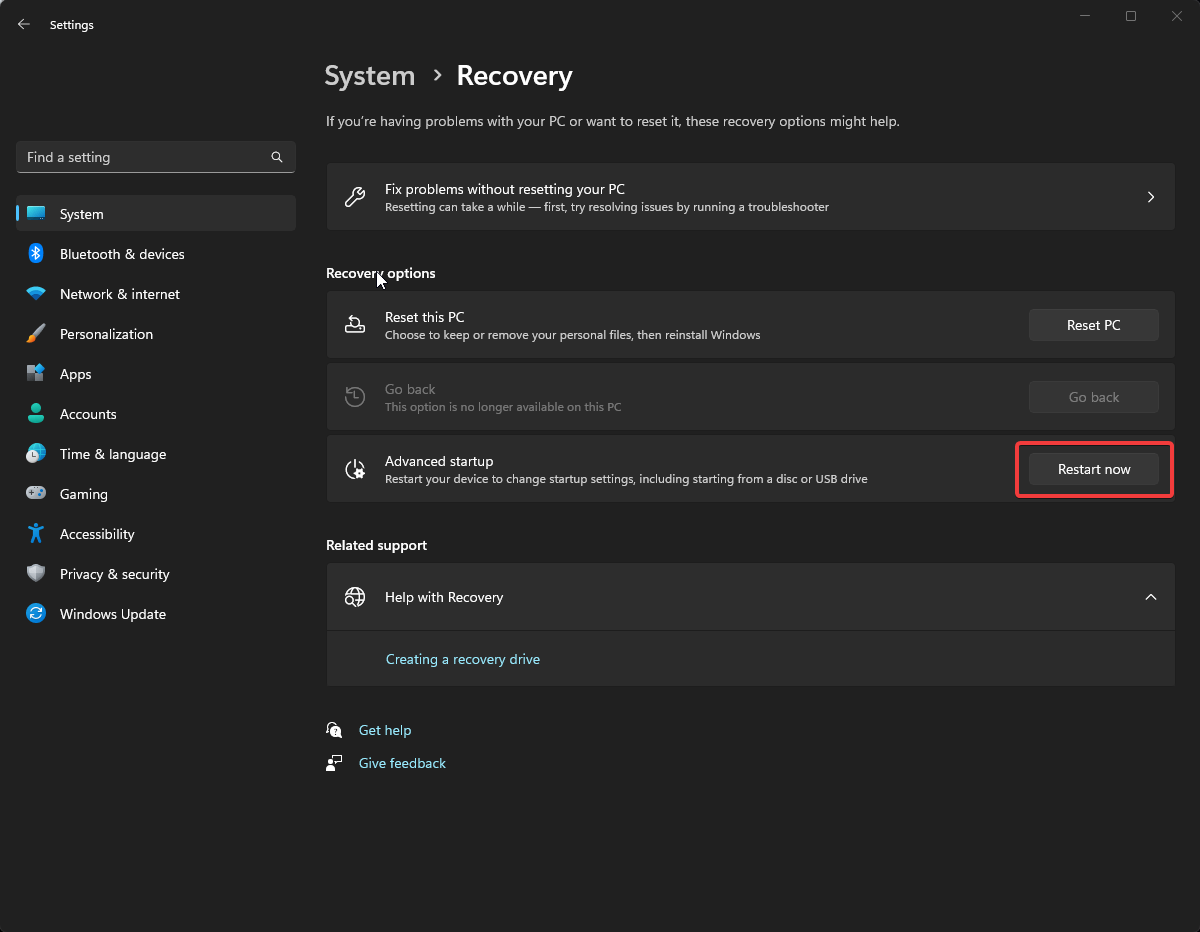
- Press Windows + I to open Settings.
- Click System, then Recovery.
- Navigate to Advanced Startup, then click Restart Now.
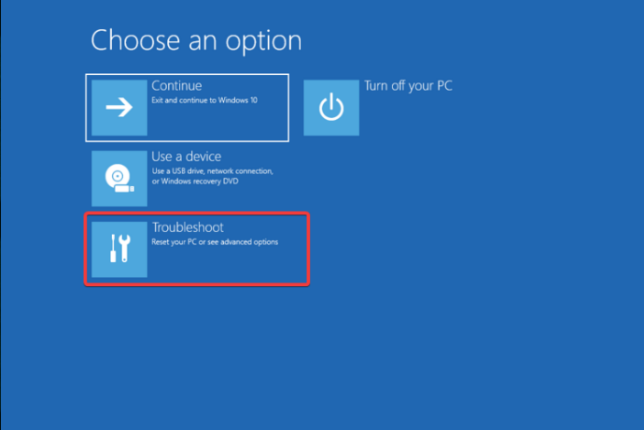
- From Choose an option screen, click Troubleshoot.
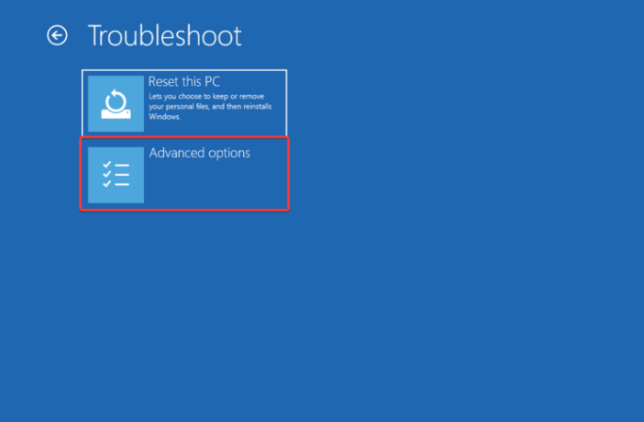
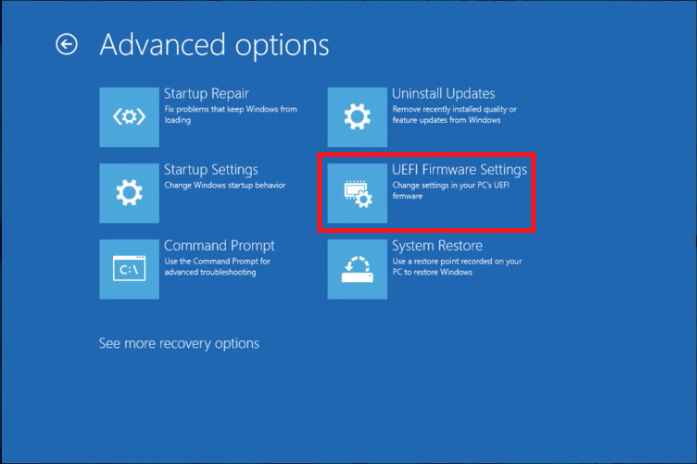
- Click Advanced Options.
- Click UEFI Firmware Settings.
- On the UEFI Firmware Settings page, Click Restart.
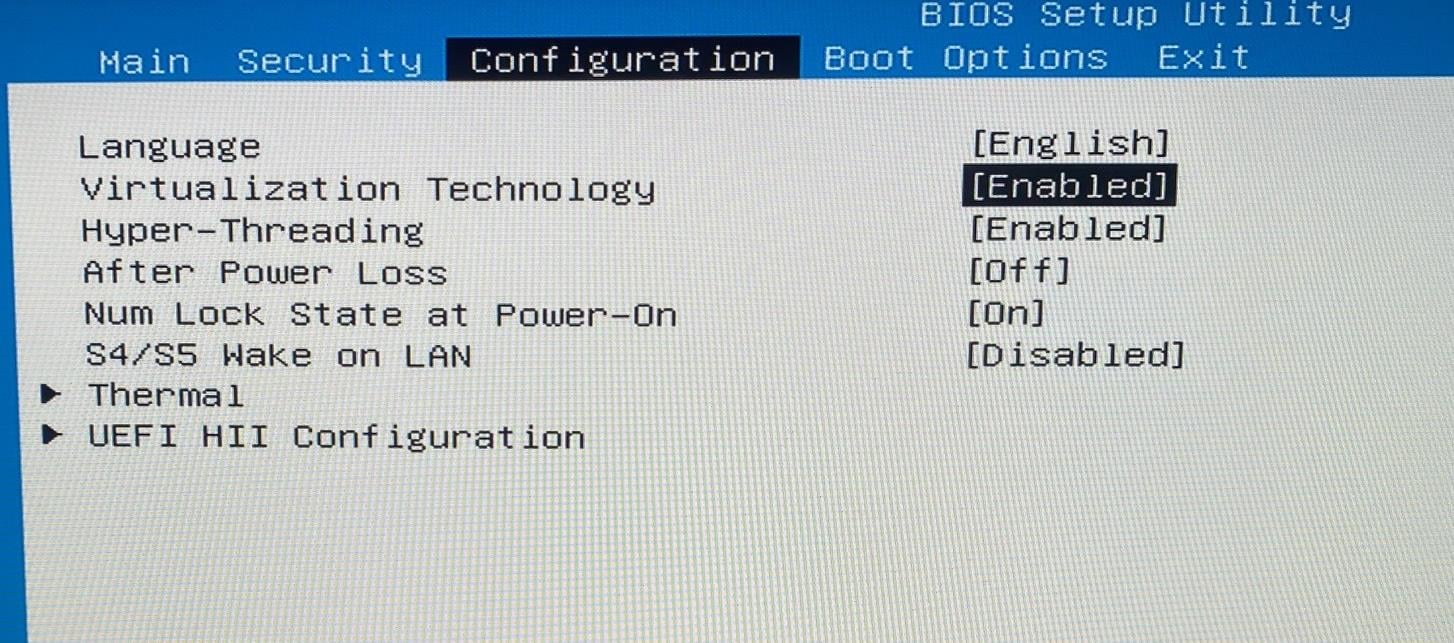
- Press the Function key as per your device to enter BIOS Setup.
- In BIOS Setup Utility, click Configuration, navigate to Virtualization Technology, and select Enabled.
- Go to the Exit menu and choose Save changes and Exit.
4. Disable Hyper-V
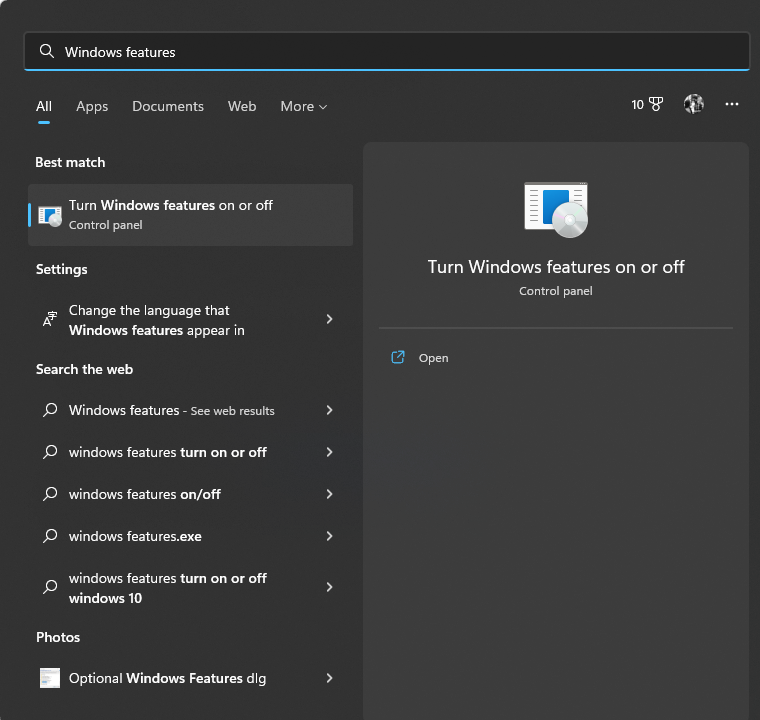
- Go to the Start menu and type Windows features on or off.
- Click Open under Windows features on or off.
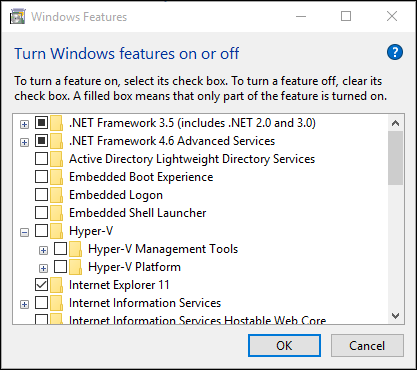
- Navigate to Hyper-V and uncheck all the boxes under it.
- Restart the computer to complete the process.
5. Enable the virtualization option if not available in BIOS
If the virtualization option is unavailable on BIOS, your device doesn’t support the feature.
However, you can check for BIOS updates using the device manufacturer app on your computer. For instance, if you have an HP computer, you can use the HP Support Assistant app to check for BIOS and other updates. If an update is available, update BIOS Setup Utility, and you might get the virtualization option.
Does Windows Sandbox require virtualization?
Virtualization feature is an essential part of the Sandbox because Windows Sandbox runs on an elevated space, so it can’t access advanced components like the Graphics processing unit. Therefore, it is vital to enable virtualization to bridge the gap and provide hardware acceleration in a virtual environment.
So, these are the fixes to resolve the Windows Sandbox not installed or greyed out issue. Try them to eliminate the problem so you can use Windows Sandbox to run apps in isolation.
If the Windows Sandbox copy paste is not working, this guide will help you fix the problem.
If there are other fixes we may have missed, then please mention them in the comments below.








User forum
0 messages