Audio Services Not Responding on Windows 11 [Fix]
Easily get rid of Windows 11 audio services not responding message
5 min. read
Updated on
Read our disclosure page to find out how can you help Windows Report sustain the editorial team. Read more
Key notes
- For internal bugs or corrupted audio drivers, you may get audio services not responding error on Windows 11.
- Updating Windows and the sound driver may help you to resolve this problem quickly.
- You also may need to reinstall the driver and follow additional steps from this article.
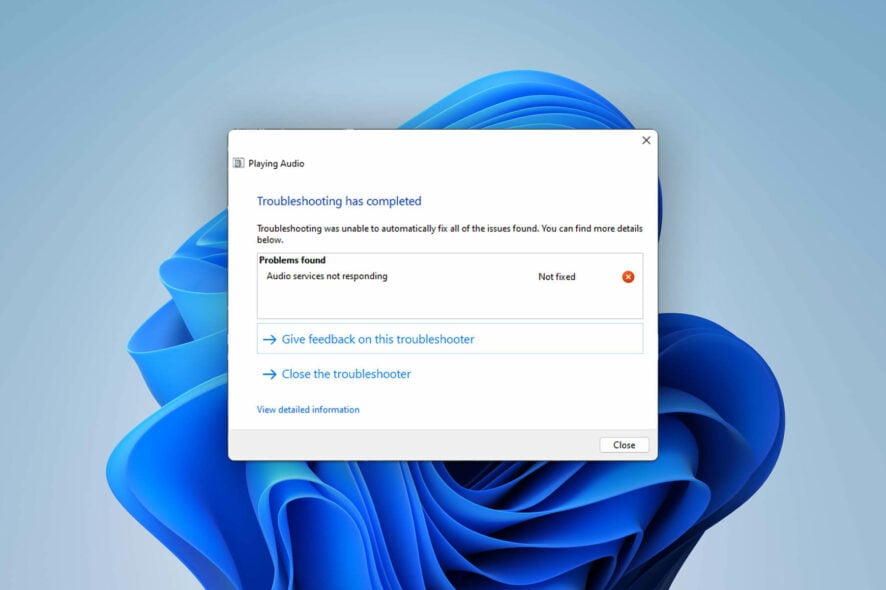
Are audio services not responding on Windows 11? You are not the only person who is encountering this problem.
If you face some audio issues, you may run the Windows sound troubleshooter. But, if it fails by showing the message that the audio services are not responding, this can be an annoying thing. Don’t worry. This article contains the solutions. Before that, let’s know about the reasons.
What causes audio services not to respond on Windows 11?
Luckily there are some specific reasons that cause this problem. As these are easily assumable, you also can troubleshoot the problem quickly. The reasons include the followings:
- Audio driver issue: If the sound driver on your PC is outdated or corrupted, a problem like this may appear.
- Outdated Windows: A PC where Windows is not up to date can go through various bugs.
- Missing or corrupted system components: System Components are necessary to deliver all functionalities correctly. If not, problems like audio services issues may appear.
- Required services are not active: There are some services required to output audio properly on Windows.
- Faulty Windows update: Some Windows updates are known to break certain functionalities on certain computers.
How do I fix audio services not responding on Windows 11?
You can easily solve this problem. But before that, you must do these things:
- Update Windows to the latest version.
- Make sure the output device/speaker is OK.
Doing the above things may save you time, and you may not need to follow the actual ways. However, if you still get the problem, follow these methods:
1. Uninstall audio software
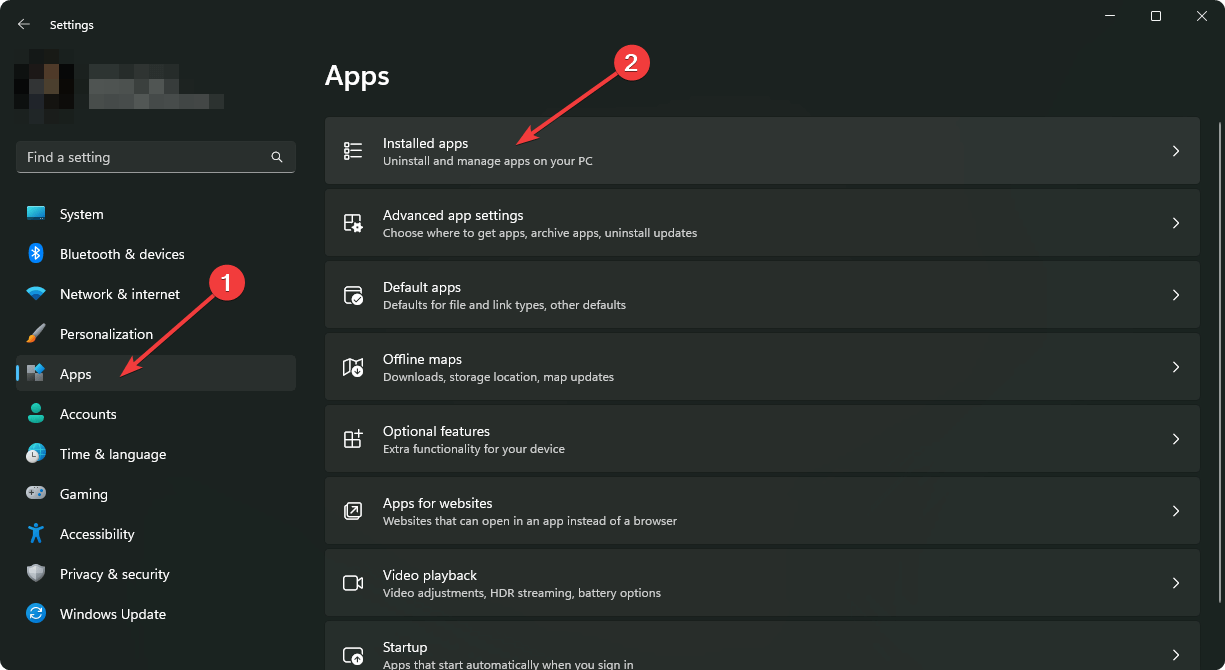
- Go to Windows Settings by pressing Win + I on the keyboard.
- Go to Apps and click on Installed apps.
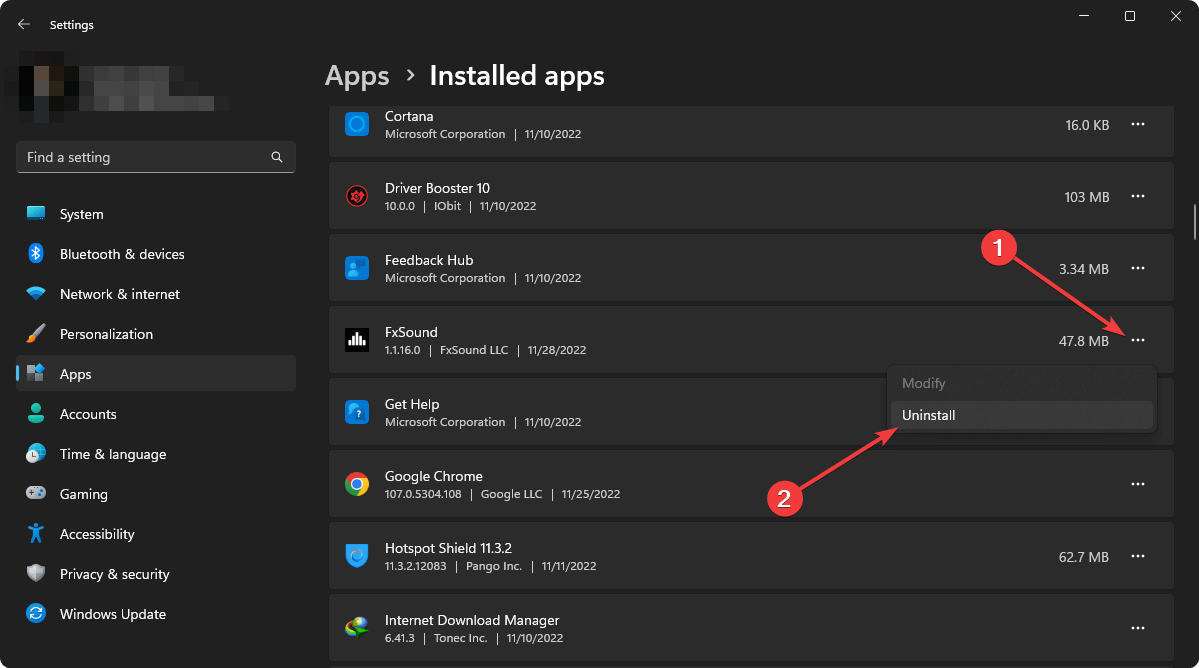
- Click on the three horizontal dots next to the audio software you want to uninstall and click on Uninstall.
Now, restart your PC and see if it has fixed the unresponsive audio services problem or not.
2. Update the audio driver
- Open the Start Menu.
- Type Device Manager and press Enter to open Windows Device Manager.
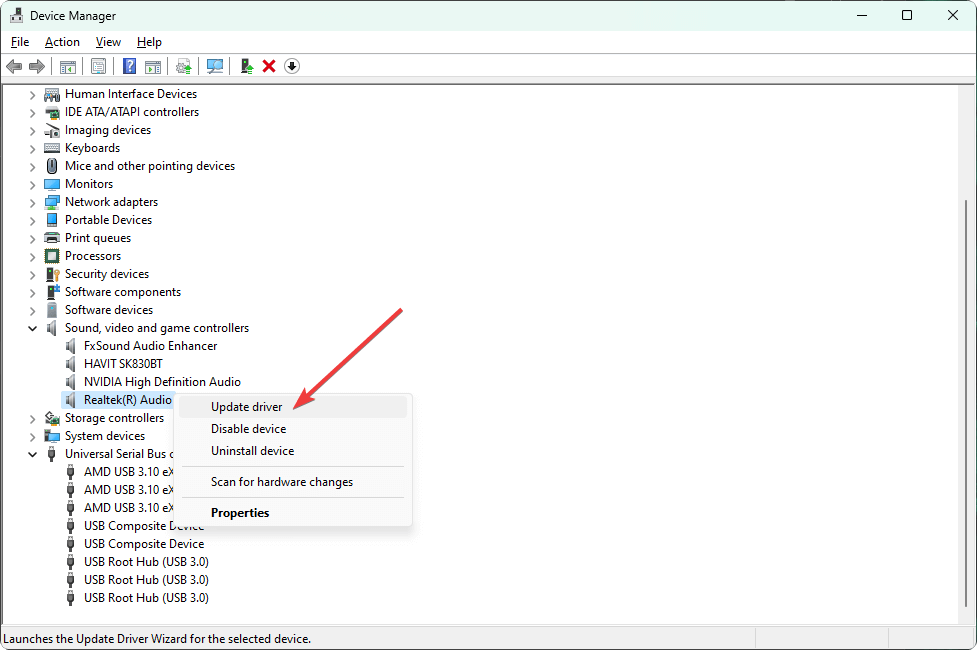
- Expand Sound, video & game controllers.
- Right-click on the audio driver like Realtek Audio and choose Update.
- Choose the preferred method to update.
- If necessary, expand Audio inputs and outputs and update some drivers.
- After updating, restart your computer.
Please keep in mind that the above steps may fail to detect the latest driver. So, we recommend you use an automated tool that can identify outdated drivers and update them with a single click automatically.
- Download and install Outbyte Driver Updater.
- Launch the software.
- Wait for the app to detect all faulty drivers.
- Now, it will show you all the malfunctioning drivers listed to select the ones to Update or Ignore.
- Click on Update & Apply Selected to download and install the newest versions.
- Restart your PC to ensure the applied changes.

Outbyte Driver Updater
Secure your Windows PC with Outbyte from various errors caused by problematic drivers.3. Re-install the audio driver
3.1 Uninstall the audio driver
- Open the Device Manager like before.
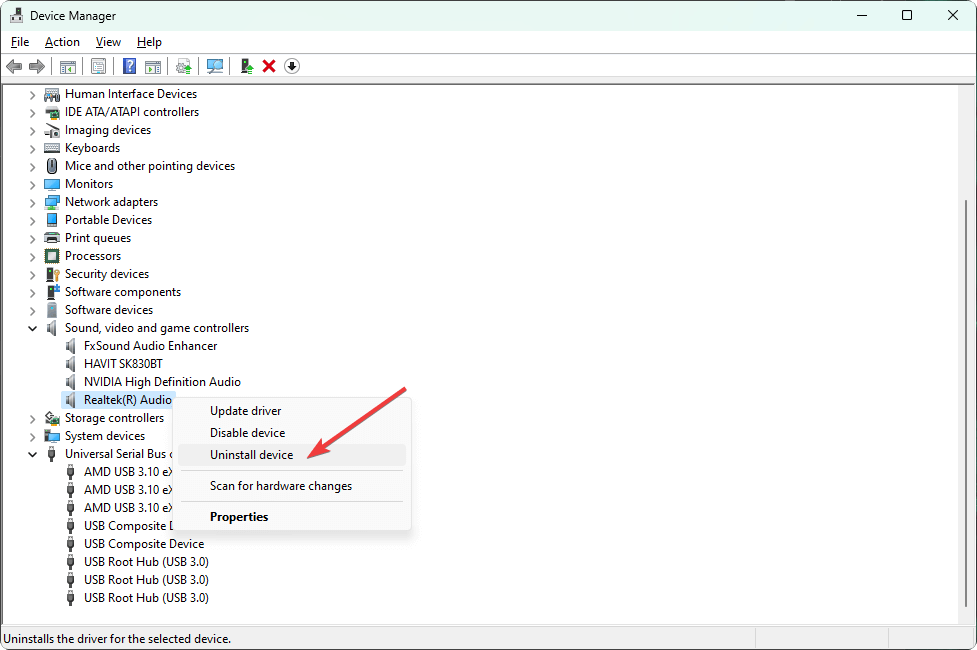
- Find the audio driver, right-click on it and choose Uninstall device.
- Check Attempt to remove the driver for this device and click on Uninstall.
- Restart your PC.
3.2 Install the driver again
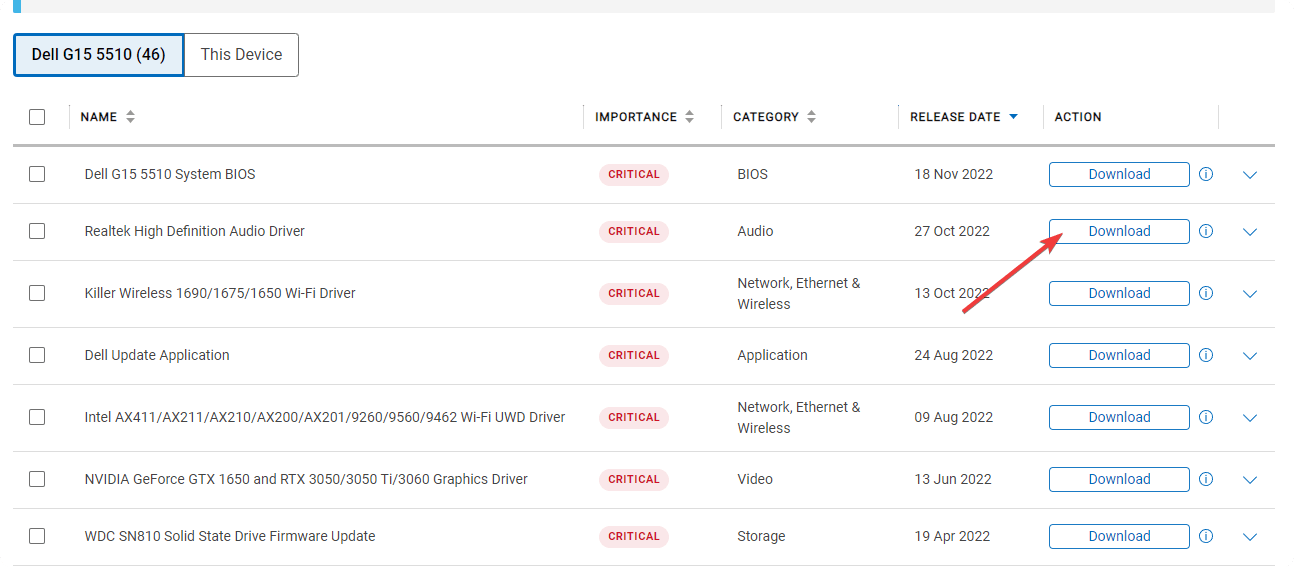
- Go to your motherboard manufacturer’s website.
- Download the appropriate driver and install it on Windows 11.
- Restart Windows if necessary.
If you can’t do it, restart your PC. In most cases, Windows may install the default audio driver, and it may work without a problem. If not, use software to install the audio driver[check solution 2].
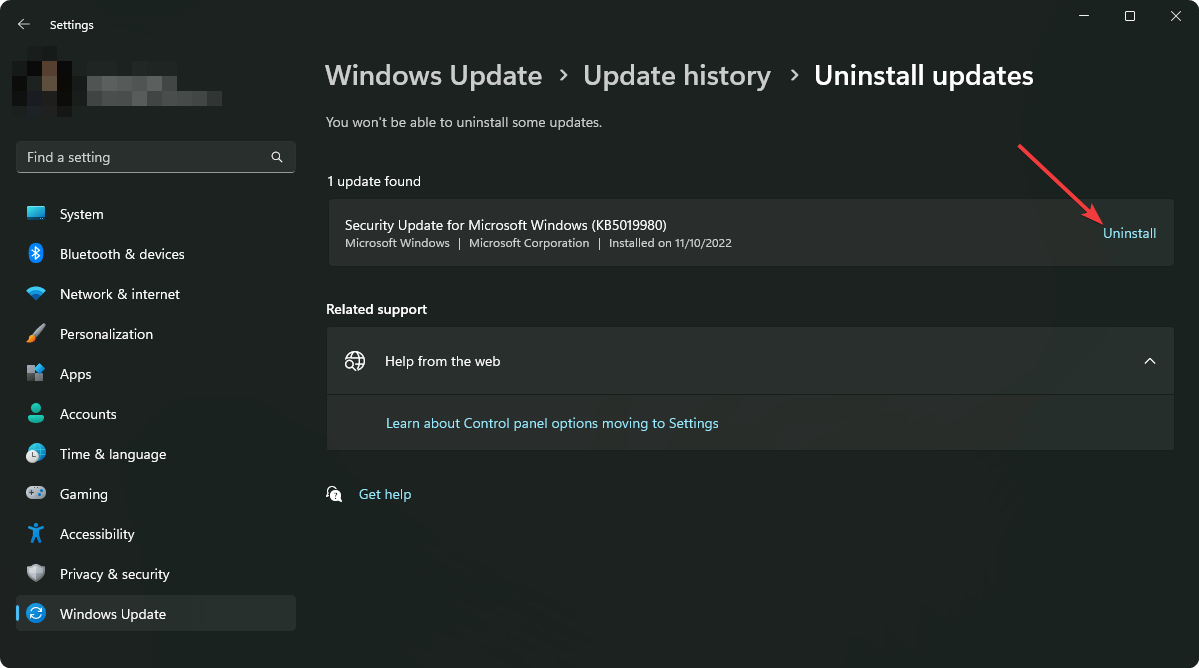
4. Uninstall problematic update
- Open Windows Settings like before.
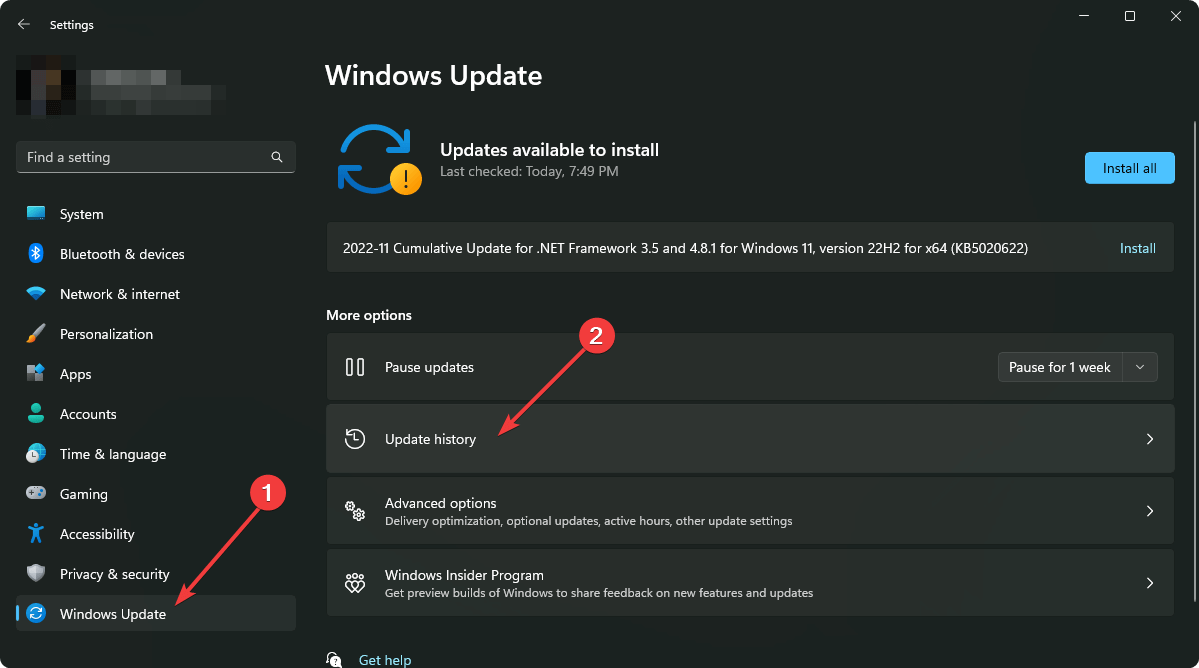
- Go to Windows Update and click on Update history.
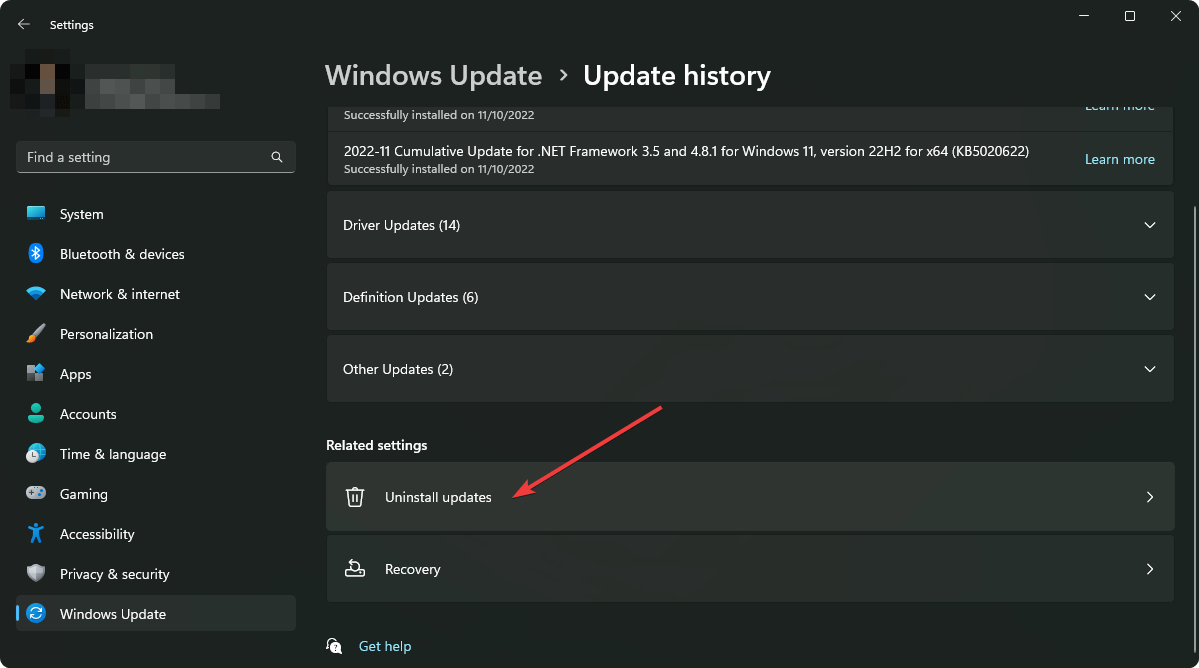
- Go to Uninstall updates.
- Click on Uninstall next to the update you want to remove.
- Restart your PC after completing the process.
Now, try to play any audio. The sound should be OK on your PC, and you will no longer face audio services not responding error.
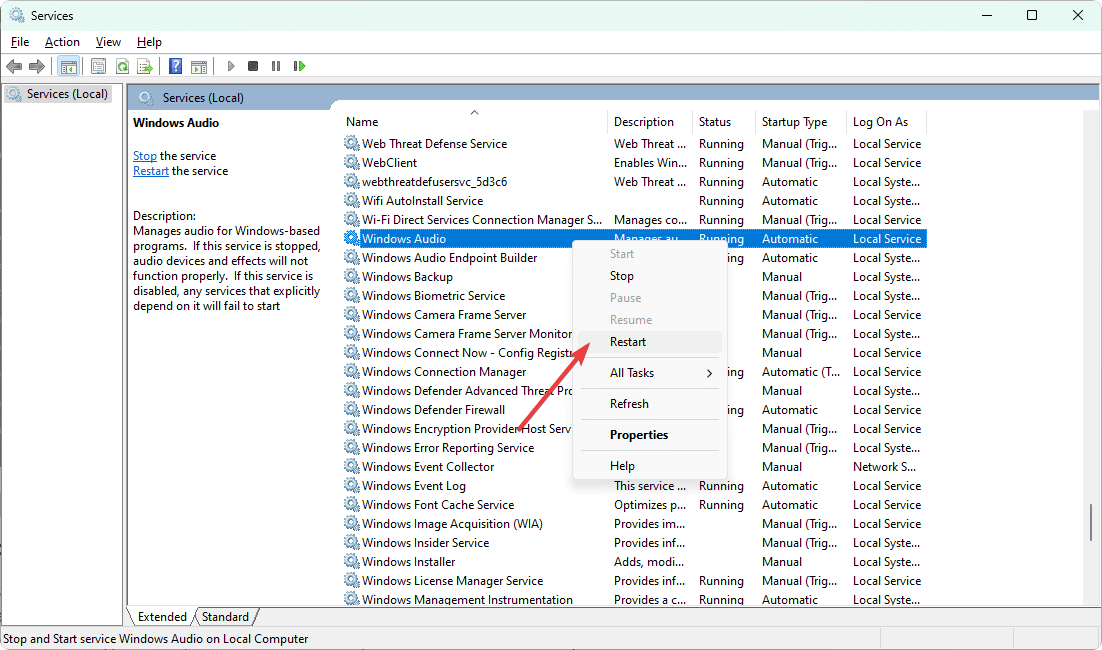
5. Start/Restart audio services
- On the Start Menu, search for services.msc and press Enter.
- Find the Windows Audio, right-click on it and choose Restart.
- Do the same for Windows Audio Endpoint Builder, DCOM Server Process Launcher, RPC Endpoint Mapper, and Remote Procedure Call (RPC).
Now, try to play any audio file. It should solve Windows 11 audio services not responding problem. If the restart option is not available, choose start.
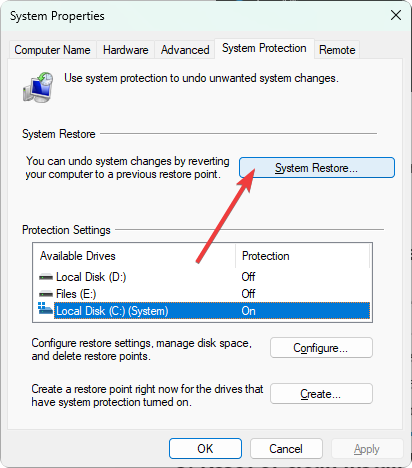
6. System Restore
- On the Start Menu, search for Create a restore point, and click on System Properties.
- Go to System Restore.
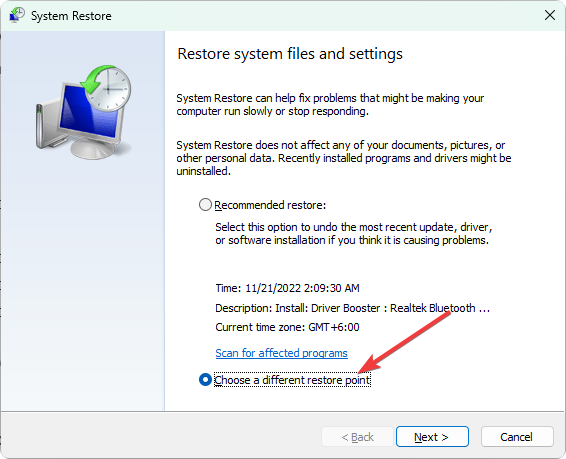
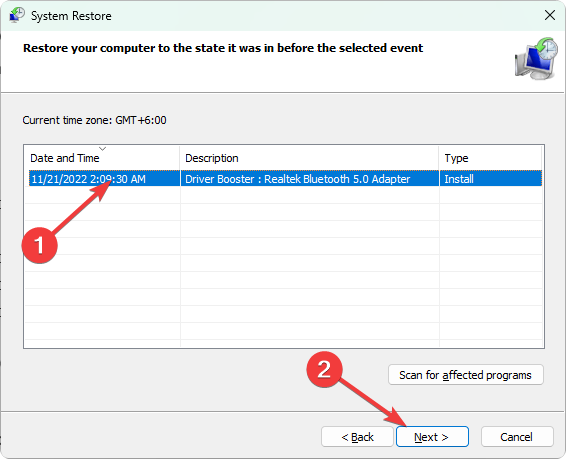
- Check the Choose a different restore point and click on Next.
- Select the restore point and click on Next.
- Click on Finish.
- Follow the onscreen steps to complete the process.
If necessary, learn how to solve if the restore point is not working on Windows.
7. Repair corrupted system files
- In Start Menu, type CMD.
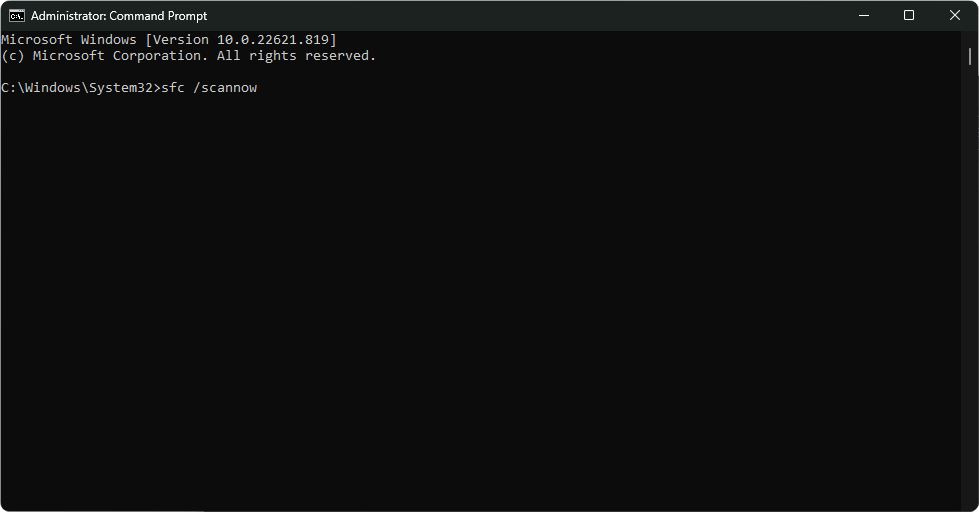
- Right-click on the Command Prompt and choose Run as administrator.
- Type the following command and press Enter to execute it: sfc /scannow
- Restart Windows after finishing the process.
For more steps, learn how to repair corrupted system files on Windows. After that, verify if it has solved the audio services not responding issue on Windows 11 or not.
8. Reset Windows
- Open the Windows Settings.
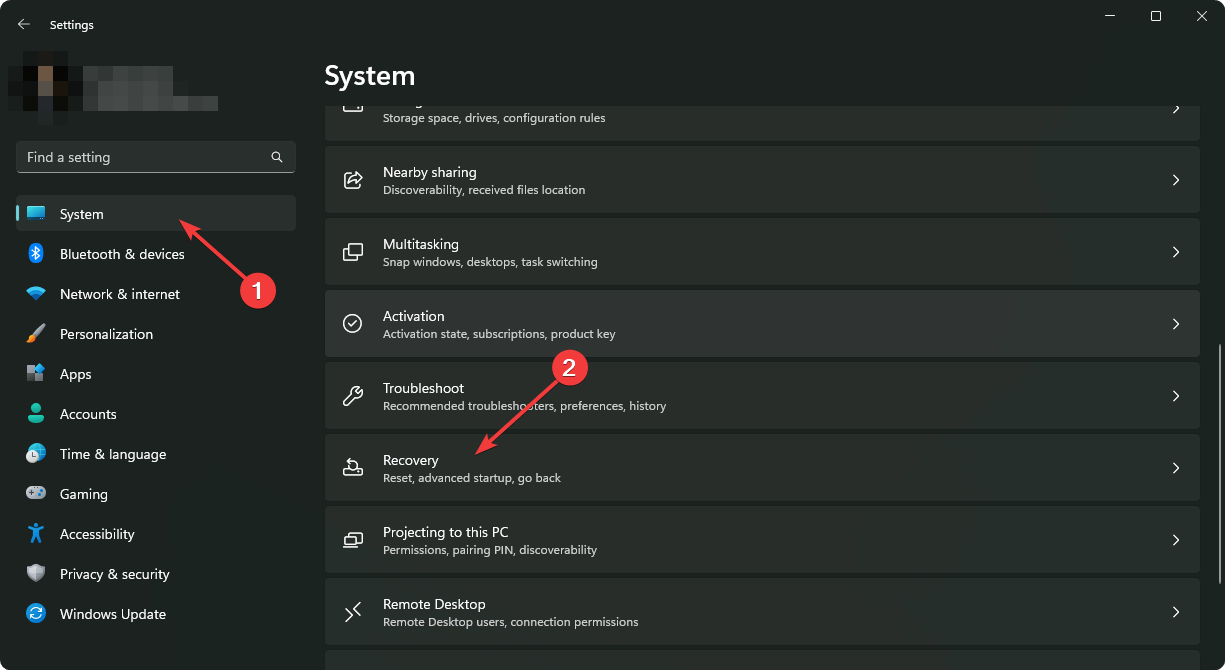
- Go to System and then Recovery.
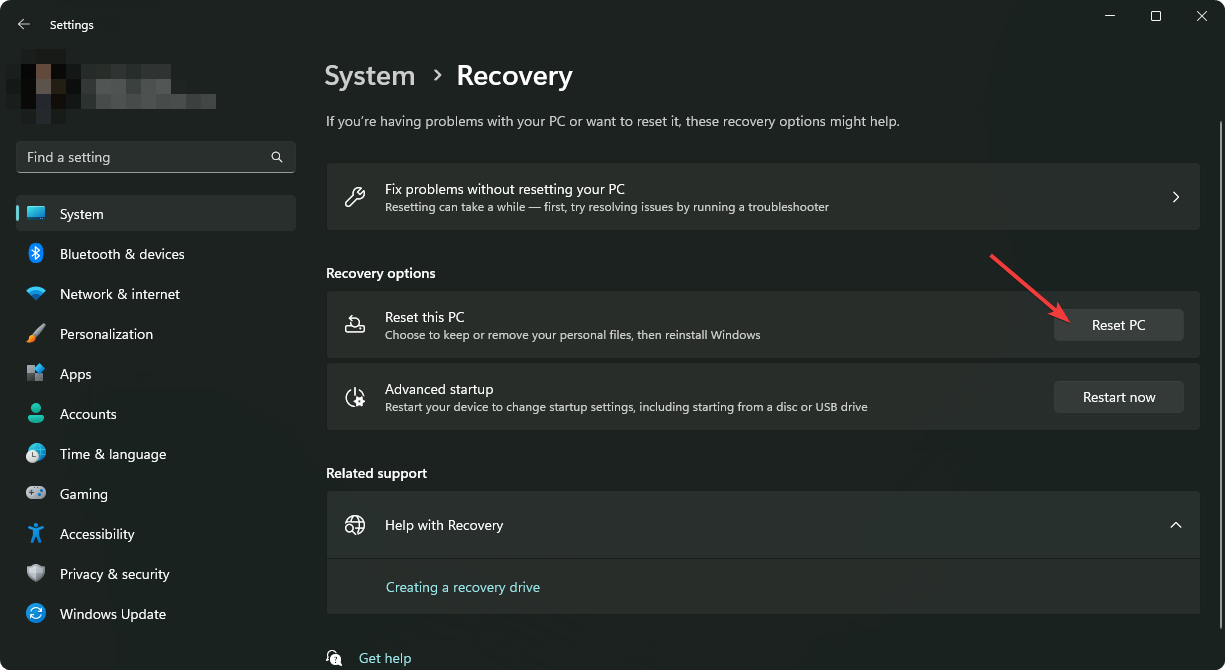
- Click on Reset PC.
- Choose your preferred way to reset.
- Go ahead and finish the process.
Following the above methods will indeed help. However, you also should make sure no software is interfering with your audio services. If appropriate, you also can try to disable the antivirus for a while to see if it improves the situation. Also, consider the clean installation of Windows if required.
This article has mentioned how to fix if audio services are not responding on Windows 11. If you know of any other methods, feel free to let us know in the comment box.




User forum
0 messages