You May Be A Victim of Software Counterfeiting: How to Fix It?
Most common reason for this is using single PC licenses on more than one PC
4 min. read
Updated on
Read our disclosure page to find out how can you help Windows Report sustain the editorial team. Read more
Key notes
- This error comes up due to Microsoft's anti-piracy update, which helps to flag false versions.
- Using the inauthentic version could help you use Windows for free but might leave to vulnerable to threats.
- However, we have the fixes to resolve the issue if you have a genuine version.
Getting you may be a victim of a software counterfeiting warning can be frustrating. This Windows Authentication error occurs when a Windows license is flagged as not genuine.
This guide will discuss the potential reasons for the issue and available fixes. Let’s begin!
What causes you may be a victim of software counterfeiting?
There could be a handful of reasons for getting this error. We have mentioned some of the popular ones here:
- Windows License is not genuine – If your computer has a cracked version of Windows, and Windows Genuine Advantage Update scans your PC to ensure Windows license authenticity, this issue could occur.
- Registry files are corrupted – If the Registry keys on your computer are missing or corrupted, you could see the error.
- Windows License is used in more than one computer – If you have the original Windows license, but it is being used on more than one computer, the issue can occur. It is advised to cross-check with your seller to ensure the same.
How do I deal with the you may be a victim of software counterfeiting message?
Before performing serious troubleshooting, let us check out some quick fixes:
- If the issue occurred after Windows Update, try restoring the system to its Last Known Good Configuration via System Restore.
- Locate wgatray.exe in Task Manager, right-click on it and select End Task.
If these fixes didn’t work for you, try using the methods mentioned below to re-authenticate your Windows license.
1. Reactivate Windows
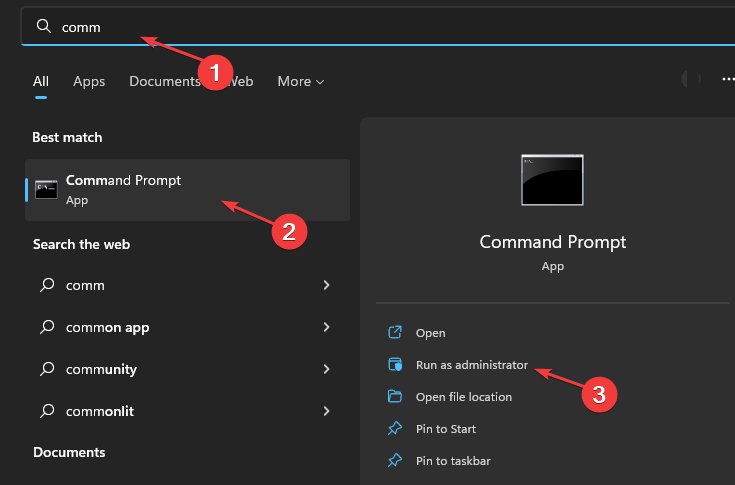
- Press the Windows key, type CMD, and click Run as administrator.
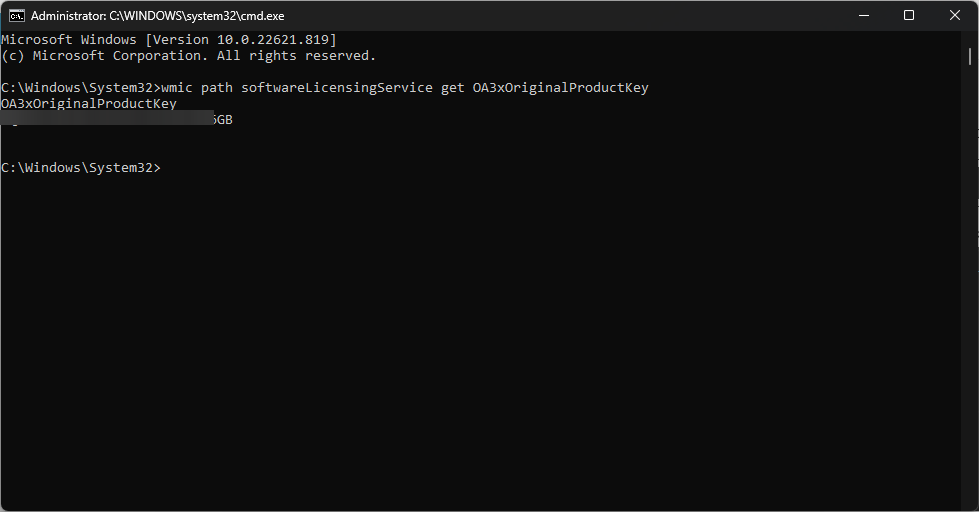
- On the Command Prompt window, copy and paste the following command to get the Windows product key and press Enter:
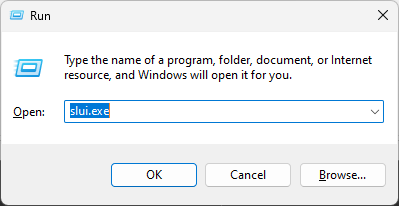
wmic path softwareLicensingService get OA3xOriginalProductKey - Note the product key. Press Windows + R to open the Run window.
- Type slui.exe and hit Enter.
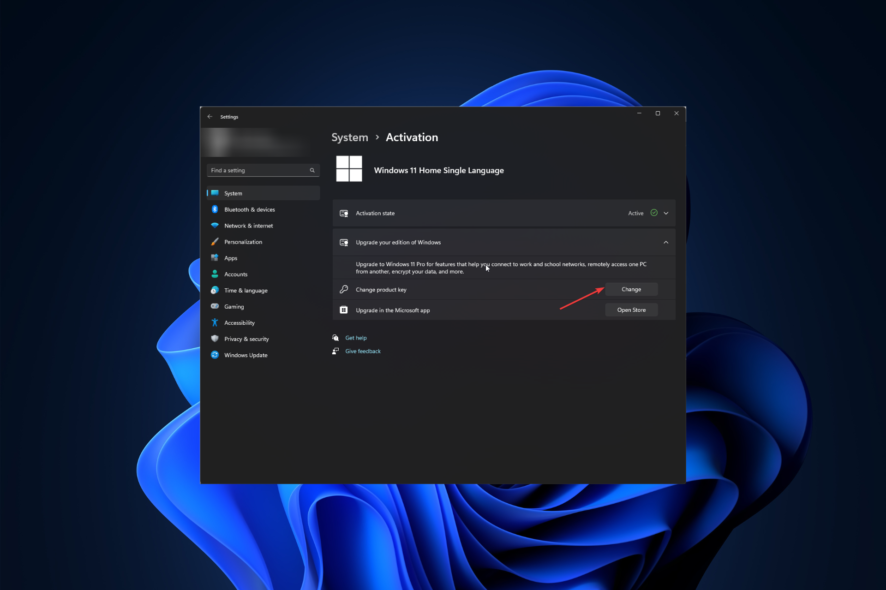
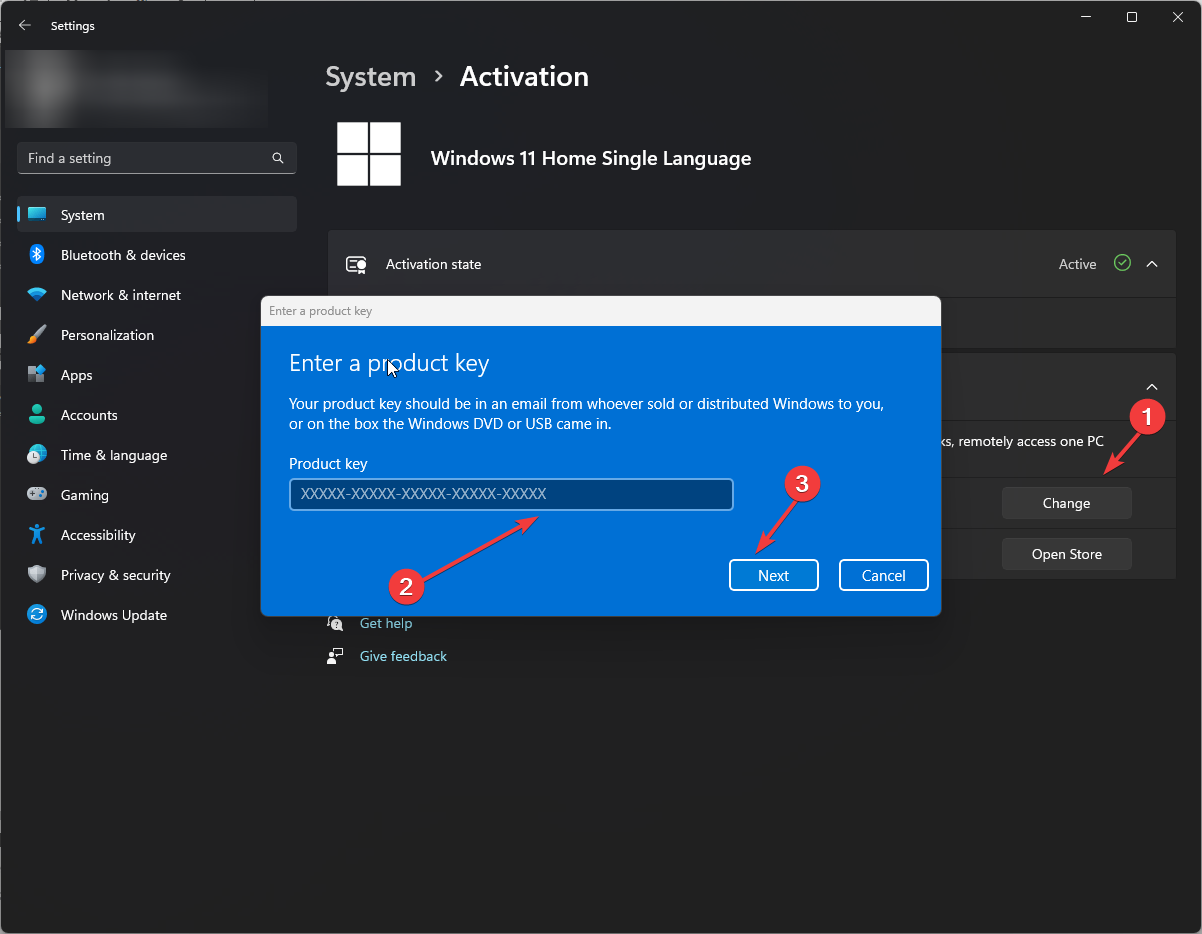
- Click Upgrade your edition of Windows, then go to the Change Product key and click Change.
- On Enter a product key window, type in or paste the license key you noted and press Next.
- Click Activate, and it is done.
2. Disable Plug and Play service via Group Policy Editor
- Press Windows + R to open the Run window.
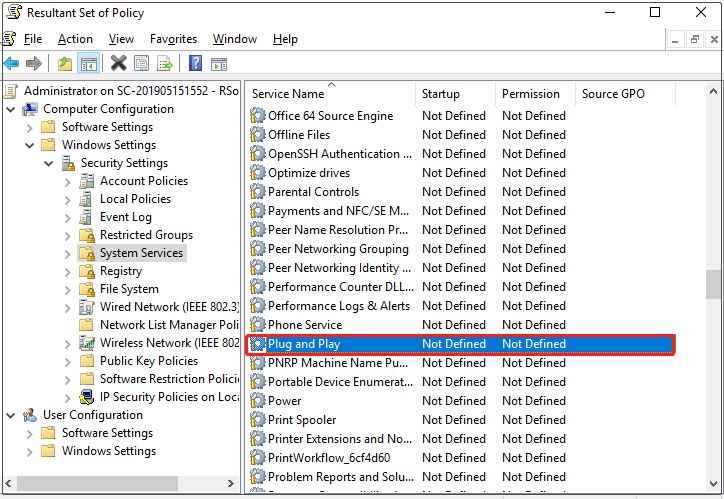
- Type rsop.msc and press Enter to open the Resultant Set of Policy.
- Now navigate to the following path:
Computer Configuration\Policies\Windows Settings\Security Settings\System Servies - Locate Plug and Play and check if Startup and Permission are set to Not Defined. If not, right-click on Plug and Play and select Properties.
- Now change Permission and Startup status to Not defined.
- Close the window and restart your computer.
3. Delete Wgalogon folder from Registry Editor
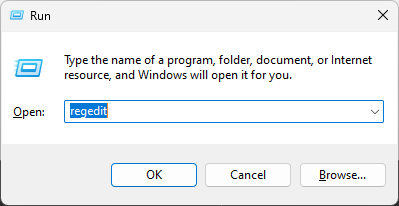
- Press Windows + R to open Run.
- Type regedit and hit Enter.
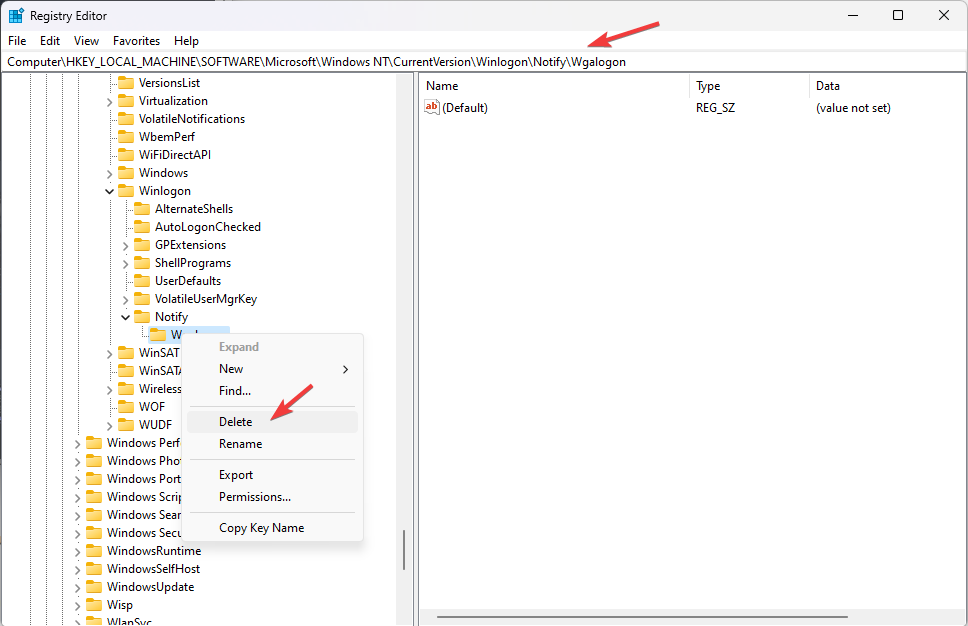
- Go to this path:
Computer\HKEY_LOCAL_MACHINE\SOFTWARE\Microsoft\Windows NT\CurrentVersion\Winlogon\Notify - Locate and right-click on the Wgalogon folder and select Delete.
4. Remove WGA files
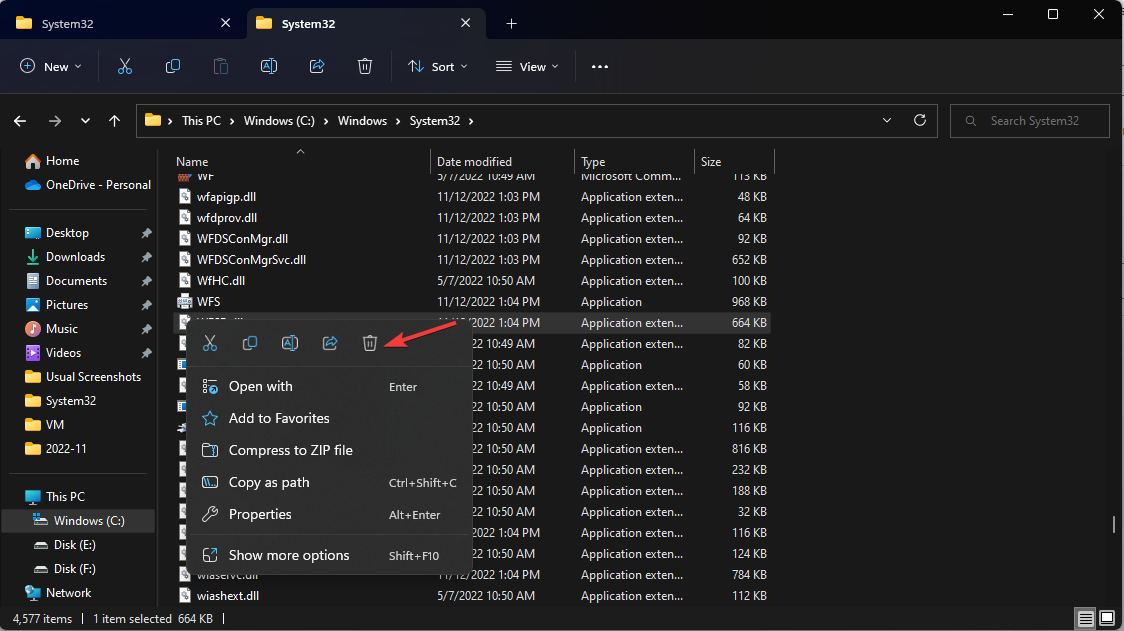
- Press Windows + E to open Windows Explorer.
- Follow this path to get WGA files:
C:\Windows\System32 - Type wga in the search bar and press Enter to locate all WGA files, including WgaSetup.exe and Wgatray.exe.
- Delete all the files and reboot your computer.
Note: If you can’t find the System32 folder, go to View, select Show, and then select Hidden items.
5. Add Necessary Network Service Permissions
- Press Windows + R to get the Run window.
- Type regedit and hit Enter to open Registry Editor.
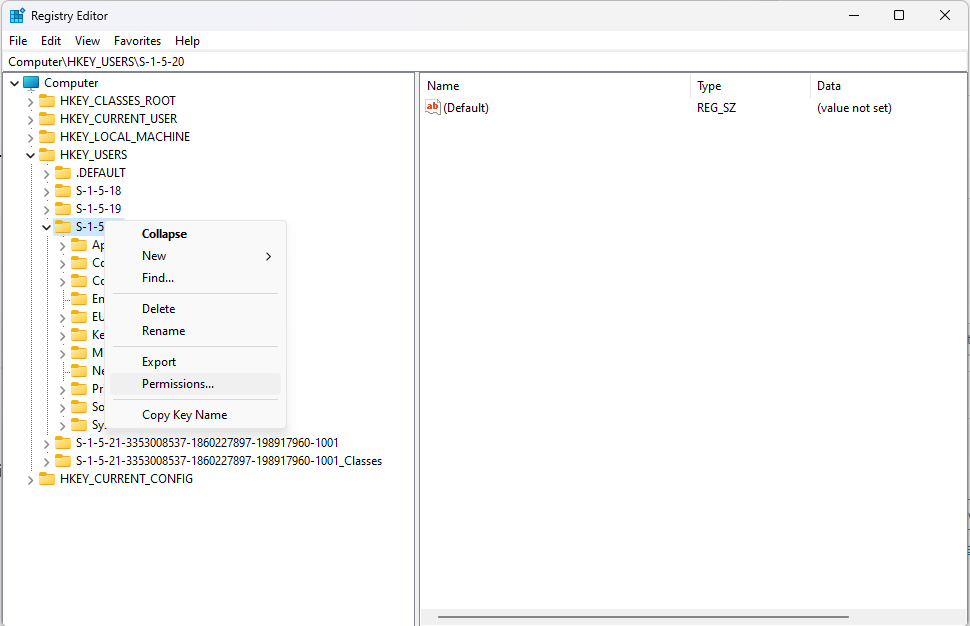
- Go to HKey_Users, click it to expand, and right-click S-1-5-20.
- Select Permissions.
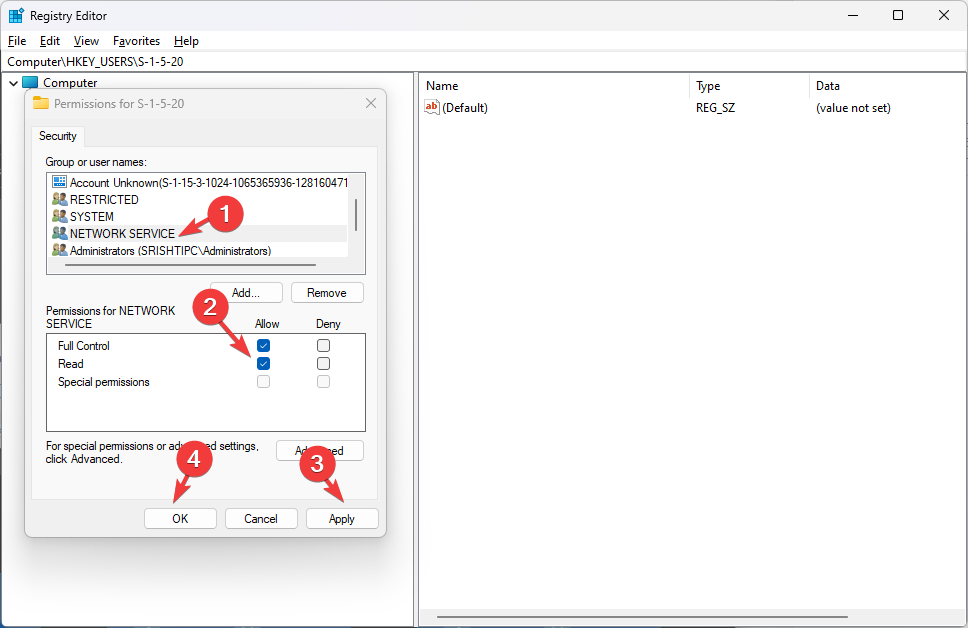
- Now on the next screen, check if Network Service is available in Group or user names section.
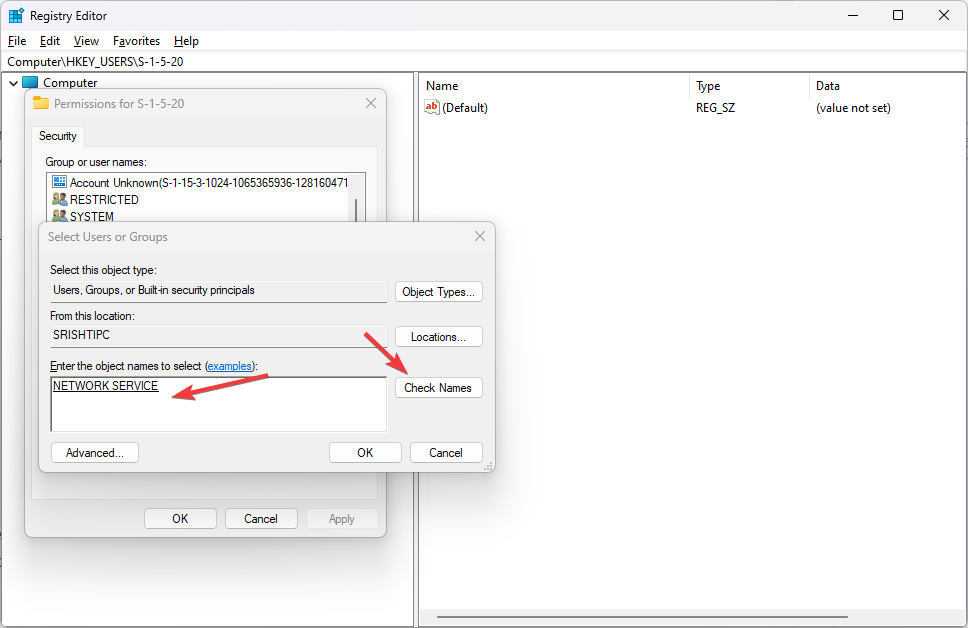
- If yes, then go to step 8. If not, click on Add, and under Enter the object names to select, type Network Service.
- Now click the Check Names button and click OK.
- Click Network Services and put a checkmark on Allow box for the Full Control and Read option. Click Apply and then OK.
- Reboot your PC to let the changes take effect.
6. Disable Automatic Updates
- Press the Windows + R to open the Run window.
- Type regedit and press Enter.
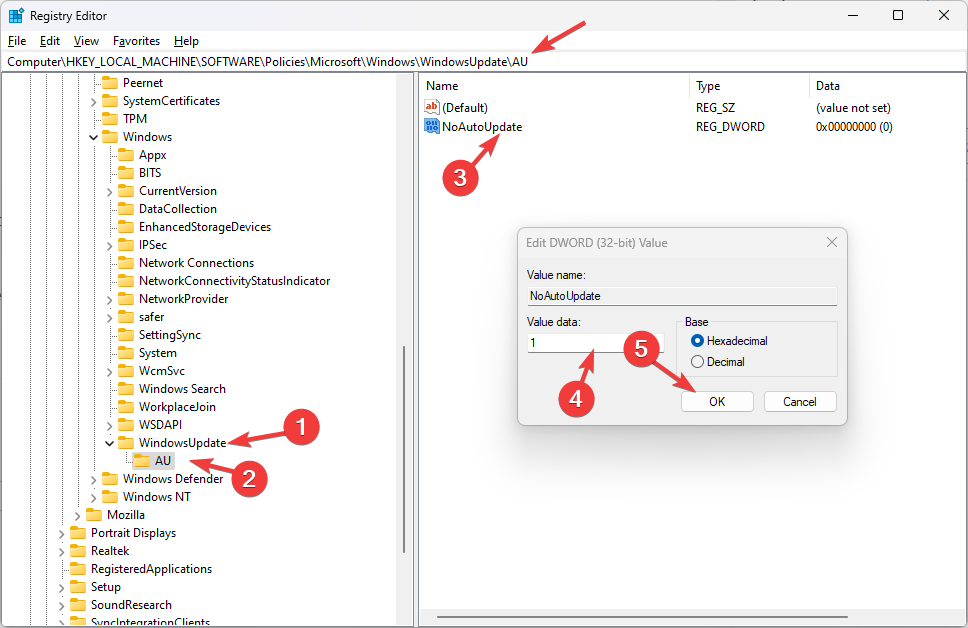
- Follow this path:
HKEY_LOCAL_MACHINE\SOFTWARE\Policies\Microsoft\Windows - Select Windows and right-click on Windows, choose New, then Key.
- Rename the key as WindowsUpdate, right-click, select New, then Key.
- Name the key AU. Right-click on the AU key and choose New. Select DWORD (32-bit) Value.
- Rename the DWORD as NoAutoUpdate. Double-click it to modify the Value data, type 1, and click OK.
- Restart your computer.
- Your computer will not automatically download updates, but you can manually check and download updates when needed.
So, these are steps to fix you may be a victim of software counterfeiting issues. If you think we missed the method that worked for you, please let us know in the comments section below.





User forum
0 messages