WSL2 Stopped Working: 4 Easy Ways to Make It Work Again
Restart LxssManager service or turn on Hardware Virtualization
![]() 4 min. read
4 min. read
![]() Updated on
Updated on
Share this article
Improve this guide
Read our disclosure page to find out how can you help Windows Report sustain the editorial team. Read more
Key notes
- WSL service allows you to load Linux and run it directly on your Windows PC.
- If it fails to work, then you will come across different issues such as the WSL2 stopped working error.
- You can try deleting the latest Windows update that you have installed on your PC.
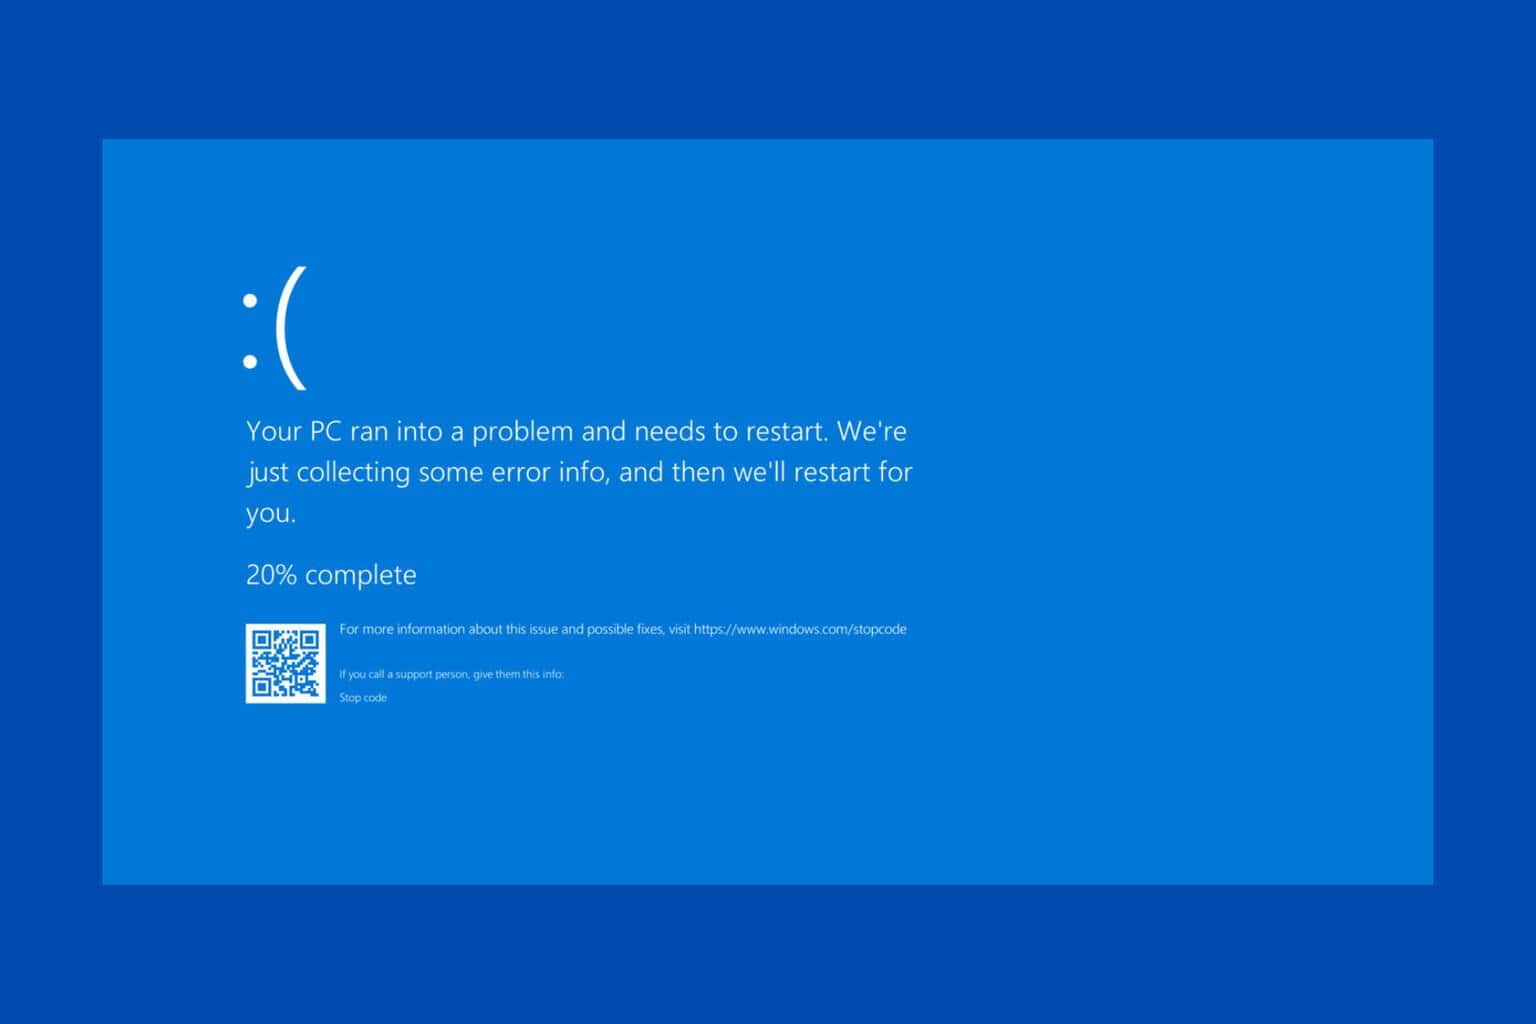
When running a Linux virtual machine on your Windows PC, you may come across issues such as the WSL2 stopped working, which has been troubling other users.
In this guide, we will discuss what is WSL and what it does in actual terms. Moreover, we will give you a few solutions that will help you resolve the problem on your end. Let us get right into it.
What is WSL or Windows Subsystem for Linux?
WSL or the Windows Subsystem for Linux lets users run Linux OS directly on their Windows PC. The best part of using WSL is that it lets you run complete Linux inside Windows, allowing you to use the same files and apps seamlessly.
WSL2 makes use of the Hyper-V virtual machine technology. This boosts the performance of using Linux on Windows OS as the compatibility is improved and the file access speed is up to 20x faster than WSL1.
Microsoft introduced WSL2 in 2020, so it is compatible with the latest version of Windows, i.e., the Windows 11 OS. However, if you are using Windows 10, then you need to manually configure it for better performance.
While you will get almost similar performance on Windows 10, as per user reports, WSL2 performs well and is stable on Windows 11.
What can I do if WSL2 stopped working?
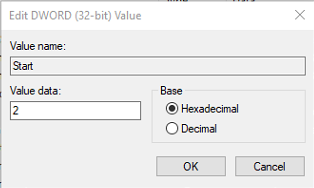
1. Set the LxssManager service startup to Automatic
- Press Win + R keys to open the Run dialogue.
- Type regedit and press Enter.

- Navigate to the below-mentioned path.
HKEY_LOCAL_MACHINE\SYSTEM\CurrentControlSet\Services\LxssManager
- Double-click on the Start key.
- Under the Value data field, type 2.

- Press OK.
- Restart your PC.


Following the above steps will set LxssManager to auto-start. We would advise you to only tweak registry settings if you know what you are doing, as incorrect tweaks can lead to system failure and important services getting disabled.
2. Restart LxssManager Service
- Open the Start menu by pressing the Win key.
- Type services and open it.
- Locate LxssManager and double-click on it.
- Under Service status, select Stop if it is running.

- Click Apply.
- Select Start under Service status to run the service.
- Click OK and Apply.
- From the Startup type drop-down, select Automatic.
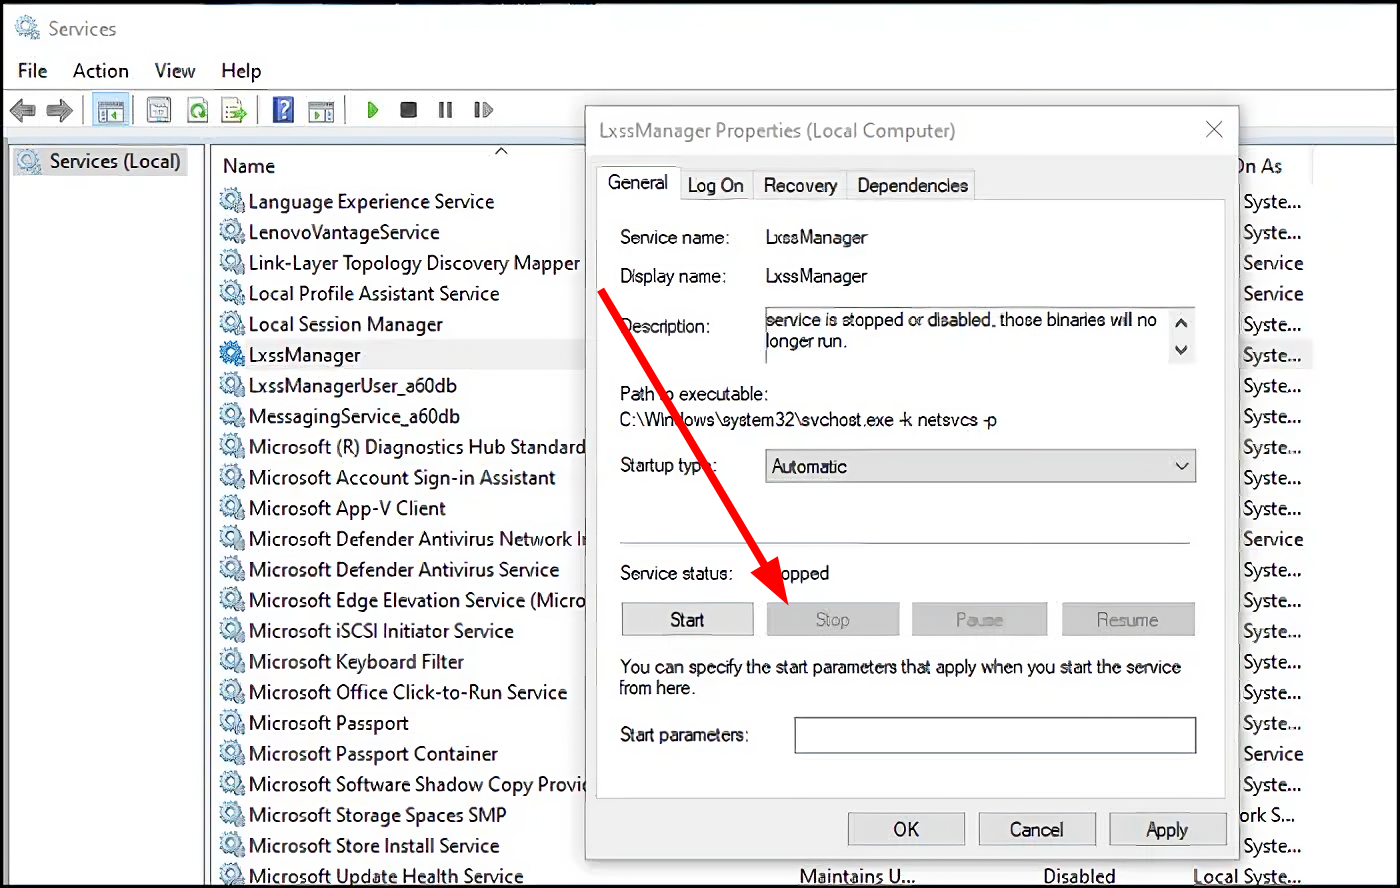


Often the LxxManager service can come across an issue that could result in its malfunction. In such a case, we would advise you to restart the service back again by following the above steps and check if this fixes the WSL2 issue.
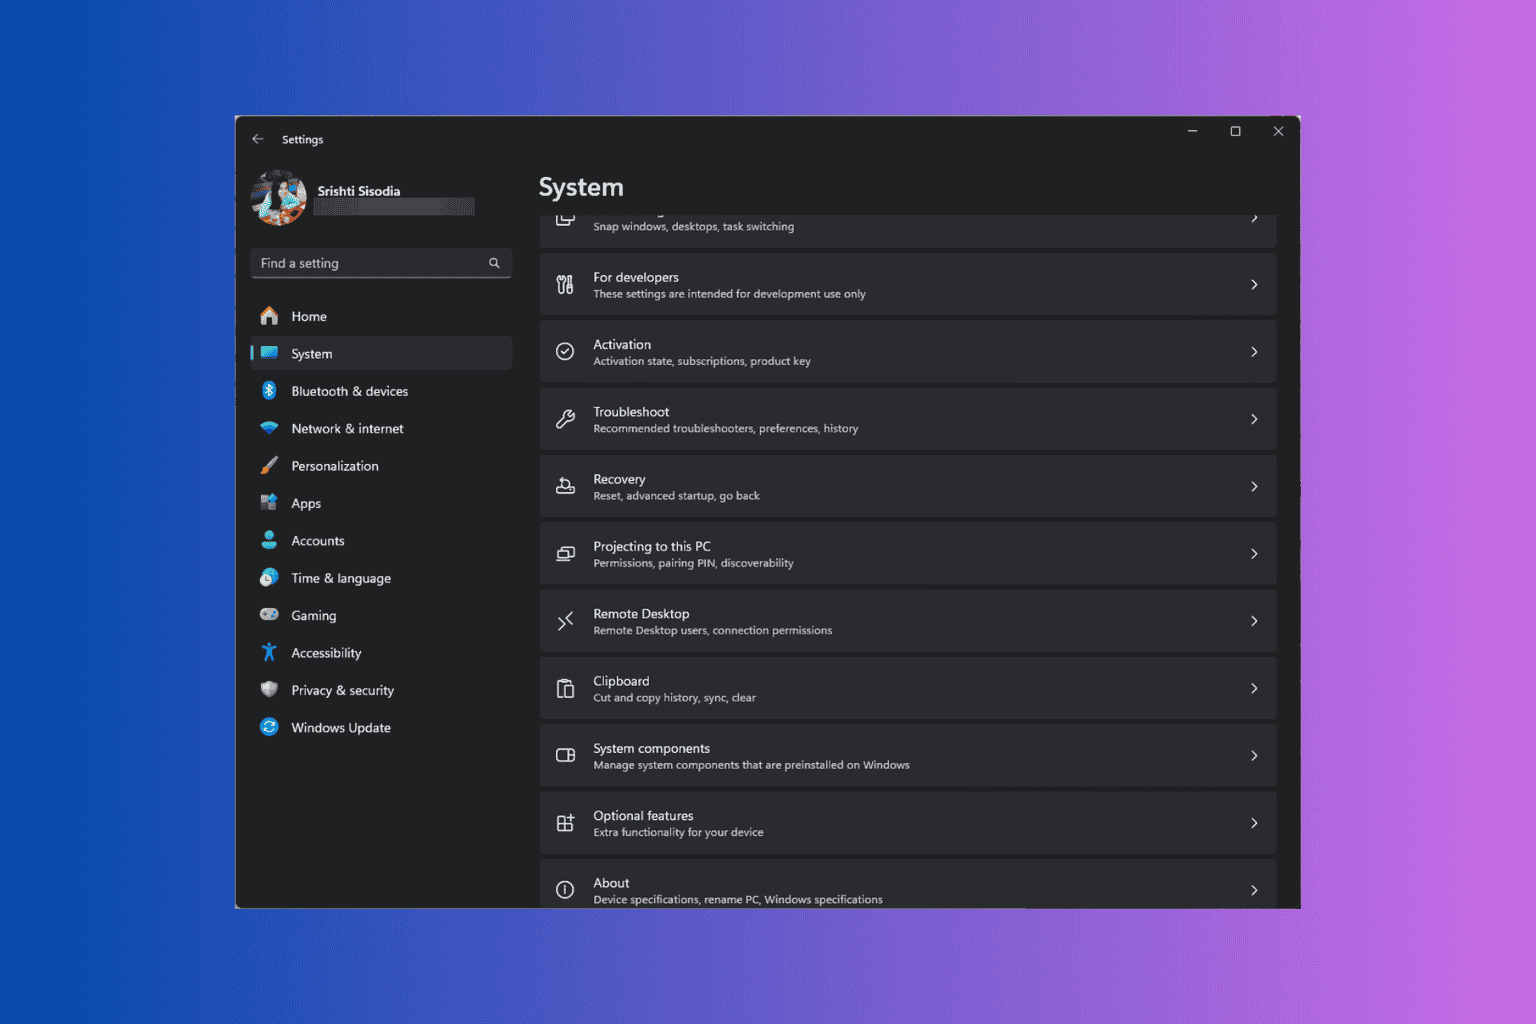
3. Uninstall Windows update
- Press Win + I keys to open the Settings menu.
- Select Windows Update from the left pane.

- Click on Update history.

- Scroll down and click on Uninstall updates under the Related settings section.
- Hit the Uninstall button next to the update you wish to uninstall.
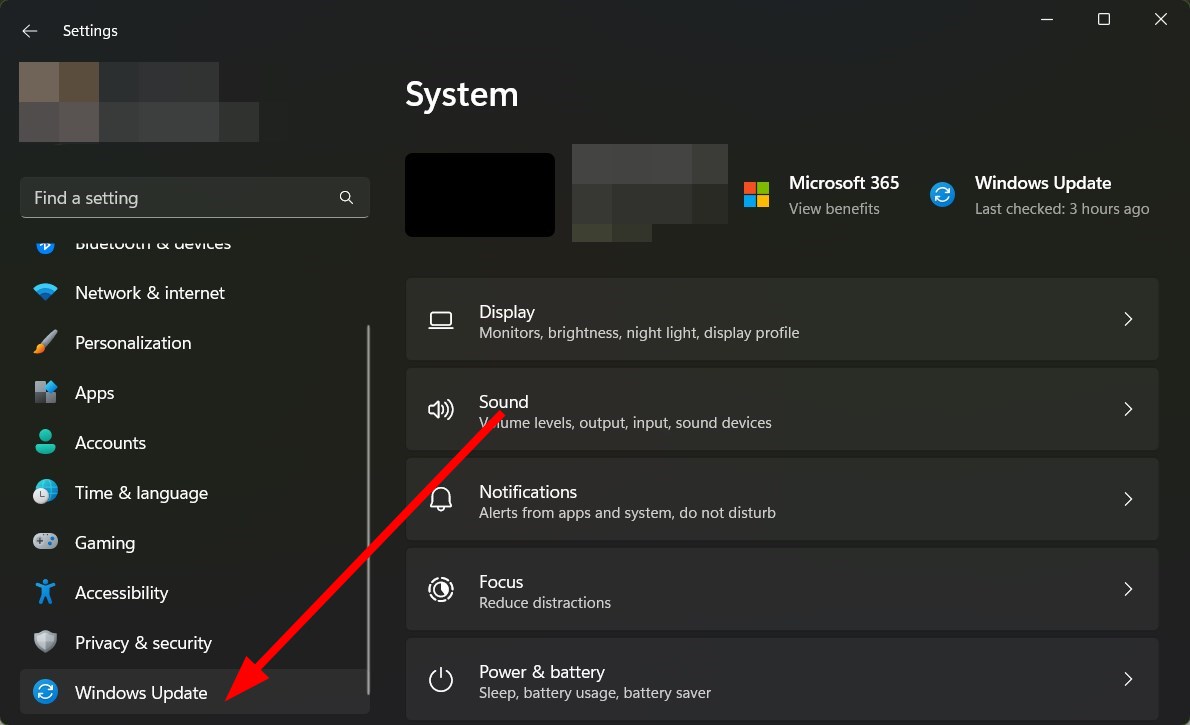
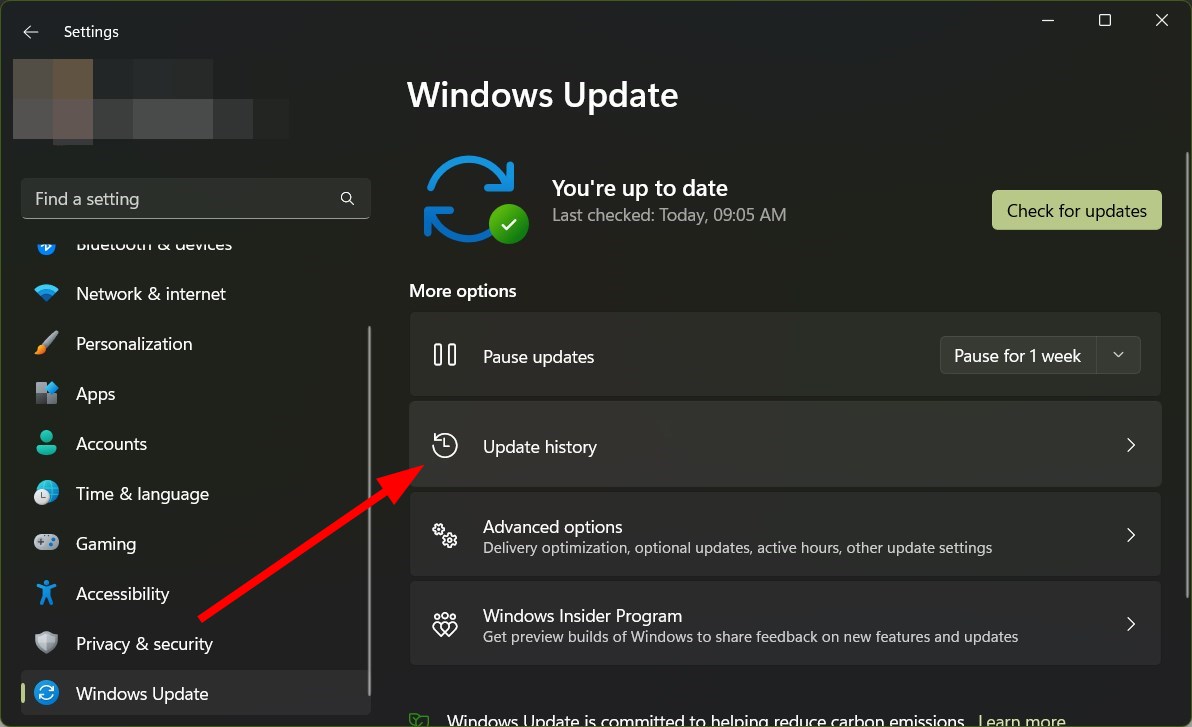
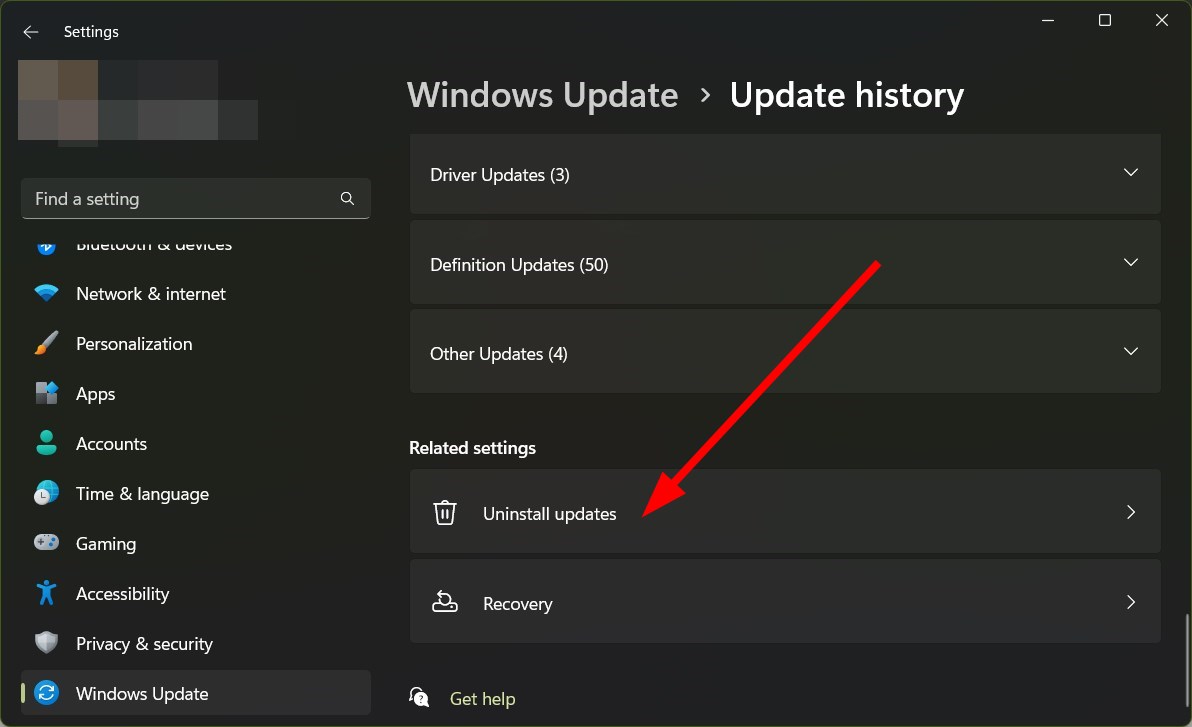
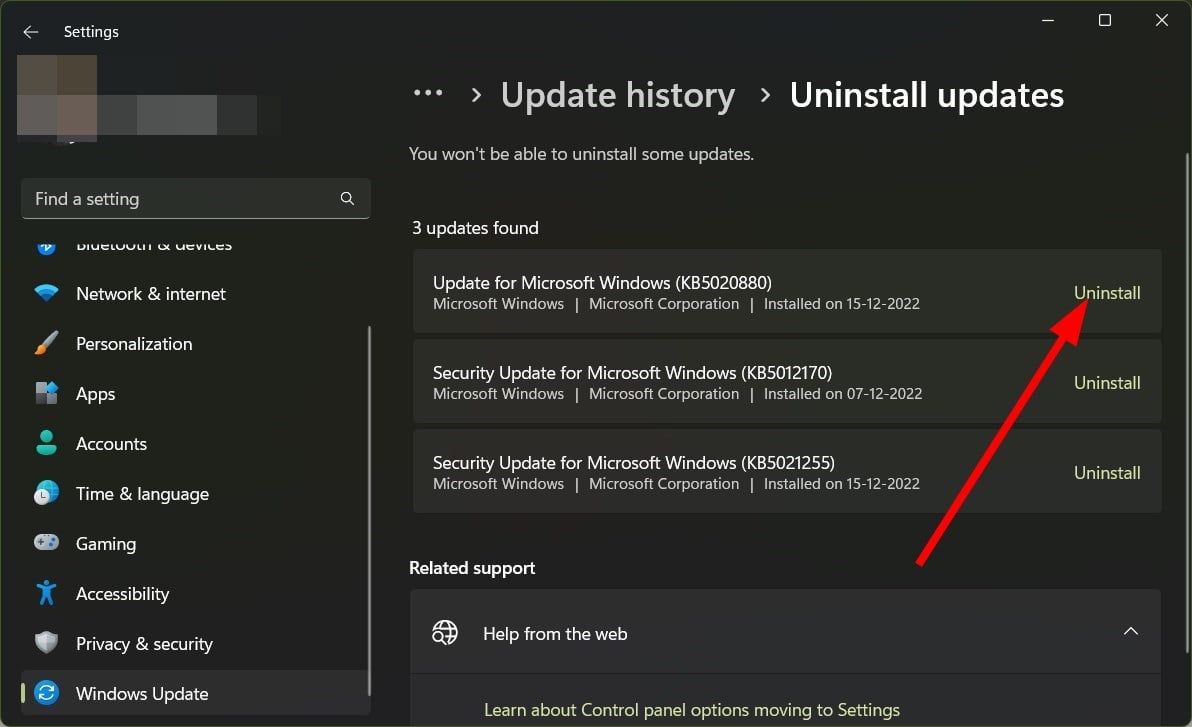
We have shown the steps to uninstall updates for Windows 11 OS, but the steps are similar for Windows 10 as well.
Chances are the version of Windows update that you are running has some bugs which are causing the WSL2 stopped working problem. You can uninstall the update and check if this fixes the problem or not.
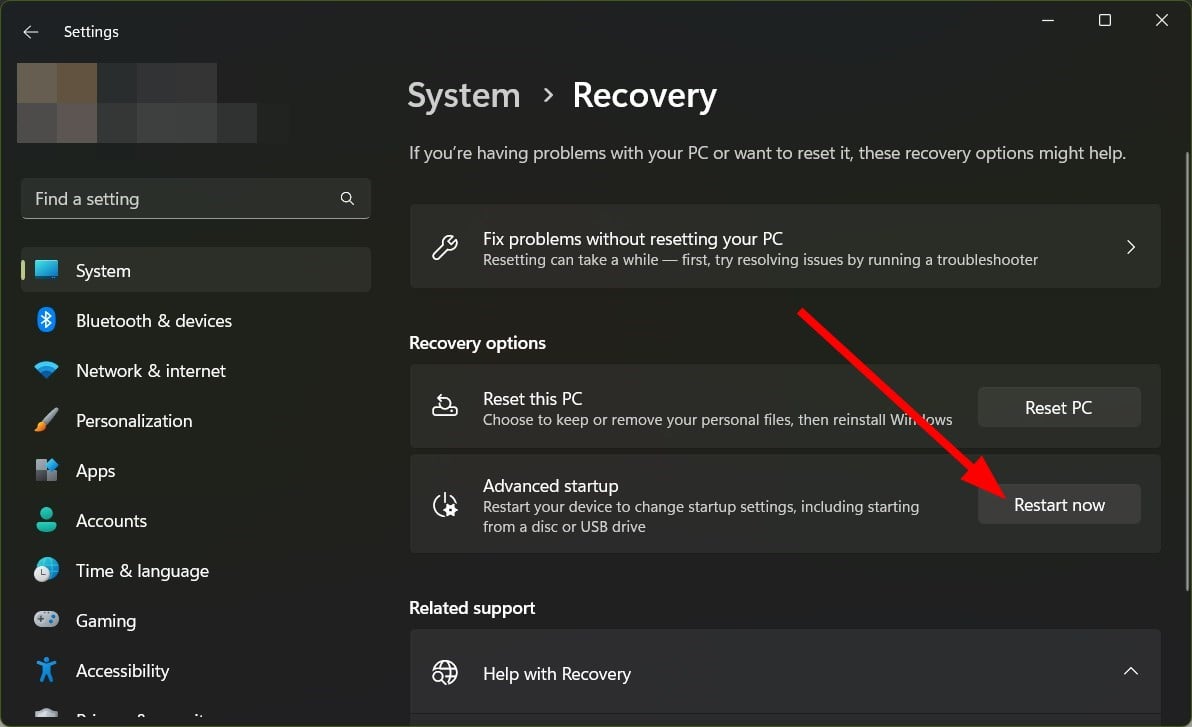
4. Enable Hardware Virtualization
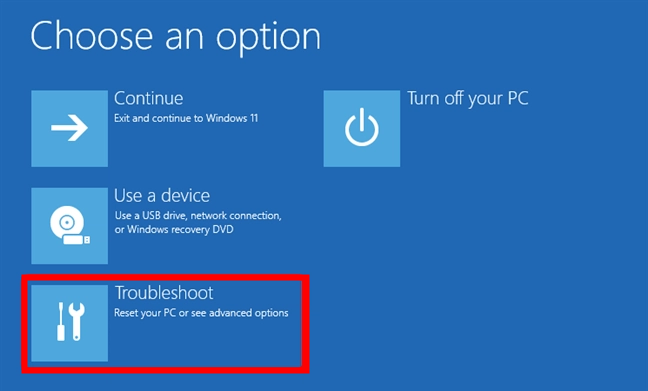
- Press Win + I buttons to open Settings.
- Select Recovery from the right side.
- Under Advanced startup and hit the Restart now button.
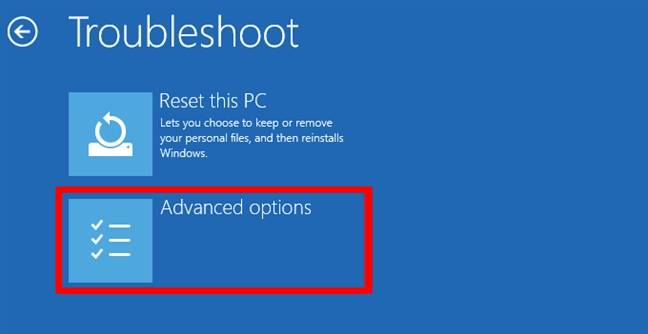
- Select Troubleshoot.

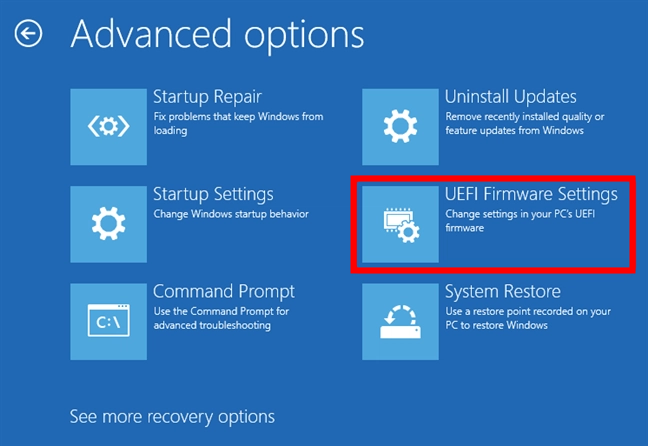
- Choose Advanced options.

- Select UEFI Settings.

- Choose Restart.


Now follow the below steps depending on the brand of laptop you have.
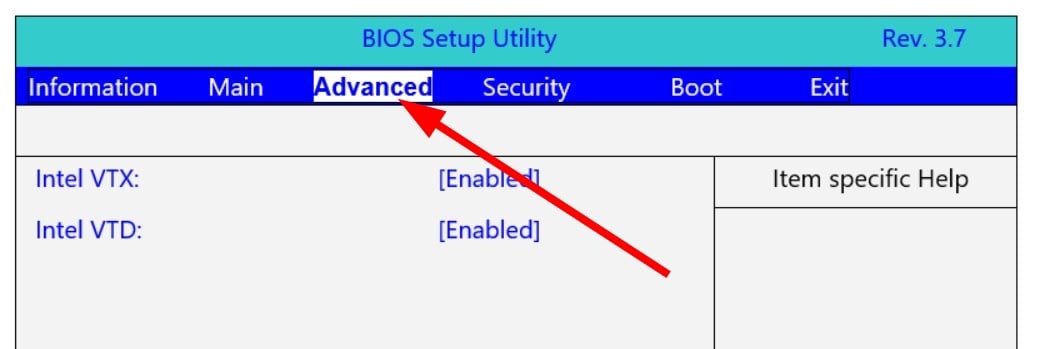
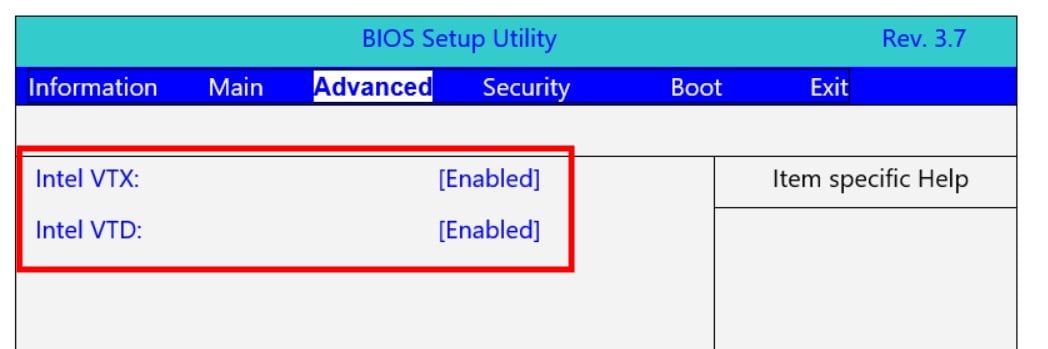
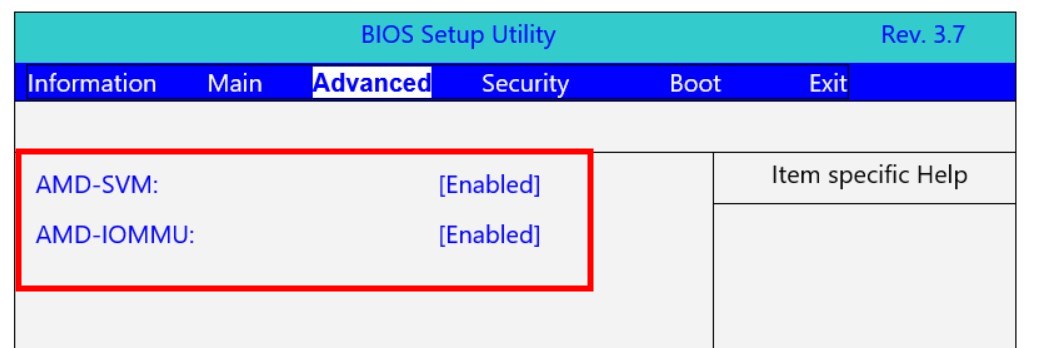
For Acer laptops
- When the system is about to boot press F2 to enter the BIOS menu.
- Select Advanced page.

- Enable the Intel VTX and Intel VTD settings for Intel-based processors.
- Enable AMD-SVM and AMD-IOMMU for AMD-based processors.

- Press F10 to save the settings.
For Dell laptops
- When the system is about to boot press F2 to enter the BIOS menu.
- Select Advanced.
- Choose Virtualization.
- Set Virtualization to Enabled.
- Set Virtualization for Direct-IO (or VT-d) to Enabled.
- Save and Exit.
We have shown the steps to enable Hardware Virtualization for Acer and Dell laptops. But you can check out this official Microsoft support page to know how to enable the settings for other brands.
That is it from us in this guide. Readers can also check out our guide to know how they can fix the Windows 10/11 bootloader from Linux.
Readers who want to know how they can create a bootable USB media for Linux OS can refer to our dedicated guide.
Let us know in the comments below, which one of the above solutions helped resolve the problem at your end.


User forum
0 messages