How To Create a Windows 11 Bootable USB on Ubuntu
Follow our first solution to install W11 from Ubuntu with the USB drive
Key notes
- Installing Windows 11 on Linux using a bootable USB is easy, and this guide shows you precisely how.
- Before you proceed, check if your system supports Linux Kernel 5.15 with the latest NTFS driver and check the WSL version.
- Learn how you can run a Windows 11 bootable USB on Linux (Ubuntu) using Windows 11 ISO and other handy tools.

While Windows 11 came with a lot of new and advanced features, and changes, it was still a tough task to create a Windows 11 bootable USB on Ubuntu Linux.
The NTFS format on Windows lacked quality drivers and hence, could not handle the bigger NTFS files, thus, corrupting the newly created installation media.
It would also need you to split the install.wim file into several different files to create the bootable USB. However, currently, the Linux Kernel 5.15 and the later versions feature the latest NTFS driver and are adept at handling bigger NTFS files, thus, helping users to create a Windows 11 bootable USB on Linux.
This guide will explain the steps in detail on how to create a bootable Windows 11 USB in Linux (Ubuntu).
? Check the requirements
Before creating a Windows 11 bootable USB on Linux, here are a few things to remember:
- Get a 6 GB+ USB drive
- A computer or laptop with a processor that is 1 GHz or faster
- 4GB+ RAM
- 60GB+ hard disk
- DirectX 12 or late (graphics) compatible
- Supports UEFI, and Secure Boot
- Supports TPM 2.0 or WinPE (in old devices)
How to make Windows 11 bootable on Linux?
1. Download & Create Windows 11 ISO USB
- To download the Windows 11 ISO file, visit Microsoft’s official page for software download.
- In Linux, it’s recommended to use the direct download links, because the other two options – Windows 11 Installation Assistant and the Create Windows 11 Installation Media are applications, built only to function in Microsoft Windows.
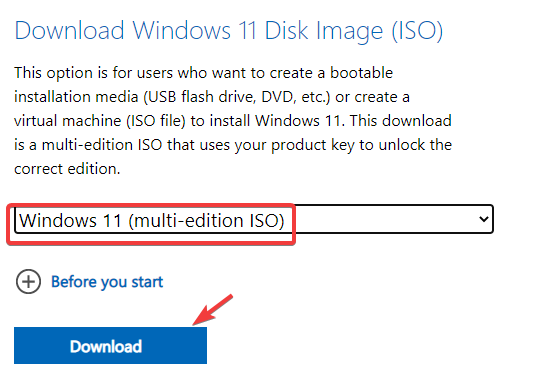
- Therefore, navigate to the Download Windows 11 Disk Image (ISO) section.
- From the drop-down, select Windows 11 (multi-edition ISO) and click on Download.

- Next, under the Select the product language field, select the desired language from the drop-down and press Confirm. For example, you can select English (United States), English International, or any other preferred language.

- It will now display a Windows 11 64-bit Download link that is valid for 24 hours from the time of creation. Click on the link to finish the download and then create the bootable USB installer for Windows 11.

➡️ Now that you’ve downloaded the W11 ISO, here’s how you can burn it on your USB stick:
1. Connect your USB device.
2. Go to the Windows icon on the taskbar (Start) and search for WoeUSB in the search bar.
3. As the app opens, select From a disk image (ISO) option and select your ISO image from the drop-down. Now, navigate to the Target device section at the bottom and highlight your USB drive.
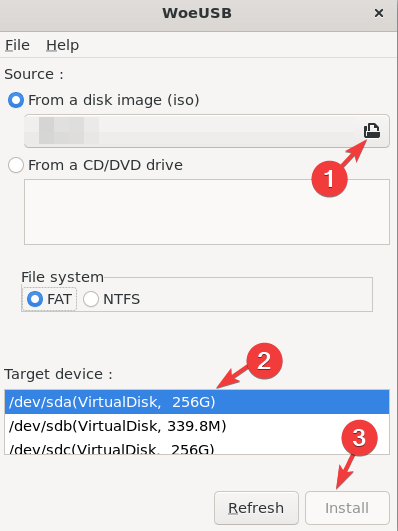
4. Press Install to continue.
5. Next, search for Disks in the Windows search to open the Disk Utility and unmount the USB device, or it will show an error message.

6. In the Disks utility, go to the left side of the pane, select the USB device and click on the square symbol. This will unmount the USB device.
7. Once done, return to the WoeUSB app, click the Refresh button below, and select the USB device.
8. Press Install again.
9. It will now start cleaning the USB drive and burning the Windows 11 OS to it.
10. Once the installation process is over, it will display a success message.
11. Shut down and boot from the USB device to begin installing the Windows 11 OS.
In order to burn the Windows 11 ISO file on your USB driver accordingly, you have our guided steps as an example.
You can also use GParted to create a bootable USB flash drive to install Windows from Linux. You would first need to install GParted and then follow the process as mentioned in the link.
Those who own a Windows device running on Intel 8th, 9th, 10th, or 11th generation and the RAID SATA Operation, and wish to install Windows 11, would need extra storage controllers. This will help them to identify the storage controller easily and find the NVMe SSD.
For this, download the Intel Rapid Storage Technology Driver from the official website, extract the folder and copy the same to the install partition of the Windows 11 bootable USB on Ubuntu Linux.
2. Use a dedicated app
Download & install WoeUSB in Ubuntu
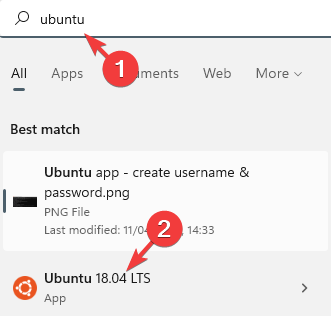
- Go to Start, and type Ubuntu to search for the Ubuntu command-line app.

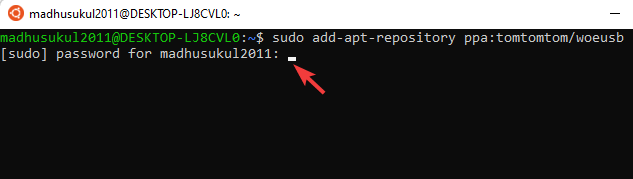
- Run the below command in the Ubuntu app and press Enter:
sudo add-apt-repository ppa:tomtomtom/woeusbThis will add the PPA.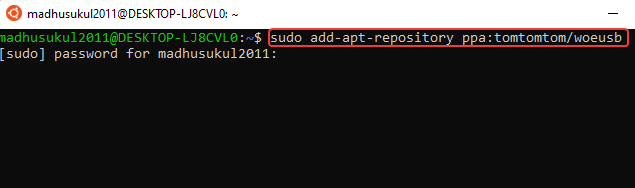
- Next, type the password, and press the Enter key as asked.

- Now, execute the below command to finish installing the WoeUSB tool:
sudo apt install woeusb woeusb-frontend-wxgtkPress Y to continue.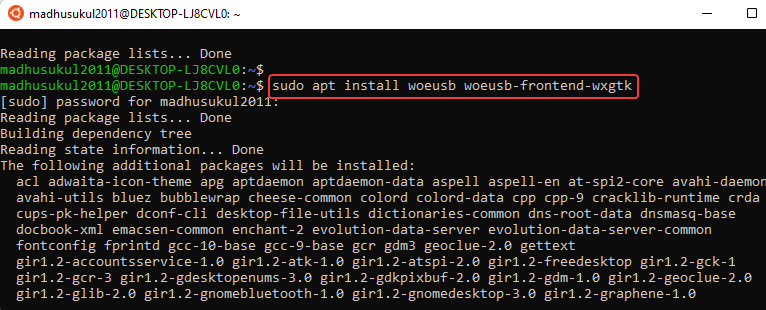
- The process takes a while, so wait till the installation is complete.
To create the Windows 11 bootable USB on Ubuntu, the WoeUSB app needs to be
installed.
How to install Windows Subsystem for Linux (WSL) in Windows 11?
The previous Windows version was called the Linux Kernel version. However, in Windows 11, it’s known as WSL or the Windows Subsystem for Linux.
Currently, there are only two WSL versions, WSL 1 (released originally) and WSL 2, the second version that comes built-in with the Linux kernel within a virtual machine.
While it supports all the features of the original version, it also helps optimize the system performance, supports multiple monitors, compatible with call support for the entire system, and also supports all of the Linux GUI-based apps.
However, it has to be installed on your Windows 11 PC. Here’s how to check if the WSL or the Windows Subsystem for Linux is installed on the Windows 11 device. Here’s how:
- To open the Run command window, press the Win + R keys together on your keyboard.
- In the search bar, write CMD and press the Ctrl + Shift + Enter keys at the same time. This will open the elevated Command Prompt.

- Now, copy and paste the below command in the Command Prompt (admin) and press Enter:
wsl –installIt will show the message: The requested operation is successful. Changes will not be effective until the system is rebooted.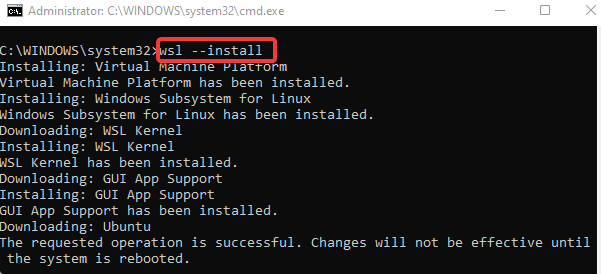
- Restart your PC to complete installing the WSL on Windows 11. The process will be completed in the Ubuntu app console.
- Create the UNIX username and password as requested.
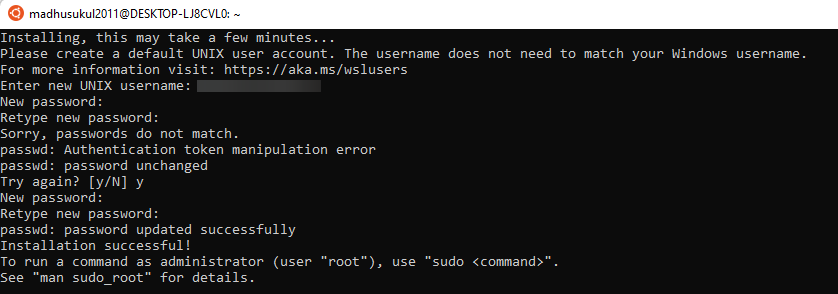
As the username and password are successfully created, it will show the message: Installation successful. One can now proceed with the below method to check the WSL version installed.
Check the WSL version or Linux Kernel Version
- Press the Win + R shortcut keys simultaneously to launch the Run command.
- In the Run command search bar, type in CMD and press Ctrl + Shift + Enter. This will open the Command Prompt window with admin rights.
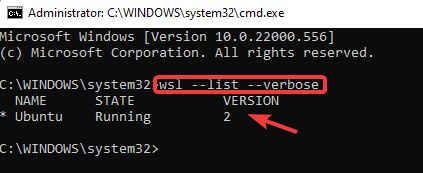
- As you see the elevated Command Prompt window, run the below command and hit Enter:
wsl --list –verboseThis will show whether the device has WS 2 or WS 1 installed. - Check the WSL version under the Version column. For WSL 1, it will show 1 and for WSL 2, it will show 2.
Now that the WSL version is known, the latest Windows Subsystem for Linux is installed, and hence, can proceed to create the Windows 11 bootable USB on Ubuntu Linux.
WoeUSB is a free and open-source Microsoft Windows® USB installation media preparer for GNU+Linux. Go to the PPA repository to download and install the tool, which includes all current Ubuntu releases (Ubuntu 18.04, Ubuntu 20.04, Ubuntu 21.04).
 NOTE
NOTE
Download Ubuntu from Microsoft Store.
If Windows 11 is running Ubuntu 18.04 (Linux Mint), run the below command to generate a fresh list of packages:
sudo apt update No doubt, Windows 11 is the most sought-after Windows OS at this moment. Thanks to its splendid features and functionalities, users are keen to install the OS on their computers. However, installing the Windows 11 OS on Linux can be perplexing.
But, if you follow the above methods properly, it should not be a tough task after all. This guide will get you going with your Windows 11 installation on Linux (Ubuntu). So, simply mount the bootable USB on the PC and reboot. This will auto-start the Windows 11 installation process and that’s it!
Read our disclosure page to find out how can you help Windows Report sustain the editorial team. Read more


Improve this guide


User forum
0 messages