Synaptics Touchpad Driver Scroll Not Working [Fixed]
Temporarily disable your touchpad to fix this issue
4 min. read
Updated on
Read our disclosure page to find out how can you help Windows Report sustain the editorial team. Read more
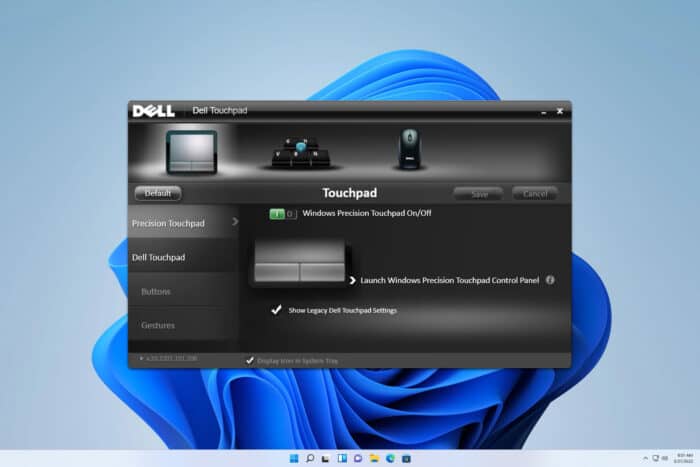
When the Synaptics touchpad driver scroll is not working on your notebook navigating can be an issue, but we have fixes that can help with this issue.
What can I do Synaptics Touchpad driver scroll if it’s not working?
Before we start, use Fn + F8 or F6 to enable your touchpad. The shortcut might be different depending on your model. Also, disconnect other input devices and update Windows.
1. Disable and re-enable the touchpad hardware
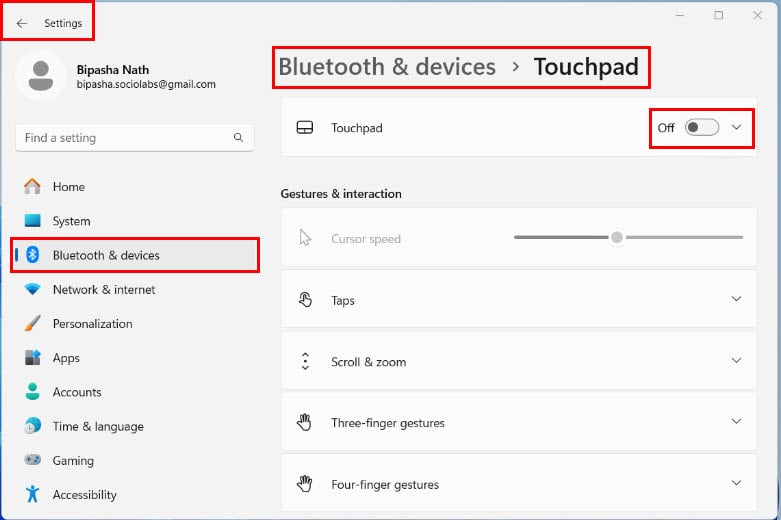
- Hit the Windows + I buttons on the keyboard to open the Settings interface. There, select Bluetooth & devices from the left menu.
- Click Touchpad in the main window on the right side. Toggle the Touchpad switch to Off to disable it.
- To re-enable it, toggle the Touchpad switch back to On.
2. Enable the Synaptics service
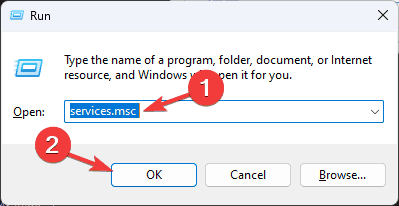
- Press the Windows + R keys together to open the Run dialog box. Type services.msc and press Enter.
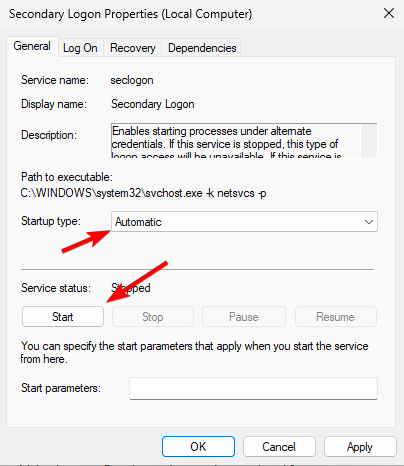
- In the Services list, scroll down and locate Synaptics Service (or SynTPEnhService). Double-click it to open its properties.
- In the Properties window, set the Startup type to Automatic by selecting it from the dropdown menu.
- Click on Start to start the service and then click Apply and OK.
3. Disable PalmCheck
- Press Windows + I to open Settings and select Devices.
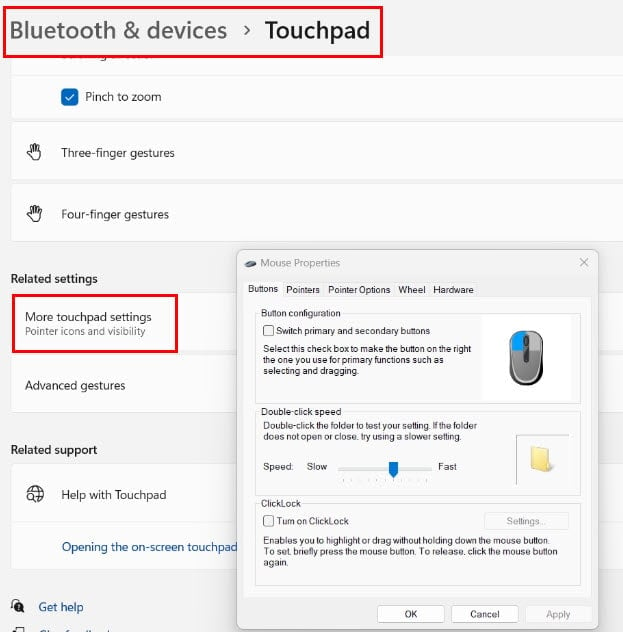
- From the left menu, click Touchpad. There, scroll down and select Additional settings under the Related settings section. This opens the Mouse Properties window.
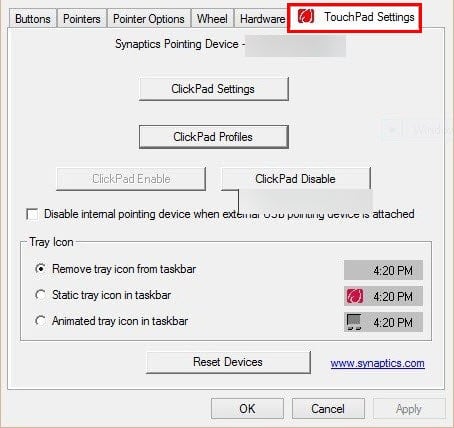
- In Mouse Properties, go to the Device Settings or Synaptics tab (name may vary based on your touchpad).
- Click Settings or Options to open the touchpad settings.
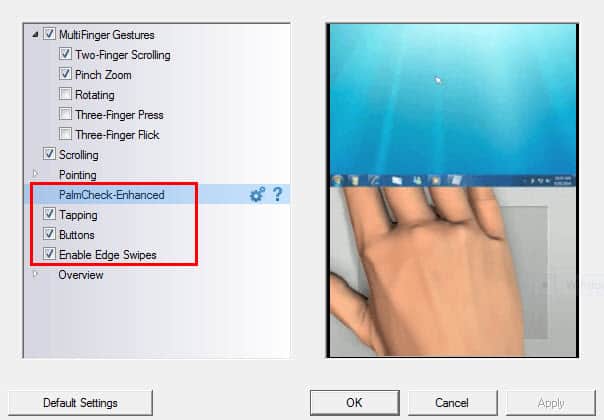
- Look for PalmCheck or Palm Tracking under Pointing or SmartSense (depending on your device).
- Move the PalmCheck slider to the Off position or turn it off by unchecking any relevant box. Click Apply and then OK to save the changes.
- Close Mouse Properties and Settings.
When PalmCheck is disabled, the touchpad processes all inputs without filtering out gestures based on proximity or touch pressure. This ensures that your scrolling gestures are always recognized.
PalmCheck won’t be available in your notebook if it doesn’t have the original Synpatcis Touchpad driver.
4. Update Synaptics touchpad driver manually
- Download the necessary driver from the manufacturer’s website and extract it on your PC.
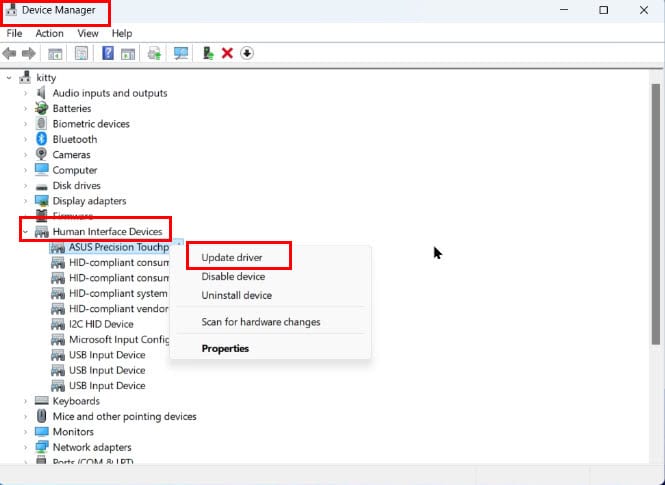
- Open the Start menu, type Device Manager, and select it from the search results. In Device Manager, expand Human Interface Devices.
- Right-click on Synaptics Touchpad (or similar), and choose Update driver.
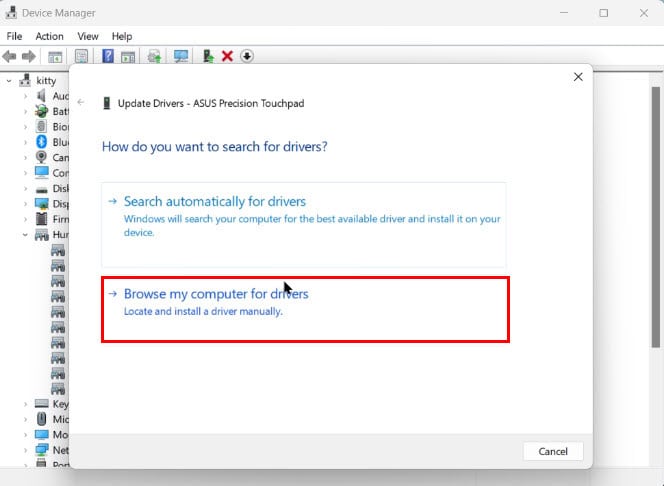
- In the Update Driver window, click Browse my computer for drivers.
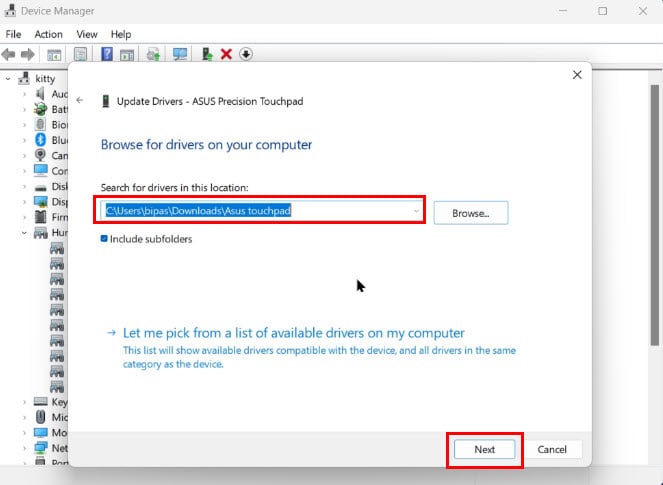
- Select Browse and navigate to the Downloads folder where the driver files are stored.
- Click OK to set this location, then select Next to begin the installation.
- Wait for Windows to install the driver, then click Close when finished. Restart your notebook to apply the changes.
5. Uninstall and reinstall Synaptics touchpad driver
- Click on the Start menu, type Device Manager, and select Device Manager.
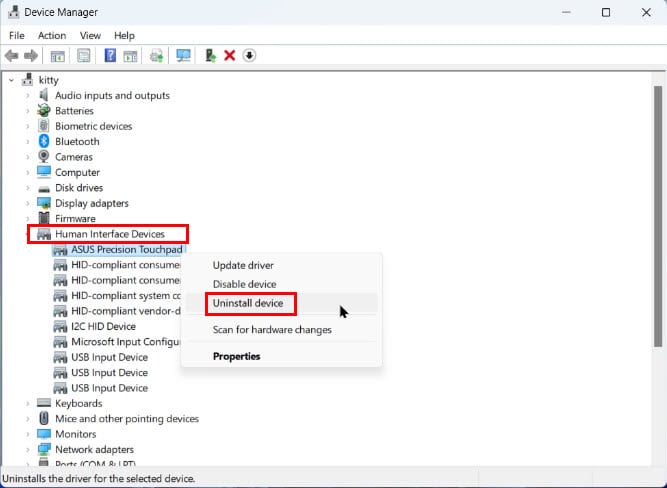
- In Device Manager, expand the Human Interface Devices tree. Right-click on the Synaptics Touchpad (or anything of that name) and choose Uninstall device.
- In the confirmation window, check Delete the driver software for this device (if available), and then click Uninstall.
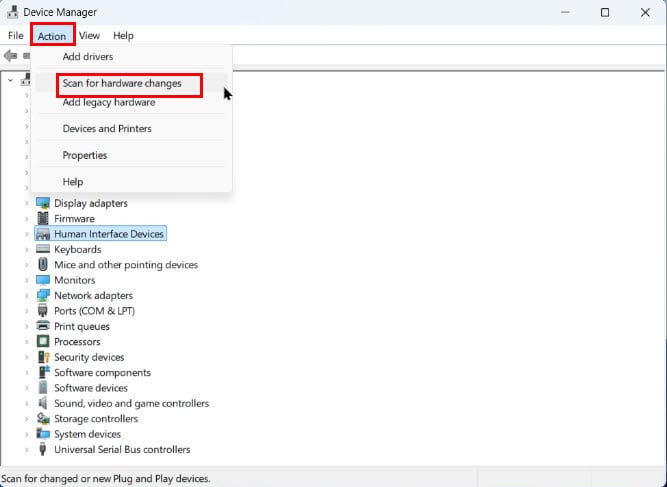
- Select Action in the top menu, and click Scan for hardware changes.
- Windows will attempt to reinstall the default driver for the Synaptics Touchpad automatically.
- If prompted, follow any on-screen instructions to complete the installation.
6. Restore PC
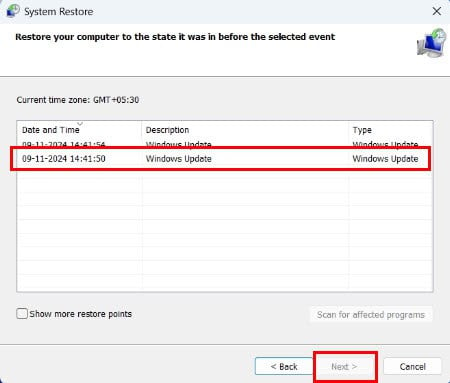
- Open the Run dialog box by pressing the Windows and R keys. In the command field, type in rstrui and hit Enter.
- Click Next.
- In the table that follows, select a restore point you think might work the best for you. Click Next.
- Hit Finish to start the System Restore tool.
- The device will restart automatically.
You should now be able to fix the laptop touch navigation by trying these proven troubleshooting methods when the Synaptics touchpad driver scroll is not working.
This isn’t the only issue you can encounter, we wrote about Synaptics Touchpad driver Error code 10 and Synaptics Touchpad driver code 24 in our previous guides, so you might want to visit them.
Did any of the fixes work for you? Reply in the comment box to share your experience with everyone reading this guide.


User forum
0 messages