Laprxy.dll: How to Fix or Download It if It's Missing
Downloading the DLL file manually can restore it
4 min. read
Updated on
Read our disclosure page to find out how can you help Windows Report sustain the editorial team. Read more
Key notes
- DLL files are not just a necessary part of Windows but also significantly impact your computer’s overall performance.
- Whereas they are important, DLL errors are also very common. The good news is that it’s easy to fix the problem.
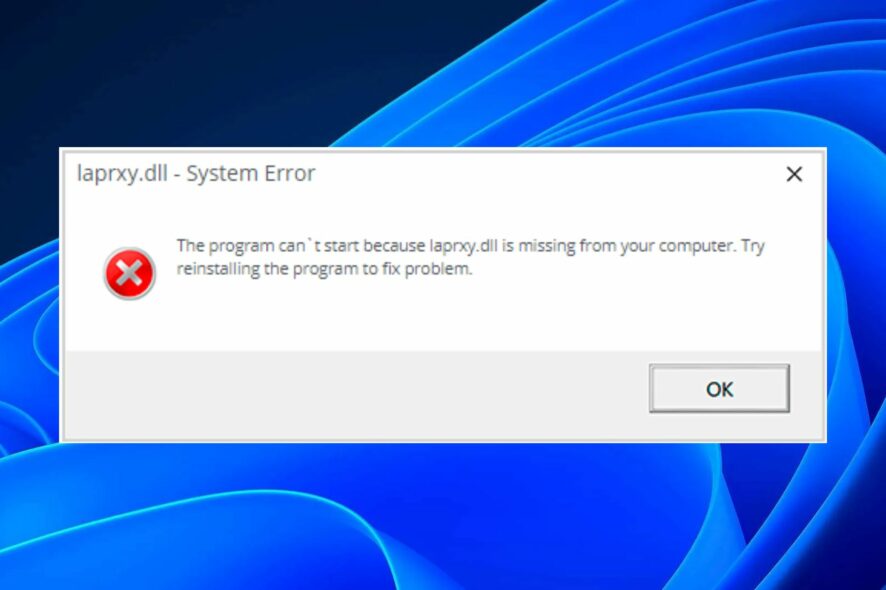
Laprxy.dll is a Windows Dynamic Link Library file that contains information on how to manage the performance of your computer and how to interact with other programs, so this file must be kept up-to-date and functioning properly on your computer.
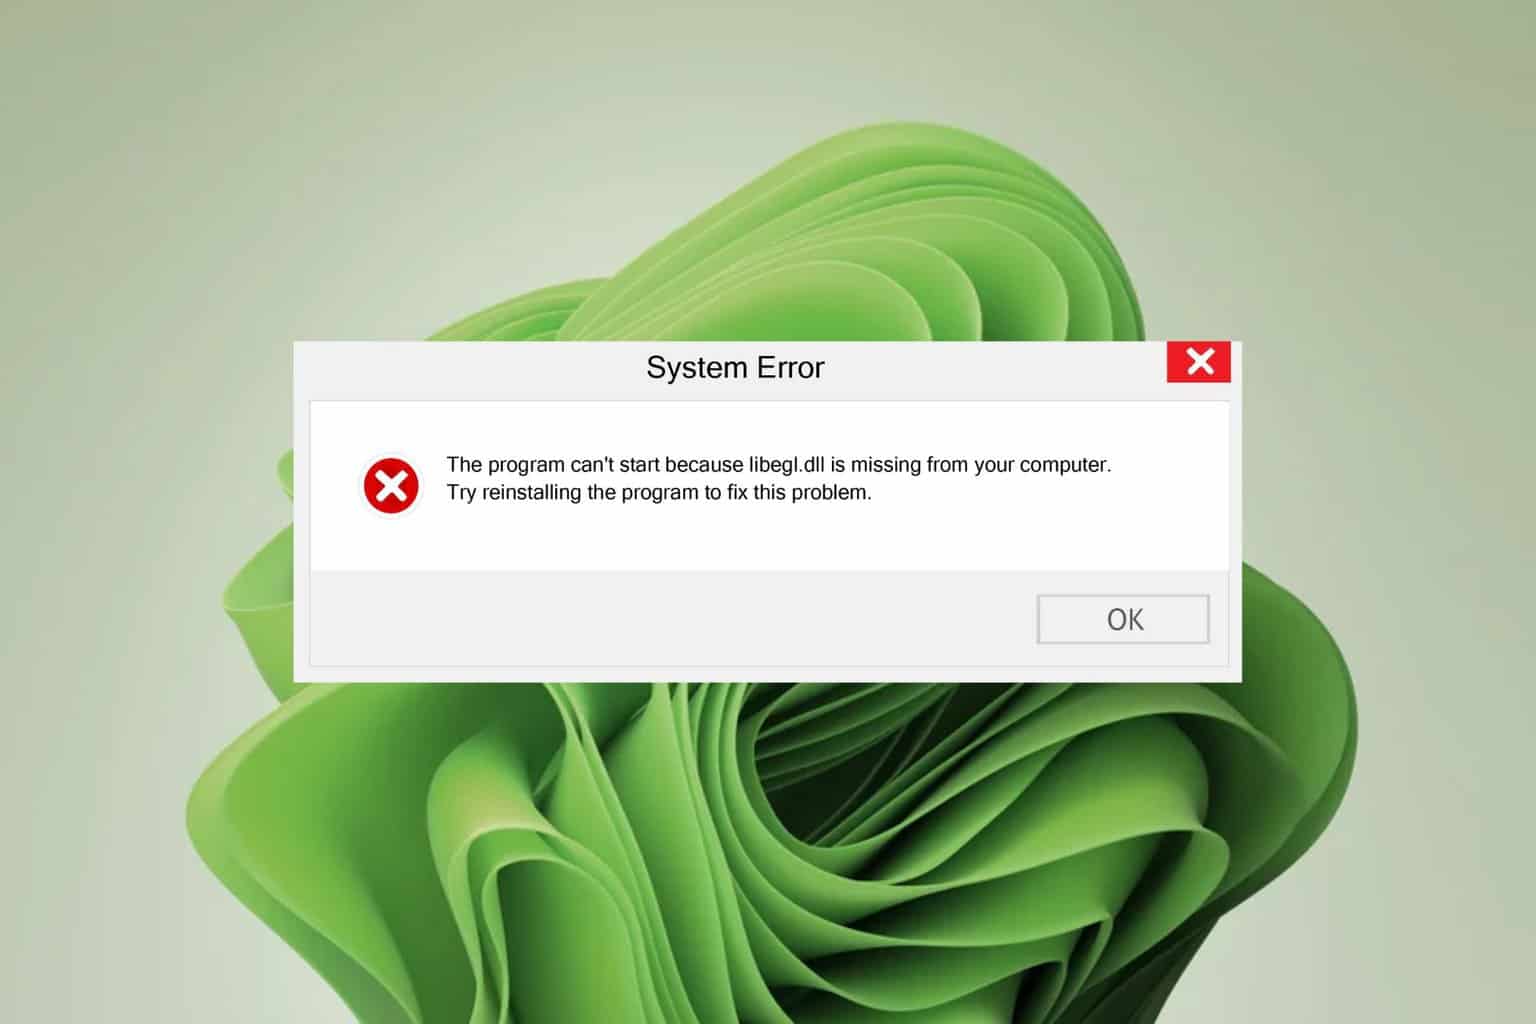
Unfortunately, sometimes these files can become corrupted or deleted due to several different reasons. This can cause issues in your operating system and make things difficult for you to use. If you encounter the laprxy.dll is missing error, we show you how to fix it.
Why is my laptop missing DLL files?
There can be various reasons why your laptop is missing some DLL files. These include:
- Your computer has been infected with malware – Malware may have caused various problems, such as missing DLL files. This can stop you from running applications and software that you need to run.
- You have installed an upgrade or new version of Windows – A new Windows version can change your system’s layout, meaning some old files may have been moved or deleted.
- File modification – It is possible that the file was modified by an external party to make it incompatible with your operating system. This can happen if someone makes an unsupported change to the original DLL file.
- Incompatibility – Apps tend to receive new updates and may no longer be compatible with the associated DLL files.
How can I fix Laprxy.dll if it is missing?
A few workarounds that may resolve the issue before you move to the slightly technical solutions include:
- Ensure that your Windows is up-to-date.
- Reinstall the app causing the issue if specified.
- Try restarting your PC.
1. Run a DLL-fixer
If you have no idea how to repair files or commands to run to attempt to recover the missing DLL file, a DLL fixer tool should suffice. These tools are great for replacing and repairing any corrupt files.
Usually, they have a huge database which is a plus when it comes to finding replacements for the missing files, so you can rest assured that your DLL file will be repaired without you having to lift a finger.
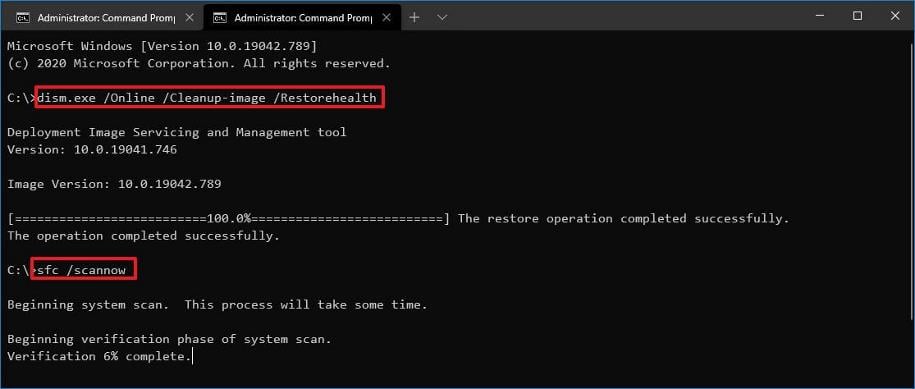
2. Run DISM and SFC scans
- Hit the Start Menu icon, type cmd in the search bar, and click Run as administrator.
- Type the following commands and press Enter after each one:
DISM.exe /Online /Cleanup-Image /Restorehealthsfc /scannow - Restart your PC.
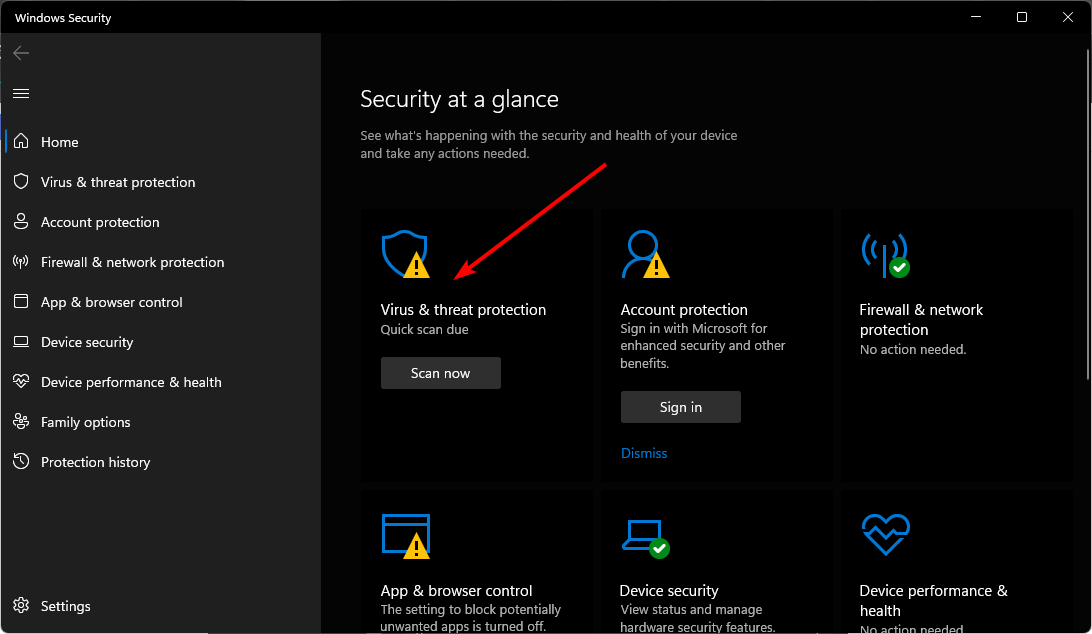
3. Run a virus scan
- Press the Windows key, search Windows Security, and click Open.
- Select Virus & threat protection.
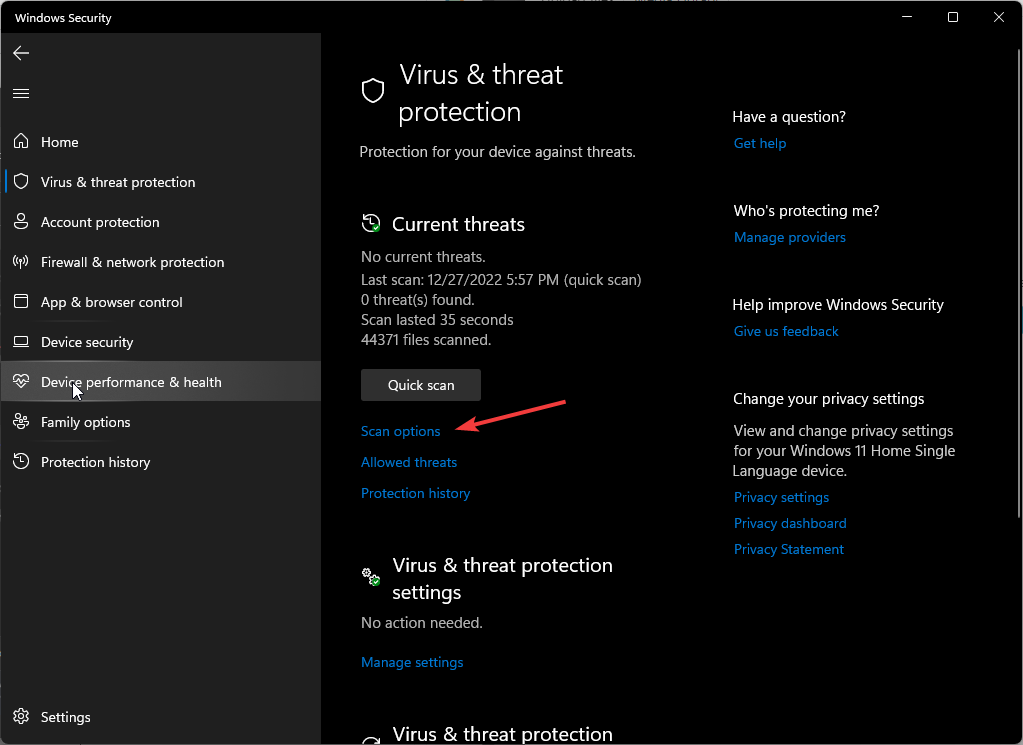
- Next, press Quick scan under Current threats.
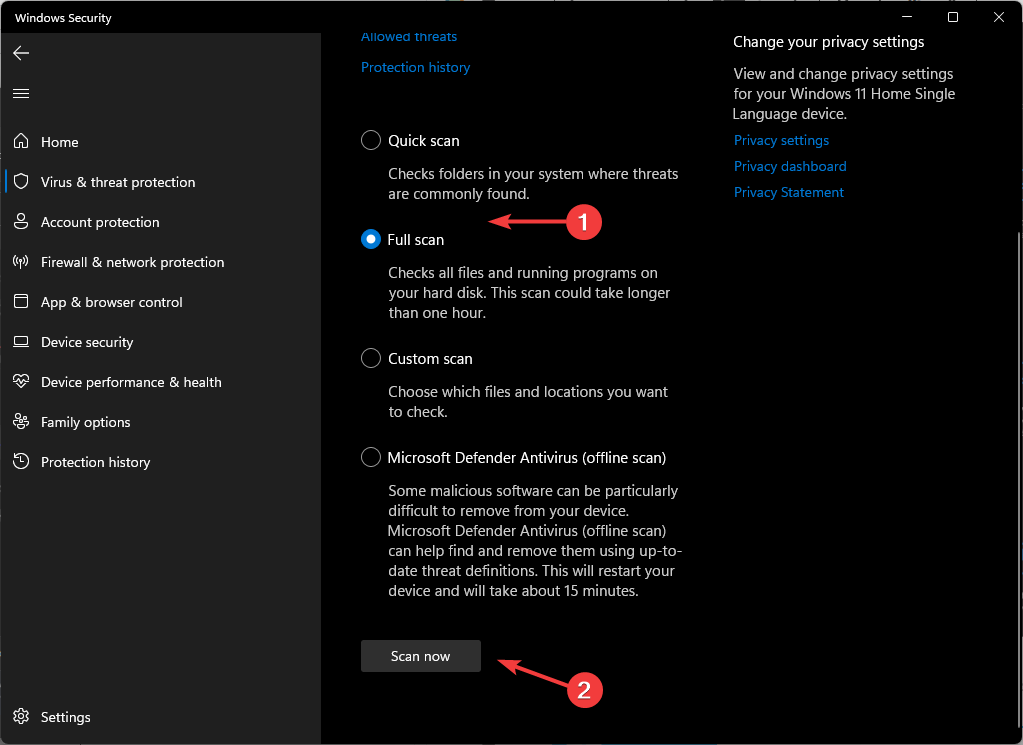
- If you don’t find any threats, proceed to perform a full scan by clicking on Scan options just below Quick scan.
- Click on Full scan and Scan now to perform a deep scan of your PC.
- Wait for the process to finish and restart your system.
4. Download the DLL file manually
If you’re good at deciphering the right DLL file that is missing and can find the right version for your OS online, then downloading manually may be an option. If you choose this option, you must be careful with the site you download from.
Some sites, such as DLL-Files.com, have legitimate DLL files, while others cannot be trusted and can install malicious code in your system masquerading as the real thing. For this reason, you need a comprehensive antivirus solution that can detect such from a mile away.
5. Perform a System Restore
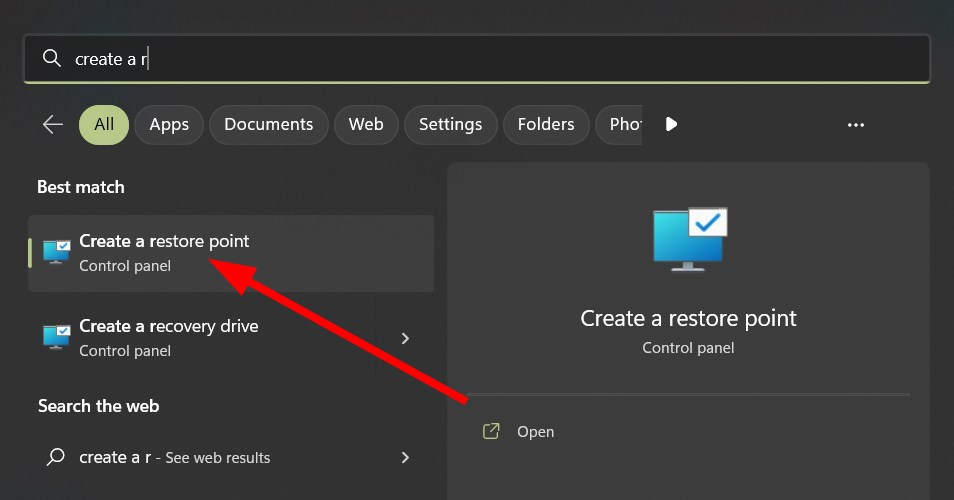
- Click the Search icon, type create restore point and click Open.
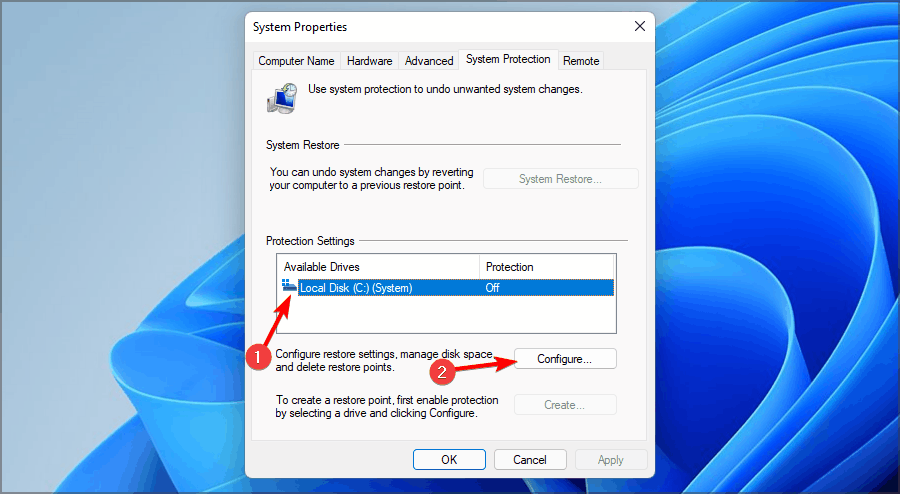
- Select the drive you wish to enable system restore for and click on Configure.
- Now select Turn on system protection. Set the Max Usage value and click on Apply and OK to save changes.
- Go back and repeat step 1.
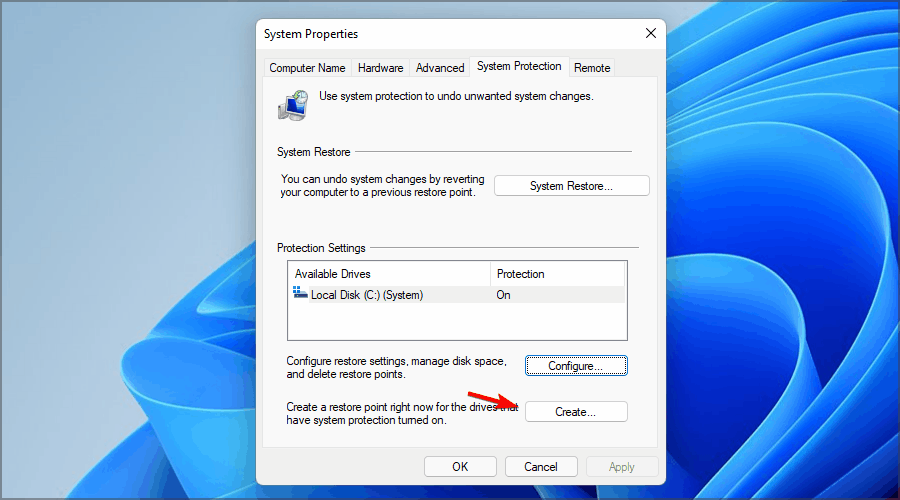
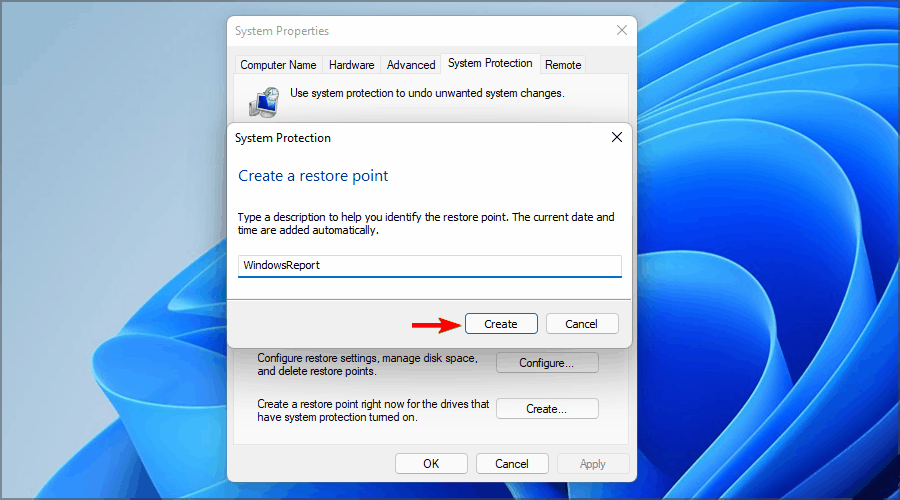
- When the System Properties window opens, click on Create.
- Enter the desired name for the restore point and then click the Create button.
- Wait while Windows creates the restore point.
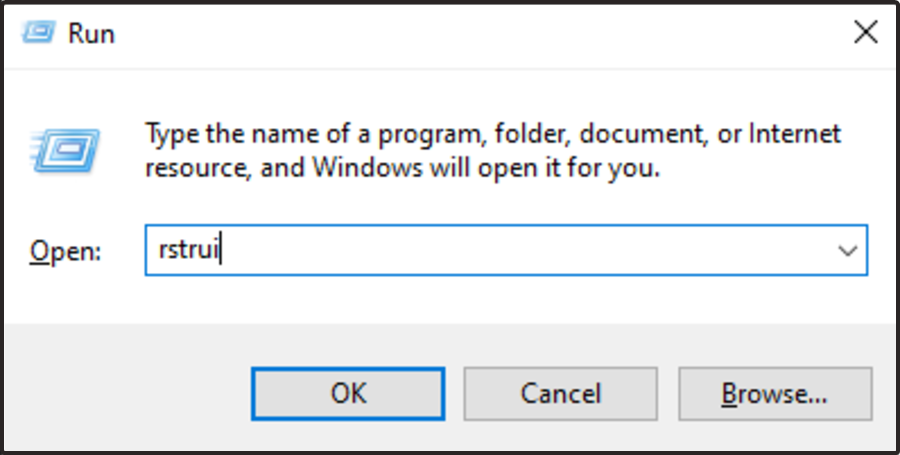
- Press the Windows + R keys, type rstui and hit Enter.
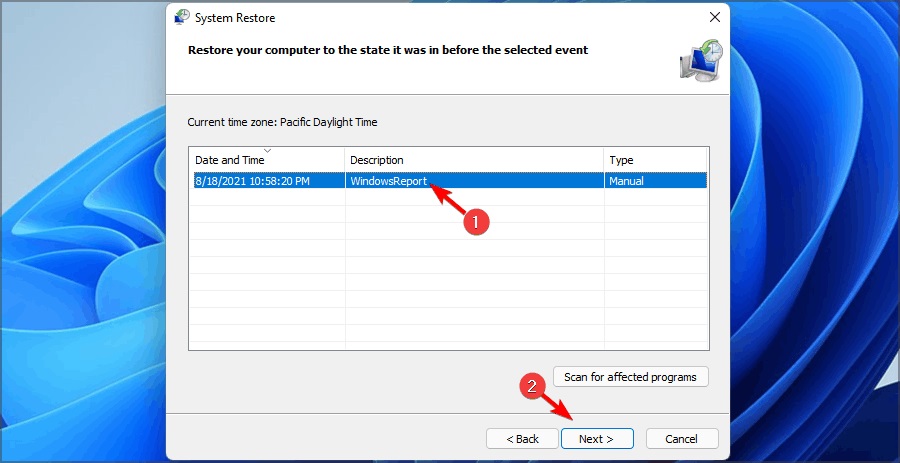
- Select the restore point you wish to revert to and click on Next.
- Now click on Finish.
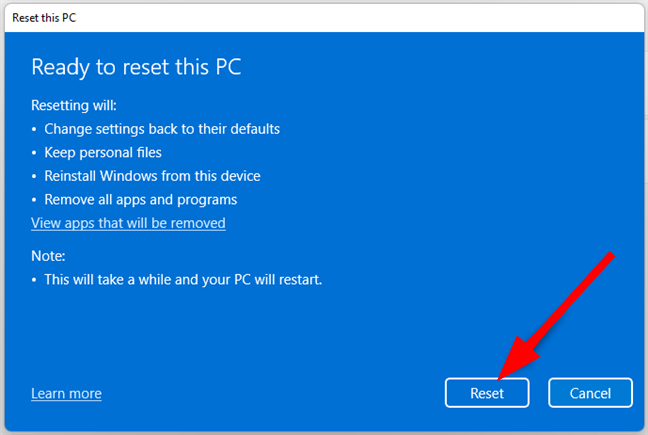
6. Reset Windows
- Hit the Windows key and select Settings.
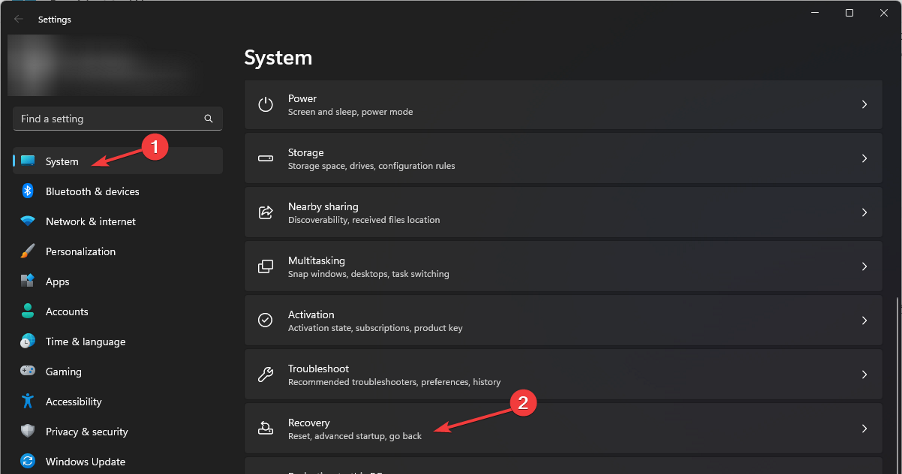
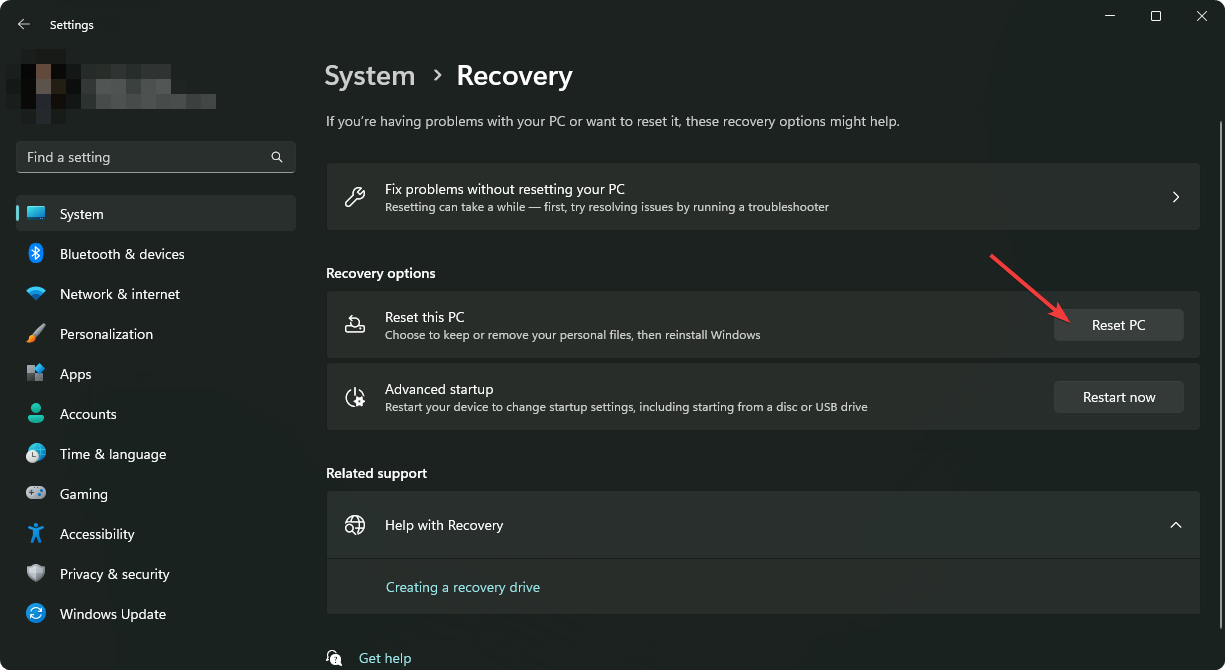
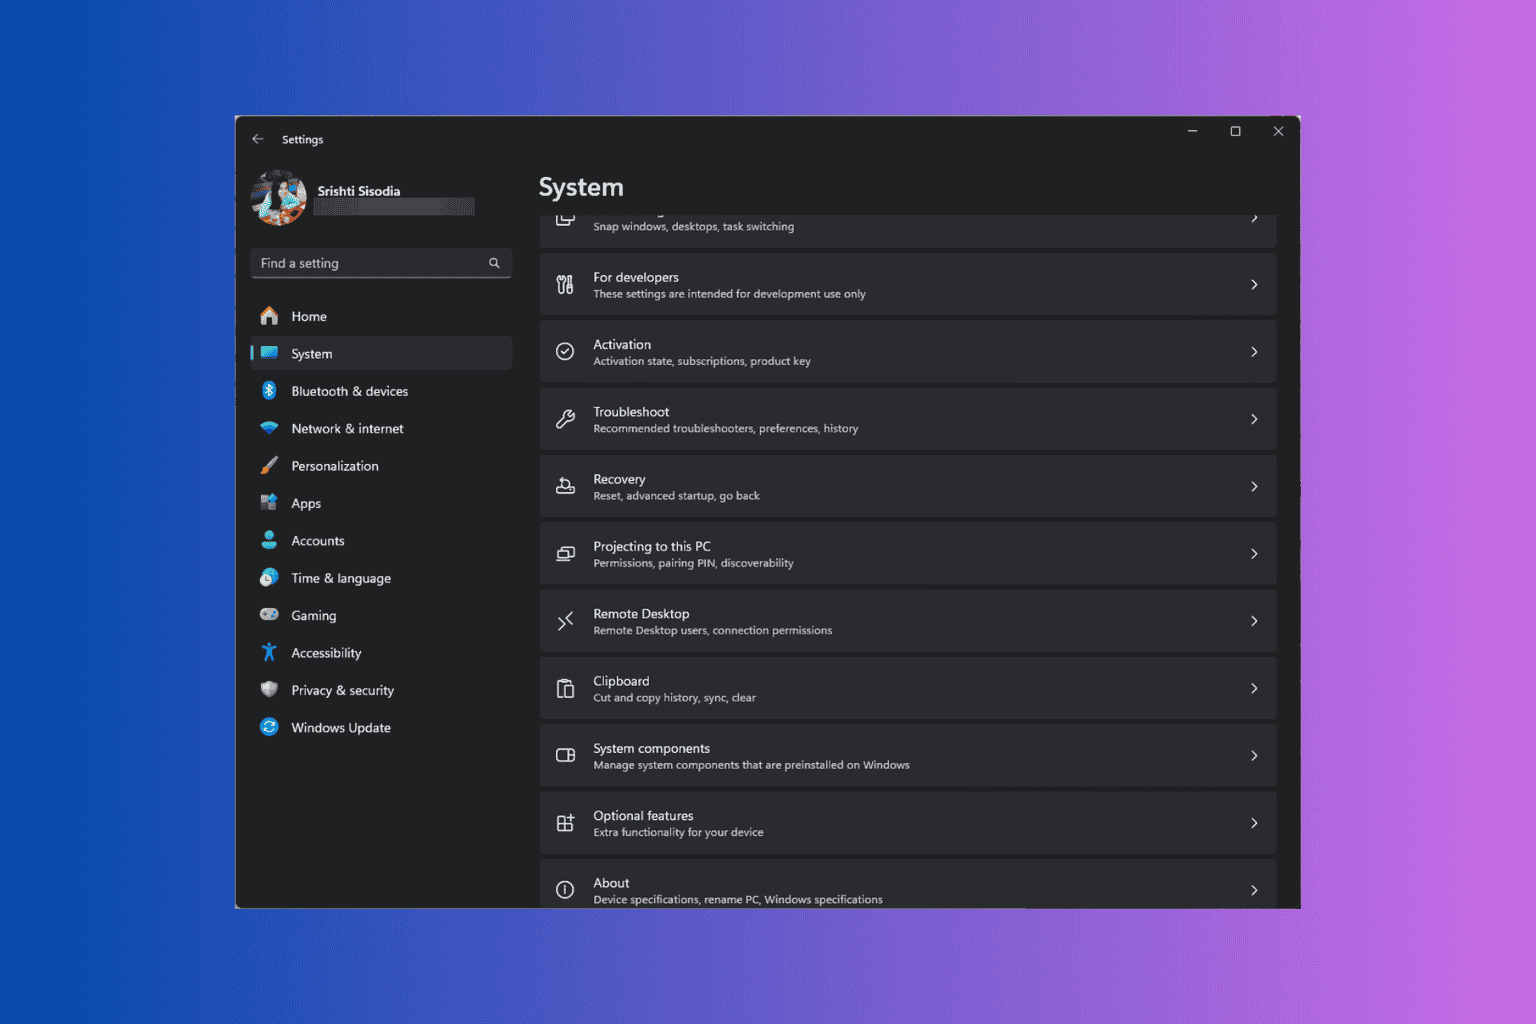
- In the left window pane, select System, then click on Recovery on the right pane.
- Click on Reset PC from the right side.
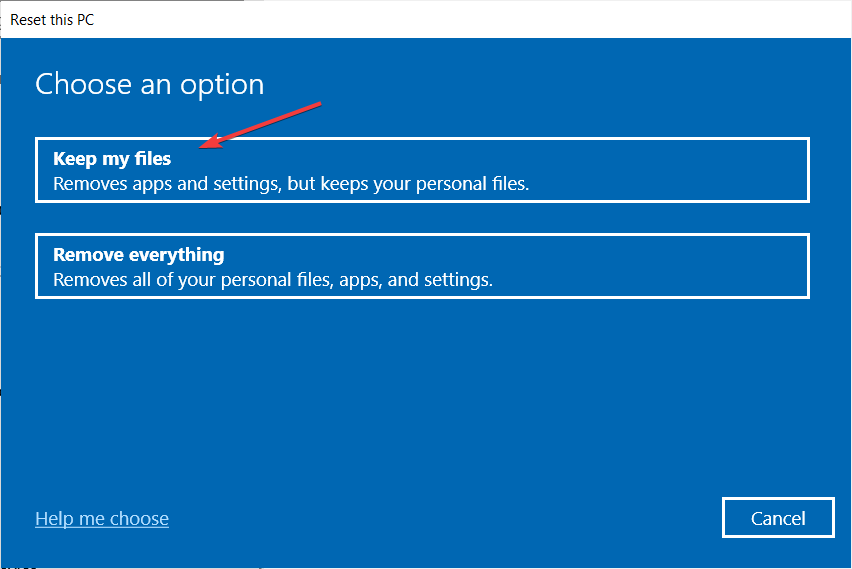
- Choose the type of factory reset you need. You can keep your files or completely delete all the files, apps, and settings on the PC.
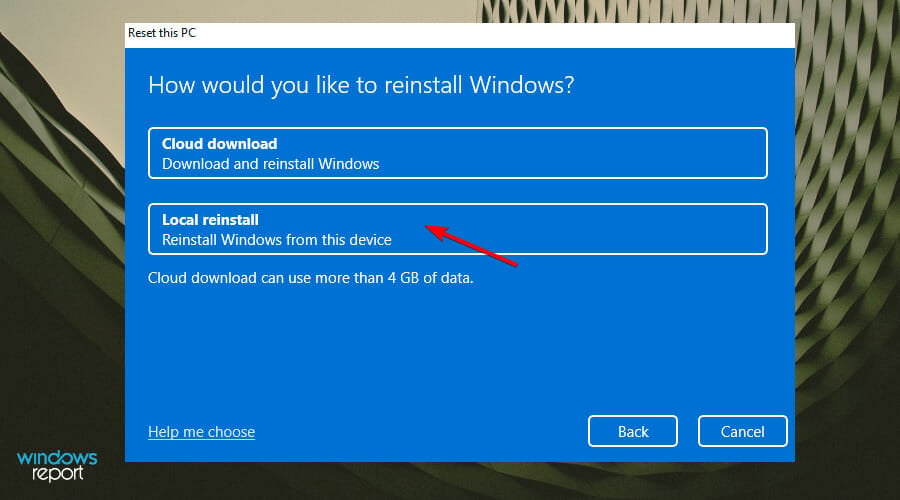
- Select the option you want to reinstall Windows: Cloud download or Local reinstall.
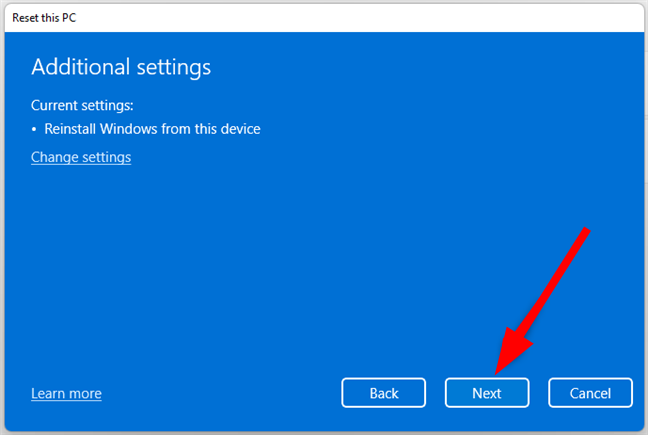
- Click on Next.
- Finally, press the Reset button.
The steps above apply to both laprxy.dll missing in Windows 10 and 11. Also, check out our detailed article in case your DDraw.dll file is missing, as we have covered various ways to restore it.
Let us know which method you tried and successfully solved this issue.





User forum
0 messages