Windows 10 Update Assistant is Stuck at 99 %: 5 Quick Fixes
6 min. read
Updated on
Read our disclosure page to find out how can you help Windows Report sustain the editorial team. Read more
Key notes
- When your Windows 10 Update Assistant gets stuck at 99%, it indicates there was a problem during the final segment of the setup.
- To easily solve this issue, make sure to disable Windows Security by following the steps below.
- Follow our neat trick to check the connection of your peripherals.
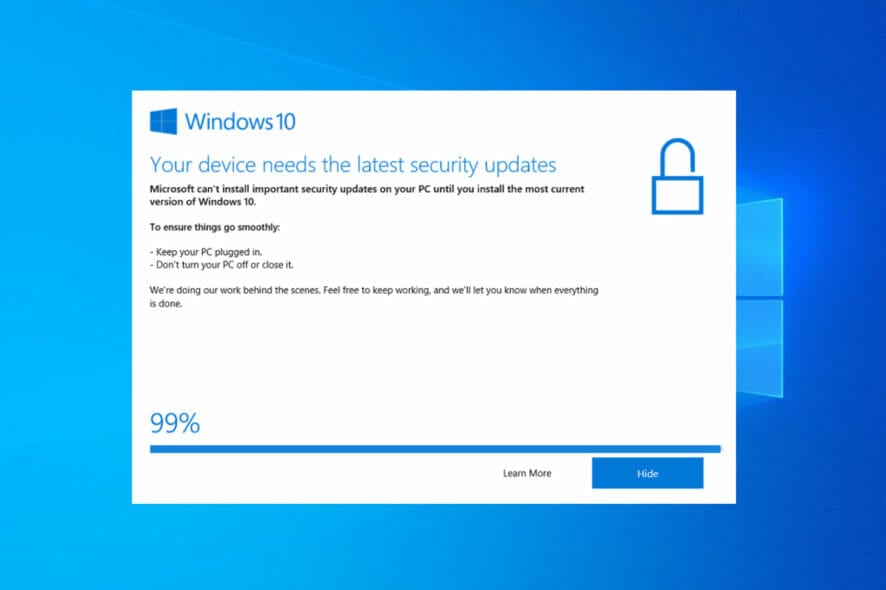
Worried that Windows 10 Update Assistant is stuck at 99 percent? Apparently, the setup download procedure works as intended, but problems arise in the final installation segment.
Sometimes a hefty dose of patience is all you need. As stated by Microsoft technicians, this isn’t an error. Basically, if there’s an upgrade error at hand, you’ll be timely prompted. Therefore, if your Windows Update Assistant is stuck at 99 %, you can wait and have a little faith in it before acting.
Since this occurrence isn’t followed by any kind of error prompt, we can concur that all you should do is simply wait and Windows Upgrade Assistant will finish the installation.
On the other hand, certain Windows 10 users reported that the 99 % installing stuck issue lasted up to 24 hours which is, to say the least, ludicrous. With that in mind, we advise you to wait up to 20 minutes.
If the Assistant is still stuck at 99 %, it’s time to take action. For that purpose, we prepared a list of possible solutions in order to help you troubleshoot this issue.
In case you want to download the Windows 10 Update Assistant, you can do so by following the link anchored.
When can Windows 10 Update Assistant get stuck?
Users have reported different scenarios in which the Windows 10 Update Assistant got stuck. Some of them are the following:
- Windows 10 Update Assistant stuck at 0 – The solutions below will also address issues that happen in the first stage of the process.
- Windows 10 Update Assistant stuck at 92 – Users have been stuck at the 92 % mark as well, which can be fixed by following the same procedures as below.
- Windows 10 Update Assistant stuck at 93 – Even though the causes are unknown, the solutions are straightforward and easy to use even in this case.
- Windows 10 Update Assistant stuck at 99 – This particular case is the main issue we have addressed today and don’t worry as you will get it fixed right away.
This being said, let’s see what you can do about this issue and get back to using your computer. Follow along!
How do I fix Windows 10 Update Assistant stuck at 99 %?
1. Temporarily disable any third-party antivirus
Even though Windows Defender is great protection-wise, some people are more fond of third-party antivirus solutions. That’s a reasonable choice for various reasons.
But, on the other hand, third-party anti-malware solutions occasionally tend to create a stir within the system. Some of them might even block the upgrade process.
Now, don’t get us wrong, we don’t advise you to ditch a third-party solution in favor of Windows Defender. However, you can disable the real-time protection for a limited period of time, until the upgrade installs, or even remove it.
We recommend you try a more stable antivirus that does not interfere with other processes or apps on your PC. Check out some antivirus software with free trial versions, so you can test them before switching to a new one.
2. Unplug peripheral devices
The fact that Windows Update covers drivers as well hints that they could be the cause of the problem. Too many outdated peripheral devices can certainly cause turmoil in the upgrade process.
So, just for the sake of trying, make sure to unplug all peripheral devices from USB ports. Additionally, if you have the USB-C SD card reader or any other similar device, unplug those, too.
Of course, this doesn’t include a mouse and keyboard. Once the procedure is finished, you can plug in all your devices and deal with drivers later on. You may then update your drivers as well since it is a necessary action in order to ensure your PC’s functionality.
If the Windows 10 Update Assistant stuck at 99 percent issue is persistent and the upgrade is stuck, give it another try, but this time without the peripheral devices. In case it still misbehaves, continue with the troubleshooting method below.
3. Temporarily disable your Internet connection
Some users were able to resolve this issue by disabling their Internet connection. For some odd reason, the network connection negatively affects the upgrade process.
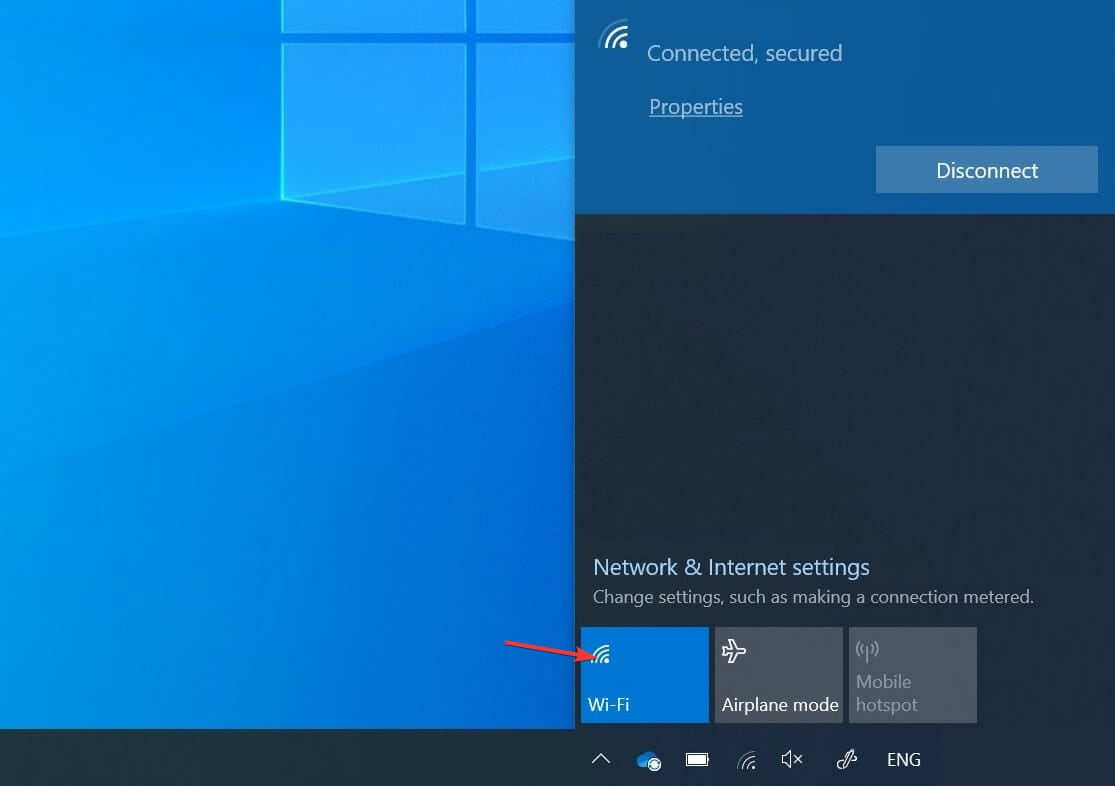
So, you can try unplugging your Ethernet cable, or disabling your Wi-Fi, and then look for any changes with the updating process. They should be visible immediately after the connection is disabled.
If that’s not the case, you can restart the upgrade procedure and, right after the download is finished, cut the Internet connection again. Nonetheless, this might not work for everyone.
4. Restart the Windows Update service
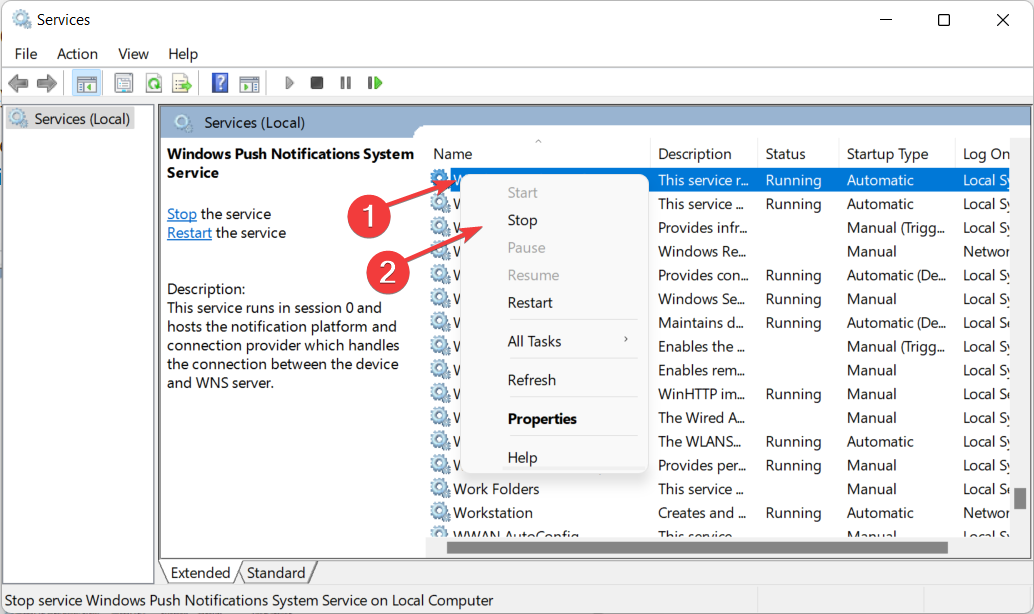
- In the Windows Search bar, type services, and open the Services app.
- Scroll down until you reach the Windows Update service and right-click on it in order to press Stop. Repeat the action but click on Start instead.
Another valid troubleshooting step is to restart the Windows Update service. This covers all update-related processes thus fixing the Windows 10 Update Assistant not working issue.
Occasionally, this service can stop working for no apparent reason and this will, consequently, prevent the upgrade operation from finishing.
5. Perform a clean system reinstallation
- Download the Media Creation Tool for Windows 10 by following the link anchored and then plug in your compatible USB flash drive. Note that you will lose all your data, thus we recommend backing it up.
- Run the Media Creation Tool and accept the License Terms.
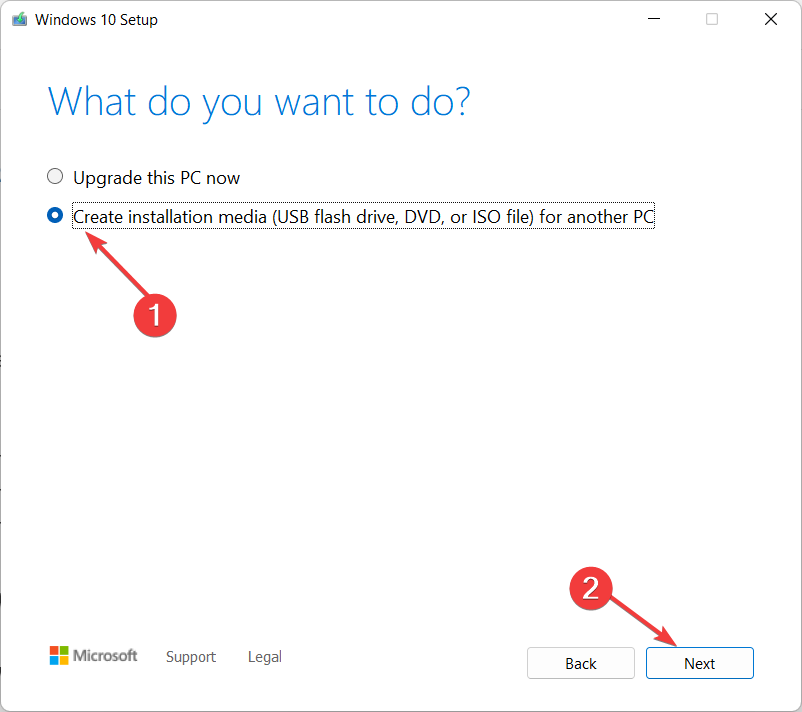
- Select the Create installation media (USB flash drive, DVD, or ISO file) for another PC option.
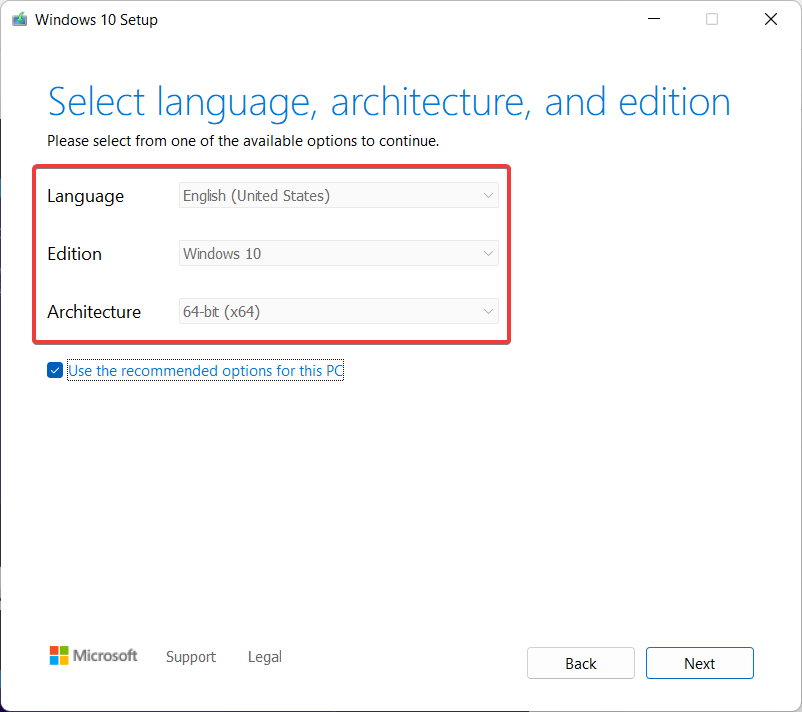
- Choose the preferred Language, Architecture, and Edition, then click Next.
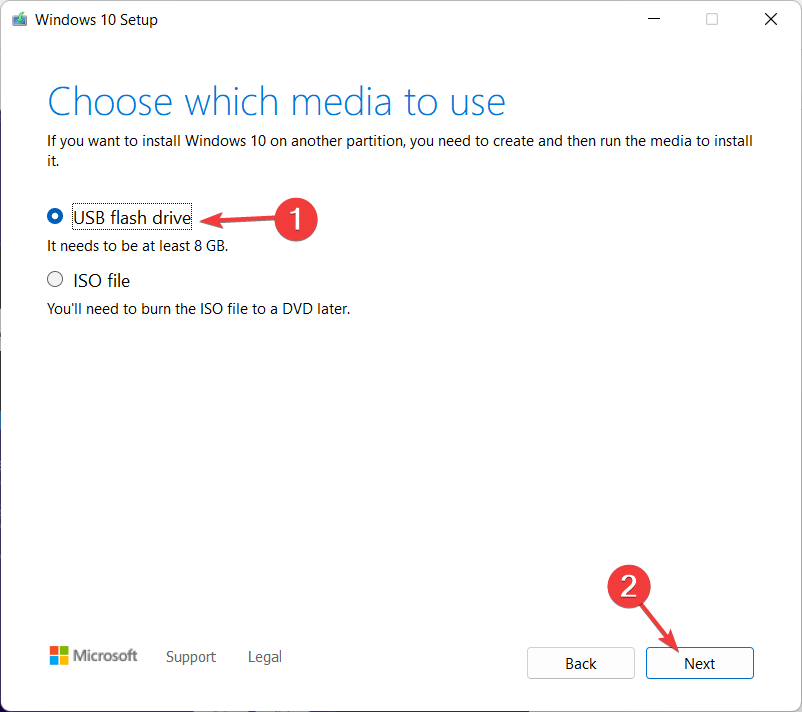
- Choose the USB flash drive option and click Next.
- Media Creation Tool will download the setup and copy the installation files on the USB flash drive. Restart your PC once you’re done with the above steps.
- In the initial boot screen, press F10, F11, or F12 to access the Boot menu. It differs depending on your motherboard.
- Choose the USB flash drive as a primary bootable device. The Windows 10 Setup should commence immediately. Follow the on-screen steps and that’s it.
Finally, if you’re repetitively unable to upgrade your system, the last resort lies in a clean reinstallation. Ages ago, reinstallation was a lengthy and complicated procedure, but that’s not the case in Windows 10.
Besides the bootable media, like USB or DVD, it takes only the Media Creation Tool to make it work. Note that you’ll need a USB flash drive with at least 4 GB of free space in order to create a bootable installation drive.
Of course, before you start, it’s of supreme importance to backup your data on the secondary partition or to an external drive, since you’ll wipe clean the system partition.
In addition, backup your license key because you might need it later on. You may use some of the best local data backup software tools of the moment in that regard.
In order to avoid or fix a slow Windows 10 Update Assistant, take a look at our post on how to stop Windows 10/11 from being unresponsive and make it faster.
That should do it. In case you have any questions regarding this Windows 10 Upgrade Assistant issue, make sure to post them in the comments section below. Thanks for reading!


User forum
0 messages