VLC Could Not Open the MP4A Audio Encoder [Error fix]
Ensure you have the latest version of VLC player installed
5 min. read
Updated on
Read our disclosure page to find out how can you help Windows Report sustain the editorial team. Read more
Key notes
- The VLC could not open the MP4a audio encoder issue occurs if VLC is outdated, missing codec, or corrupted media file.
- To fix this problem, you can edit preferences, modify the audio and video codec settings, reset preferences, or update the media player.
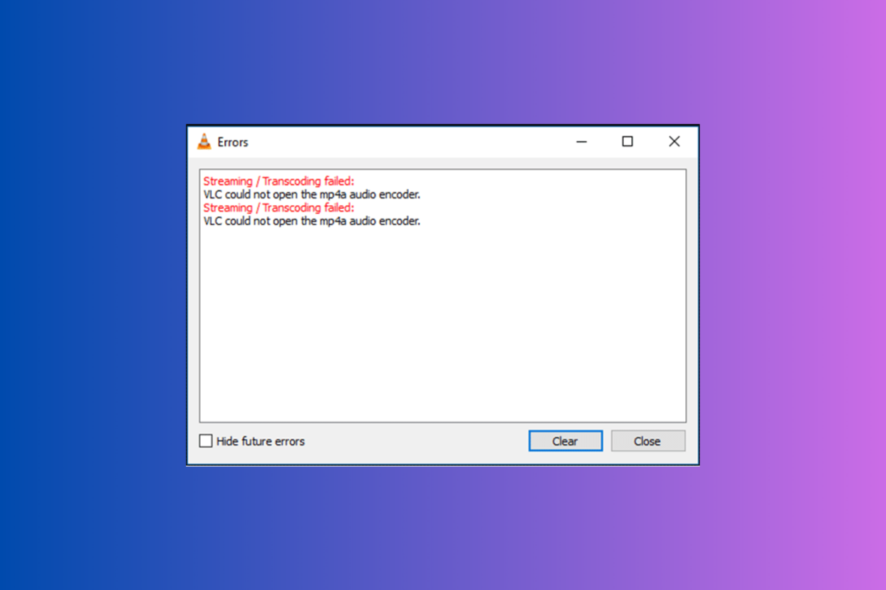
VLC is a powerful media player popularly used on various platforms, including mobile phones. It can play a wide range of audio and video formats without any issues.
However, like any other software, it is not free from errors. One such common error is VLC could not open the MP4A audio encoder.
In this guide, we will talk about the common causes along with the potential solutions to fix the issue and reclaim the audio experience with VLC.
Does VLC support MP4A?
VLC media player is renowned for its versatility and supports almost all popular audio and video file formats, including M4A, MP3, AAC, FLAC, WAV, MP4, AVI, MOV, WebM, FLV, and more.
M4A comes with advanced audio coding and has a high bitrate which ensures better sound quality; therefore, it might require additional plugins in some media players.
However, with VLC, you can play M4A without additional codecs or plugins. All you need to do is launch VLC and choose the file to play.
What might cause the VLC MP4A audio encoder error?
There could be various reasons for the VLC could not open the MP4A audio encoder error; some of the common ones are:
- Incompatible codecs – To play MP4A on VLC, you need to get specific codecs to encode audio; if they are missing or outdated, you may get this error. Update VLC to fix it.
- Outdated VLC app – If the VLC player files are corrupted or missing, it may cause various issues, including this one. Reinstall the VLC player from the official website.
- Corrupted media file – The media file you are trying to encode if damaged, might result in this error. Try to encode a different audio file to check if the file is the culprit.
- Third-party software interference – Other software running on your computer could conflict with VLC, causing it to fail to perform certain operations. Close all unwanted apps.
Now that you know the causes of the issue, move to the detailed methods to fix it.
How can I fix the VLC MP4A audio encoder error?
Before proceeding with any steps for resolving the VLC could not open the MP4A audio encoder issue, go through the following preliminary checks:
- Restart your computer, launch VLC, and try to play the audio file again.
- Close all background applications.
- Try to play your audio file in a different media player or play a different media file in VLC to check what is causing the problem.
Once done, check out the troubleshooting methods to get your VLC working again on Windows 11 PC.
1. Edit the Strict standard compliance value
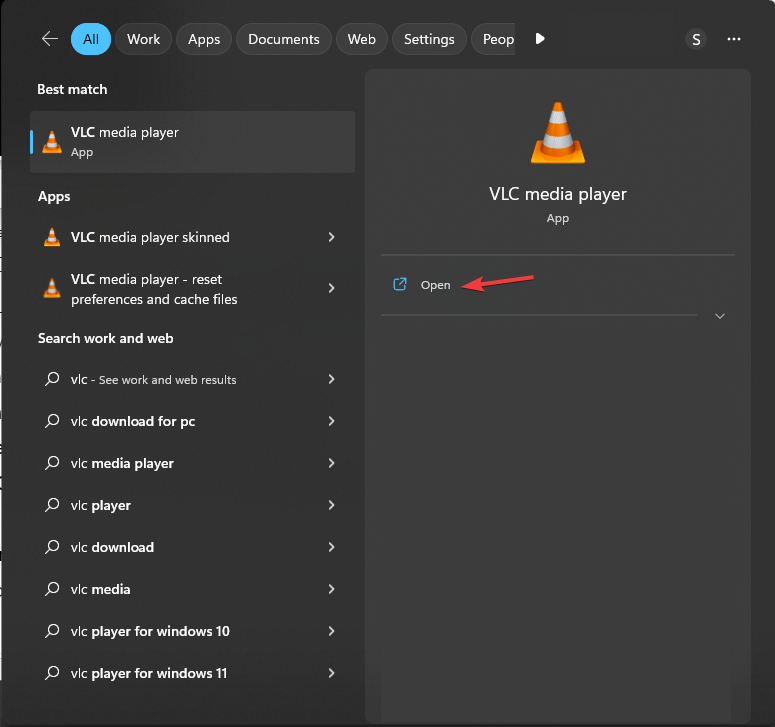
- Press the Windows key, type vlc, and click Open.
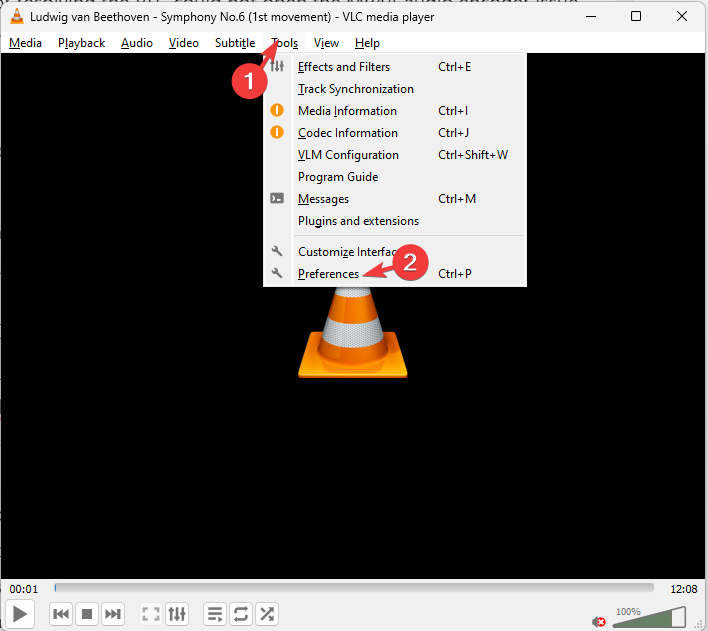
- Go to Tools, then select Preferences.
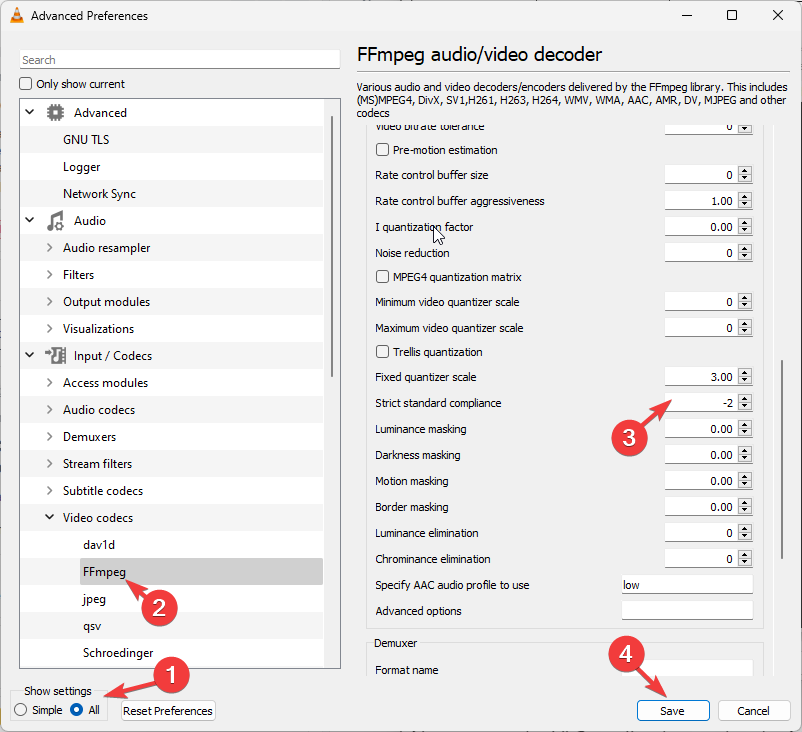
- Under Show settings, click the radio button for All.
- Next, locate and click Video codecs.
- Select FFmpeg, and locate Encoding.
- Locate Strict standard compliance and input -2 as the value.
- Click Save to confirm the changes.
Now restart the VLC media player, play the M4A file, and check if the issue persists.
2. Modify the video & audio codec settings
- Press the Windows key, type vlc, and click Open.
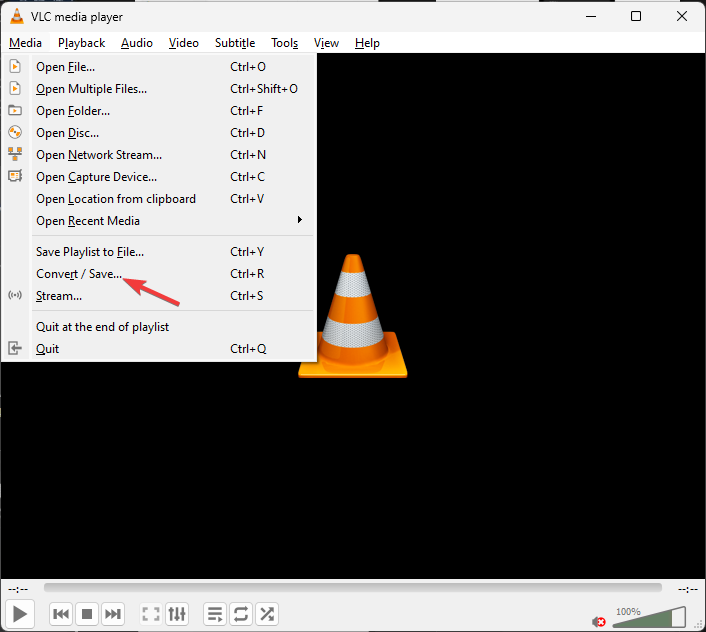
- Go to Media, then click Convert/Save.
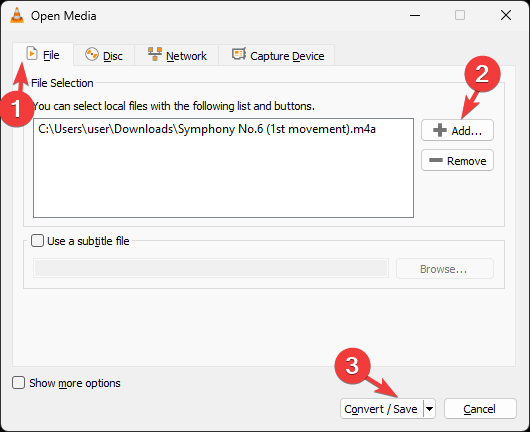
- Click Add and select the file.
- Next, click Convert/Save.
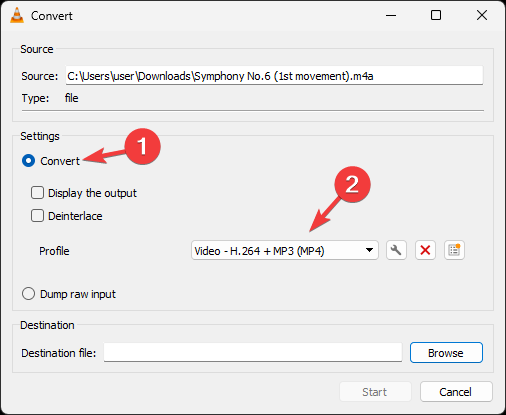
- Under Settings, select Convert, and choose a suitable option for Profile.
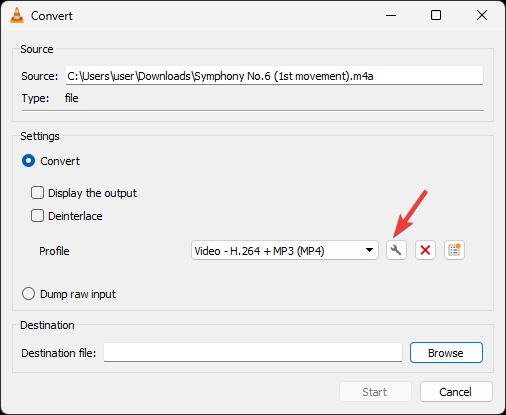
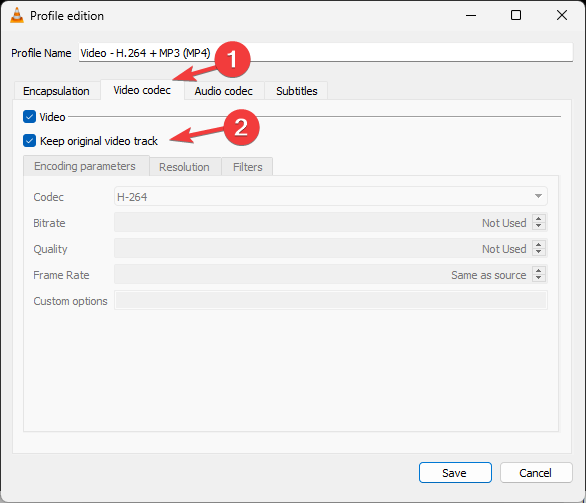
- Next, click on the Wrench icon to open the Profile edition.
- On the Profile edition window, go to the Video codec tab and choose Codec or place a checkmark next to Keep original video track.
- Next, switch to the Audio codec tab, choose Codec, or put a checkmark next to Keep original audio track and click Save.
This will ensure that the original file is not lost in the process. Now restart your VLC media player and check if the issue is resolved.
3. Reset VLC preferences
- Press the Windows key, type vlc, and click Open.
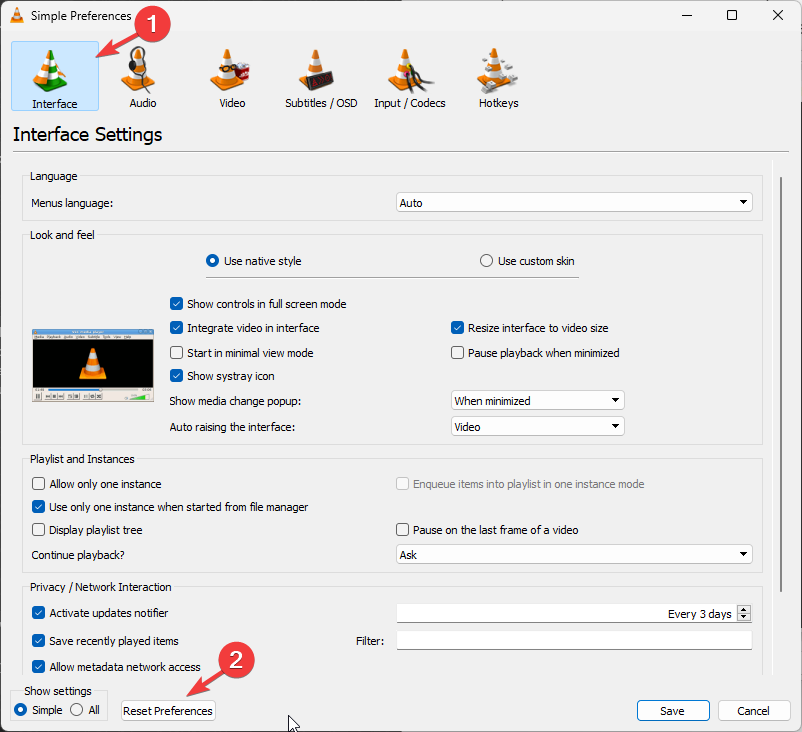
- Go to Tools, then select Preferences.
- On the Interface tab, locate and click Reset Preferences.
- Now, click OK to confirm the action.
Resetting preferences will revert the media player’s settings to default, removing any misconfiguration issues leading to the error.
4. Update the VLC player
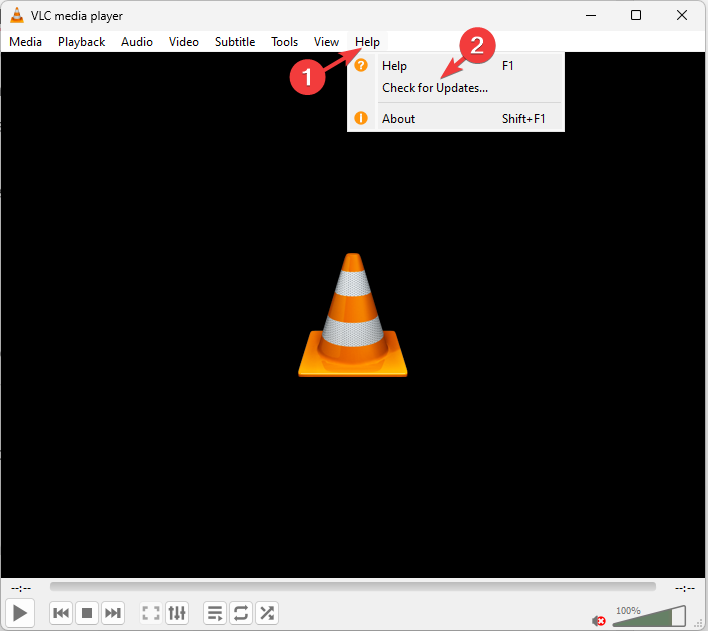
- Launch the VLC player, click Help, and then Check for updates.
- If the update is available, follow the onscreen instructions to install the newest version.
You can follow the same methods to fix VLC mpga audio encoder errors and other errors related to similar audio formats.
What should I do if I still can’t fix the MP4A Audio Encoder error?
If nothing has worked for you so far and VLC still throws the error or has lagging issues, you need to reinstall the VLC media player. To do so, follow these steps:
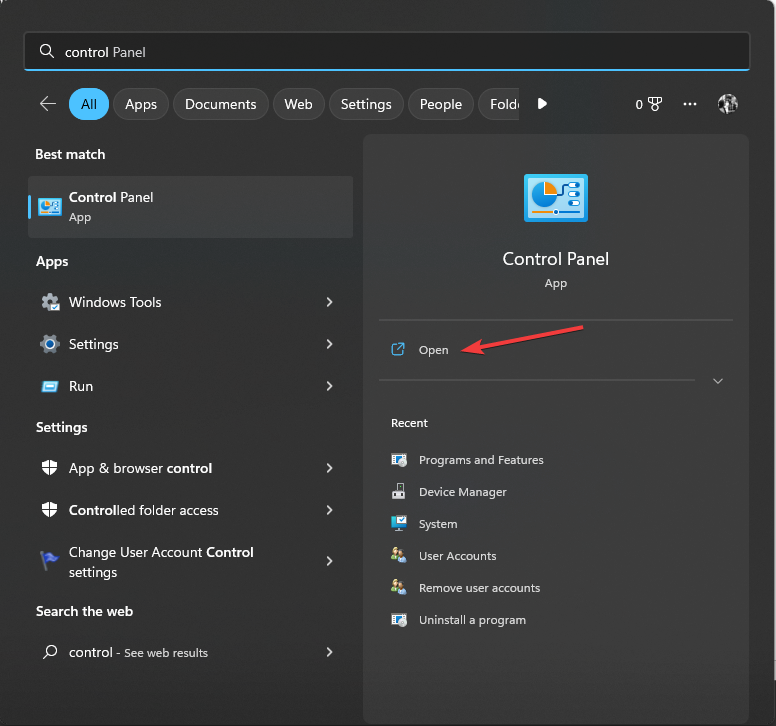
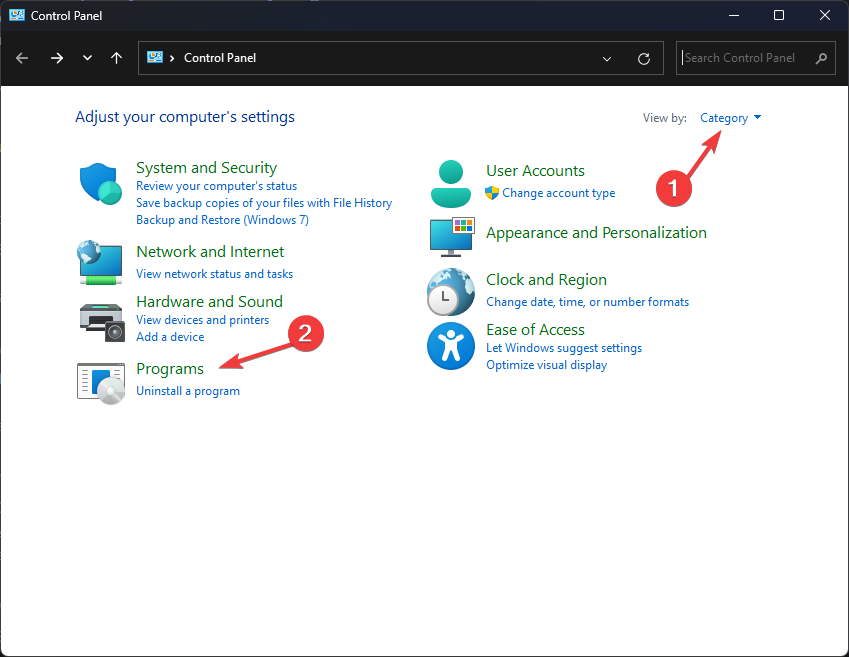
- Press the Windows key, type control panel, and click Open.
- Select View by as Category, and choose Uninstall a program.
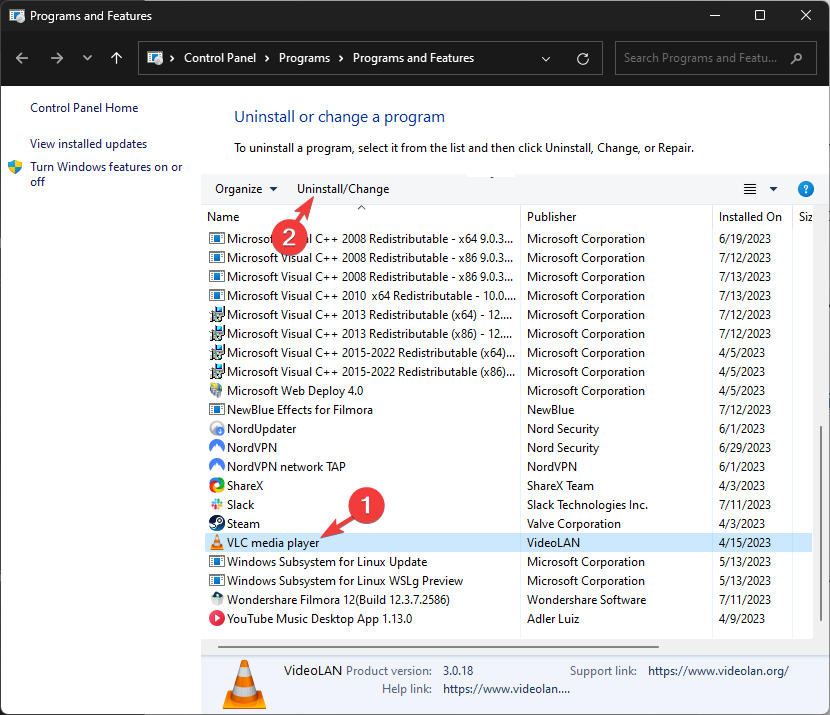
- On the Programs and Features window, locate VLC and select Uninstall.
- Follow the onscreen prompts to complete the action.
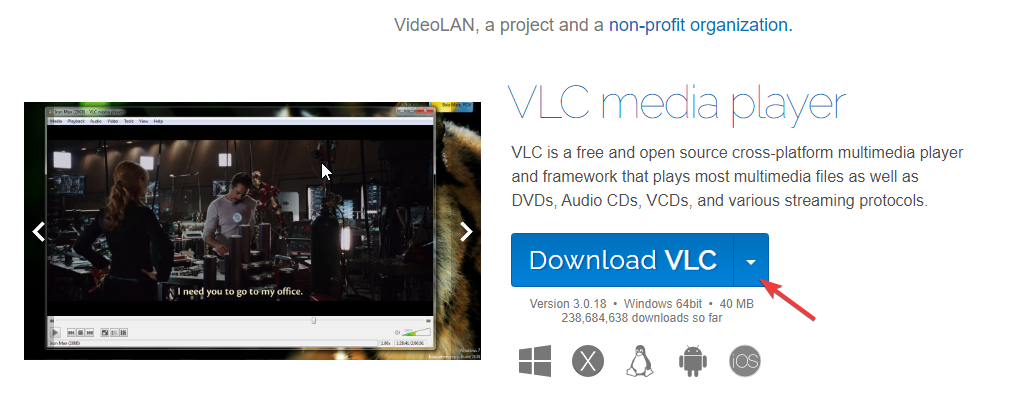
- Now visit VLC’s official website and click Download VLC.
- Double-click the downloaded file and follow the onscreen prompts to complete the installation.
Now try to play the media file causing the issue.
So, these are methods you can follow to fix the VLC could not open the MP4A audio encoder error to stream or play your favorite content seamlessly.
If you are facing issues while opening Media Source Locator on VLC, we recommend you check out this informative guide for quick and easy solutions.
Please feel free to give us any information, tips, and your experience with the subject in the comments section below.

User forum
0 messages