How to Fix the WD External Hard Drive if it's not Showing Up
Turn on the USB Root hub to troubleshoot this issue
4 min. read
Updated on
Read our disclosure page to find out how can you help Windows Report sustain the editorial team. Read more
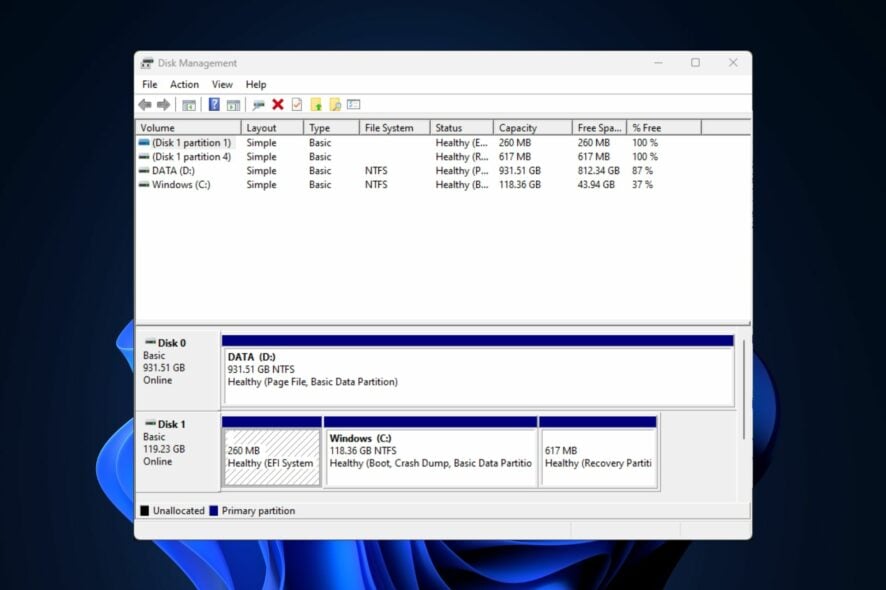
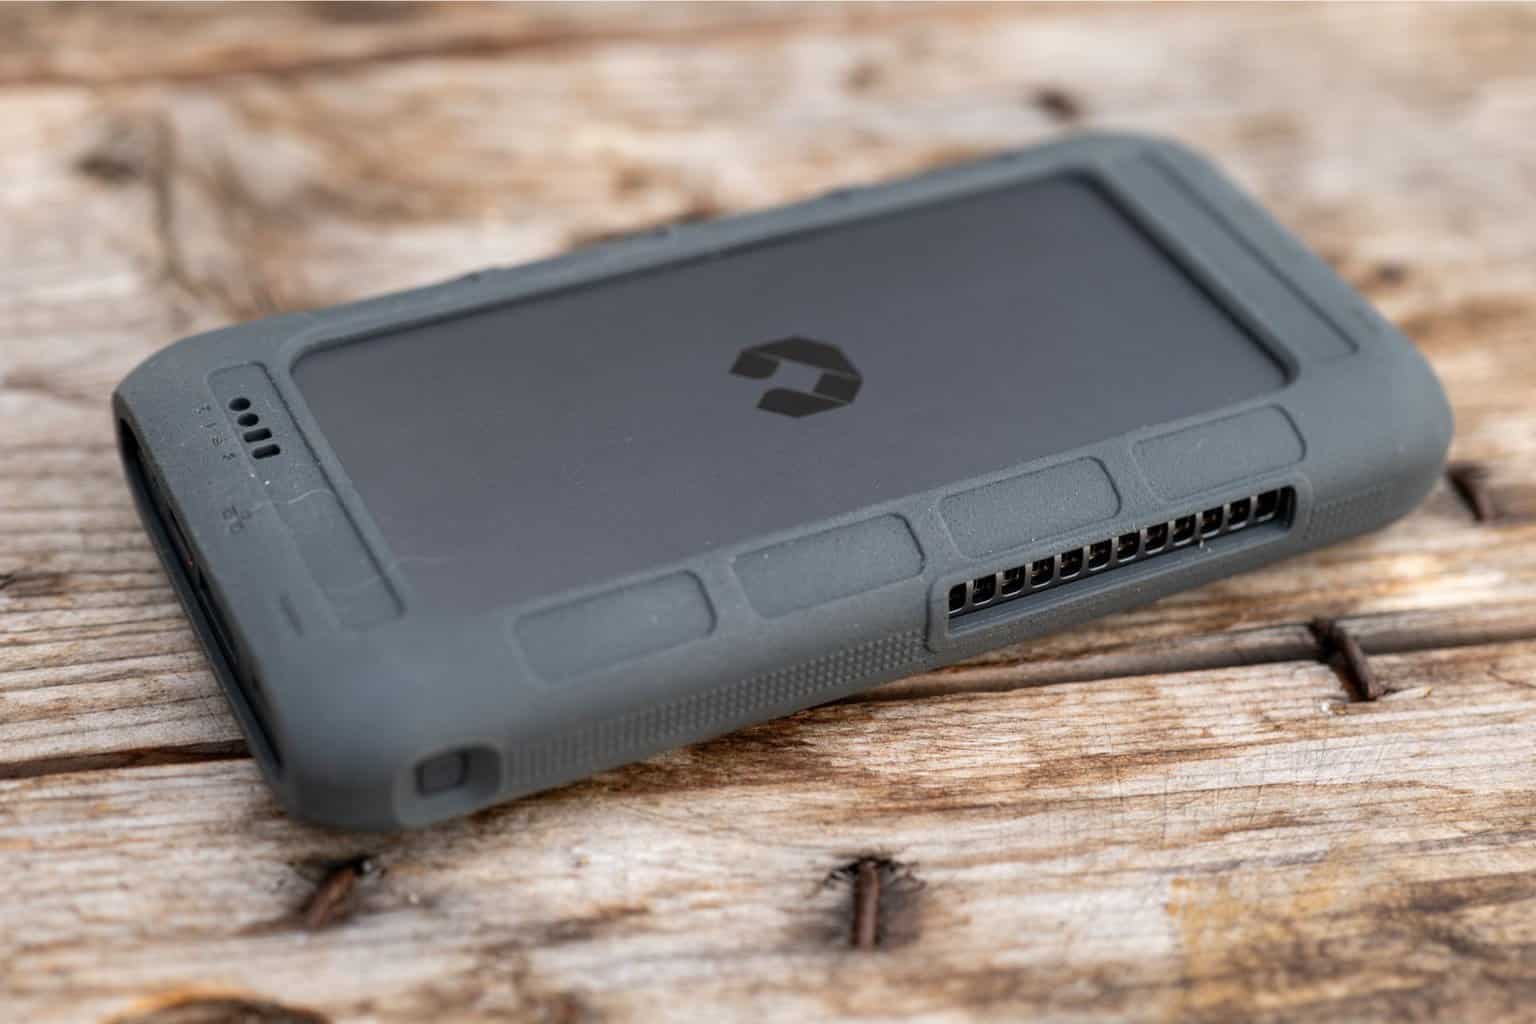
The WD external hard drive not showing up is a situation where your Western Digital external HDD is physically connected to your computer but not recognized by your OS in File Explorer. A corrupt USB driver, USB port issues, partition issues, etc can cause it.
Before applying the solutions below, inspect the physical connections for any damage and try to use another port on your PC. Also, ensure that the file system of the external hard drive is compatible with your operating system.
What can I do if my WD external hard drive doesn’t show up?
1. Check the WD drive with disk management
- Press the Windows + R keys, Type diskmgmt.msc in the dialog box, and press Enter.
- Locate and right-click on the WD hard drive, then select Initialize Disk.
- Select the partition style (MBR and GPT) and press OK.
- Now, right-click on the unallocated WD external hard drive.
- Choose New Simple Volume and follow the on-screen instructions to create a new partition.
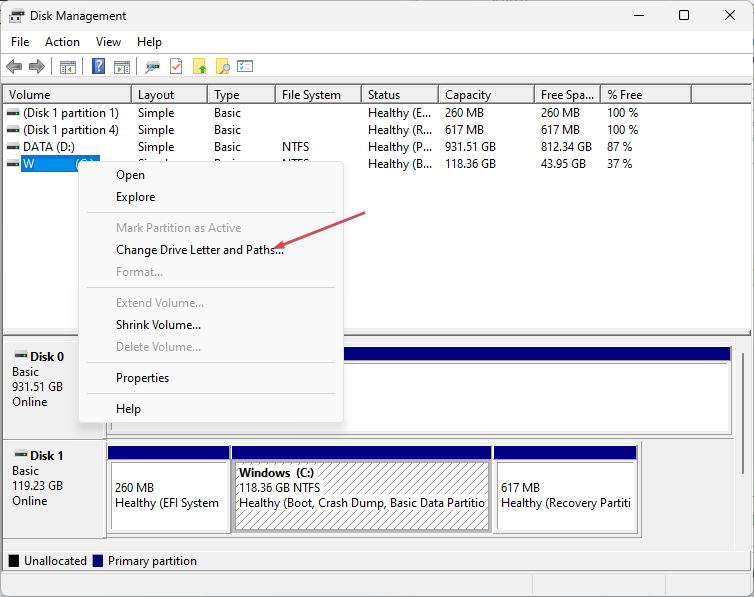
- Next, right-click on your WD external hard drive and select Change Drive letter and path from the options.
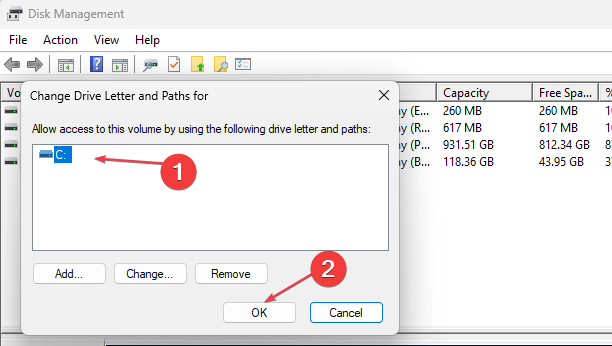
- Assign a new drive letter to your WD external drive and press OK.
Ensure that you backup important files before running the disk management tool. However, if the disk management tool fails to load, you can follow these steps to fix it.
2. Turn on the USB Root Hub
- Press the Start button, type devmgmt.msc in the search box, and press Enter to open Device Manager.
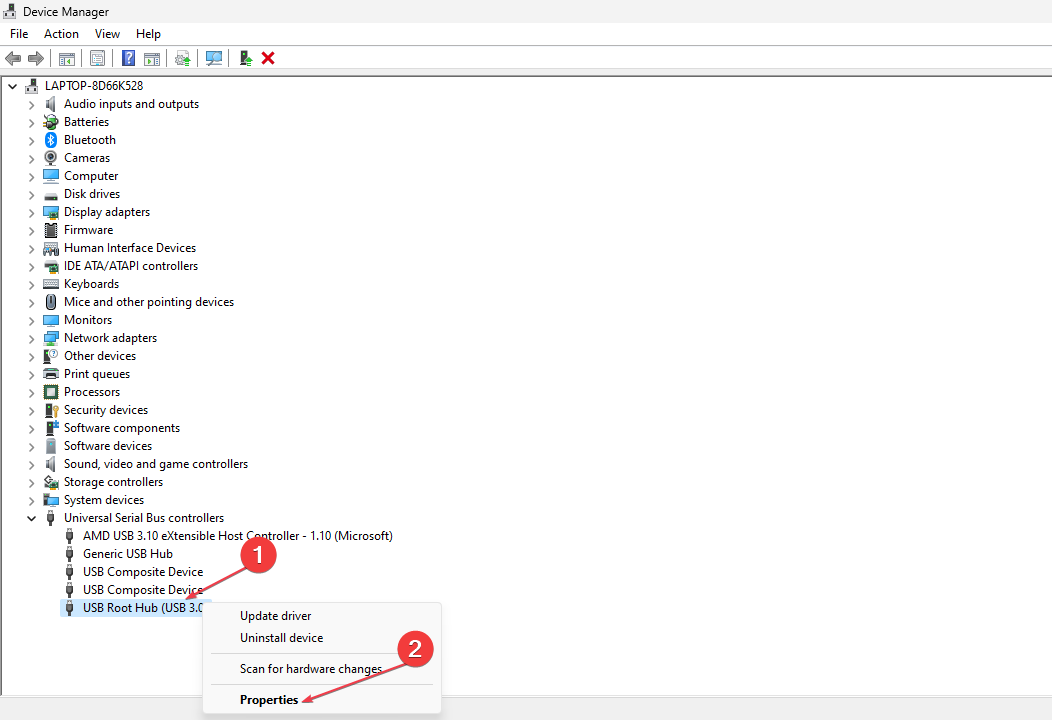
- Expand the Universal Serial Bus controllers. Right-click on the USB Root hub from the list, and select Properties.
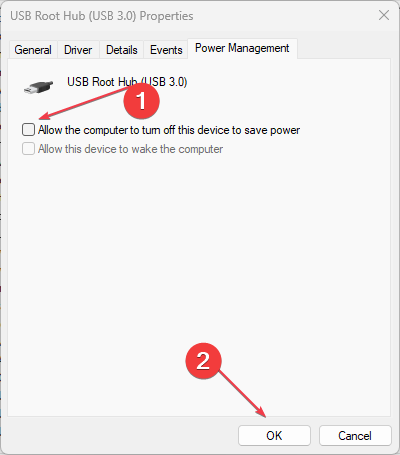
- Then, navigate to Power Management. Uncheck the box Allow the computer to turn off this device to save the power, and press OK.
Repeat the same steps for other available USB Root hubs and restart your computer afterward. Now, check if your WD external hard drive shows on your computer.
3. Update WD hard disk device drivers
- Press the Windows + I keys to open the Settings app.
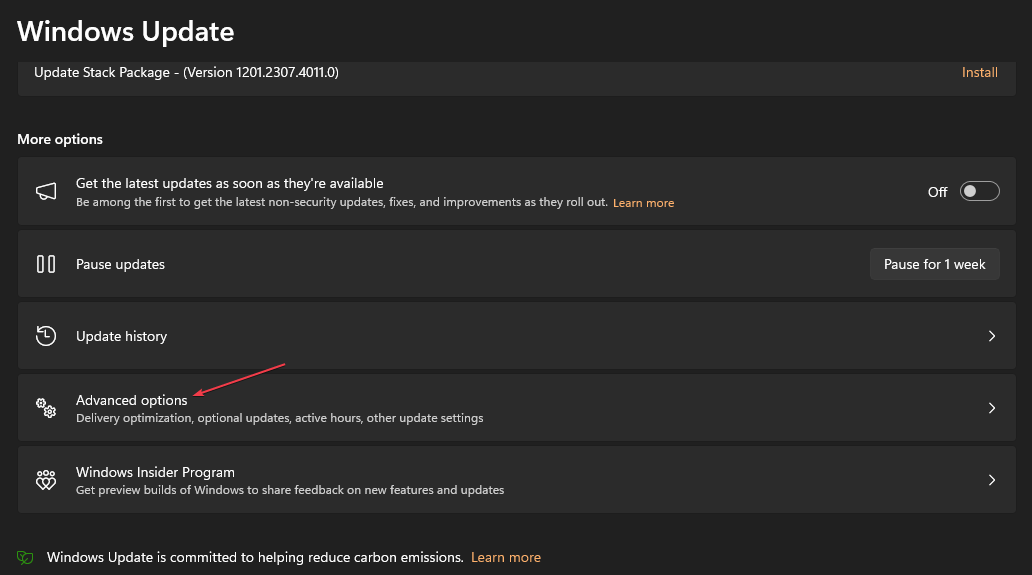
- Choose Windows Update and click Advanced option.
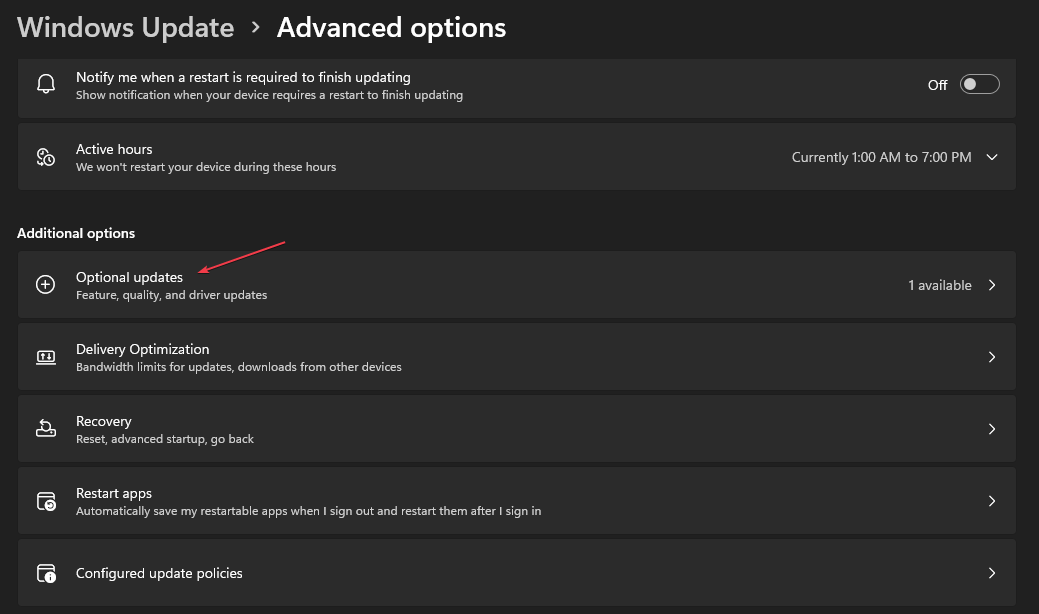
- Select optional updates.
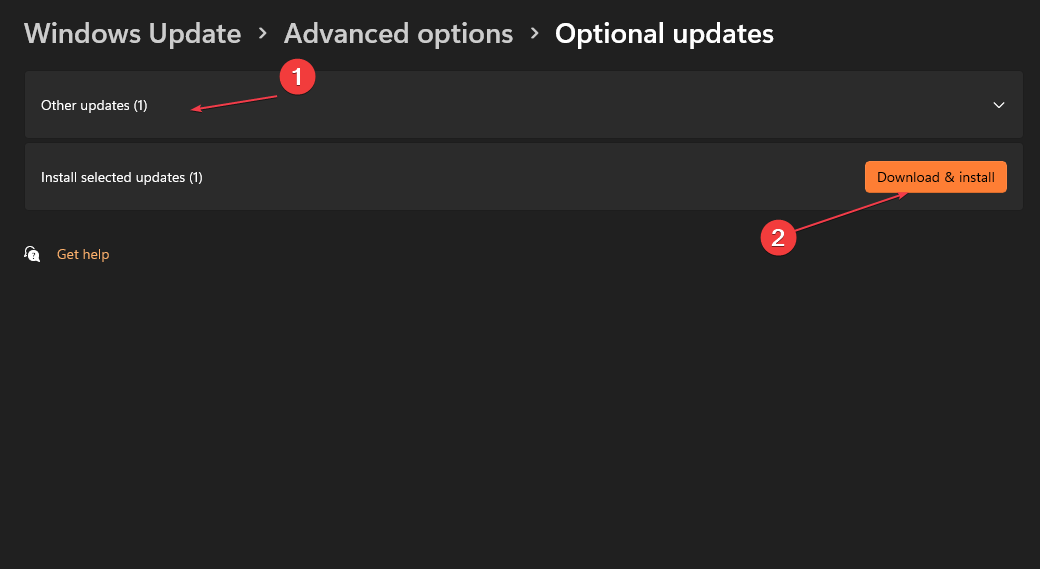
- In the new window, select other updates, check for the updates, and click Download & install.
- Your computer will automatically install any available update for WD hard disk drivers.
- Restart your PC.
After updating the WD hard disk driver, reconnect it to your computer; it should now be recognizable to your computer when connected.
Alternatively, you could also update this particular driver with a standalone driver update software that will automatically scan your PC and update all drivers from their official manufacturers.
4. Disable the USB selective suspend option
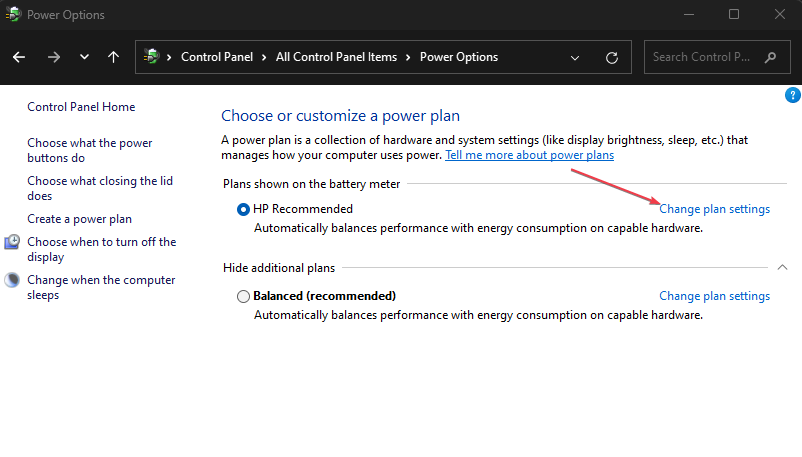
- Right-click the Start button and select Power Options from the context menu.
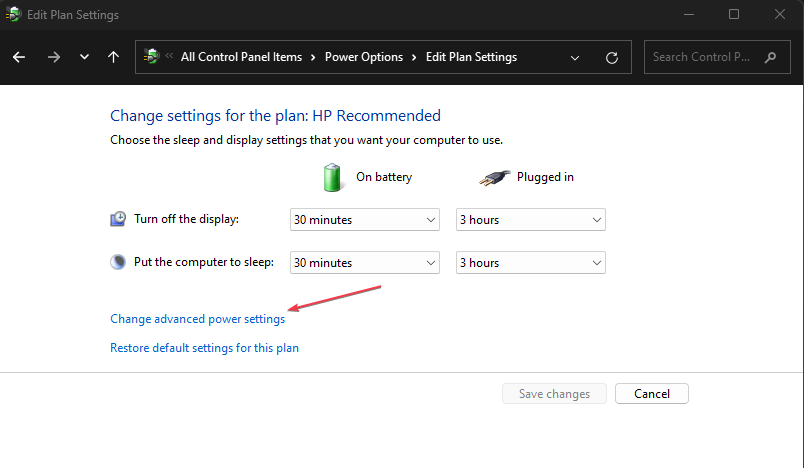
- Choose the power plan you want to modify. Click on Change plan settings next to the selected power plan.
- In the next window, click on Change advanced power settings.
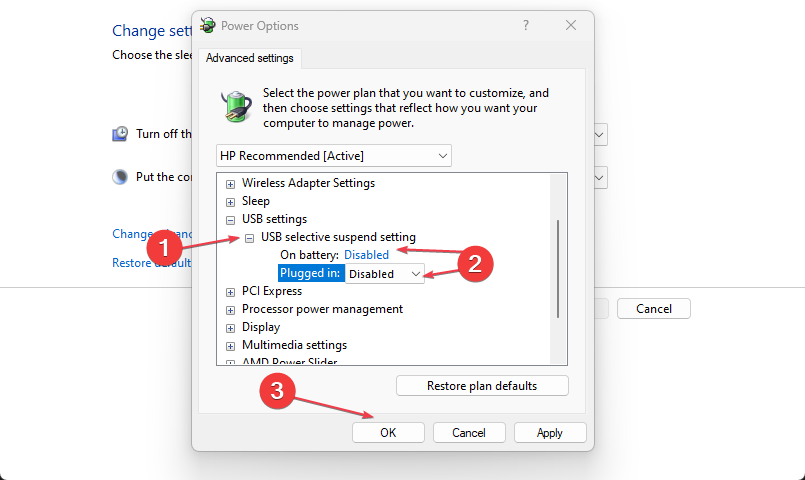
- Scroll down and expand the USB settings.
- Under the USB selective suspend, set both the On battery and Plugged-in options to Disabled. Click Apply and then OK to save the changes.
By disabling the USB selective suspend, you should be able to fix the WD external hard drive not showing up error if this setting causes it.
Work through any of the methods provided in this guide, and you should be able to fix the WD external hard drive not showing up.
There are several cases of external hard drive errors ranging from mild to fatal cases. However, there are methods to troubleshoot the issue seamlessly.
You can also explore our detailed guide on fixing external hard drives not showing up on Windows 11 for other helpful tips to apply.
Do not hesitate to use the comments section below if you have any questions or suggestions.
User forum
0 messages