Not Enough Memory Error in DirectX 12: How to Fix It?
Increasing the page file size should work
5 min. read
Updated on
Read our disclosure page to find out how can you help Windows Report sustain the editorial team. Read more
Key notes
- You may run into the DirectX 12 not enough memory error when playing games on a Windows PC.
- This usually happens when sufficient page file size has not been allocated on your system.
- Increasing the page file size and clearing the DirectX shader cache will fix the problem.
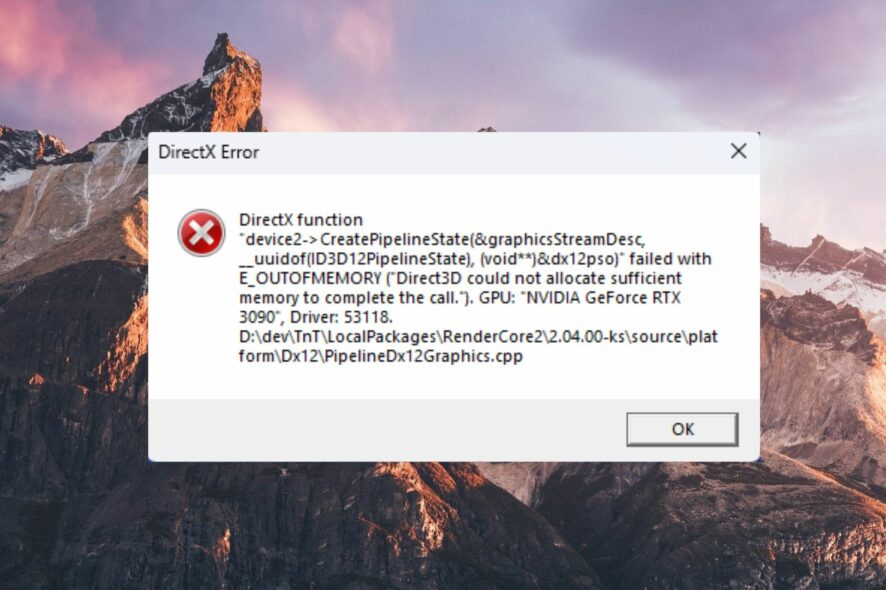
DirectX 12 is designed to provide graphics effects to Windows-based PC games at the same time, reducing CPU overhead and increasing GPU utilization.
However, there have been several instances when DirectX causes the game to crash during the launch or in the middle of gameplay. If you are struggling with the same problem, go through this guide to discover the possible fixes.
What causes the not enough memory error in DirectX 12?
Below are the potential reasons why the game is crashing due to the not enough memory error in DirectX 12:
- Hardware-related errors – As reported by users, physical damage to the motherboard or hard disk drive is known to cause this unfortunate error.
- Using an outdated game version – The DirectX 12 not enough memory error can also occur if you haven’t upgraded the game for a long time.
- Corrupt or outdated graphic drivers – In some cases, obsolete GPU drivers cause a lot of trouble during gaming sessions.
- Incorrect paging file size – If the page file settings are configured to be adjusted automatically, it can suddenly cause not enough memory error during the gameplay.
- Corrupt DirectX cache – Several readers mentioned that the DirectX cache files accumulated for a long time can get corrupted causing this error.
Regardless of the reasons why DirectX 12 gives you not enough memory error, the solutions listed below will help you resolve it in no time.
How do I fix the not enough memory error in DirectX 12?
Before you implement the complex solutions listed a little later, try these simple workarounds:
- Check for hardware-related issues, such as the damage to motherboard, hard disk, and graphics card.
- Install the available game updates in which you are facing the error.
- Install all the outdated graphic driver updates.
If these tricks did not fix the problem, move on to more advanced solutions listed below.
1. Increase the paging file size
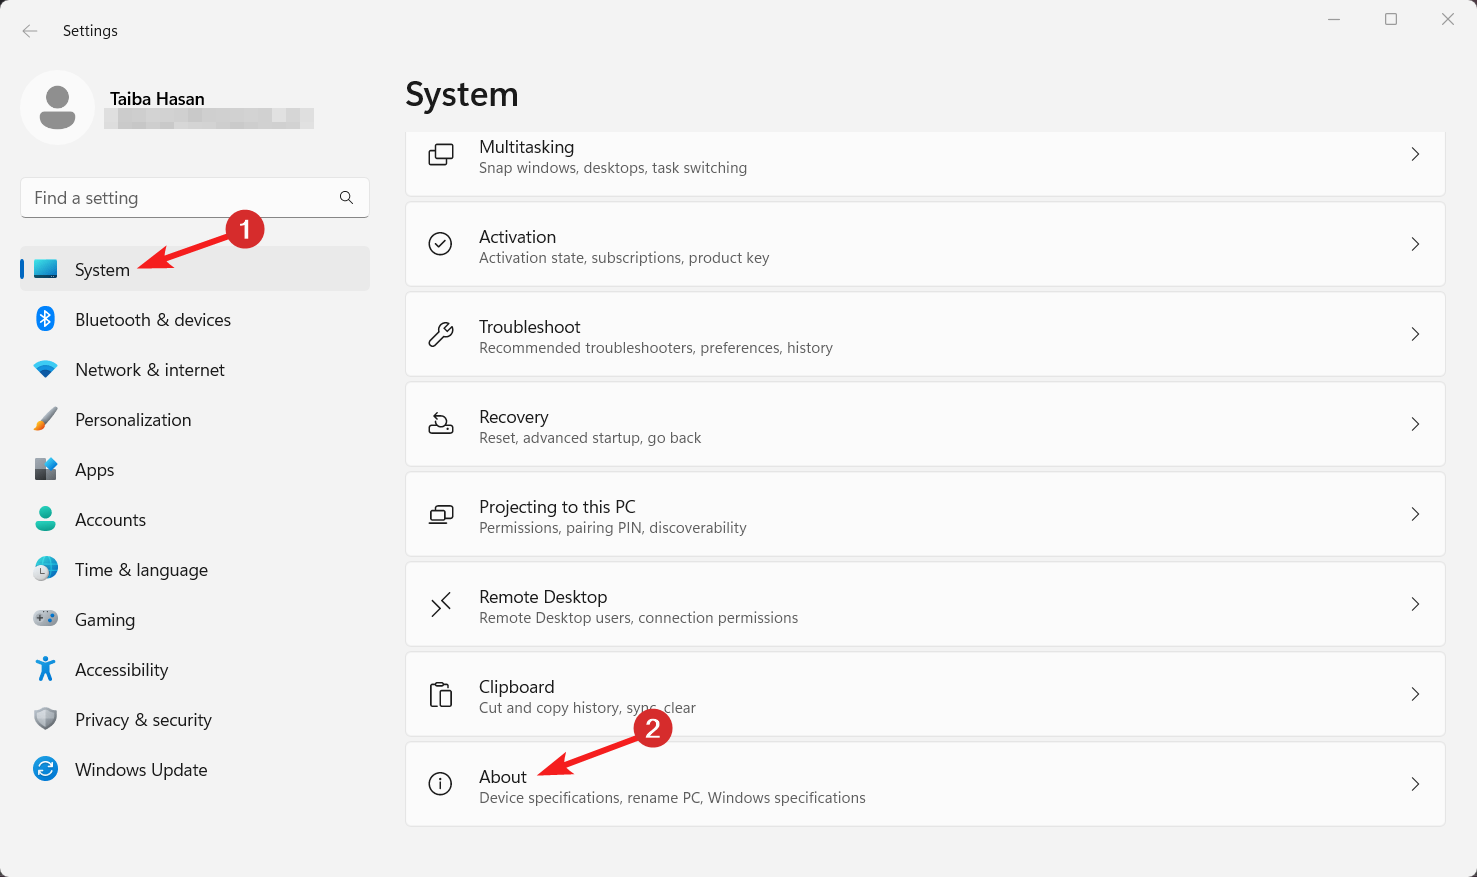
- Use the Windows + I shortcut to launch the Settings app.
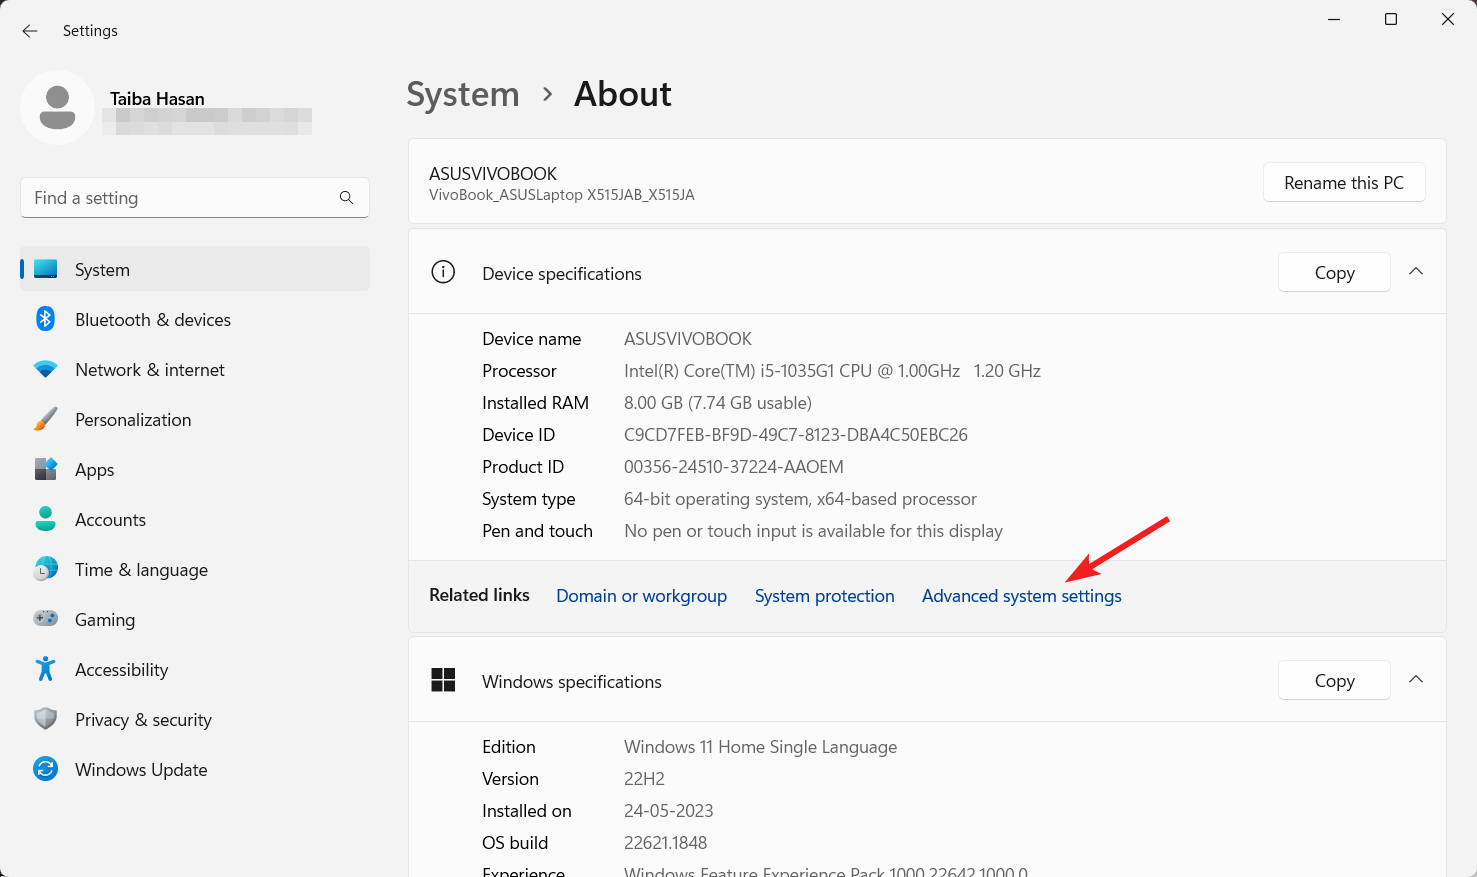
- Scroll down the System settings and choose About from the right section.
- Click Advanced system settings present in the Related links section.
- Switch to the Advanced tab of the System Properties window and press the Settings button under the Performance section.
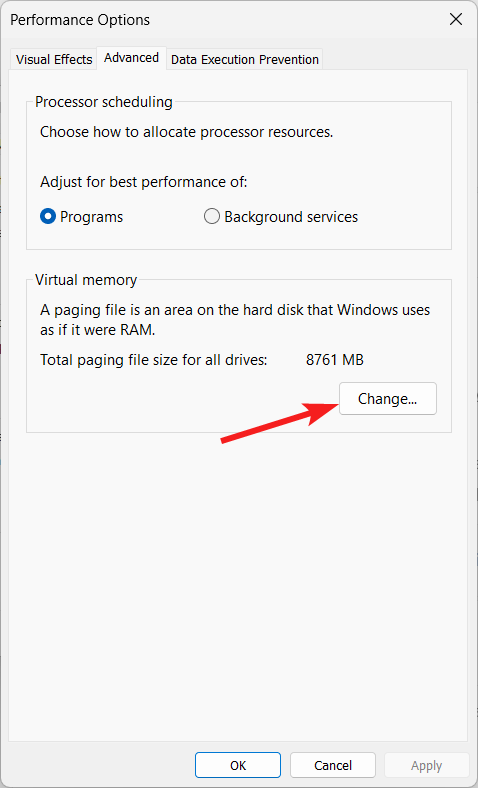
- Switch to the Advanced tab of the Performance Options box and hit the Change button.
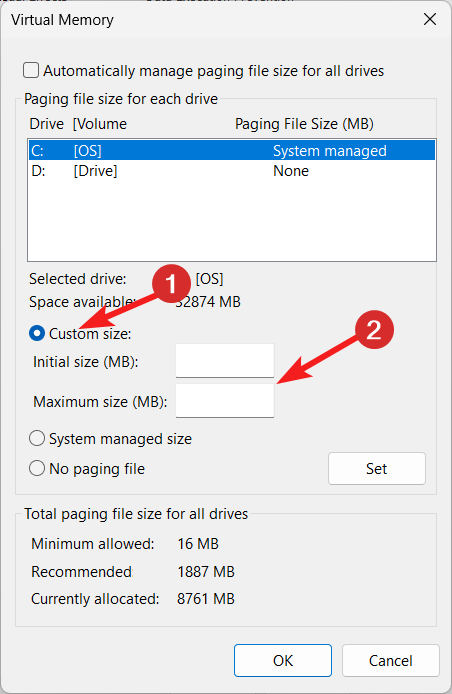
- Disable the checkbox next to the Automatically manage paging file size for all drives option in the Virtual Memory properties box.
- Select the drive on which the problematic game is assigned. Enable the Custom option and type custom values in the Initial size and Maximum size text box.
- Press the Set button followed by OK.
- Exit the settings window and then relaunch the game once again. The not enough memory error will not bother you in DirectX 12.
Misconfigured page file settings may create memory allocation problems causing the error in hand.
2. Add the game to Afterburner’s OSD exclusions
- Launch the MSI Afterburner program on Windows PC.
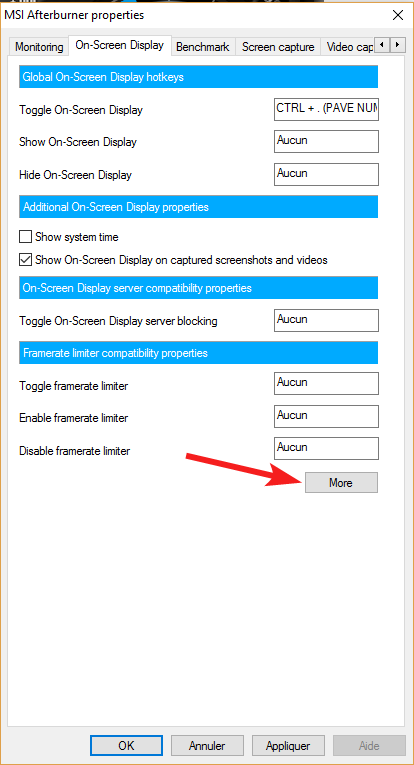
- Click the Gear icon to access the MSI Afterburner’s properties window.
- Switch to the On-screen Display tab and click the More button at the bottom.
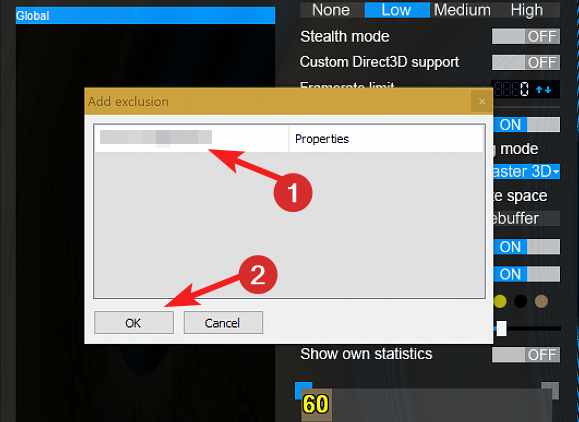
- Press and hold the Shift key and hit the Add button in green located on the bottom left of the RTSS window.
- Add exclusion popup will appear on the screen. Choose the problematic games you want to add to the list and hit the OK button.
- Now exit the Afterburner app and try to launch the game once again.
The Afterburner MSI will no longer show up on the screen, resolving the not enough memory error in DirectX 12.
As mentioned on several forums, the not enough memory error usually occurs when the MSI Afterburner’s OSD is running with DirectX 12, causing the system to crash. Adding the affected game to the OSD exclusions will ensure that the OSD does not show up during the system launch.
3. Delete the DirectX cache
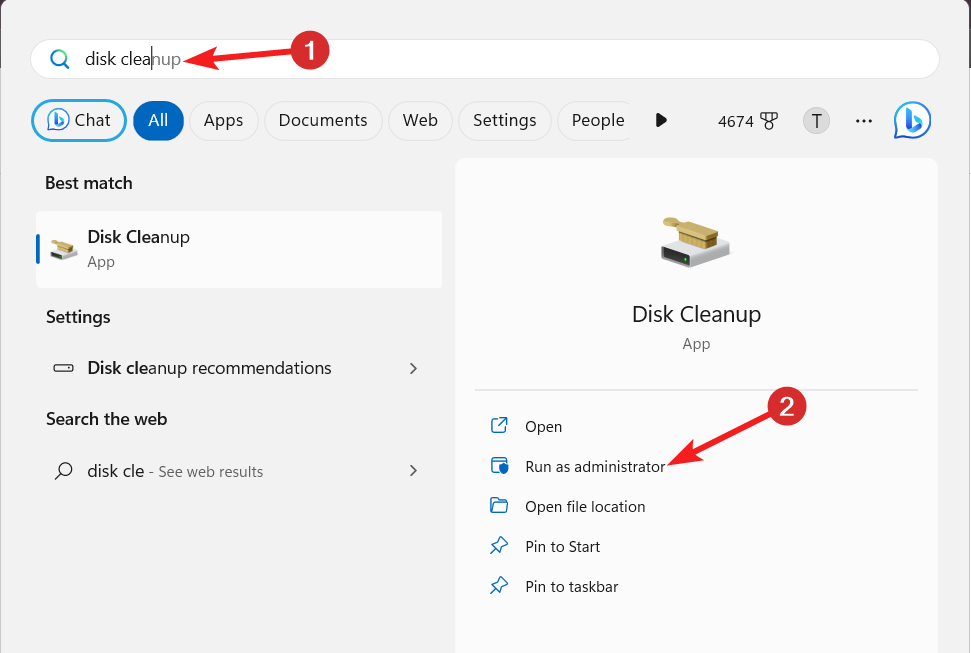
- Hit the Windows icon on the taskbar and type disk cleanup. Choose the Run as administrator option to access the Disk Cleanup tool with administrative privileges.
- Choose the C drive in the drop-down menu and press the OK button to continue.
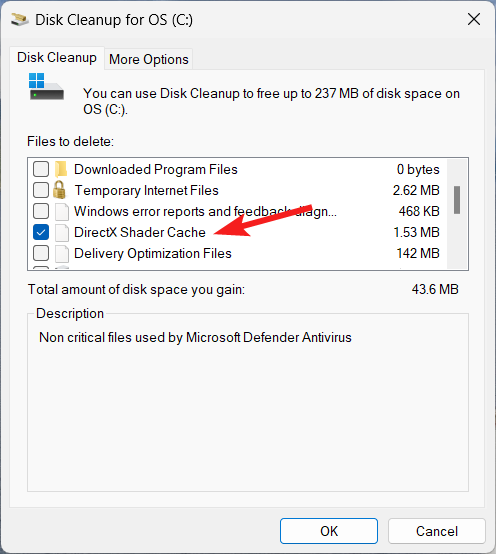
- In the Disk Cleanup window, uncheck all the checkboxes except the one next to DirectX Shader Cache and click OK.
- A confirmation popup will appear. Press the Delete Files button to complete the action.
Corrupt DirectX cached data can also cause the DirectX 12 not enough memory error when launching the game. Deleting the shader cache using the built-in disk cleanup tool will force DirectX to build a new one, resolving the error.
4. Run the Windows Memory Diagnostic tool
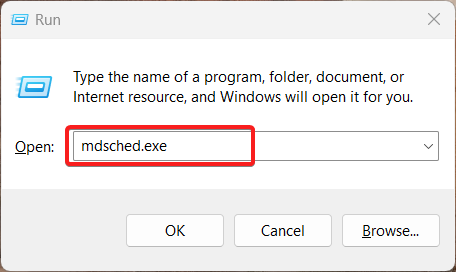
- Use the Windows + R shortcut keys to launch the Run dialog box.
- Type the following command in the text box, and hit the OK button to access the Memory Diagnostic tool.
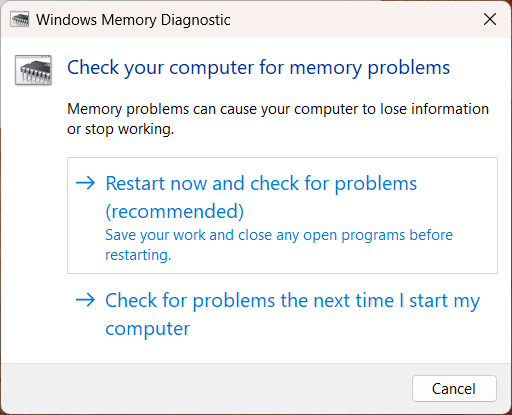
mdsched.exe - Choose Restart now and check for problems (recommended) option from the popup window.
Your Windows PC will not restart and will diagnose potential memory problems such as memory leaks which might be the reason for the not enough memory error in DirectX 12.
That’s it! Hopefully, you were able to resolve the not enough memory error in DirectX 12, which causes an abrupt game crash.
You might be interested in resolving the error DirectX is not compatible with this version of Windows if it occurs after you upgrade Windows to the latest available version.
Which of these methods worked in your case? Do let us know in the comments section below.


User forum
0 messages