Microsoft Store Install Service has High CPU Usage [Solved]
Disabling the service and deleting any related tasks should work for most
4 min. read
Published on
Read our disclosure page to find out how can you help Windows Report sustain the editorial team. Read more
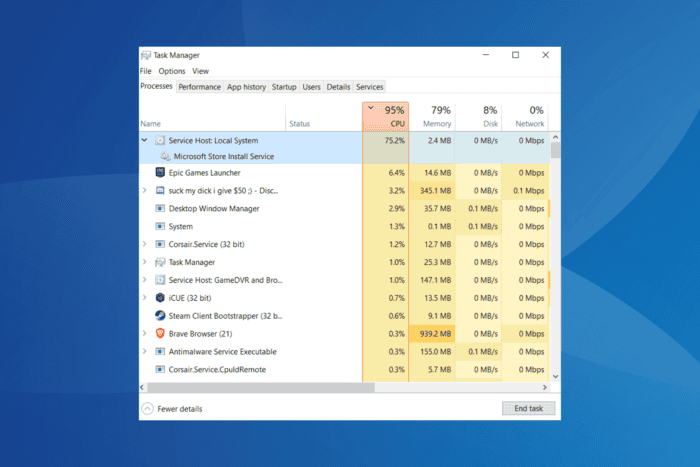
If the computer suddenly starts running slow and you head to the Task Manager to identify what’s consuming all the resources, you may find the Microsoft Store Install Service taking up high CPU, sometimes 75%-100%!
The problem is usually caused by misconfigured MS Store settings, active tasks, corrupted system files, or issues with the Microsoft Store Installer Service itself.
Before you start troubleshooting, restart the computer and check for improvements. If the CPU usage continues to remain high, install any pending Windows updates.
What can I do if the Microsoft Store Install Service uses high CPU?
1. Turn off auto updates in the Microsoft Store
- Press Windows + S to open Search, type Microsoft Store in the text field, and click on the relevant result.
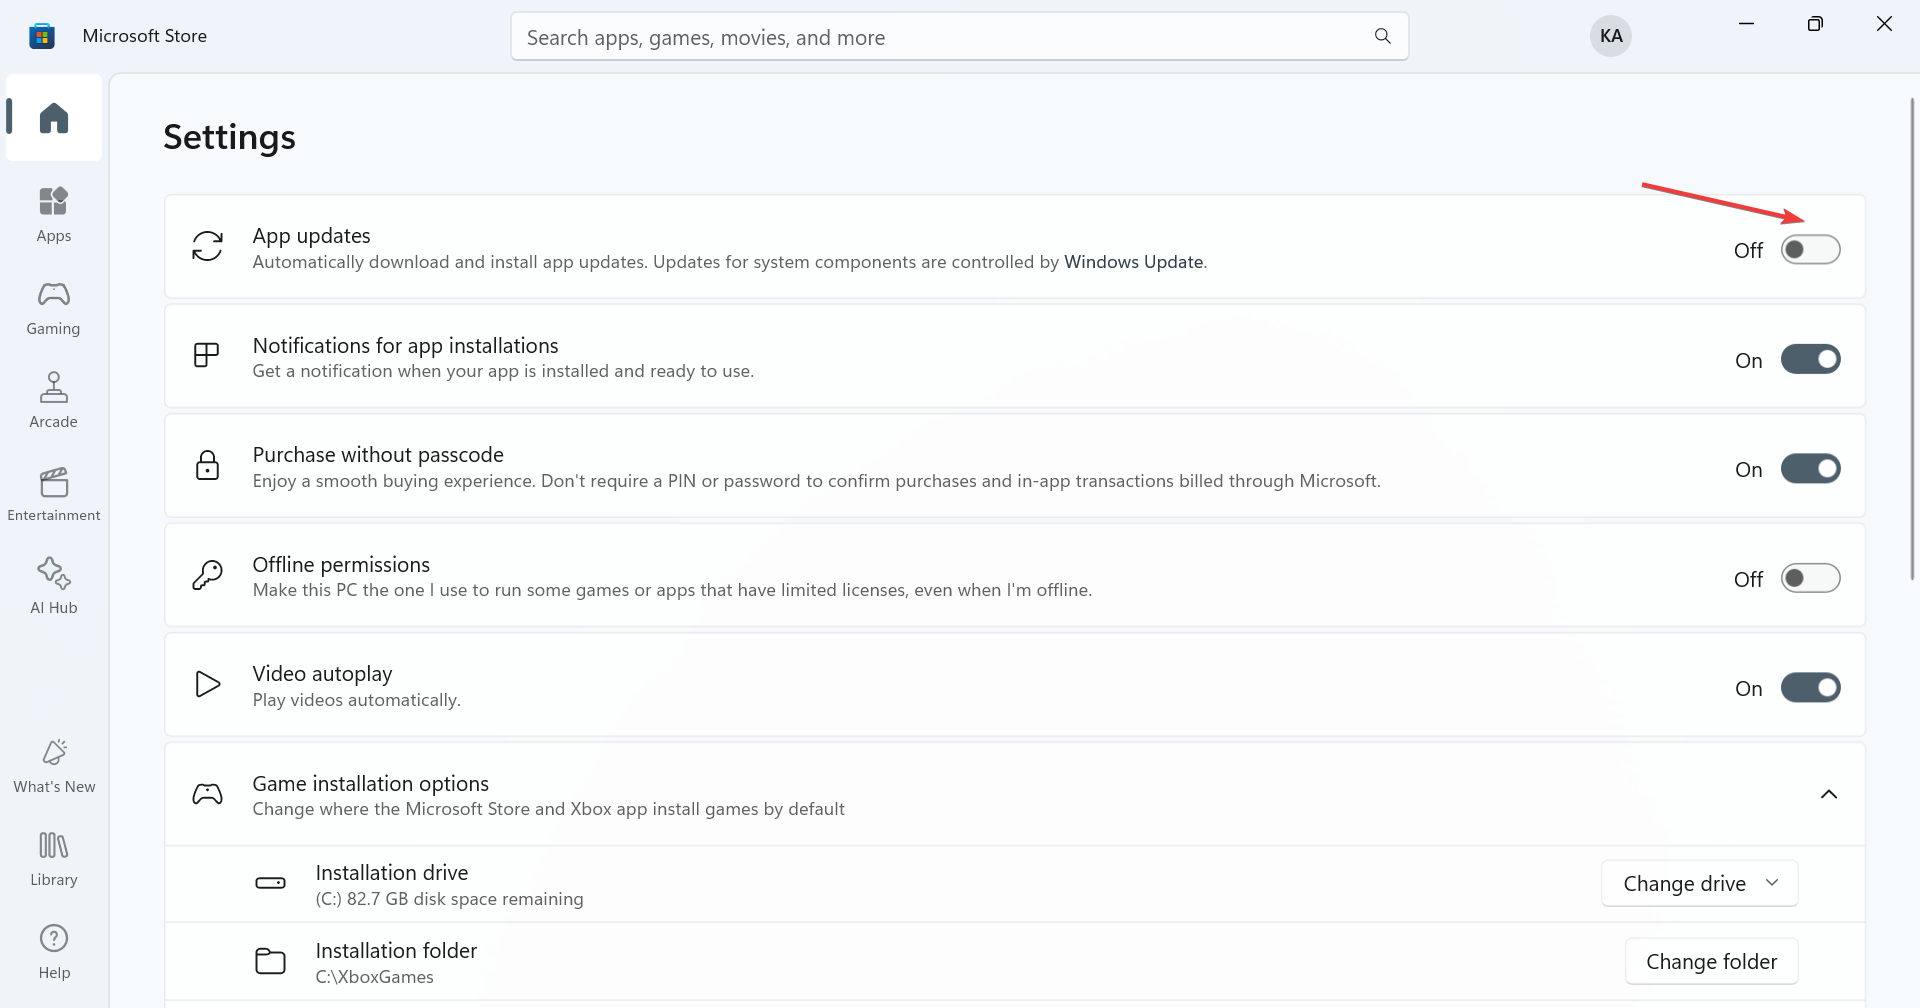
- Click on the profile icon near the top-right corner, and select Settings.
- Disable the toggle for App updates.
- Now, restart the computer and inspect the CPU usage for the Microsoft Store Install Service.
2. Disable the Microsoft Store Install Service
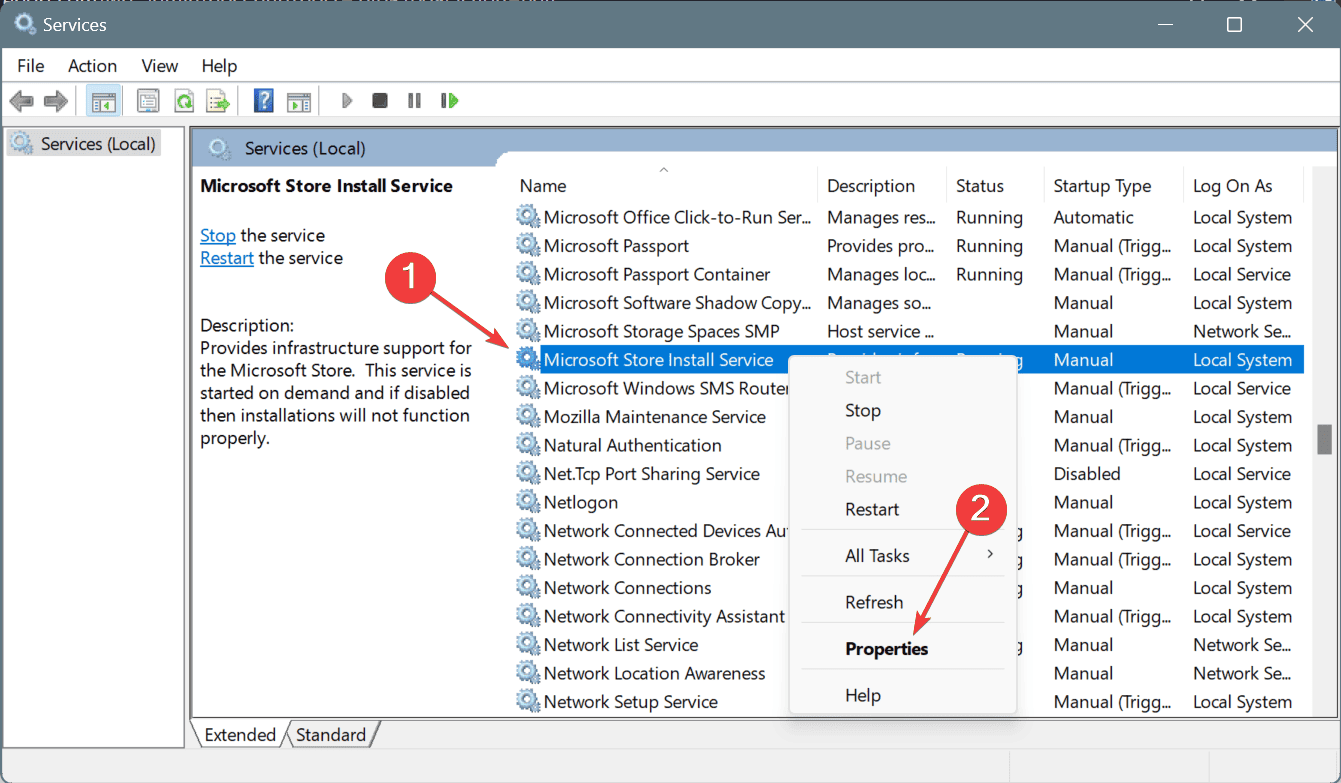
- Press Windows + R to open Run, type services.msc in the text field, and hit Enter.
- Scroll down, right-click on the Microsoft Store Install Service, and choose Properties.
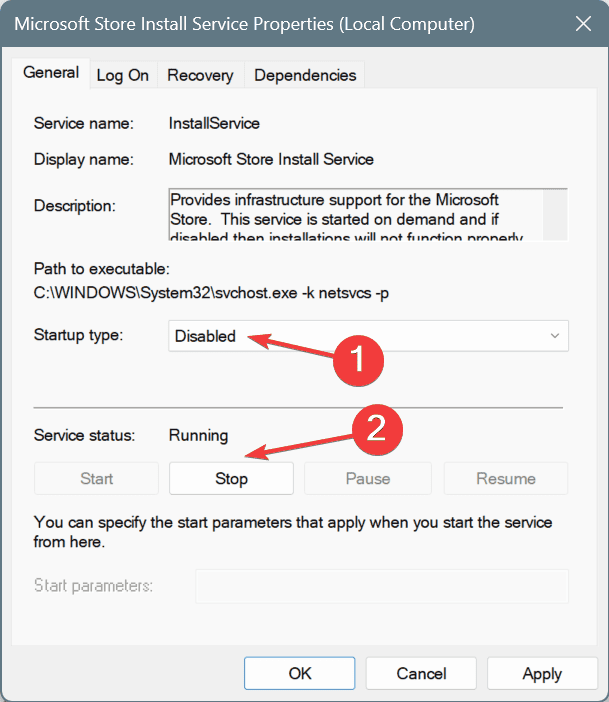
- Select Disabled from the Startup type dropdown menu, and click the Stop button under Service status if the Microsoft Store Install Service is currently running.
- Click on Apply and OK to save the changes, and then restart the computer.
Disabling the Microsoft Store Install Service won’t cause any issues if you don’t actively rely on the Microsoft Store to install apps. On the contrary, it will free up system resources!
3. End the ScanForUpdates task
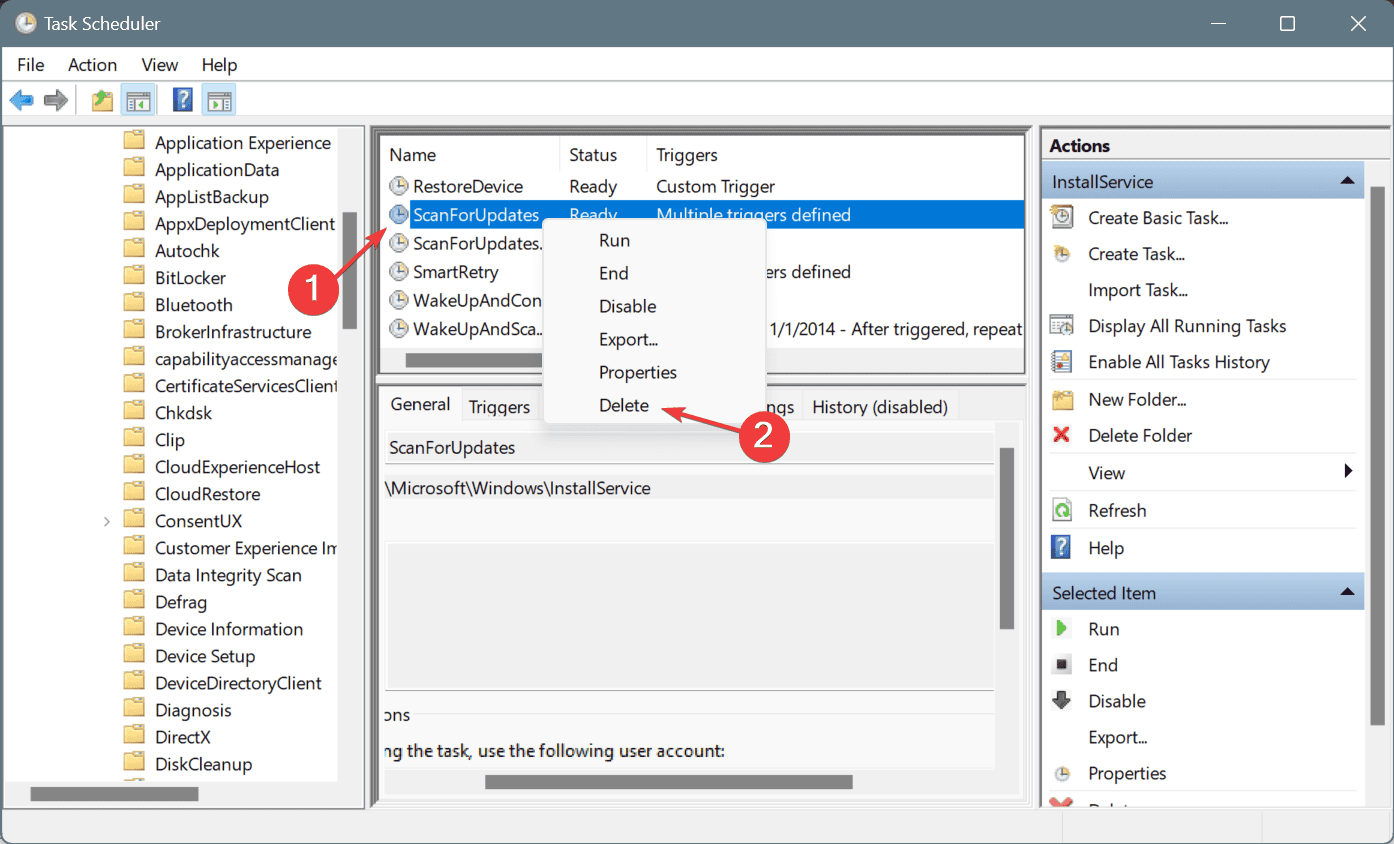
- Press Windows + S to open Search, type Task Scheduler in the text field, and click on the relevant result.
- Navigate the following path using the left pane:
Microsoft > Windows > InstallService - Right-click on the ScanForUpdates task, and select Delete from the context menu.
- Click Yes in the confirmation prompt.
- After deleting the task, restart the PC and check for improvements.
If the Microsoft Store Install Service keeps running even after you have disabled it from the Service.msc console, it might be the ScanForUpdates task to blame for this behaviour, and deleting it will fix things in no time!
Deleting the task also helps if you face high memory (RAM) consumption by the Microsoft Store Install Service.
4. Repair the corrupt system files
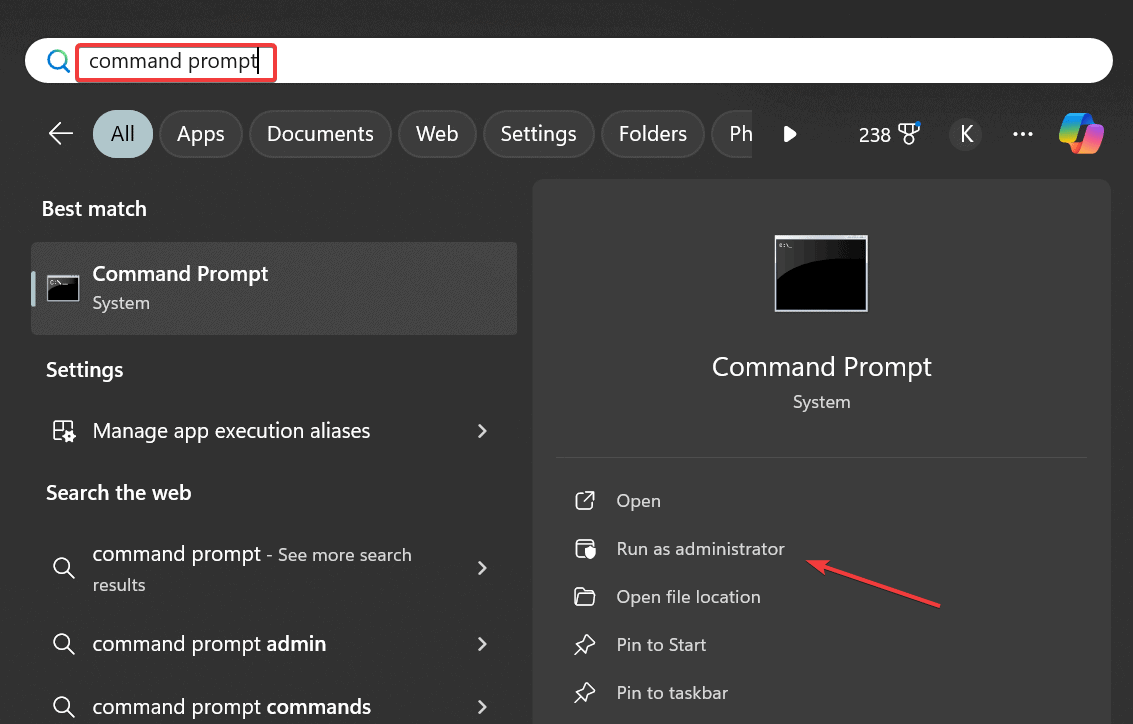
- Press Windows + S to open Search, type Command Prompt in the text field, and click on Run as administrator.
- Click Yes in the UAC prompt.
- Paste the following DISM commands individually and hit Enter after each:
DISM /Online /Cleanup-Image /CheckHealthDISM /Online /Cleanup-Image /ScanHealthDISM /Online /Cleanup-Image /RestoreHealth - Next, execute the following command to run the SFC scan:
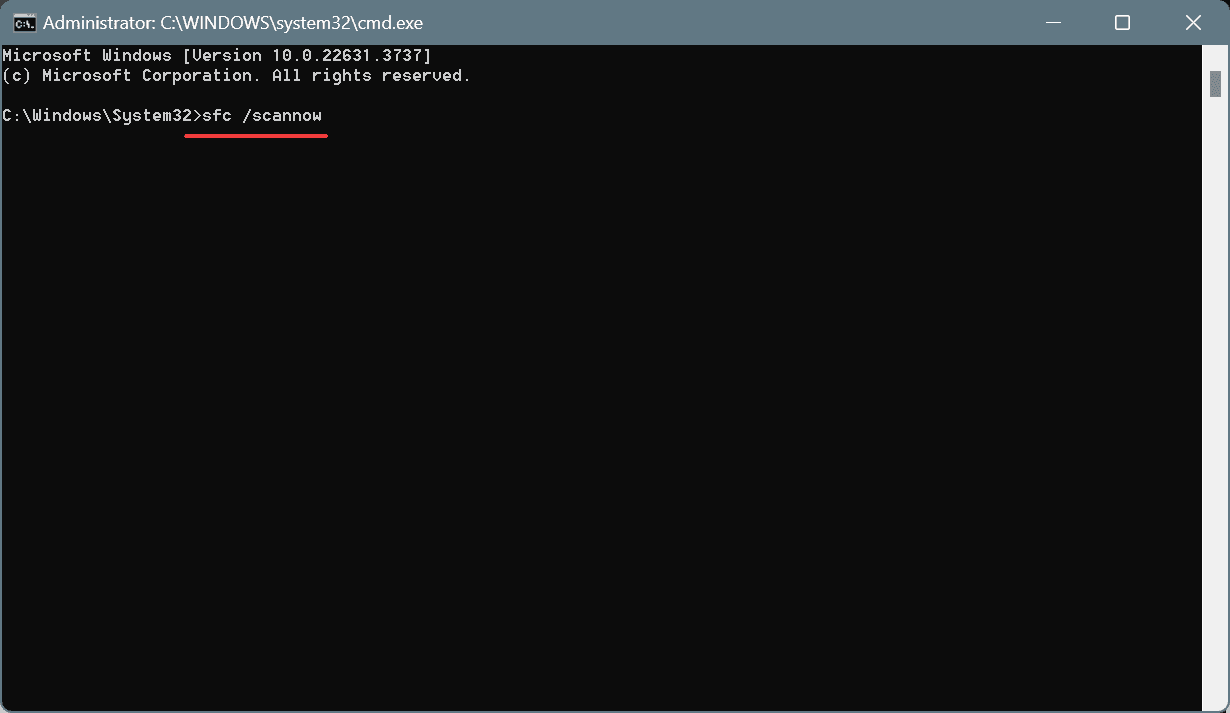
sfc /scannow - Finally, restart the computer to apply the changes.
If there are corrupt system files on the PC, the Microsoft Store Install Service may show 100% CPU usage. In this case, running the DISM commands and SFC scan will restore all problematic files with their cached copy stored on the PC!
5. Repair/reset the Microsoft Store
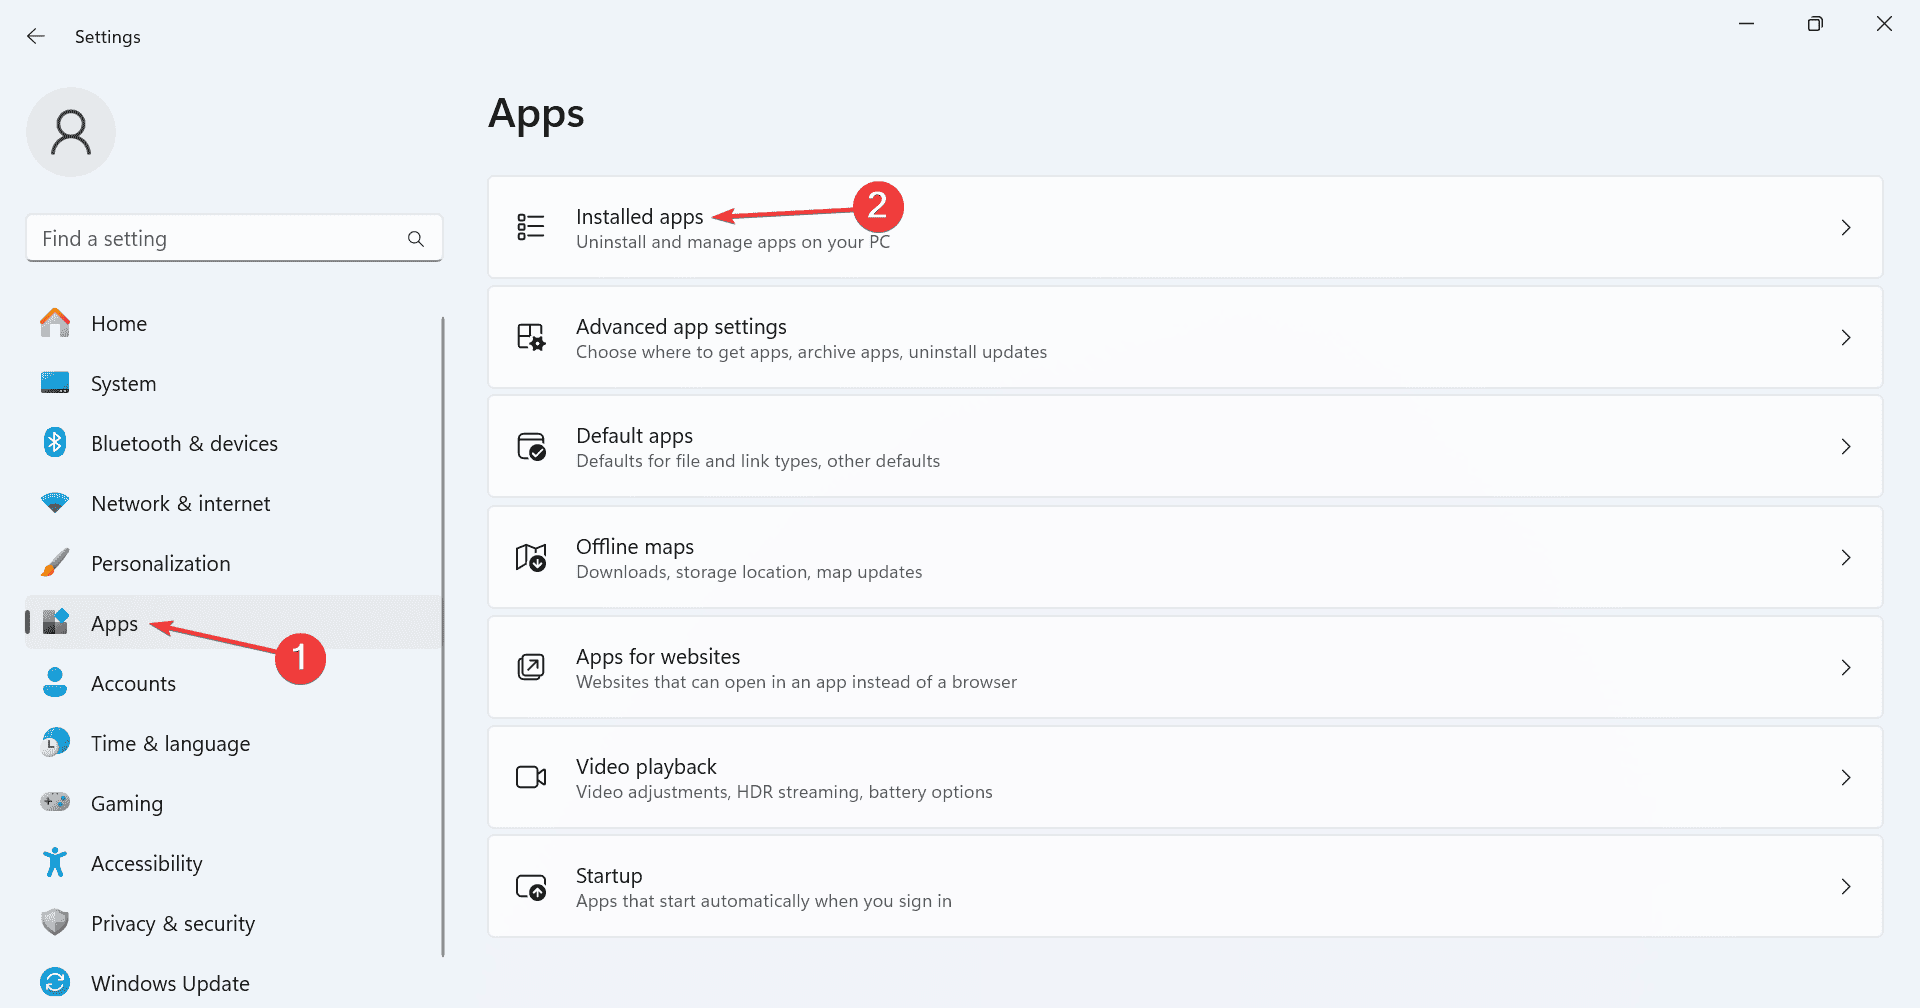
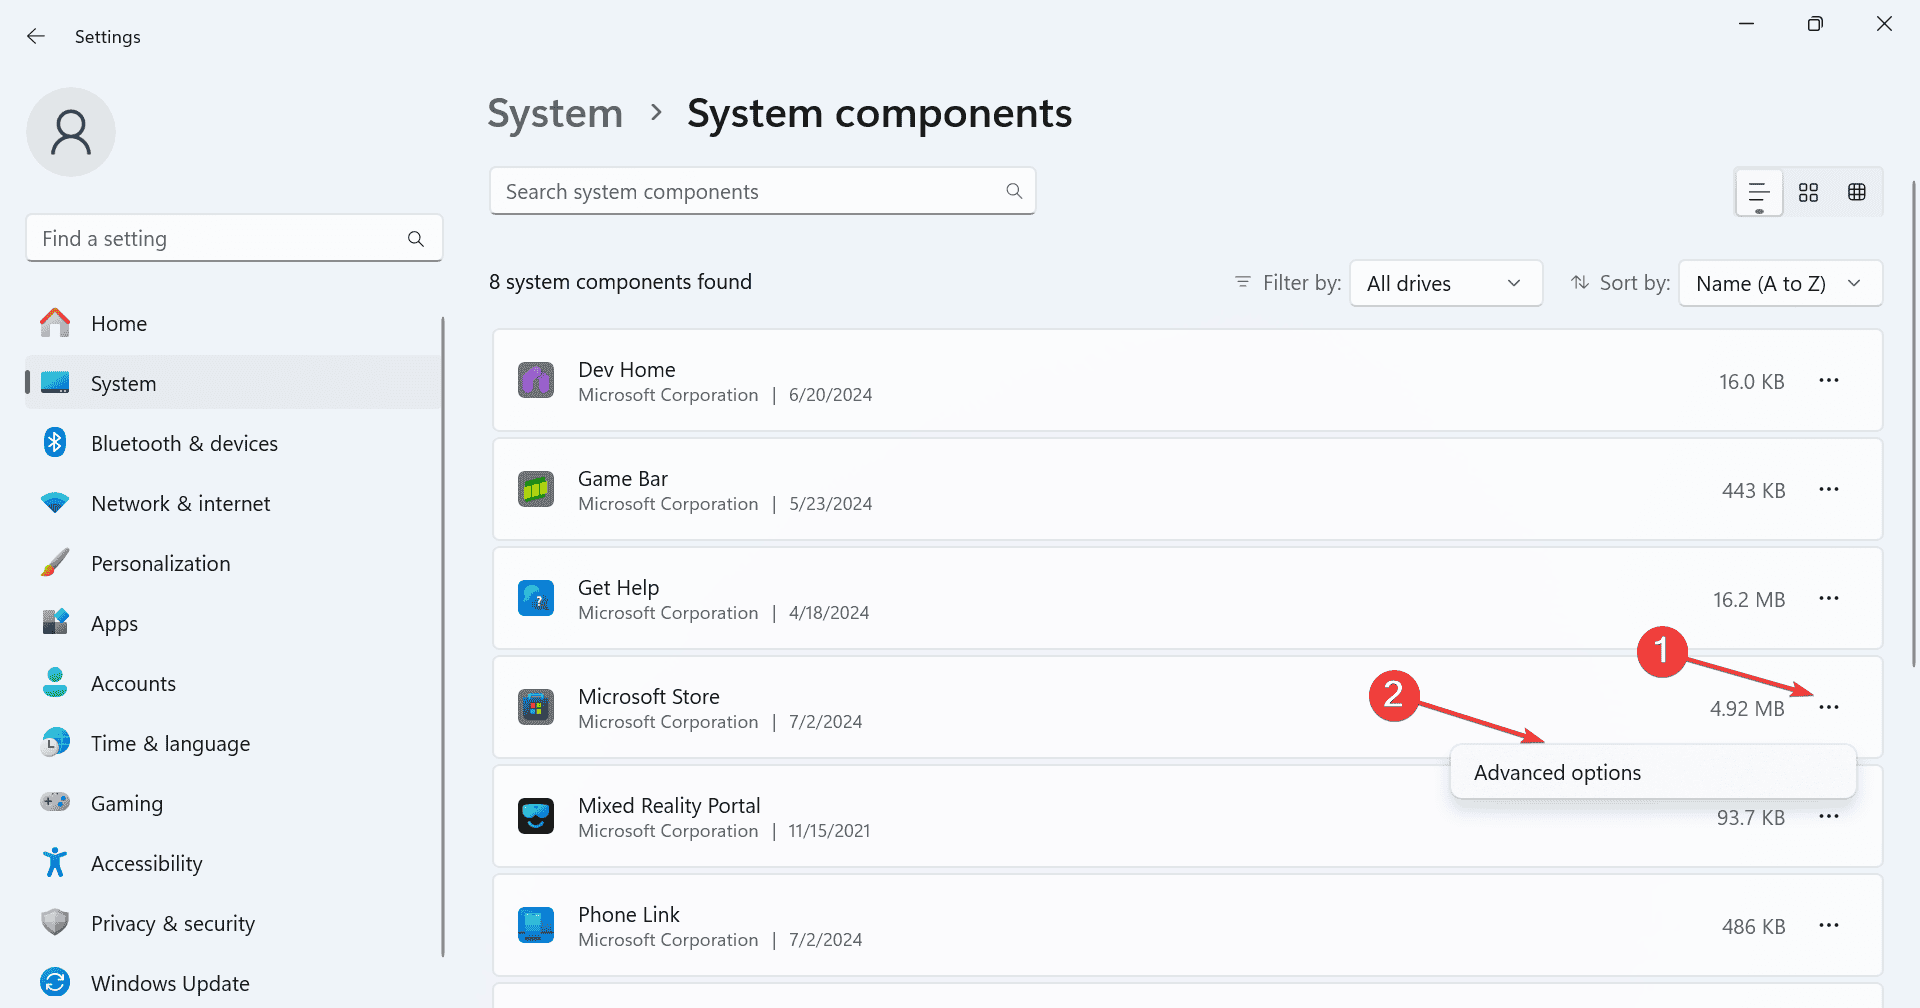
- Press Windows + I to open Settings, go to Apps from the navigation pane, and then click on Installed apps.
- Scroll down to the bottom and click on System components.
- Locate Microsoft Store, click on the ellipsis next to it, and select Advanced options.
- Click the Repair button, wait for the process to complete and check for improvements.
- If the high CPU usage continues, click on Reset.
- Again, click Reset to confirm, and the CPU usage should come to normal levels.
If the Microsoft Store Install Service continues running with high CPU usage, you can repair/reset the app. A reset will delete all Microsoft Store’s data, including the cache stored over time.
When all else fails, the last option is to factory reset Windows 11, though for 9 out of 10 users, disabling the Microsoft Store Install Service will bring the CPU usage under check!
While you are here, discover some quick tips to make Windows faster than ever and improve app performance.
Which fix worked for you? Share with our readers in the comments section.






User forum
0 messages