Google Passkey: Everything You Need to Know
The keys to a passwordless fututre
3 min. read
Published on
Read our disclosure page to find out how can you help Windows Report sustain the editorial team. Read more

If you’ve ever wanted to simplify your sign-in process, Google Passkey is what you need. Gone are the days when you have to remember complex passwords and add additional layers of security such as 2FA.
Google Passkey works by eliminating the need for passwords and replacing them with biometric authentication or a security key. They are more secure because only you has access to your biometrics and security keys stored in trusted devices.
What are the key features of Google Passkeys?
- Passwordless – Google Passkeys does not rely on passwords. When you set it up, you’ll be prompted to enter your password to verify your identity but that’s it. Any other time will require you to use biometrics or your chosen authentication method to sign in.
- Google integration – Google Passkeys are seamlessly integrated into all Google products and services.
- Cross-platform compatibility – You can easily create Google Passkeys for your devices from Windows, iOS and Android.
- Enhanced security – Google Passkeys offer more advanced security compared to traditional passwords. Even with password managers, you’re still vulnerable to phishing attacks but with a passkey, there’s reduced password-related data breaches and makes unauthorized access close to impossible.
How do I set up Google Passkeys?
1. Set up Google Passkey
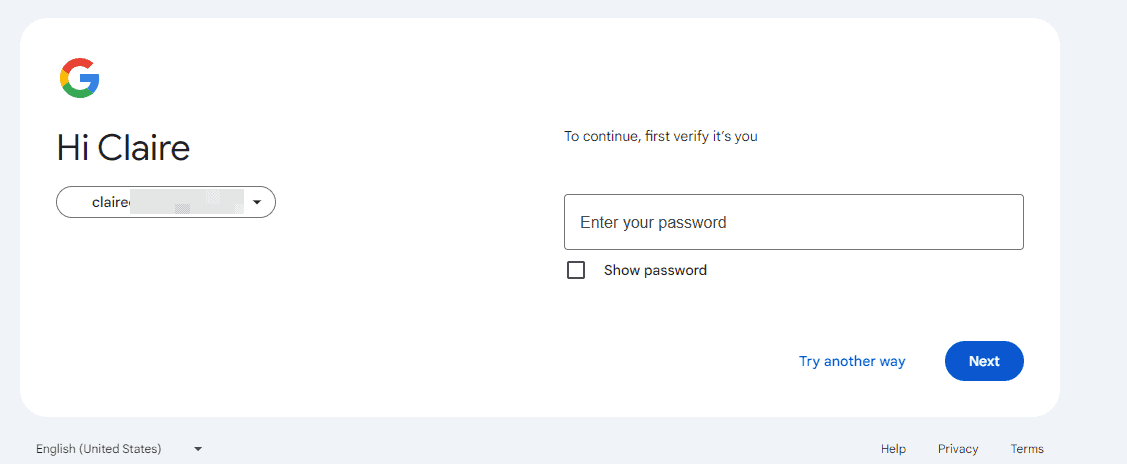
- Navigate to your browser and sign into your Google account.
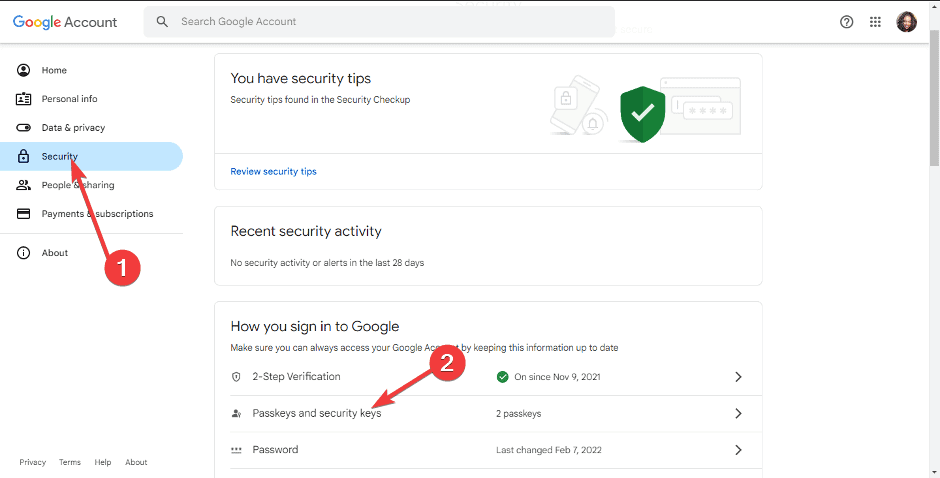
- Go to Security Settings > Security.
- Select Passkeys under how to sign in.
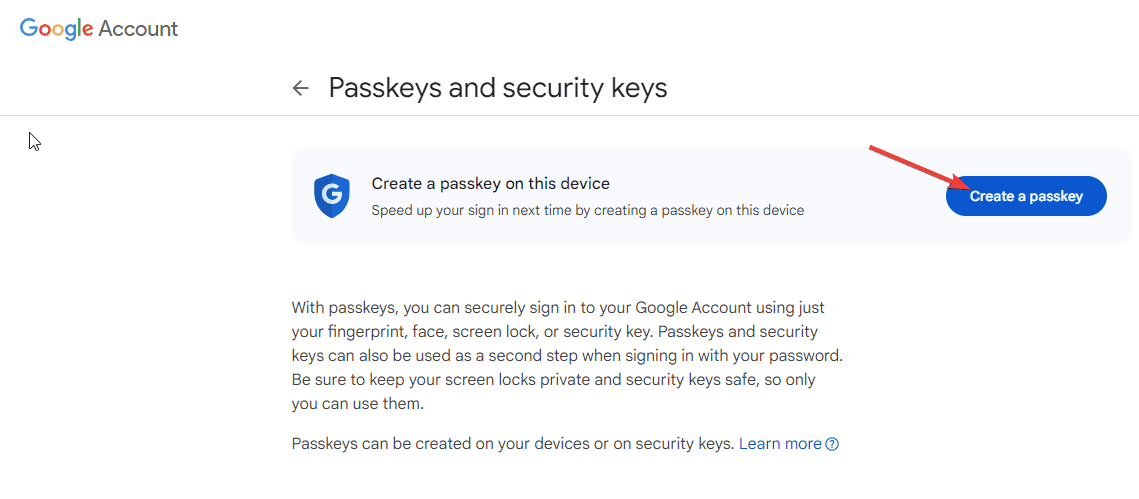
- Click on Create a passkey.
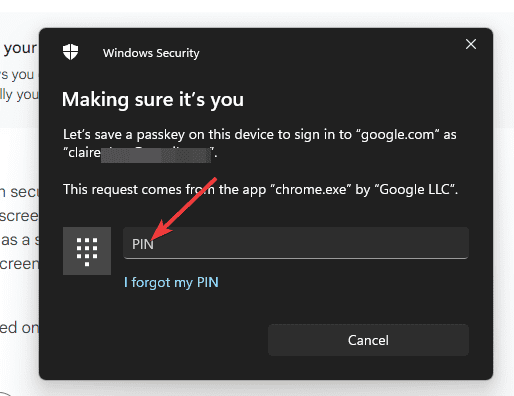
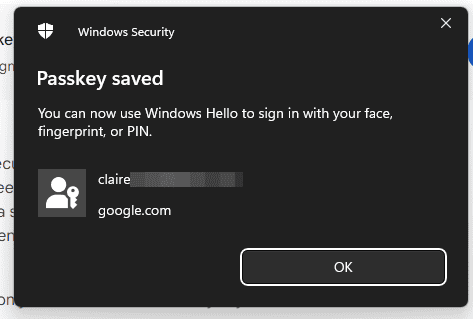
- You’ll be prompted to enter your Windows PIN to verify your identity.
- You’ll get a confirmation that your passkey has been successfully set and your new device will be listed under the passkey list.
- You can test whether the passkey is working by logging out and logging back in.
2. Opt out of Google Passkeys
- Navigate to your browser and sign into your Google account.
- Go to Security Settings > Security.
- Select Passkeys under how to sign in.
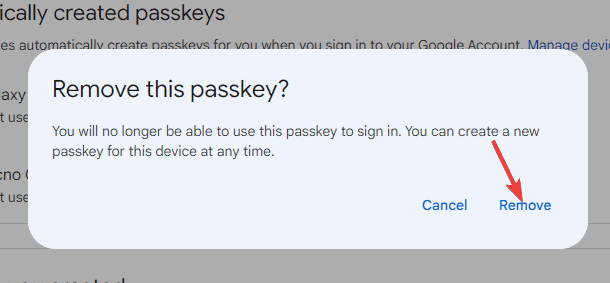
- Under created passkey, select the X mark then hit Remove to confirm.
For Android devices, Passkeys are created automatically the first time you sign into your Google account.
Troubleshooting common setup issues with Google Passkeys
- Error setting up – If you encounter issues setting up, your device probably doesn’t meet the minimum system requirements. Check the server status and try later.
- Device sync issues – Google sometimes goes out of sync when you’ve not logged on for a substantial amount of time. Log back into that device to activate your session and these issues should be resolved.
- Authentication failure – If your chosen authentication uses biometrics and it fails, your hardware is probably the issue. Clean your camera and move to a well-lit room or clean your screen where you need to place your fingerprint. For Windows users, check if the biometric service has failed.
Passkeys are not a preserve of Google and its products. You can also use passkeys on Windows 11 if you want seamless sign-ins.
Finally, if you don’t like passkeys, you can go back to the traditional method of signing in with a password. However, make sure to regularly check whether your passwords have been compromised to reduce the risk surface area.
Have you used passkeys before? How convenient were they? Would you create passkeys for all your devices? Let us know in the comment section below.




User forum
0 messages