Unlock Excel Sheet Without Password: 4 Proven Ways
![]() 8 min. read
8 min. read
![]() Updated on
Updated on
Share this article
Improve this guide
Read our disclosure page to find out how can you help Windows Report sustain the editorial team. Read more
Want to learn how to unlock an Excel sheet without a password in case you forget it?
Microsoft Excel workbooks and worksheets come with individual protection features. They prevent unauthorized users from editing or making structural changes to the content. Also, if you’ve used the workbook encryption functionality, you might not even open it without a password.
So, if you’ve misplaced the password or the file got corrupted and no longer accepts the right passphrase, you can take a few steps to recover your data.
I’ve tested the following password-unlocking methods and outlined the exact steps you need to follow to access your data quickly.
 NOTE
NOTE
How To Unlock Excel Sheet Without Password
Before moving ahead with the instructions, you should know about some of the limitations:
- Using a third-party password-finding app comes with the risk of making confidential data public. Don’t use any such programs if your datasets require absolute secrecy.
- It’s highly likely you won’t be able to unlock the Excel workbook without a password if the encryption has been implemented using the Tools menu.
- Editing the XML files poses a higher risk of corrupting the entire workbook if you make any changes outside the steps mentioned here.
If you’re okay with the above risks and shortcomings, follow along:
With an Excel Password Recovery Tool
This is the easiest and most intuitive method to unlock an Excel sheet without a password. If you’re okay with uploading your workbook to a third-party server, follow these steps:
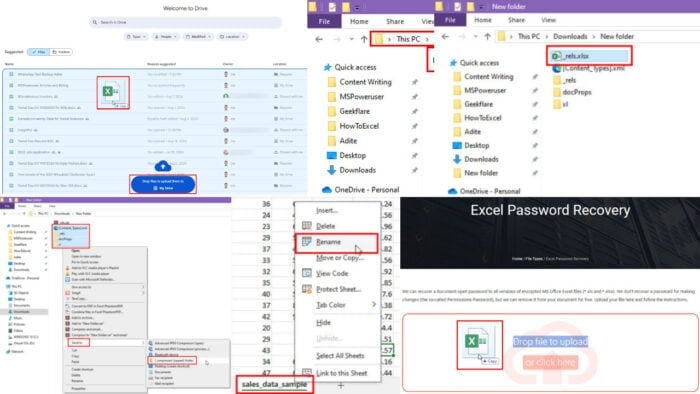
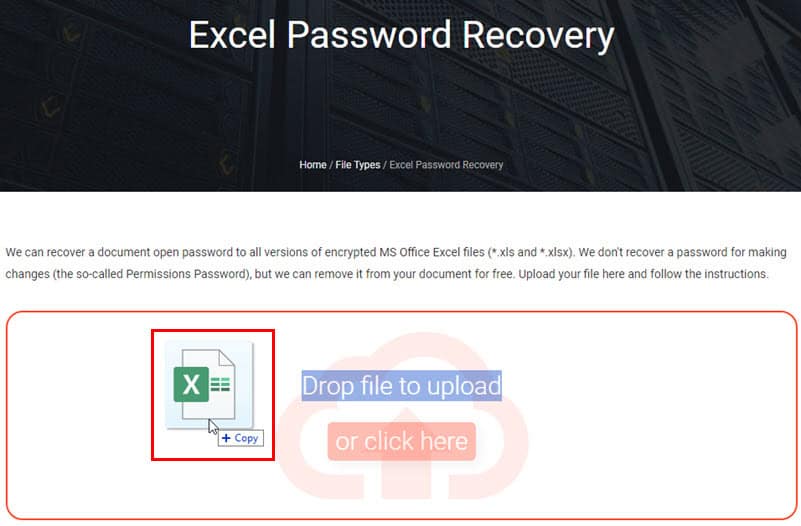
- Visit the Excel Password Recovery app by LostMyPass.
- Interact with the reCAPTCHA challenge to enable the file uploader.
- Drag and drop the Excel file into the appropriate field.

- If the uploaded workbook only contains passwords for the Protect Sheet and Protect Workbook commands, the web app will quickly unlock the file.
- You should see the following screen next: Success! The document is unlocked.
- Click on the Download Unlocked File button to get the unprotected file.
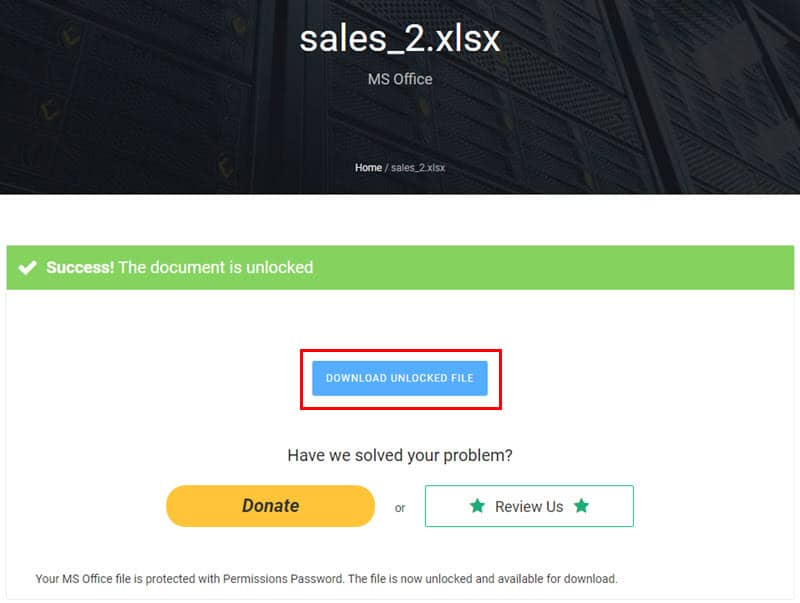
You can now freely edit the worksheet contents or change the workbook structures.
I also tested the app with an Excel workbook protected with file access encryption. You usually add this lock from the Save As dialog box, by clicking the Tools option at the bottom, near the Save button.

This protection prevents you from opening the file as well as making the workbook read-only.
So, when you upload this type of workbook, LostMyPass uses the Weak password recovery algorithm. It runs through all possible password combinations.
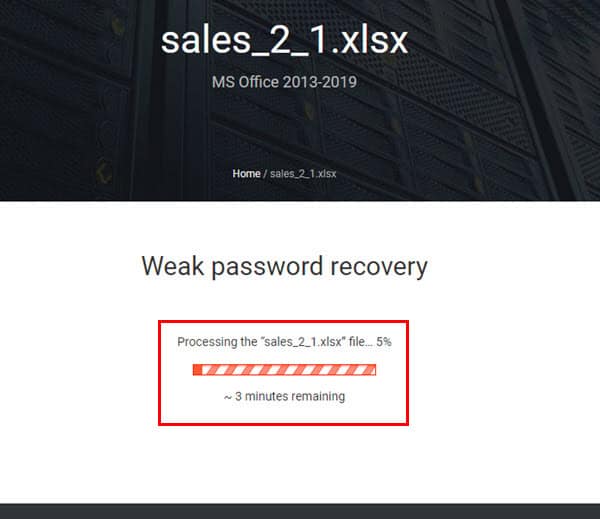
The password I used for the test file was 12345. The program unlocked that in less than a minute.
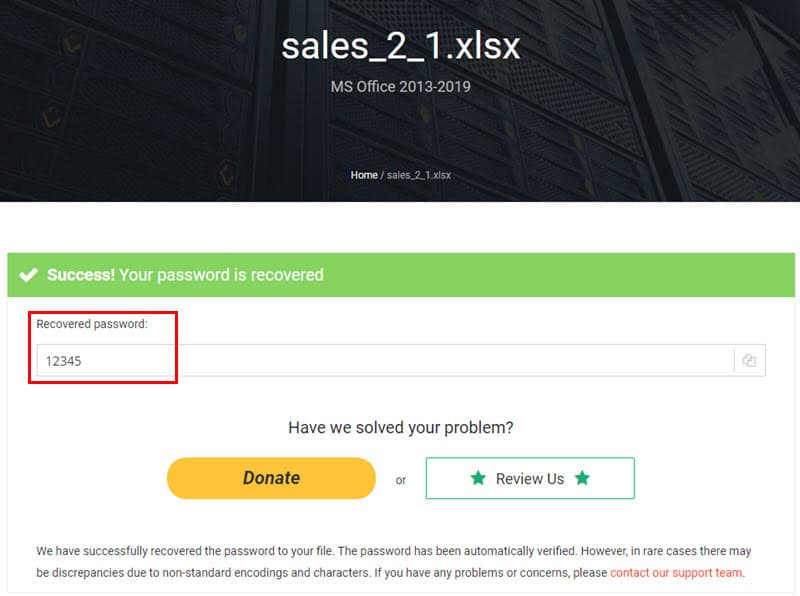
Moreover, LostMyPass appears to be an HTTPS site. It means the tool encrypts data at rest or in transit.
Using Google Drive
When you need to unlock a confidential worksheet with Protect Sheet and Protect Workbook locks, you can use Google Drive. It’s more secure than random third-party apps. Let’s look at the steps:
- Go to Google Drive.
- Drag and drop the source workbook on the home screen.
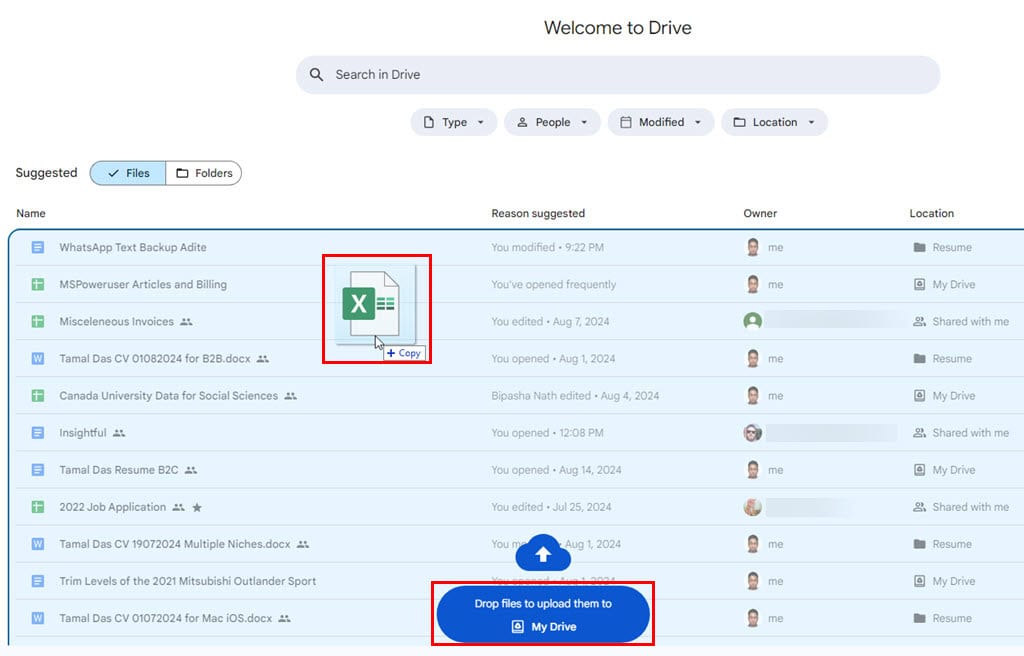
- The 1 upload complete message will pop up in the bottom right corner.
- Click on the file name.
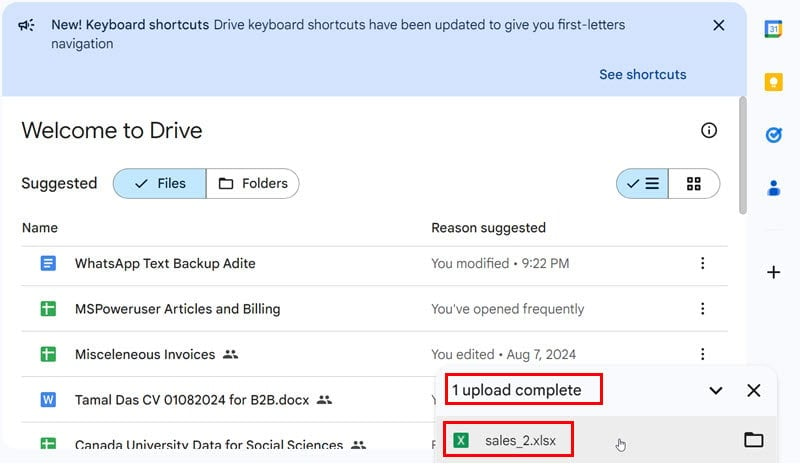
- Google Drive will open the file in Google Sheets.
- You can now edit the sheets as well as workbook structures.
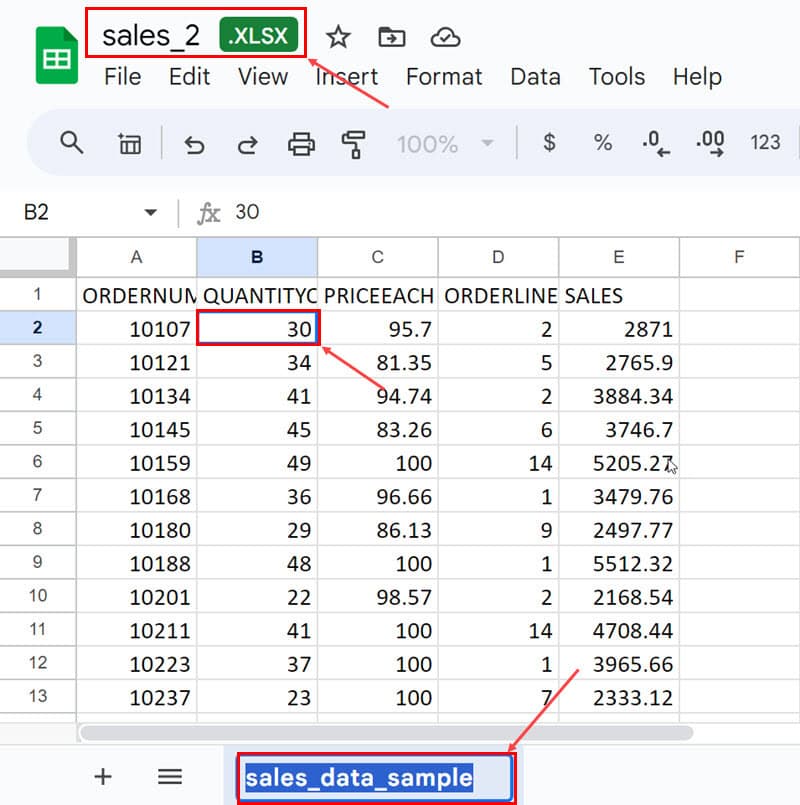
- Now, click the File menu in the top left corner and hover the mouse cursor over the Download menu.
- Select Microsoft Excel from the overflow menu.
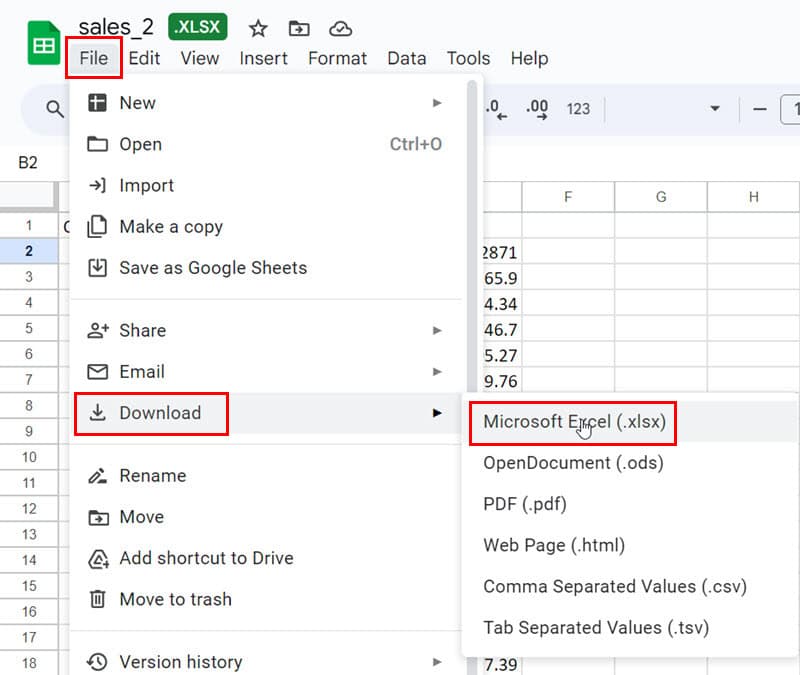
Your web browser will download a copy of the Google Sheets file in the XLSX format. You can now edit the Excel workbook or worksheet the way you like.
This method won’t work if the source Excel workbook was saved as access-protected.
Using XML Editing
If you don’t want to use any third-party programs to unlock an Excel sheet without a password, you can try this approach. This is completely offline and performed on the local PC without leaving any online traces.
Remove Protection from a Worksheet
- Create a New folder anywhere on your PC.
- Copy and paste the source Excel workbook into this folder.
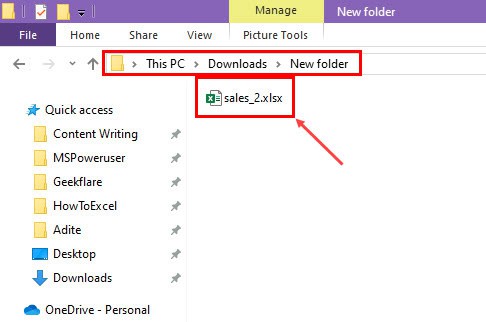
- Now, select this file inside the New folder and press Alt + Enter.
- The File Properties dialog box will open.
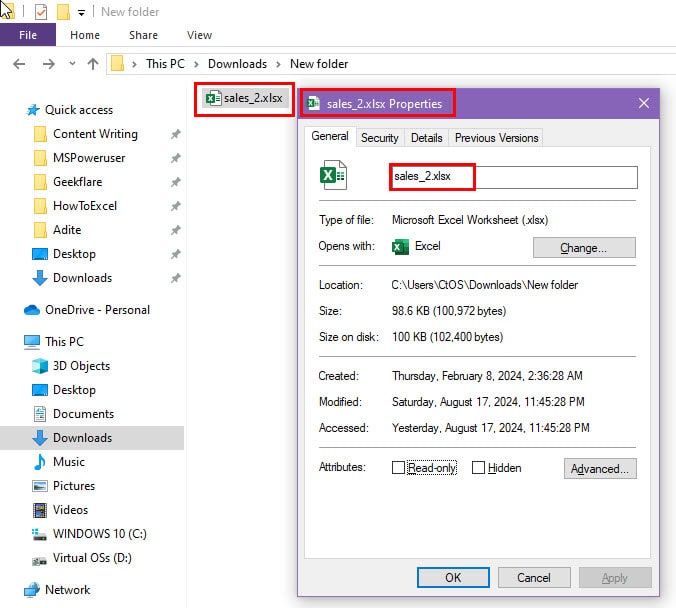
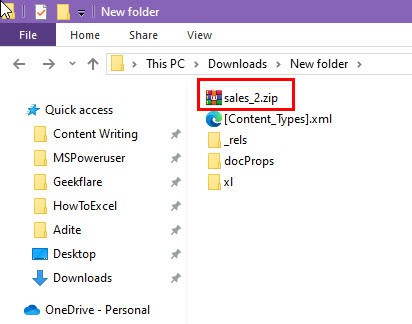
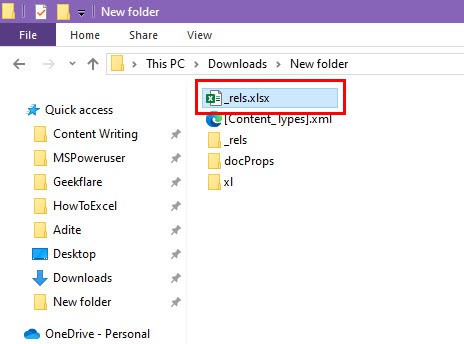
- Click on the file extension name in the General tab and change it to ZIP.
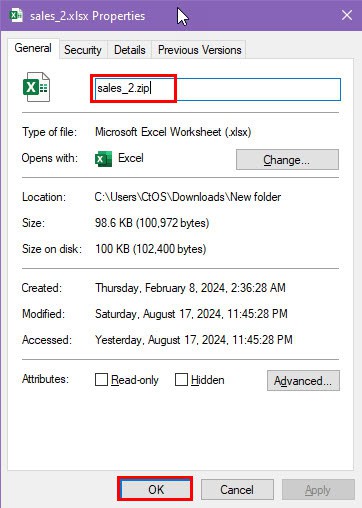
- Select OK and click Yes on the warning pop-up.
- Extract the file using WinRAR, 7-Zip, or Windows ZIP file uncompressing tool.
- A few new folders and files will appear.
- Delete the source ZIP file.
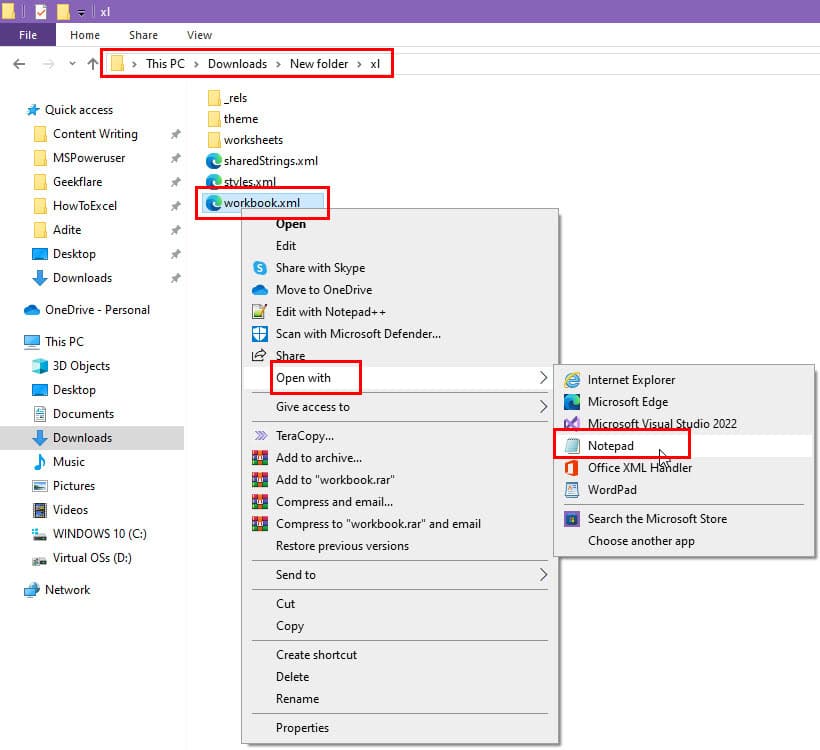
- Go to the xl directory.
- Now, access the worksheets folder.
- Here, you’ll see the XML files for all the worksheets of the source file.
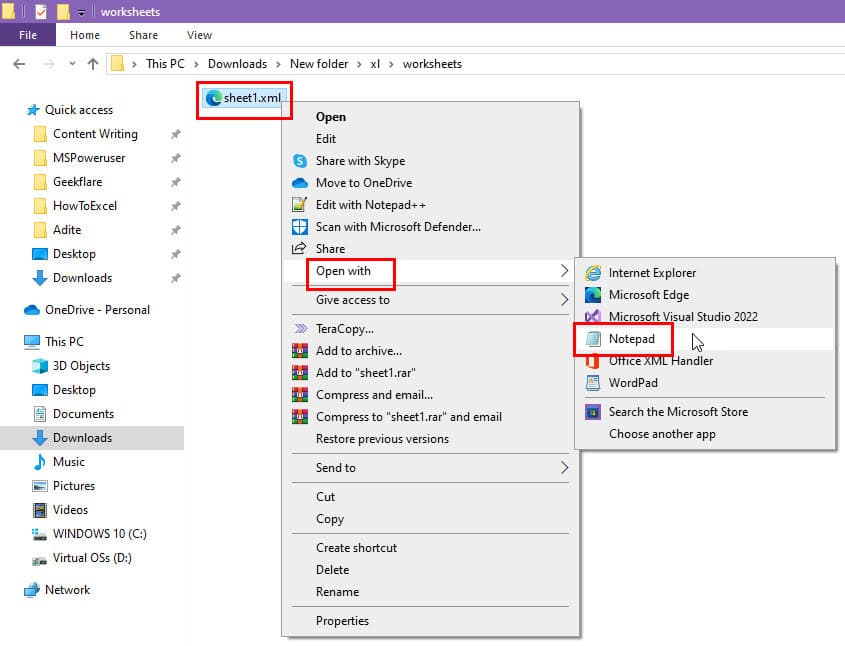
- Select an XML file here, like sheet1.xml, right-click, and choose Open with Notepad.
- Now, search for the
sheetProtectioncode in the Notepad file that opens.
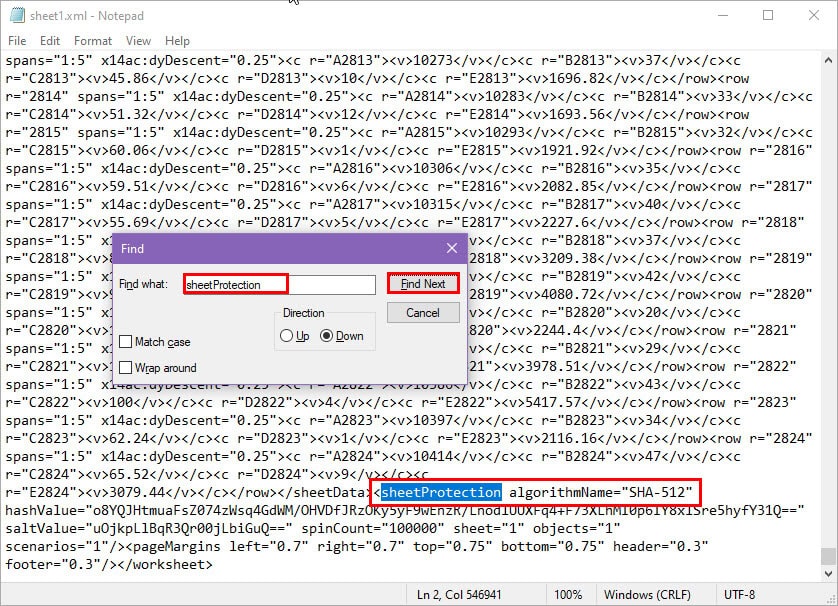
- The
sheetProtectioncode along with its helper components will be closed within these brackets<>. - So, select the entire code line as shown below and hit Delete.
<sheetProtection algorithmName="SHA-512" hashValue="o8YQJHtmuaFsZ074zWsq4GdWM/OHVDfJRzOKy5yF9wEnzR/LnodlUUXFq4+F73XLhMI0p6IY8xlSre5hyfY31Q==" saltValue="uOjkpLlBqR3Qr00jLbiGuQ==" spinCount="100000" sheet="1" objects="1" scenarios="1"/>- Press Ctrl + S to save the Notepad file.
- Now, close the Notepad file and go back to the New folder.
- Select all the files and folders in that directory, right-click, hover over Send to, and select Compressed (zipped) folder on the overflow menu.
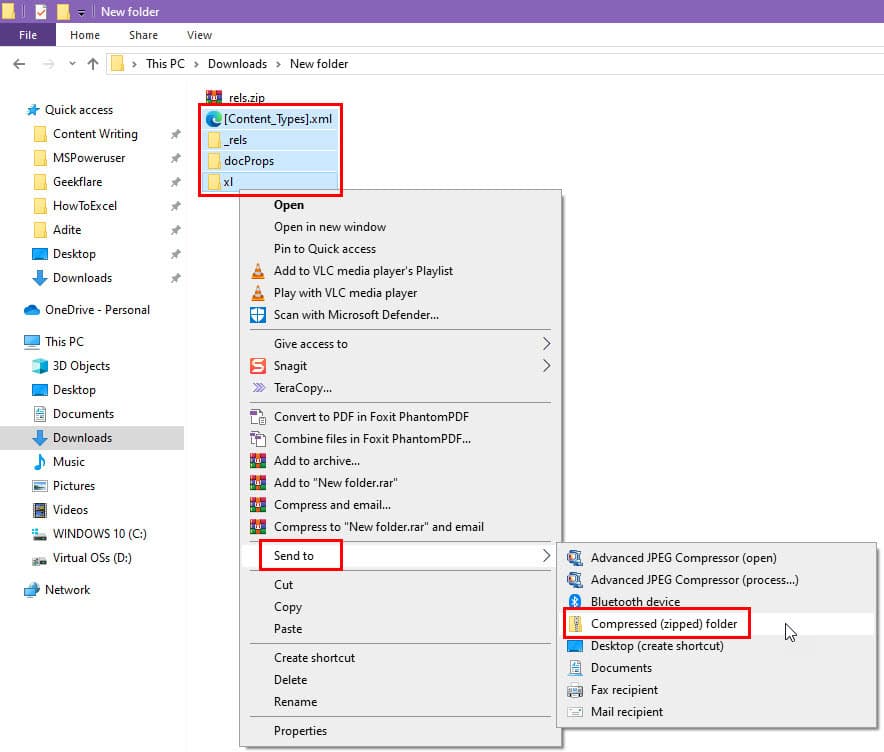
- You must create a ZIP archive. If you’re using WinRAR, don’t create a RAR archive. It won’t work.
- Now, change the file extension to XLSX.
- Double-click the file to open the unlocked worksheet.
Remove Protection from a Workbook
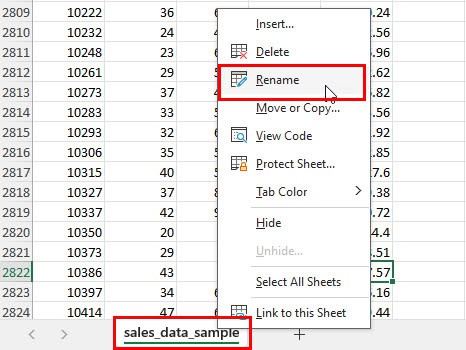
If you’re unable to rename a worksheet or add more to an Excel file, the Protect Workbook feature is active. Here’s how to remove that so you can change the workbook structure:
- Follow all the steps mentioned in the above method until you reach the xl directory.
- There, select the workbook.xml file and open it in Notepad.
- Now, look up the
workbookProtectioncode line.
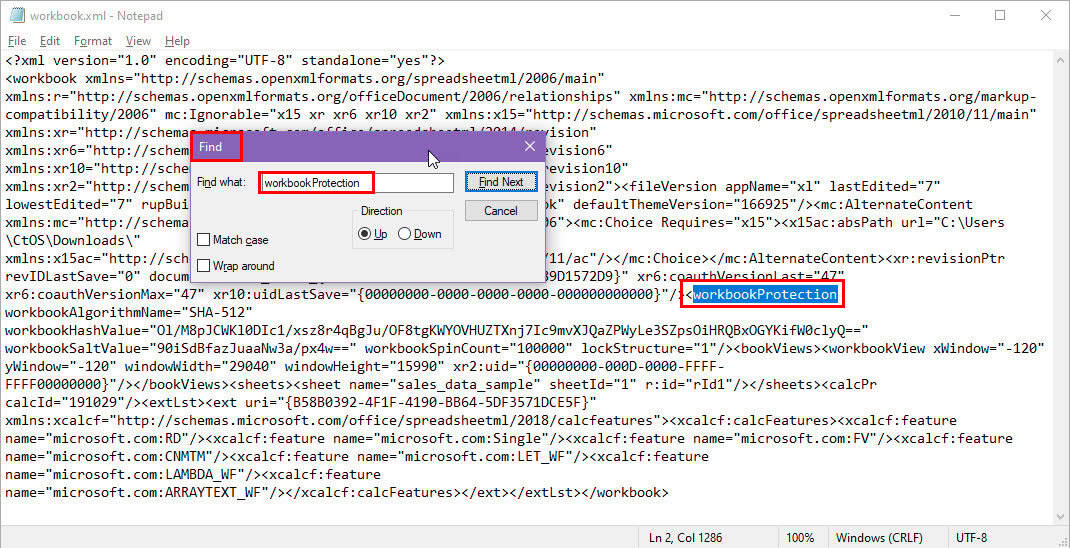
- Delete the following code from the Notepad:
<workbookProtection workbookAlgorithmName="SHA-512" workbookHashValue="Ol/M8pJCWKl0DIc1/xsz8r4qBgJu/OF8tgKWYOVHUZTXnj7Ic9mvXJQaZPWyLe3SZpsOiHRQBxOGYKifW0clyQ==" workbookSaltValue="90iSdBfazJuaaNw3a/px4w==" workbookSpinCount="100000" lockStructure="1"/>- Save the file.
- Now, follow all the steps from 18 to 22 as outlined above.
Now, you’ll be able to rename, add, and remove sheets.
With a VBA Macro
By using this approach, you can unlock an Excel sheet without a password using a script. You’ll only need to run a VBA macro which will look up the password and disable it.
- Open the source workbook and navigate to the sheet that’s locked.
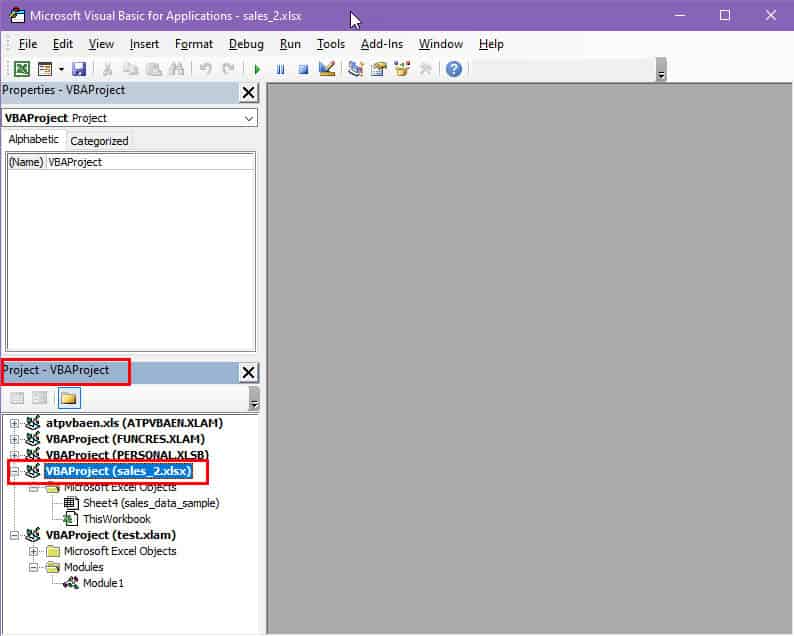
- Now, press Alt + F11 to bring up the Excel VBA Editor interface.
- Select the appropriate workbook in the Project column on the left-side navigation panel.
- Click on the Insert button in the VBA Editor toolbar and choose Module.
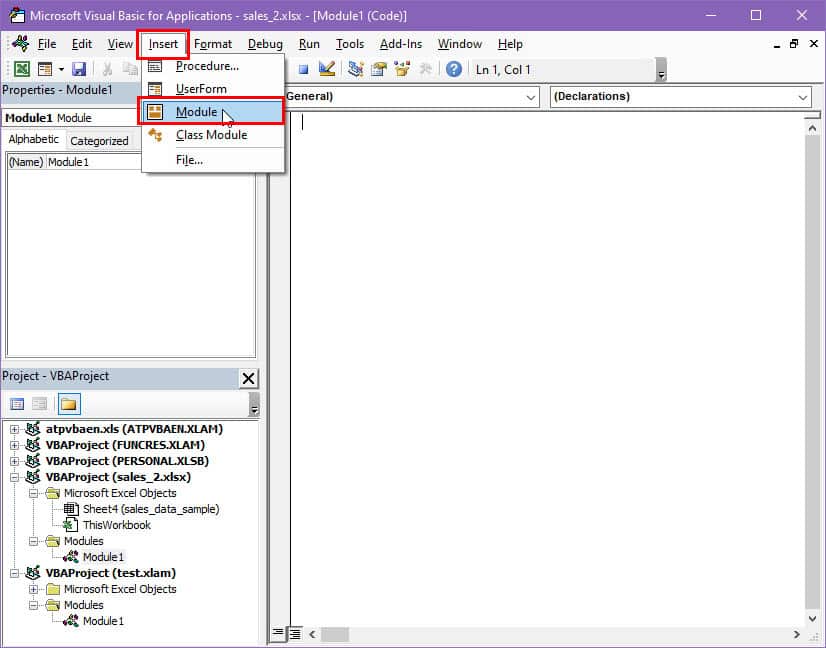
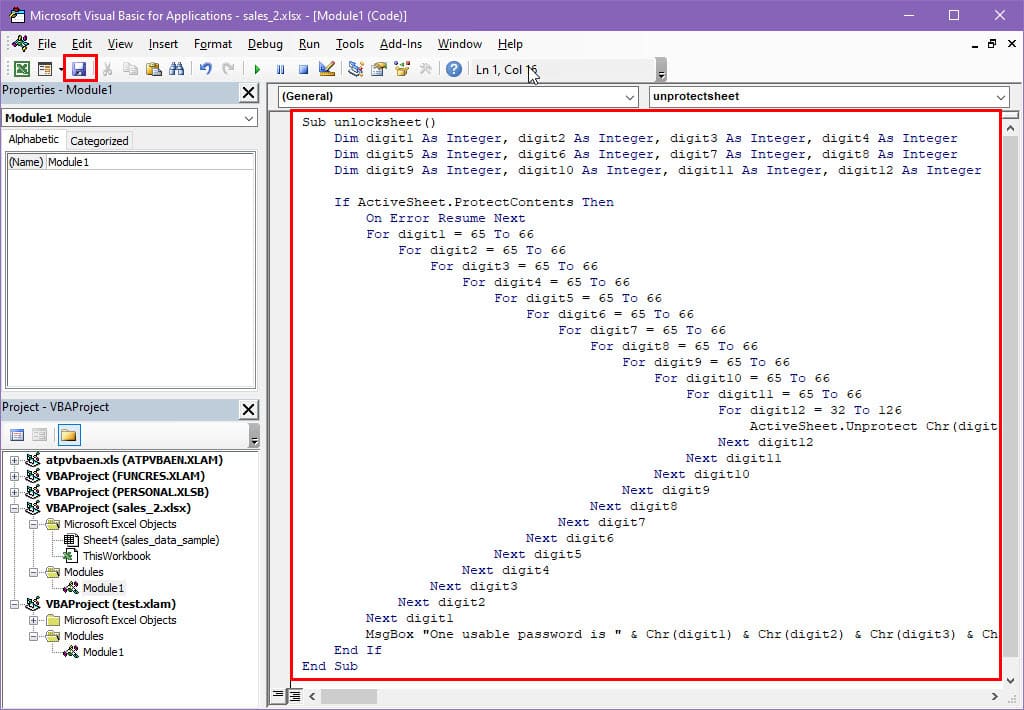
- In the blank module, copy and paste the following VBA script:
Sub unlocksheet()
    Dim digit1 As Integer, digit2 As Integer, digit3 As Integer, digit4 As Integer
    Dim digit5 As Integer, digit6 As Integer, digit7 As Integer, digit8 As Integer
    Dim digit9 As Integer, digit10 As Integer, digit11 As Integer, digit12 As Integer

    If ActiveSheet.ProtectContents Then
        On Error Resume Next
        For digit1 = 65 To 66
            For digit2 = 65 To 66
                For digit3 = 65 To 66
                    For digit4 = 65 To 66
                        For digit5 = 65 To 66
                            For digit6 = 65 To 66
                                For digit7 = 65 To 66
                                    For digit8 = 65 To 66
                                        For digit9 = 65 To 66
                                            For digit10 = 65 To 66
                                                For digit11 = 65 To 66
                                                    For digit12 = 32 To 126
                                                        ActiveSheet.Unprotect Chr(digit1) & Chr(digit2) & Chr(digit3) & Chr(digit4) & Chr(digit5) & Chr(digit6) & Chr(digit7) & Chr(digit8) & Chr(digit9) & Chr(digit10) & Chr(digit11) & Chr(digit12)
                                                    Next digit12
                                                Next digit11
                                            Next digit10
                                        Next digit9
                                    Next digit8
                                Next digit7
                            Next digit6
                        Next digit5
                    Next digit4
                Next digit3
            Next digit2
        Next digit1
        MsgBox "One usable password is " & Chr(digit1) & Chr(digit2) & Chr(digit3) & Chr(digit4) & Chr(digit5) & Chr(digit6) & Chr(digit7) & Chr(digit8) & Chr(digit9) & Chr(digit10) & Chr(digit11) & Chr(digit12)
    End If
End Sub- Click the Save button.
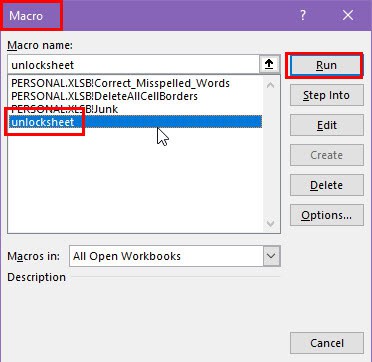
- Now, press Alt + F8 to launch the Macro dialog.
- Select the unlocksheet macro and hit Run.
- It might take up to 30 minutes or more to decode the passphrase.
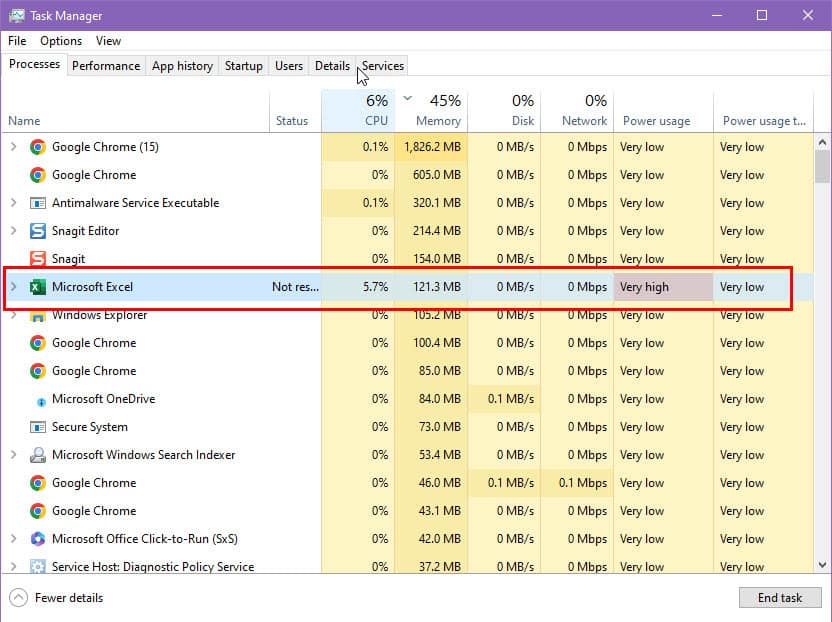
- The Excel app won’t respond when the macro is running.
- You can check the Windows Task Manager process for CPU and Power usage.
- Once the password has been discovered, a dialog box will show up.
- Click OK and then you can edit the worksheet.
Summary
These are some of the methods you can try to unlock an Excel sheet without a password. If you’d like to remove passwords from your Excel file, we also have a guide for that.
Don’t forget to leave a comment below to share which approach you liked the most or if you know a better technique.
We also have troubleshooting guides if you can’t open Excel files by double-clicking them or unlock grayed-out menus.


User forum
0 messages