Easy Ways to Enable the Windows 11 Hidden Administrator Account
Uncover and reveal the high-level admin account
3 min. read
Updated on
Read our disclosure page to find out how can you help Windows Report sustain the editorial team. Read more

Every Windows user is used to the standard administrator account but when you get to exploring, you’ll discover the hidden administrator account and how you can enable it.
So why is it hidden? First, it is to prevent unauthorized access to your PC. Administrator accounts have privileged access to features that standard users don’t so making this available to all and sundry can put your data at risk.
Second, since this admin account operates high-level system operations, it’s best kept hidden to minimize errors for users who don’t understand the implications. Enabling it can increase the surface area attack. It also helps by separating it from regular admin tasks and comes in handy for advanced troubleshooting.
How do I enable the hidden administrator account in Windows 11?
1. Enable the hidden account
- Hit the Windows + R keys to open the Run command.
- Type lusrmgr.msc in the dialog box and hit Enter.
- Select Users on the left pane and double-click on the second Administrator account.
- Uncheck the Account is disabled option then click on Apply and OK to save changes.
Once enabled, go ahead and activate the hidden administrator account using any of the below methods.
2. By using the Command Prompt
- Hit the Windows key, type cmd in the search bar, and click Run as administrator.
- When Command Prompt starts, type the following command and press Enter to run it:
net user administrator /active:yes - Sign out of your current account.
- You should see new Administrator account available. Log in to it.
3. By using the PowerShell command
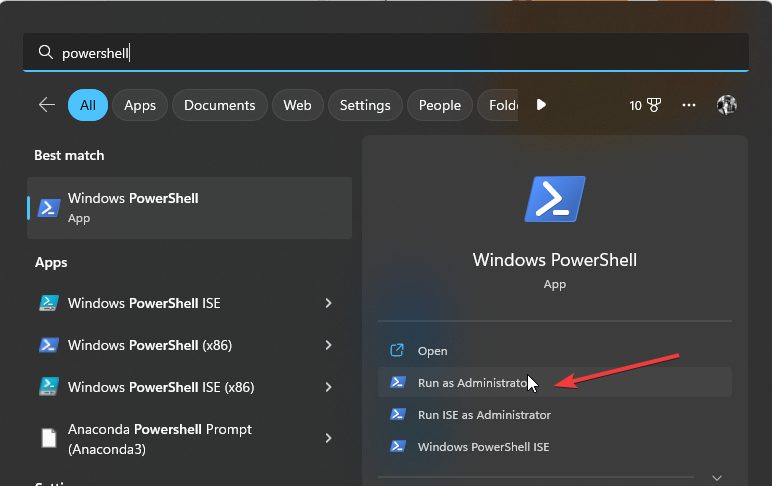
- Hit the Windows key, type Powershell in the search bar, and click Open.
- Type the following command and hit Enter:
Enable-LocalUser -Name “Administrator”
4. By using the Local Policy
- Press Windows key + R and type secpol.msc. Click OK.
- Next, go to Local Policies and select Security Options.
- Navigate to the right pane, right-click on Account: Administrator account status and select Properties.
- Check the Enabled box then click Apply and OK to save the changes.
Because enabling the hidden administrator account on your Windows 11 can be risky, you need to know your way back to minimize this risk. To disable it, simply reverse engineer the above steps.
Best practices for managing the hidden administrator account
- Only enable this admin account when necessary. If you’ve accidentally deleted your admin account, try getting it back. Only enable the hidden one for advanced troubleshooting or accessing high-level system files. Once done, disable it.
- Keep an eye on the event viewer for any potential issues when the hidden admin account is enabled. This can hep you identify cropping issues and address them in a timely manner.
- Ensure your system is up-to-date because the hidden admin account is prone to malicious attacks and any vulnerabilities in the system increase the surface area risk.
Aside from enabling the hidden administrator account in Windows 11, you can also change your standard admin account if it’s not working or your user profile is corrupt. If these prove to be problematic, you can delete your admin or local account and start afresh.
That’s all we had for this article but we’d love to hear your experiences with this hidden admin account. Have you enabled it before? What was the reason and any notable differences with the standard admin account? Let us know in the comment section below.


User forum
0 messages