Fix: Your device is being protected error on Windows 10
6 min. read
Updated on
Read our disclosure page to find out how can you help Windows Report sustain the editorial team. Read more
Key notes
- In the security department, Microsoft spared no effort, thus providing reliable native protection solutions. But errors do occasionally occur.
- If your Windows Defender gets blocked with a your device is being protected warning, here's how to tackle it quickly and easily.
- Take a look at our Windows Defender Hub to identify, diagnose, and solve any related issue in no time.
- Make sure you explore our Windows 10 Troubleshooting Hub as well.

Windows 10’s built-in security solutions proved to be rather competitive in the anti-malware market.
In addition to that, Windows Security Center is the hub of everything, from security to maintenance and performance.
But, regardless of its functionality, it’s not flawless. There were recent reports about Windows Defender being stuck at the home screen with the Your device is being protected prompt.
All the options were gone and the only thing the affected user could do is closing the Center/the Defender.
For that purpose, we prepared some solutions which should come in handy. In case you’ve experienced something similar with Windows Security Center and Windows Defender, go through the steps below.
How can I fix Your device is being protected error for Windows Defender?
- Remove the third-party antivirus
- Reset the dedicated service
- Run SFC and DISM
- Update Windows 10
- Turn to recovery options
1. Remove the third-party antivirus
If you decide to use a third-party antimalware tool, the system will disable Windows Defender automatically.
However, Windows Security Center should stay active regardless of whether you run the Defender or the 3rd-party antivirus or not.
On the other hand, there are some reports saying otherwise. Namely, certain multifunctional antivirus suites tend to block the Windows Security Center.
They’re basically similar applications, with a variety of monitoring and maintenance tools included in the suite.
Therefore, chances are that your third-party antivirus solution blocks Windows Security Center. If you, for some reason lean forward to the built-in solution, the best way to avoid this is to uninstall the antivirus completely.
You can do so by following the instructions below:
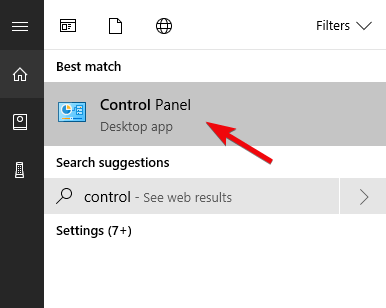
- In the Windows Search bar, type control and open Control Panel.
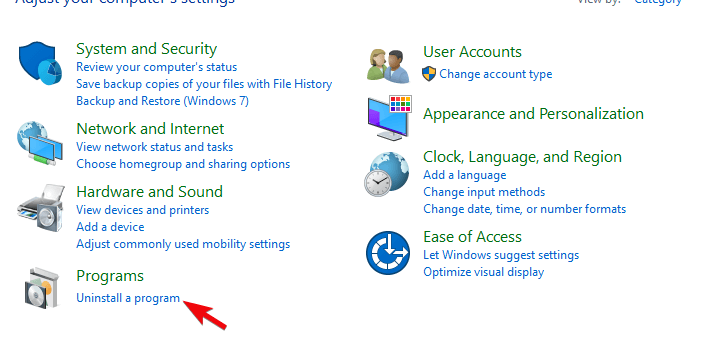
- From the Category view, click Uninstall a program under Programs.
- Right-click on the third-party antimalware solution and Uninstall it.
- Use dedicated uninstaller software to clean all remaining files and registry entries the antivirus made.
- Restart your PC.
- Try opening Windows Security Center again.
It is not mandatory to use uninstaller software, but it surely helps. Removing all leftover files and registry entries will significantly decrease the possibility of getting any more errors.
Plus, this type of utility keeps your system clean. Leftover files are generally small, but they add up and take memory space if you never get a chance to remove them.
Uninstallers are usually very straightforward. Similarly to the Windows uninstaller, it displays a list of all the apps on your PC. You just select it and wait for the process to complete.
2. Reset the dedicated service
As the Windows Action Center and its subsidiary part, Windows Defender, are essential built-in pieces of Windows 10 platform, you can’t reinstall them.
What you can do, when it comes to troubleshooting errors or tackling issues concerning Windows Action Center is resetting its dedicated service. Once you’ve reset the service, Windows Action Center should start working as intended.
You can do so by following the instructions provided below:
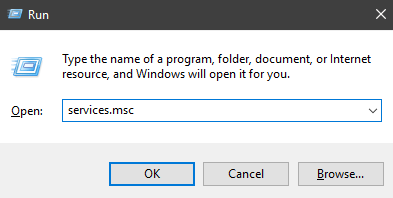
- Press Windows key + R to open the Run command-line.
- In the command line, type services.msc and press Enter or click OK.
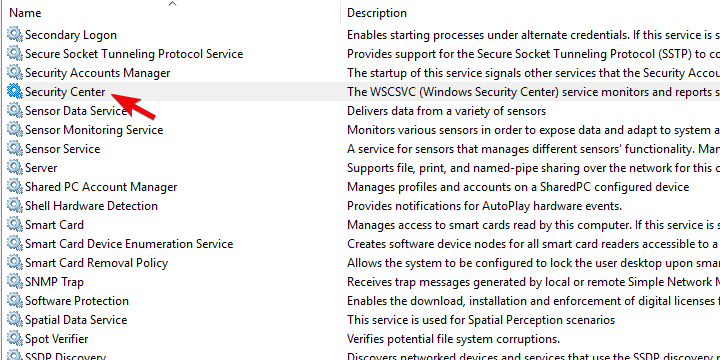
- Navigate to Security Center service, right-click on it, and open Properties.
- Under the General tab, select Automatic as the Startup type.
- If the service is running Stop it and Start it again. If it’s stopped, just start it.
- Confirm changes and close Services.
3. Run SFC and DISM
When an essential system component fails, there’s a chance of system errors. Critical system errors mostly occur due to system files corruption, because of the virus infection or misuse.
However, another major problem lies in major updates that tend to break the system. One way or another, we recommend running 2 in-built system tools in order to possibly address the error at hand.
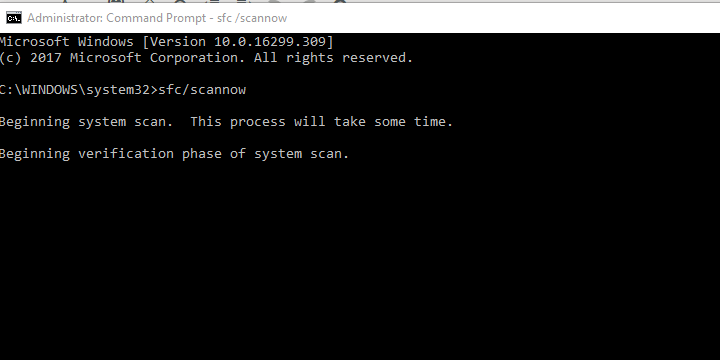
The first tool is System File Checker and its main purpose is to check the integrity of system files and apply fixes if needed. Here’s how to run it in Windows 10:
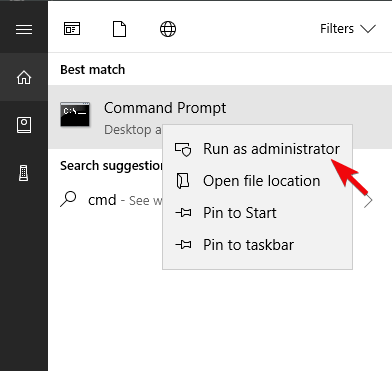
- Type cmd in the Windows Search bar.
- Right-click on Command Prompt and run it as administrator.
- In the command line, type sfc/scannow and press Enter.
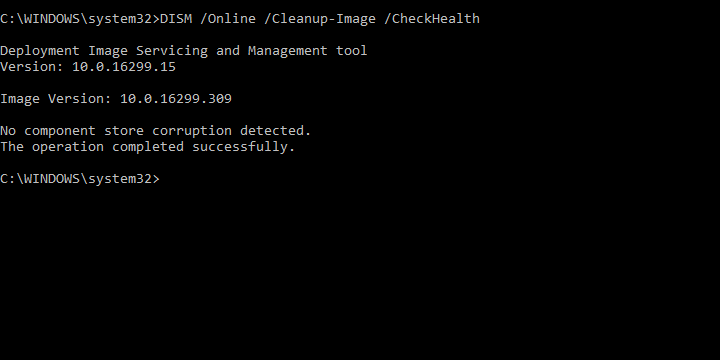
On the other hand, the Deployment Image Servicing and Management tool is similar but a step up in comparison to SFC.
It uses Windows servers to download the missing or corrupted system files. As same as SFC, it runs through Command Prompt, and these are the steps you should follow to run it in Windows 10:
- Open Command Prompt with administrative permissions.
- In the command line, type the following commands and press Enter after each:
- Wait until the scan/repair procedure ends.
4. Update Windows 10
We already stressed the negative impact certain updates have had on Windows 10. Luckily, due to the reports via Feedback Hub, a lot of major system issues were resolved in short terms.
Therefore, we suggest updating the system as soon as possible. This especially applies to Windows Insiders which run into similar errors frequently.
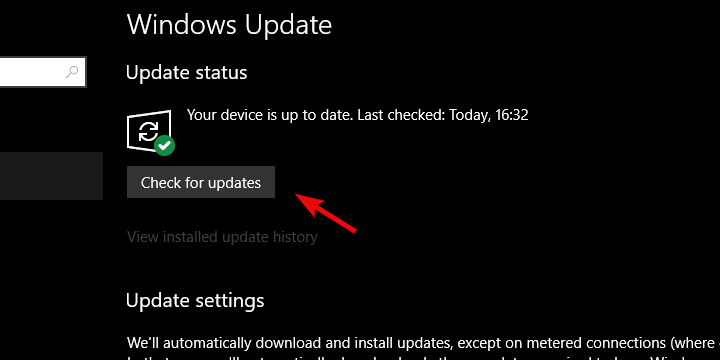
As we all know, the updates are distributed automatically on Microsoft’s latest system iteration. On the other hand, you can check for available updates manually by following these steps:
- Right-click Start and open Settings.
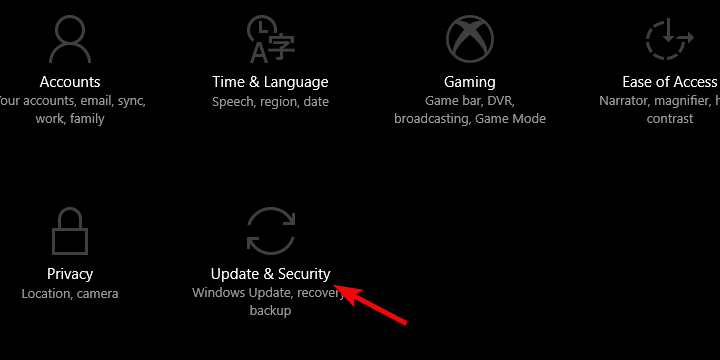
- Choose Update & Security.
- Under Windows Update, click on the Check for updates button.
5. Turn to recovery options
Finally, if none of the previous steps provides the definitive solution for the issue at hand, recovery options are the only thing crossing our mind.
You can use the System Restore option to roll back, but this only works if you’ve set restore points previously. Our go-to solution in these scenarios is the factory reset.
You get to preserve your files and apps while you also get to renew the system. The clean system reinstall has its advantages, but this recovery is probably the most compromising one.
You can reset your PC to default values by following the steps we provided below:
- Firstly, it’s essential to back up your data on an alternative partition or cloud storage.
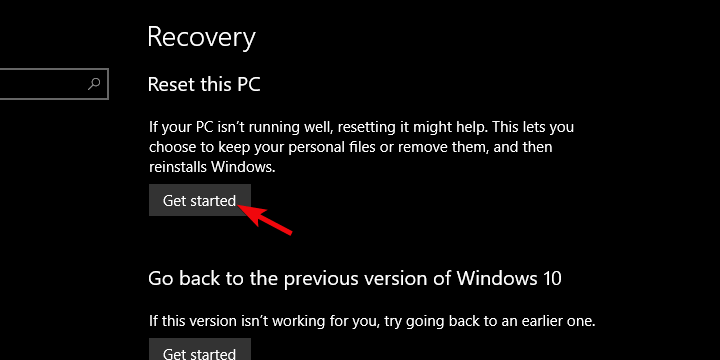
- Once you’ve done that, press Windows key + I to open the Settings app.
- Open the Update & security section.
- Select Recovery in the left pane.
- Click on the Get Started button under the Reset this PC section.
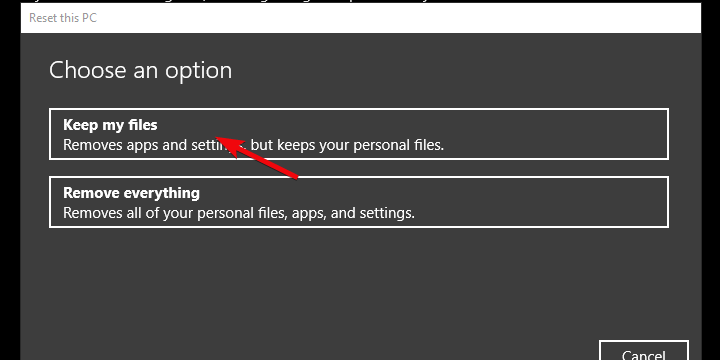
- Choose to Keep your files and click Next.
That’s a wrap-up. If you still have the same issues, the only remaining solution is starting from scratch with a clean reinstall.
In case you get hold of an alternative workaround for the Windows Defender issues, feel free to share it with us in the comments section below.



User forum
0 messages