NVIDIA driver update failed / BSoD error [Complete Fix]
5 min. read
Updated on
Read our disclosure page to find out how can you help Windows Report sustain the editorial team. Read more
Key notes
- When the latest NVIDIA driver update generates a BSoD, some users choose to rollback to other previous versions.
- However, you can still have a great experience with the new version if you perform a clean reboot in Safe Mode first.
- This can also require uninstalling any graphics drivers you may have on your PC. See how you can do it in the guide below.
- Another solution for this issue is to use an advanced tool to update drivers automatically.
One of the most common issues upon the release of the latest NVIDIA GPU drivers is the recurrence of the Blue Screen of Death error on Windows 10.
Most users claim that once they installed the new patches for the Nvidia drivers they get the BSoD right after they restart their computer.
The latest update from NVIDIA is also aimed at the gaming community, and it’s meant to provide the best experience regarding a variety of games including the ones developed on VR technology.
This Game Ready driver includes the latest GameWorks VR tweaks, errors, bug fixes, and optimizations to ensure your gaming sessions go smoothly.
What can I do if the NVIDIA driver update failed?
1. Roll back drivers in Safe Mode
1.1. Roll back drivers manually
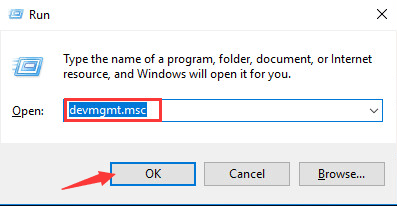
- Press Windows + R hotkeys at the same time to open the Run dialogue box
- Type devmgmt.msc and click OK, this will open Device Manager.
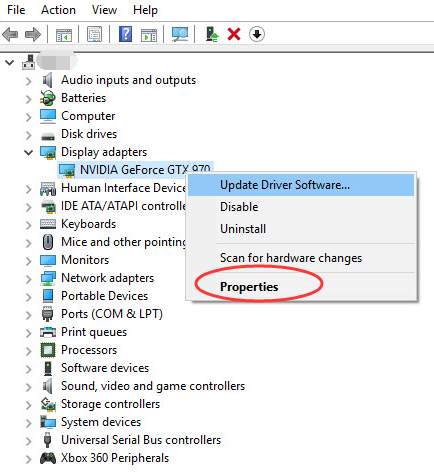
- In the Device Manager menu click Display adapters and right-click Nvidia graphics card device, select Properties.
- Click the Driver tab. Then click Roll Back Driver.
- A pop-up message box will appear asking if you want to roll back the Nvidia drivers to a previous version, click Yes.
- Restart PC.
A user who had driver-related problems in Windows 10 reported the BSoD errors right after they updated the drivers and they needed to restart their device.
If the Nvidia driver update failed, that can also mean that the NVIDIA driver is not compatible with your Windows version.
One solution is to downgrade the drivers in Safe Mode to a previous version and you can do this easily by following the steps above.
1.2. Uninstall and reinstall drivers automatically
- Download Display Driver Uninstaller and make sure that you have the latest NVidia driver pack downloaded onto your computer.
- Go to the DDU icon on your desktop and run the installation wizard on your computer.
- When you are required to choose the Launch Option, select Safe Mode and click Reboot to Safe Mode.
- Upon restart you may get an error that says This app can’t open, click close.
- On the DDU menu that appears on your screen select deleting your NVidia drivers. Afterward, select Clean and Restart.
- Click on the NVidia drivers icon on your desktop and select Uninstall.
- Go to the NVidia site and perform a clean installation of the graphics drivers.
If you encounter the BSoD error after the NVidia driver update in Windows 10, performing a Clean Graphic Cards Drivers installation will definitely help you solve it.
Start off by uninstalling all of your graphics drivers with the Display Driver Uninstaller tool, and after rebooting download the latest version of the NVIDIA drivers as we’ve shown you above.
If you can’t download your graphics card drivers, you might need to perform certain actions like the ones presented in this user-friendly guide on what to do if you can’t download NVIDIA drivers on Windows 10.
2. Update drivers automatically
After you finish uninstalling the driver, the system will automatically install a default one, but when it comes to graphics drivers, you want the exact driver for your device.
You can start looking for drivers on the NVIDIA website but that can be time-consuming and tricky if you don’t get things exactly right.
You may as well update your device with professional software that will start updating your device as soon as you install it. With this excellent tool, you can be sure you’ll never miss any other important updates.
This solution has a large daily-updated driver database, so it will propose the most recent drivers available after scanning your system.
You will also receive a comprehensive report detailing the exact condition of your Windows 10’s missing, damaged, or obsolete drivers. You may rely on Outbyte Driver Updater to make such changes to ensure a proper update with the most recent graphics card drivers.
3. Install the latest version of BIOS
- Type msinfo into the Windows search bar in order to find out what version of BIOS you are using. Write down the version number and date
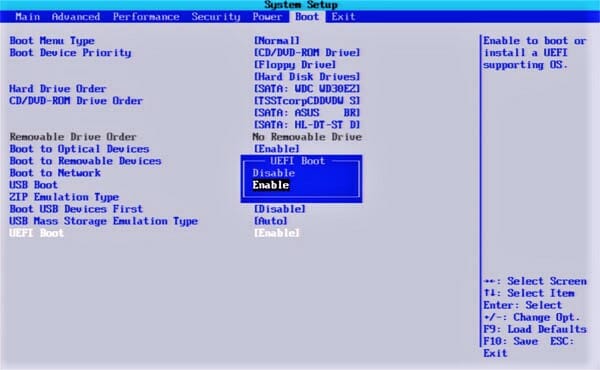
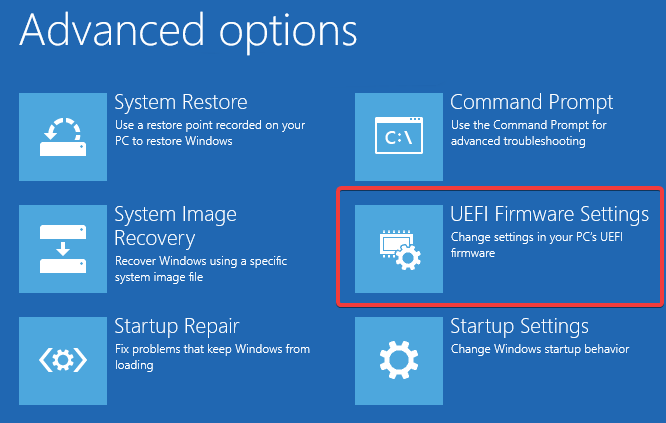
- Boot your PC and enter UEFI BIOS.
- Go to the motherboard’s official page and find the latest BIOS update.
- Download the BIOS update file onto your computer.
- Transfer the update file onto a USB flash drive.
- Reboot your PC into the UEFI control panel.
- Launch the UEFI’s firmware update tool and create a backup of your existing firmware to your flash drive. (just in case something goes wrong)
- Use the UEFI utility to select the new firmware image you saved on the flash drive.
- Run the firmware update utility. Once the update process is over, restart your PC.
Certain users also stated that installing the latest version of BIOS helped solve the issue they had with the occurrence of the BSOD error after the NVidia driver update failed.
As you can see there are various ways to perform an NVIDIA driver update in Windows 10 so you can be sure that you won’t encounter those BSoD crashes.
We also recommend that you take a look at this article that focuses on how to solve the most common BSOD problems that occur in Windows 10.
Which solution turned out to be the best for you? We’d like to hear more from you on this matter, so leave us a comment in the dedicated section below.



User forum
0 messages