Failed to Connect to a Windows Service: How to Fix it
Disconnect non-critical peripherals and restart the PC
4 min. read
Updated on
Read our disclosure page to find out how can you help Windows Report sustain the editorial team. Read more
Key notes
- The Failed to connect to a windows service error is usually caused by another conflicting service or misconfigured settings.
- A quick solution is to disable UAC and fast startup.
- For advanced users, modifying the Registry should do the trick.
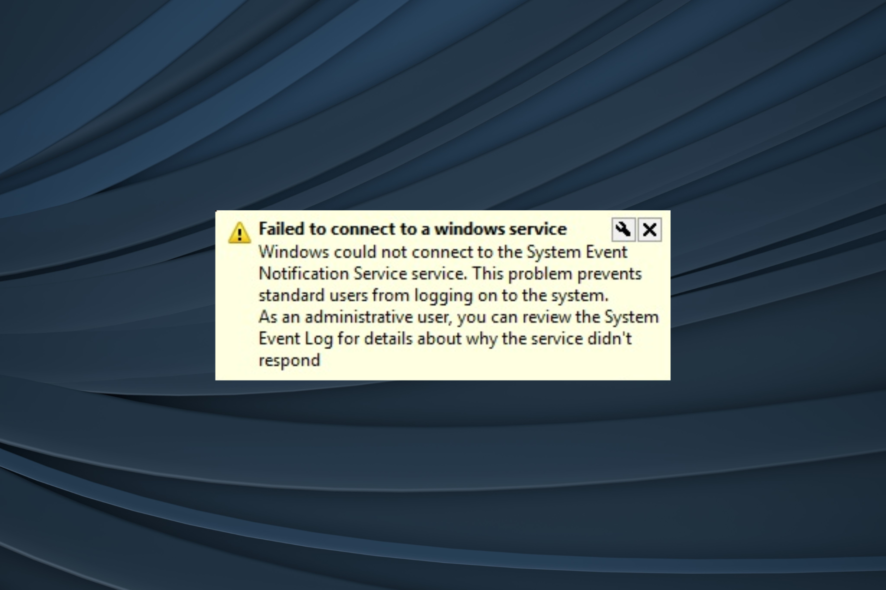
Services are a crucial part of every Windows 10. However, some service-related issues can occur from time to time. Many reported the Failed to connect to a Windows service error message on Windows 10.
It affects a wide range of services and can lead to issues with the automatic startup, thus affecting the related functionality. So, let’s find out how you can get things up and running when a Windows service failed to start.
How do I fix Failed to connect to a Windows service error?
Before we head to the slightly complex solutions, try these quick ones first:
- Restart the computer. If a quick reboot doesn’t do it, disconnect the headphones or earphones and then try again.
- Disable UAC in Windows and verify whether the Windows could not connect to the System Event Notification Service error disappears.
- Turn off fast startup and check for any improvements.
- If you have Soluto or Bing Bar, uninstall the programs.
- Boot Windows into Safe Mode. In case the Failed to connect to a Windows service error is fixed, it’s a third-party program, driver, or service triggering the issue. Identify the problematic one and take the necessary action.
If none work, head to the fixes listed next.
1. Use netsh winsock reset command
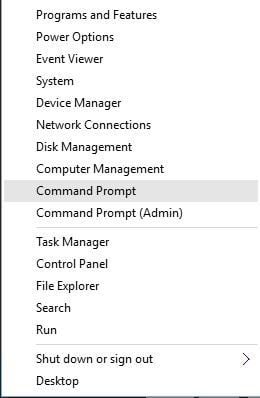
- Press Windows + X and choose Command Prompt from the menu.
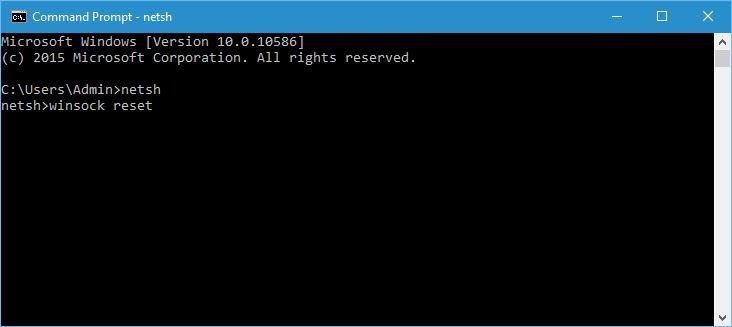
- Type the following command and press Enter:
netsh - Now, execute the following command:
winsock reset - Once done, restart your computer and check if the issue is resolved.
To fix the Failed to connect to a Windows service error in Windows 7 or Windows 10, you need to reset the network settings and configuration. This could be done both via Settings and the Command Prompt.
2. Modify the Registry
- Press Windows + R, type regedit, and then click OK.
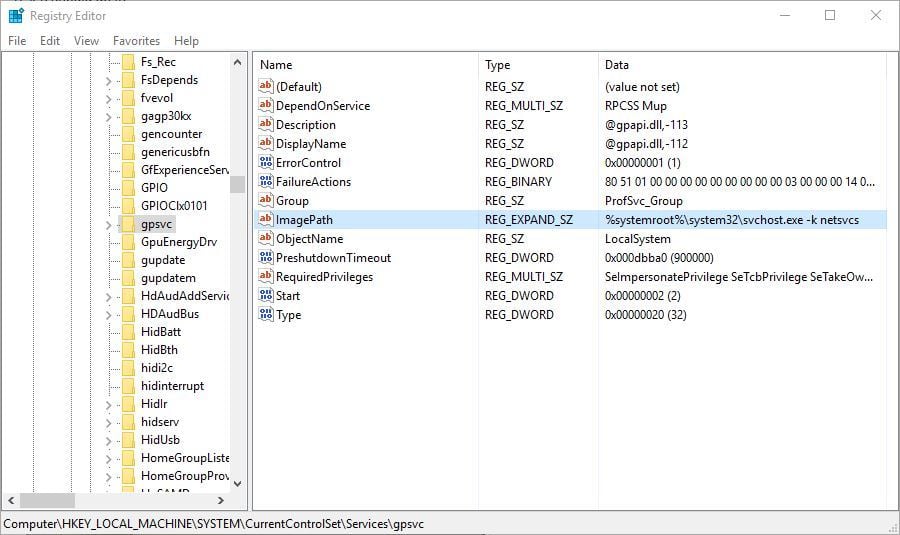
- Now, navigate the following path: HKEY_LOCAL_MACHINE\SYSTEM\CurrentControlSet\Services\gpsvc
- Locate the ImagePath string, double-click on it, and check the Value data. If it’s set to svchost.exe -k netsvcs, this means that svchost and netsvcs keys are in charge of this service.
- On the left pane, navigate to:
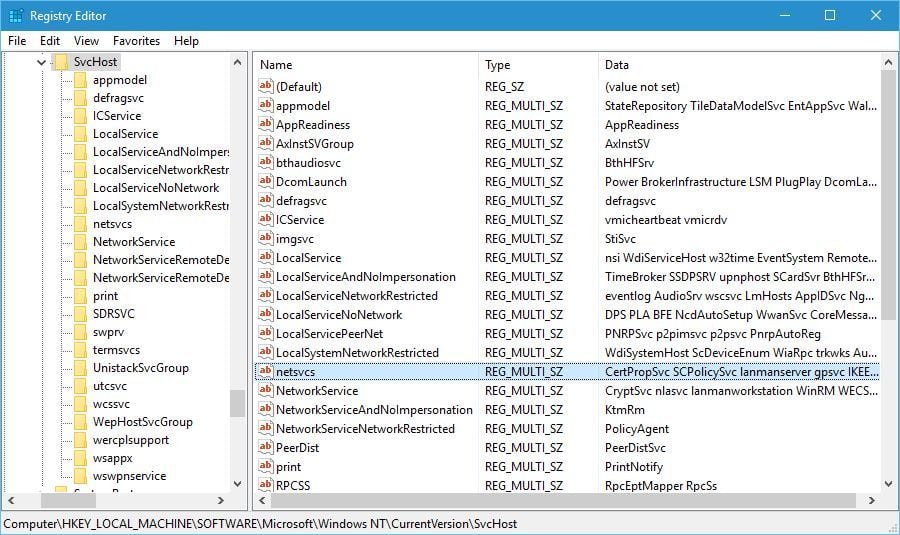
HKEY_LOCAL_MACHINE\SOFTWARE\Microsoft\Windows NT\CurrentVersion\SvcHost - Locate netsvcs on the right pane and double-click it.
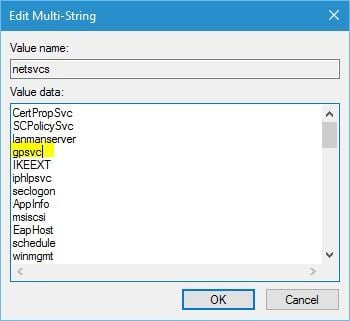
- Check the Value data field. If gpsvc is missing, make sure to add it. Do not delete anything from the list, just add gpsvc if it’s missing.
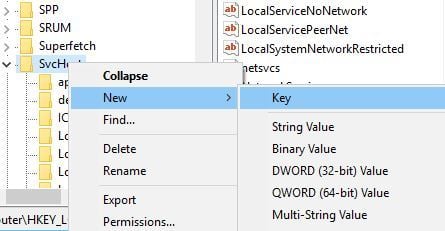
- If the netsvcs key is not available under the SvcHost in the left pane, you need to create it manually. Right-click on SvcHost, choose New, select Key, and name it netsvcs.
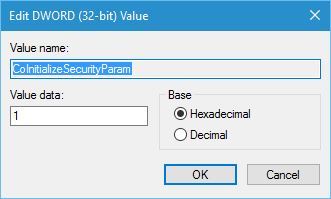
- Select the netsvcs key you just created, right-click on empty space, hover the cursor over New, select DWORD (32-bit) Value, and name it CoInitializeSecurityParam.
- Double-click the DWORD, set the Value data to 1, and click OK to save the changes.
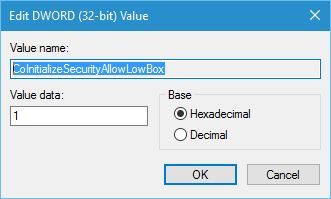
- Create another DWORD value, name it CoInitializeSecurityAllowLowBox, and set its Value data to 1.
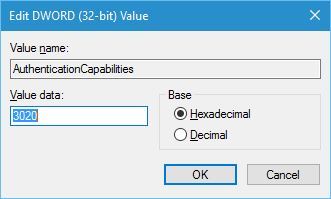
- Create a new 32-bit DWORD, name it AuthenticationCapabilities, and set its Value data to 3020.
- Also, create a CoInitializeSecurityAllowInteractiveUsers DWORD and set its Value data to 1.
- Close Registry Editor and restart your computer.
When you get a Windows service start failure error in Windows 10, modifying the registry and adding the missing keys should get things up and running in no time.
3. Stop the Windows Font Cache Service
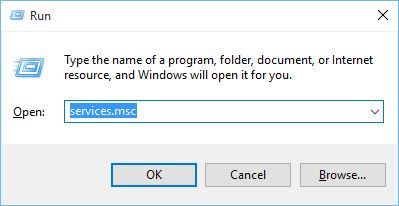
- Press Windows + R, type services.msc, and press Enter.
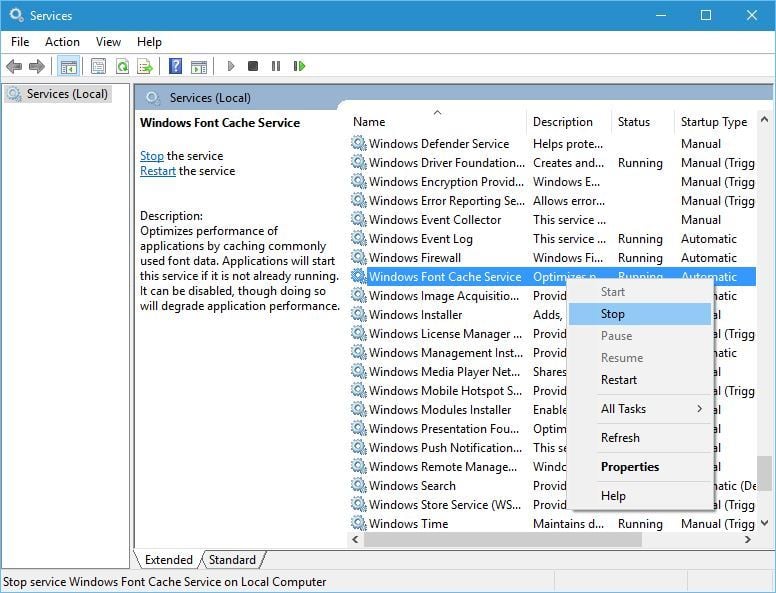
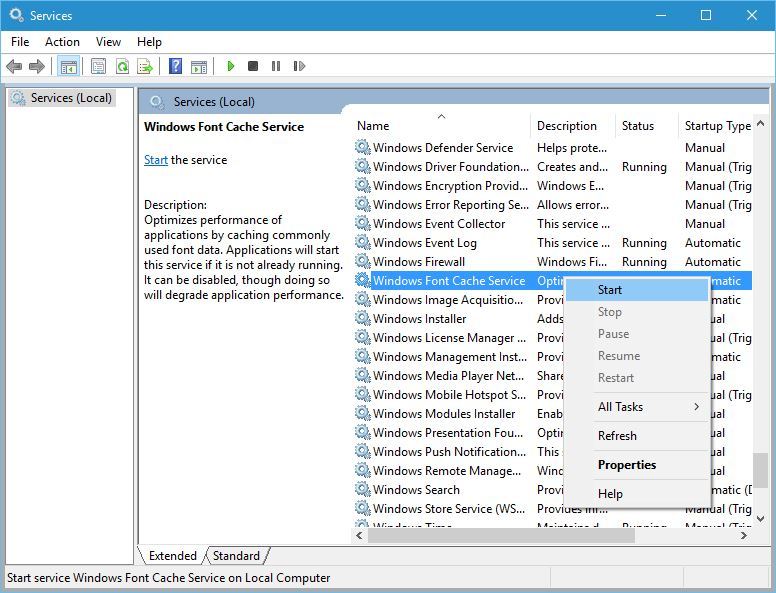
- Locate Windows Font Cache Service, right-click on it, and choose Stop.
- Press Windows + R, type %localappdata%, and click OK.
- Locate and delete the FontCache.dat files.
- Go back to Services, right-click Windows Font Cache Service, and choose Start from the menu.
According to users, Windows Font Cache Service can sometimes cause issues with other services. Therefore, you need to re-enable the service and delete the FontCache.dat files to fix the Failed to connect to a Windows service. This problem prevents standard users error.
Before you leave, find out the services you can disable in Windows and get a better performance out of your PC.
Tell us which fix worked for you in the comments section below.





User forum
1 messages