The Installer Couldn't Create a Temporary Directory [Fix]
Obtain administrative privileges to fix this error message on your PC
5 min. read
Updated on
Read our disclosure page to find out how can you help Windows Report sustain the editorial team. Read more
Key notes
- When the installer can’t create a directory, it’s because you don’t have full control over the installation folder.
- In some cases, it might be necessary to adjust system variables or temporarily disable your antivirus.
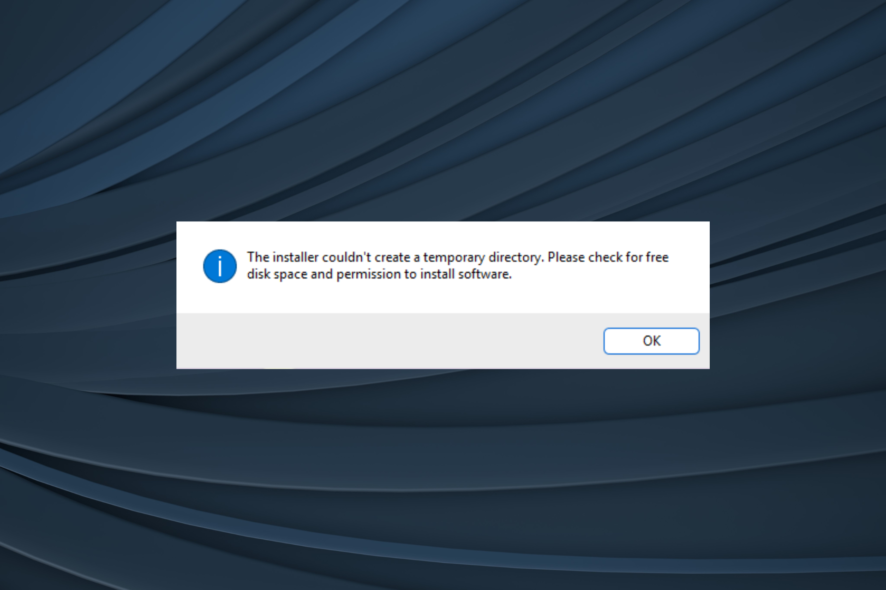
As usual, mostly for new users, there are a lot of error messages and notifications encountered every day, especially on Windows 10, with The installer couldn’t create a temporary directory.
The problem appears when installing apps and prevents the process from completing. Users reported the error with Chrome, Vivaldi, and several other programs. Keep reading to find out all about it!
Why can’t the installer create a temporary directory?
- The lack of necessary permissions can cause this and many other problems.
- Sometimes, system variables can cause various issues on your PC.
- Your antivirus can sometimes prevent the installation from running properly.
How do I fix The installer couldn’t create a temporary directory error?
Before we start, there are a few preliminary checks you can perform:
- Try using the full or offline installer. Not all applications have one, so be sure to check the download page thoroughly.
- Reinstall the software using the older version. After that, try to update from that version.
- If updating software, try using the built-in update feature from the app.
- Moving the setup file to the root directory, C, can sometimes help.
1. Select Run as administrator
- Look for the executable file that you want to install.
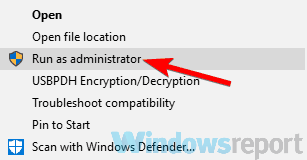
- Right-click on it, and then from the context menu, select Run as administrator.
- Click Yes in the UAC prompt.
In case you’re trying to update certain software, make sure that the software is completely closed. You can achieve that using Task Manager.
2. Run the setup from the Temp folder
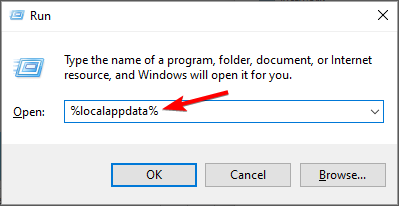
- Press Windows key + R and enter %localappdata%.
- Next, navigate to the Temp folder.
- Locate the folder software and open it.
- Look for the setup file inside. If there’s one, run it.
This is not an universal solution, and it only works for certain apps.
3. Create a new Temp folder and change the variables
- Enter the C: drive and create a new folder, rename it as Temp (switch C: with the drive your OS is installed)
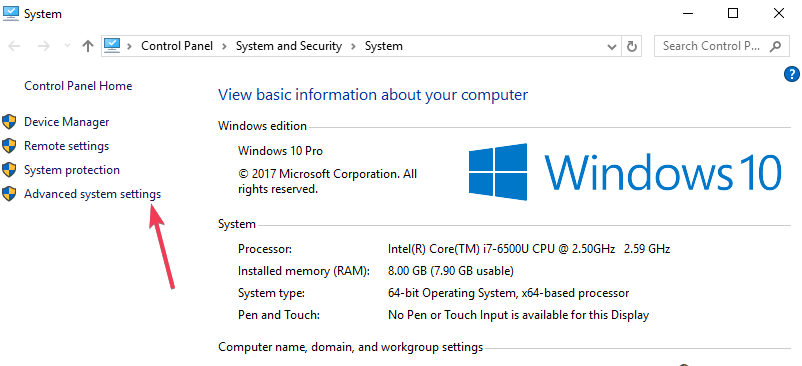
- Right-click on This PC and select Properties from the menu context
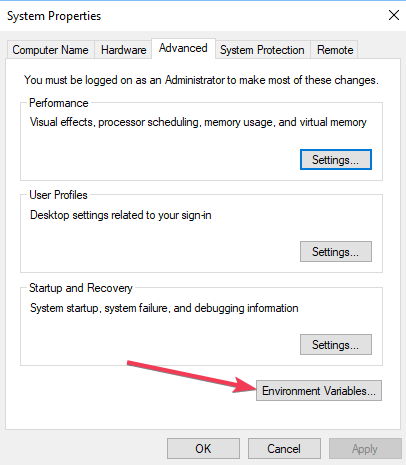
- Click on Advanced system settings.
- Navigate to the Advanced, and click on the Environment Variables
- Double-click TMP in the User variables.
- The value you will see should be:
%USERPROFILE%\AppData\Local\Temp - Change that to the following and click OK to save the changes:
C:\Temp
Creating a new Temp folder and changing the variables is the best option if the error signal clearly says that there is a problem with the temporary directory.
After all, try to install the program, and it should be able to work perfectly without throwing The installer couldn’t create a temporary directory error.
4. Change the control over the TEMP folder
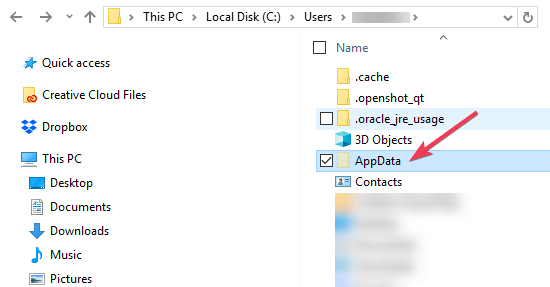
- Press Windows + E to open File Explorer, paste the following path in the address bar, and hit Enter:
%USERPROFILE%\AppData\Local - Search for the Temp folder inside, right-click, and select Properties from the menu
- Click on Security.
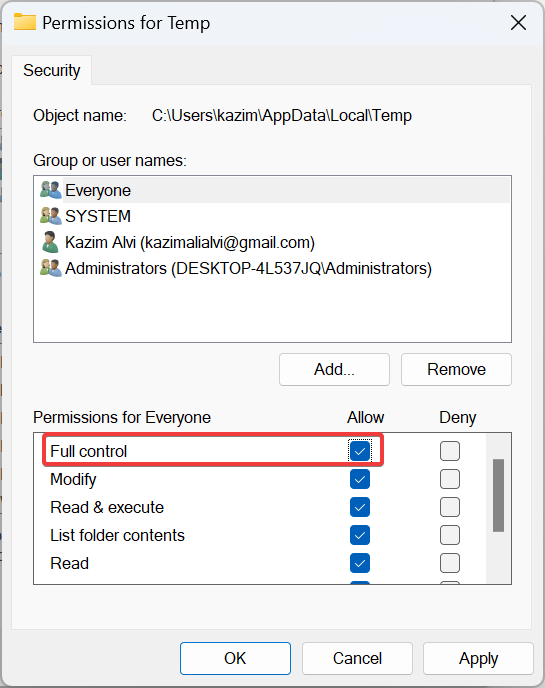
- Now, click on Everyone.
- Click on Edit and ensure that all the Full control box is selected, then click on OK to save the changes.
5. Confirm the Include inheritable permissions in the Temp folder
- Press Windows + E to open File Explorer, and navigate the following path:
%USERPROFILE%\AppData\Local - Search for the Temp folder inside, right-click, and select Properties from the menu.
- Click on Security.
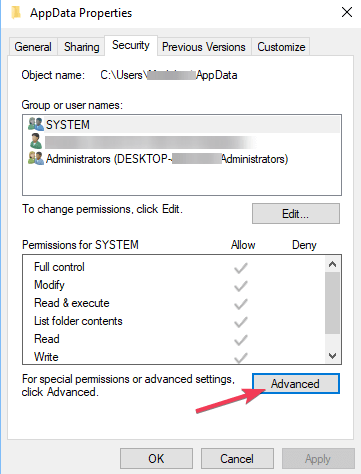
- Click on Advanced to view the permissions.
- In the permissions, there should be SYSTEM, Administrator, and User. All these must have full control and be inherited from the user.
- Look for the Include inheritable permissions from this object’s parent selection, and click Continue. Click on Apply and then press OK to save the setting.
6. Assign full permissions over the installation directory
- Locate the installation directory of the software you’re trying to install.
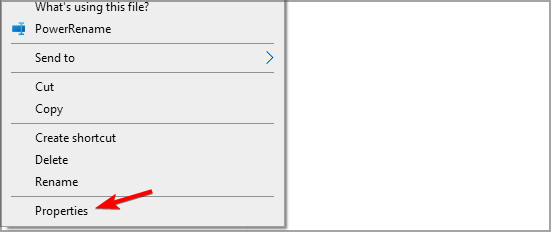
- Right-click it and choose Properties.
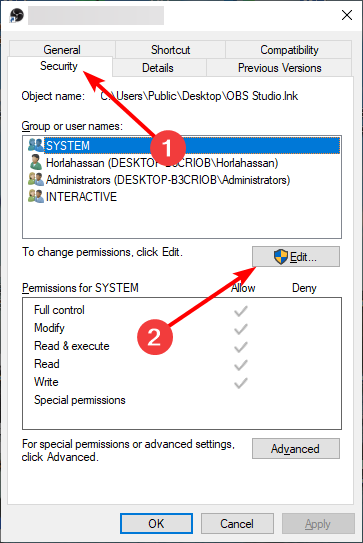
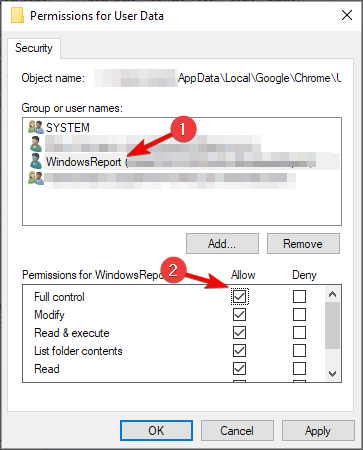
- Navigate to the Security folder and click the Edit button.
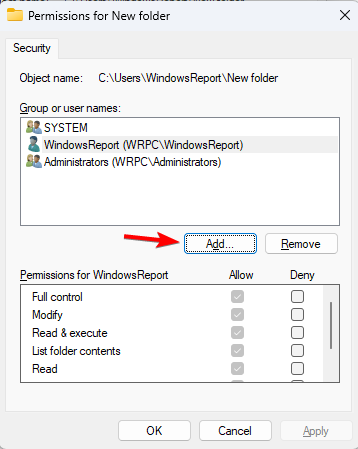
- Click on Add.
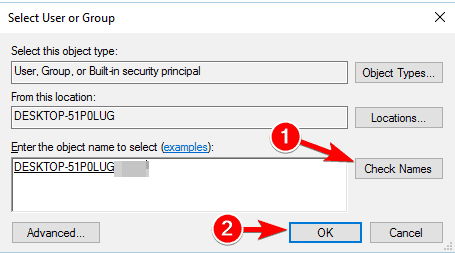
- Type your account name and click Check Names, next click OK.
- Check Full control in the Allow column and save changes.
- Do the same steps for TrustedInstaller if possible.
7. Temporarily disable your antivirus software
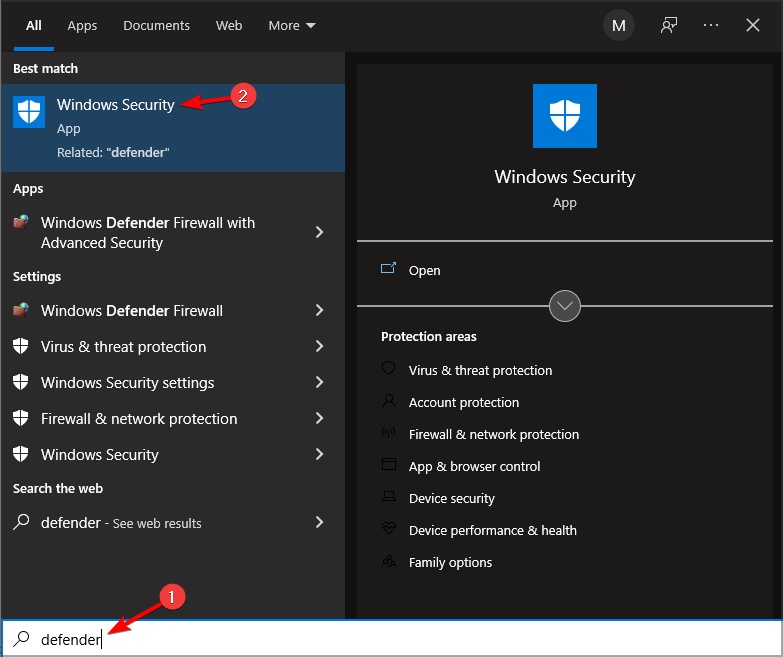
- Press the Windows key + S and enter defender. Select Windows Security.
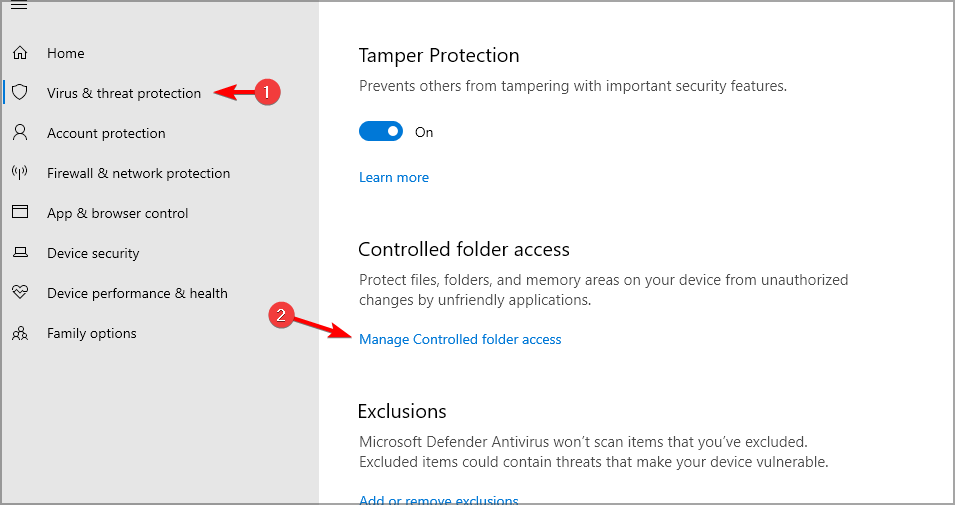
- In the left pane, navigate to Virus & threat protection. In the right pane, navigate to Manage Controlled folder access.
- Now disable Controller folder access.
If you’re using a third-party antivirus, we suggest disabling it to perform these steps.
 NOTE
NOTE
By now, you should already have access to write to the directory, which provides you with an instant remedy for this error. This should fix The installer couldn’t create a temporary directory error.
Notwithstanding, these proffered solutions, when followed correctly, will enable you to fix the error of not being able to create a temporary directory encountered on Windows 10.
Before you leave, find out how to get full folder permissions in Windows, or check our guide on the SquirrelTemp folder.
Tell us which fix worked for you in the comments section below.





User forum
0 messages