Fix: Your security settings could not be detected in Dell
3 min. read
Updated on
Read our disclosure page to find out how can you help Windows Report sustain the editorial team. Read more

Dell is probably one of the biggest names in the PC industry. It produces PCs that are great for pretty much any environment, from servers to elegant business laptops and powerful gaming rigs.
However, Dell machines also come with some of their own software, and it doesn’t always comply with the OS you have installed, resulting in errors.
One good example is a frequent error message that plenty of users have reported getting when updating or installing the BIOS on their PCs, which states that:
Your security settings could not be detected. Try restarting your system and running the update again.
Several devices have been known to cause issues when updating or installing the BIOS.
Here’s a list of these devices, and their affected BIOS versions:
| Dell Model | BIOS version |
|---|---|
| Latitude 7275 | 1.1.29 |
| Latitude 5175/5179 | 1.0.22 |
| Latitude 7370 | 1.11.4 |
| Latitude E7270/E7470 | 1.14.3 |
| Latitude E5270/E5470/E5570 | 1.13.3 |
| Precision 3510 | 1.13.3 |
| Precision 7510/7710 | 1.11.4 |
This error message prevents users from updating or even installing their BIOS, meaning that it basically nullifies the use of the PC.
Given the seriousness of the issue, we’ve decided to create this step-by-step guide that will show you how to bypass it with no further problems.
How do I fix the security settings issues on my Dell?
1. Perform your BIOS update from outside of Windows
Required materials:
- Blank USB thumb drive
- Rufus
- Other options include HP USB Disk Storage Format Tool, MSI DOS Tool, UNetbootin, etc
- Updated BIOS + update utility
- Working Dell PC
- Internet Connection to download BIOS update from manufacturer’s company website
Once you have all the materials, proceed with the following steps:
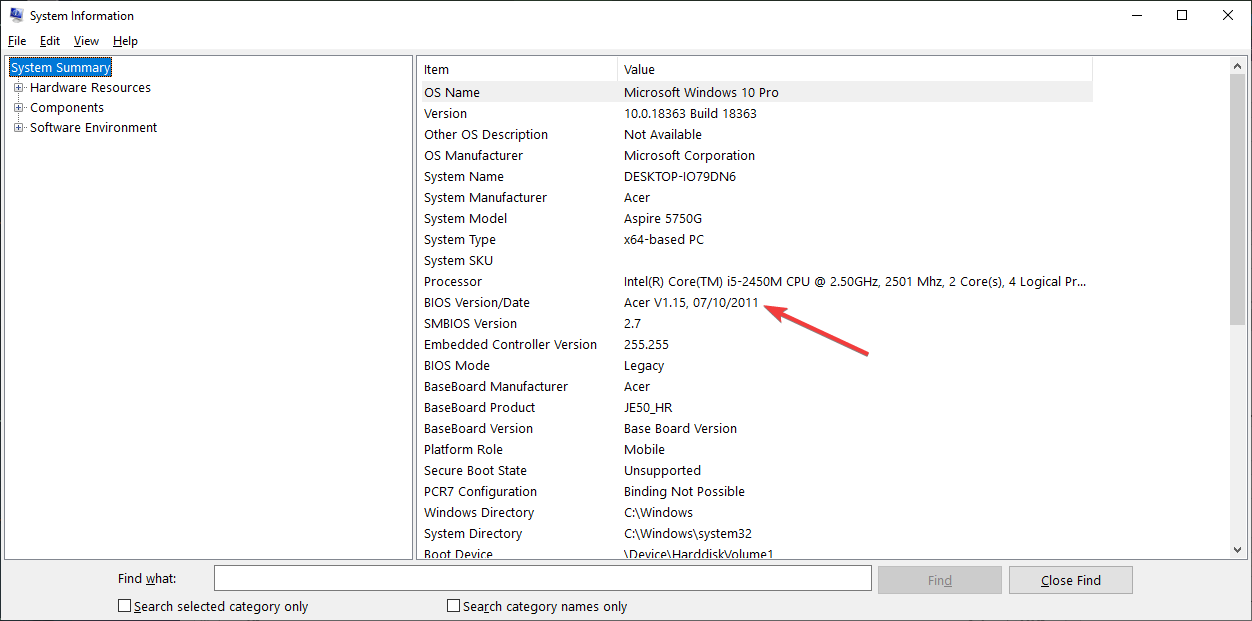
1.1 Check your current BIOS version
1.2 Update your Bios
- Download the appropriate version from the motherboard manufacturer’s website
- Copy the update on the USB flash drive, and plug it in the PC
- Restart the PC, and open the BIOS when it boots
- Go to the Bios Update tab, select your USB flash drive as the source
- Follow the on-screen instructions
- Restart your PC
Looking to get a new Dell device? Check out this article with our top picks.
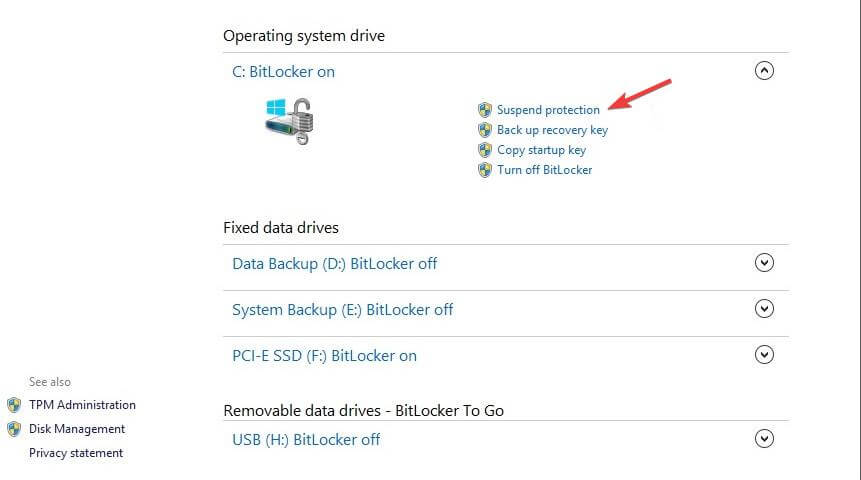
2. Suspend Bitlocker while performing the BIOS update
- Press Start
- Go to Control Panel
- Go to System and Security
- Select BitLocker Drive Encryption
- Select Suspend Protection
- Perform the BIOS update
- Restart the PC
- Once the update is complete and the PC has rebooted, enable Bitlocker again
By following these steps, you should now be able to update or install your BIOS on a Dell PC without any further issues.
If you know of any other way to solve this problem, share it in the comments section below so that other users can benefit from it as well.


User forum
0 messages