How to Disable NetBIOS in Windows 10
Try 3 expert-tested methods to turn it off
2 min. read
Updated on
Read our disclosure page to find out how can you help Windows Report sustain the editorial team. Read more
Key notes
- NetBIOS over TCP/IP is a broadcast network protocol that is no longer useful for most Windows 10 users nowadays.
- You can disable NetBIOS on Windows 10 using various methods, which include tweaking your network settings and performing commands in Command Prompt.
- More advanced users can tweak their Registry to turn off this protocol.
NetBIOS is a somewhat obsolete broadband protocol. Yet, despite its vulnerabilities, NetBIOS is still enabled by default for network adapters in Windows.
Some users might prefer to turn off the NetBIOS protocol. This is how users can disable NetBIOS in Windows 10.
How can I turn off NetBIOS on my Windows 10 device?
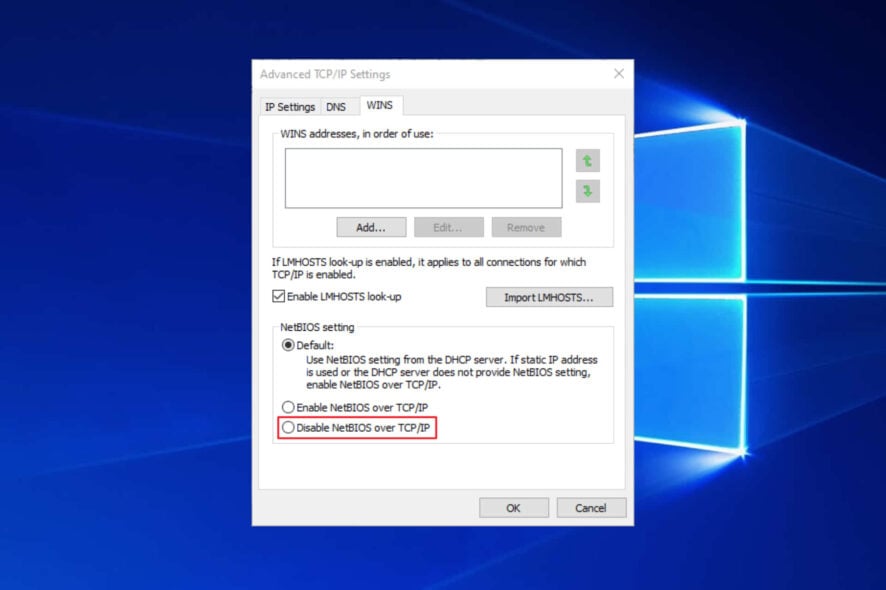
1. Select the Disable NetBIOS over TCP/IP Option
1. Open the WinX menu by pressing the Windows key + X hotkey.
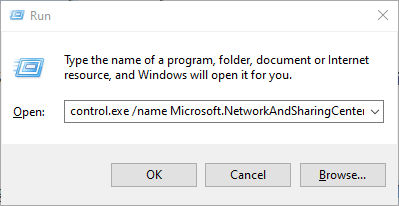
2. Select Run from the list of options.
3. Enter control.exe /name Microsoft.NetworkAndSharingCenter in the Open box, and then click the OK button.
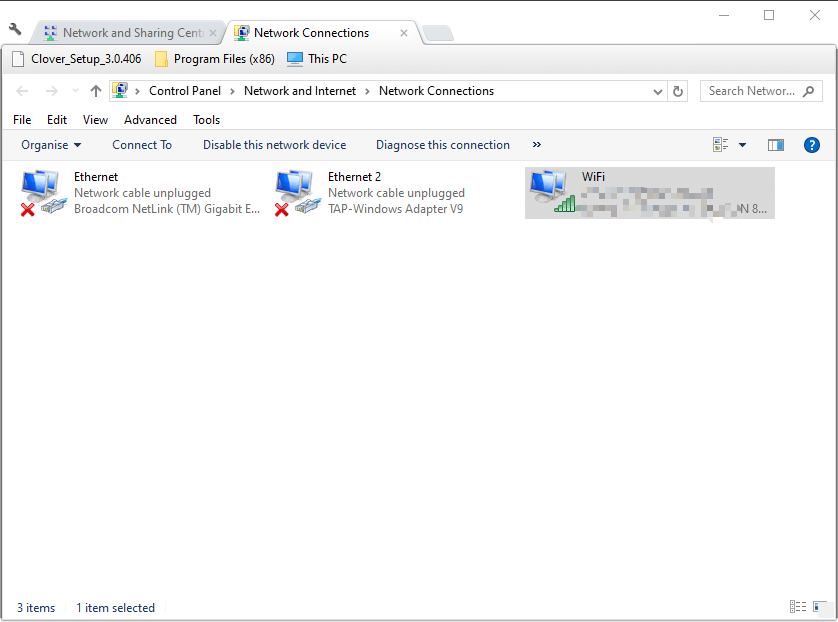
4. Then click Change adapter settings in the Control Panel applet that opens. The Network Connections window will open on the screen.
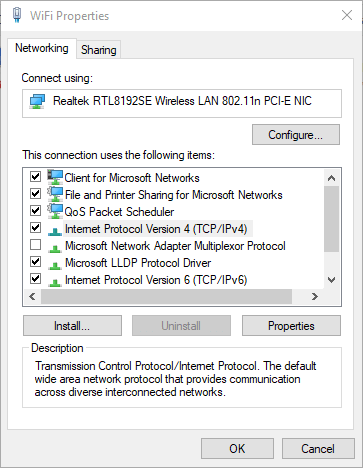
5. Right-click a network adapter there to select Properties.
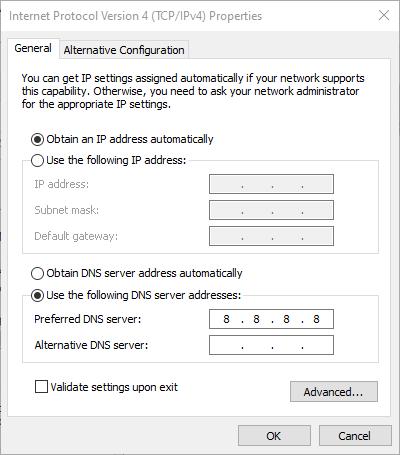
6. Select Internet Protocol Version 4, and then press the Properties button.
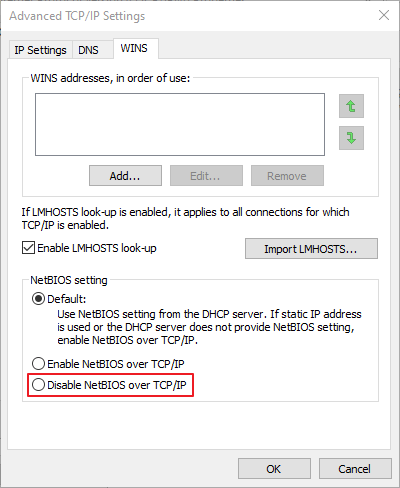
7. Click the Advanced button to open the Advanced TCP/IP Settings window.
8. Then select the WINS tab shown directly below.
9. Select the Disable NetBIOS over TCP/IP radio button.
10. Press the OK button.
The NetBIOS over TCP/IP networking protocol can be easily turned off on your Windows 10 PC using built-in Network settings.
All you need to do is disable the NetBIOS option via the Advanced TCP/IP Settings window, and the protocol will no longer be used.
If your WinX menu is not working on Windows 10 and you cannot use it to apply our solution, check out our dedicated guide to find out how to fix it.
2. Turn off NetBIOS via Command Prompt
- Alternatively, users can disable NetBIOS with the Command Prompt. First, open the WinX menu.
- Select Command Prompt (Admin) to open the Prompt’s window.
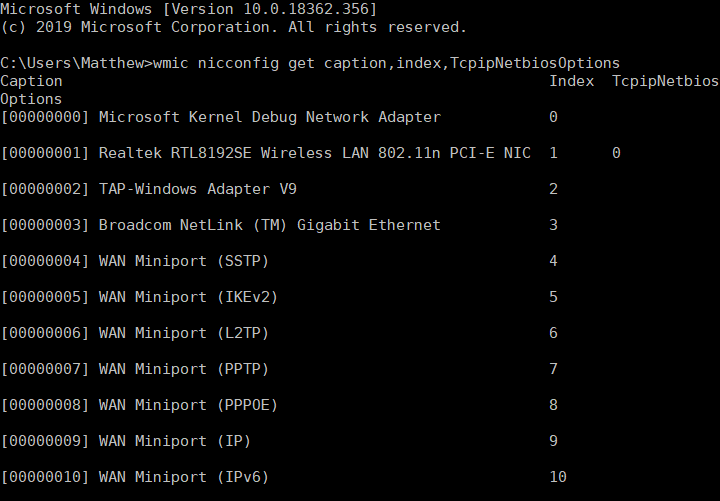
- Next, input wmic nicconfig get caption,index,TcpipNetbiosOptions in the Prompt, as shown below, and press the Return key. That shows users a list of their network adapters.
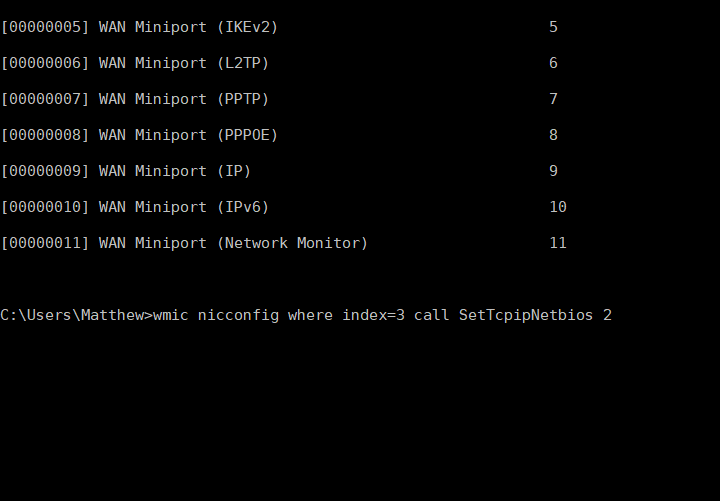
- Note the index number of the adapter you need to disable NetBIOS for and include that in the wmic nicconfig where index command. For example, to disable the NetBIOS for the network adapter listed as three, users would enter the following command: wmic nicconfig where index=3 call SetTcpipNetbios 2.
- In the above command, three is the index number for the adapter and two disables NetBIOS over TCP/IP. Press the Enter key after entering the command to disable NetBIOS.
3. Edit the Registry
- Users can also disable NetBIOS for more specific network adapters by editing the registry. Open the Run accessory.
- Enter regedit in Run and click OK, which will open the Registry Editor.
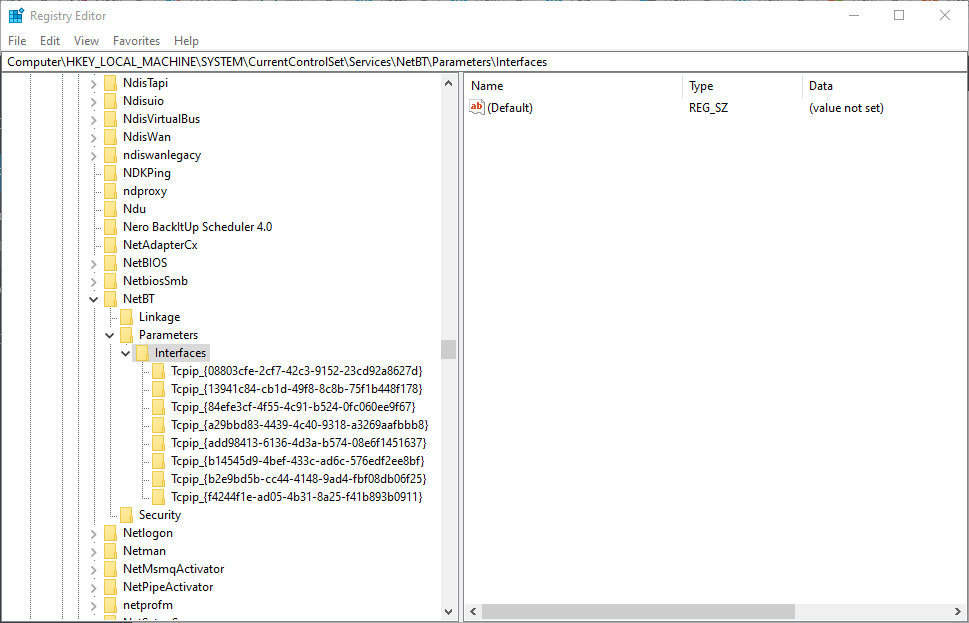
- Open this registry path in the Registry Editor:
- Select a Tcpip registry key for a network adapter.
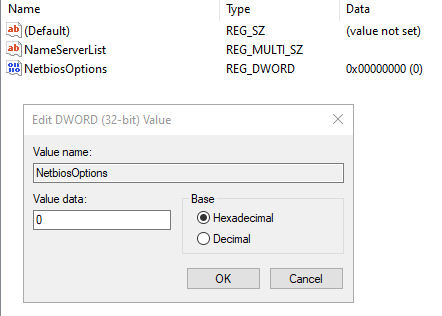
- Double-click NetbiosOptions to open the window shown directly below.
- Erase 0 and enter 2 in the Value data box.
- Press the OK button.
So, there’s more than one way to disable NetBIOS in Windows. Users can choose whichever method they prefer.
Let us know in the comments field below whether you were successful in following our guide in order to turn off NetBIOS on your devices.


User forum
0 messages