How to Reinstall DirectX 12 on Windows +Troubleshooting Steps
Reinstalling step by step and addressing common installation errors
3 min. read
Updated on
Read our disclosure page to find out how can you help Windows Report sustain the editorial team. Read more
If your upgrade to the latest version of DirectX12 failed or the app is buggy, reinstalling is a viable troubleshooting step. We’ll show you below everything you have to do.
First, you should check what version of DirectX your OS is using. To do this, press Windows +R keys on the keyboard, type dxdiag in the Run box, and hit enter.
If DirectX 12 is not listed, and since there is no stand-alone package for this version, we recommend the following solutions.
How do I reinstall DirectX 12?
1. Check for updates
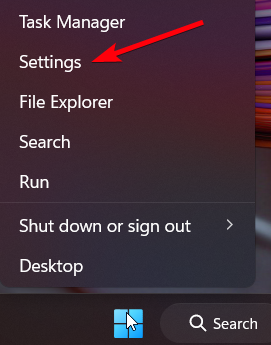
1. Open the Start menu and select Settings.
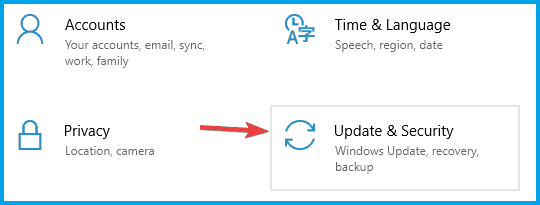
2. Select Update & Security.
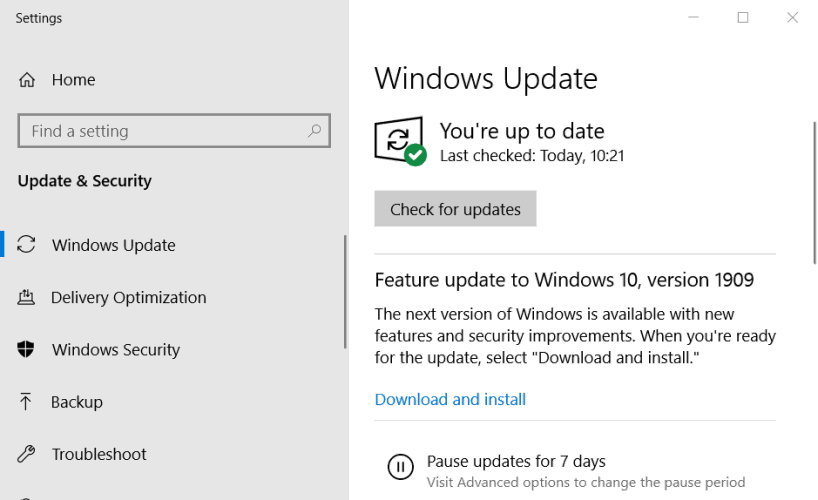
3. Click Check for updates.
If you need to properly reinstall DirectX 12, you can check for Windows updates with the simple steps presented below.
Usually, Windows is updated automatically. But if any updates are missing, this action should solve the problem. Wait for the process to finish and make another attempt to see the DirectX version.
2. Run the DirectX End-User Runtime Installer
Reinstall DirectX using the DirectX End-User Runtime Web Installer available in the Microsoft Download Center to try and restore missing files, if any.
Check once again for updates and see if the problem is fixed. If you’re still having trouble with a proper installation for the graphics component, take a look at this dedicated article that lists a few alternative options.
3. Use the SFC tool for missing files
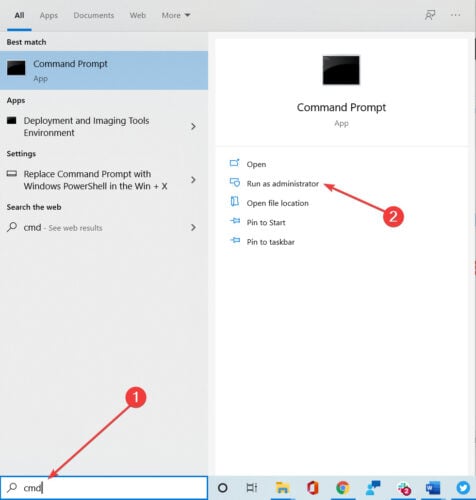
- Type Command Prompt in the taskbar and click on Run as administrator.
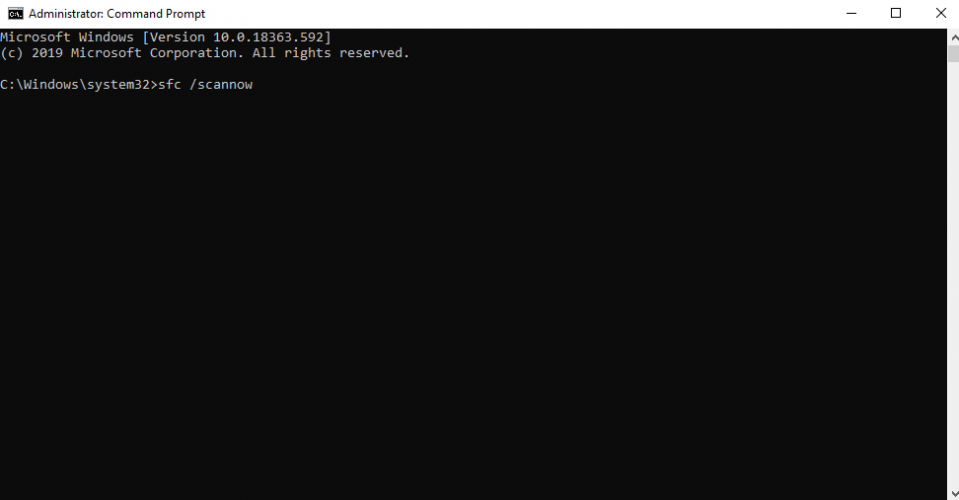
- Type sfc /scannow and hit Enter.
- Wait for the results.
This scan might take some minutes. SFC is a built-in tool that should repair any corrupted files in the system or install missing ones, after faulty OS installation.
4. Perform a clean boot
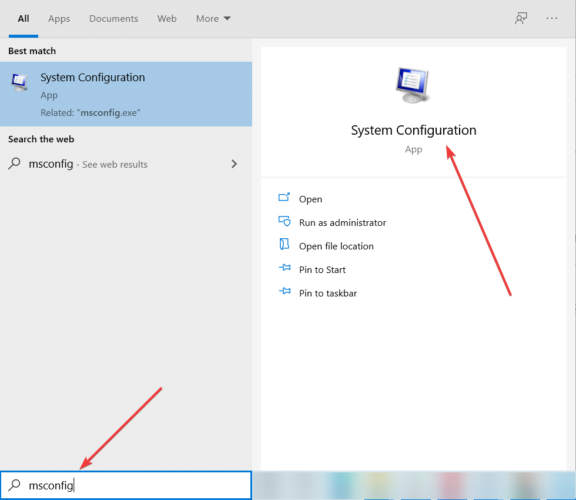
- Type System Configuration in the taskbar and select Run as administrator.
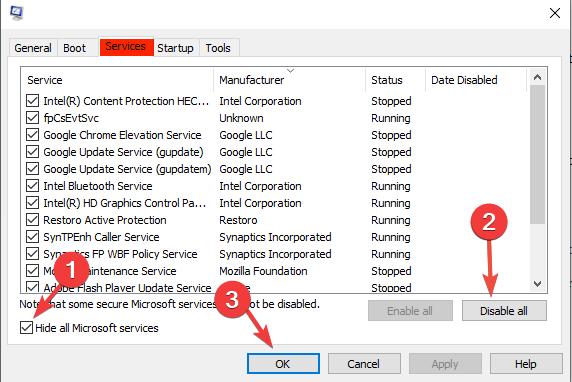
- On the Services tab, select Hide all Microsoft services, and then select Disable for all.
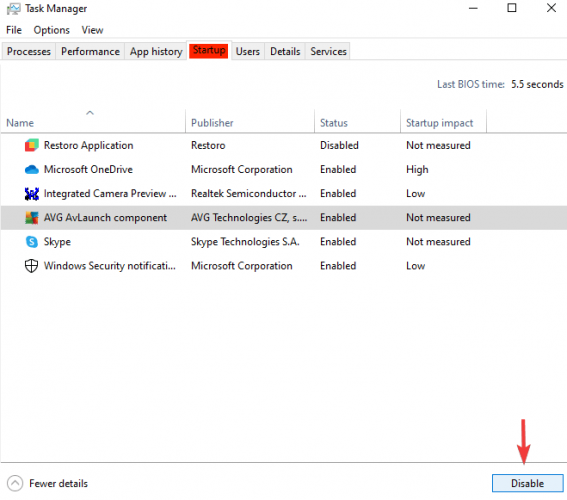
- On the Startup tab, open Task Manager, and Disable all items.
- Close the Task Manager and click OK in the System Configuration window.
- Restart your device and reinstall DirectX using the DirectX End-User Runtime Web Installer download link as mentioned before and see if it helps.
To completely uninstall a program, you can use a third-party uninstaller solution to make sure no leftovers remain in your system.
The above solutions will help you for use to install the latest DirectX on your computer. To learn more about DirectX, we have a great guide on how to enable DirectX 12 Ultimate, so don’t miss it. And if DirectX 12 throws a black screen when launching games, we have the answers.
If you have any suggestions or questions, please write us a comment below.




User forum
0 messages