How to move Overwatch to another drive [FULL GUIDE]
5 min. read
Updated on
Read our disclosure page to find out how can you help Windows Report sustain the editorial team. Read more
Key notes
- Overwatch brings to life a virtual world where you and your team-mates challenge other teams for supremacy.
- Learn why PC MOVER is the best tool if you need to move Overwatch to another drive and how to do it in the detailed guide below.
- We have much more useful information about this wonderful game in our dedicated Overwatch Hub.
- If gaming is your hobby, you must dive into our rich and comprehensive Gaming Hub.

When it comes to multiplayer first-person shooters, Overwatch is one of the best-known names. In the game, two teams of six players compete for control points on a map. Players love it for its mixture of unique characters, engaged in dynamic action. Graphics is excellent and maps abound in stunning details, mad ein the same quality you would expect from a typical Blizzard game.
However, for different reasons, you may have to move Overwatch to another drive. This article deal with that. We have a full guide on how to move Overwatch to another drive.
How can I move Overwatch to another drive?
1. Use a dedicated software solution to transfer Overwatch
- Install PC MOVER on both of your computers.
- Verify that the new PC has the same Windows version as the old PC or a new one.
- Check that the new PC has enough drive space for transfer.
- Run PC MOVER on both of your PCs.
- Connect your PCs. If your computers are on the same WiFi or wired network, they’re connected.
- Otherwise, use either Laplink Ethernet cable or Laplink USB cable.
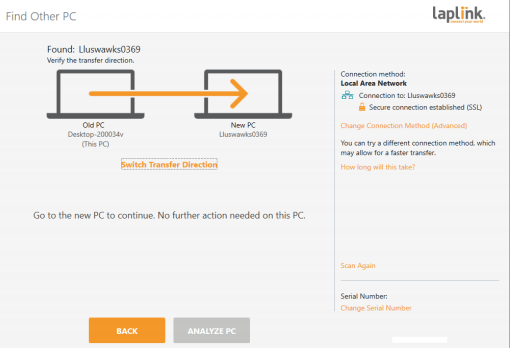
- Once the PCs are connected, start the wizard on the old computer to find the new PC.
- On the new PC, click Analyze PC.
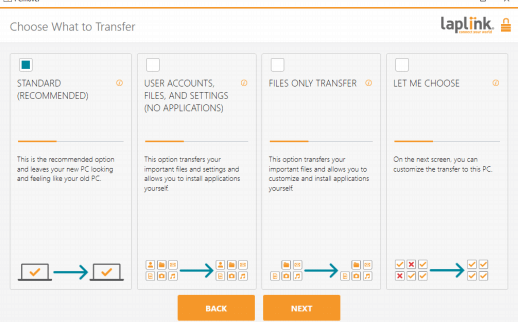
- After the analysis is done, you choose what to transfer. We recommend you to choose the STANDARD option as this allows you to select the applications to transfer.
- In Transfer Summary, go to Applications and check Battle.net and Overwatch.
- Click Start Transfer.
- Wait for the transfer to finish.
- When all is done, restart your new PC and you can play Overwatch on it without the need of reinstalling it.
Following these steps, you can transfer OVERWATCH to a new PC with PC MOVER doing all the hard work. It relieves you of the complication of reinstalling Blizzard’s client and Overwatch. It also saves you a lot of time you can now spend playing your favorite games.
More about PC MOVER
Let’s talk a little more about PC MOVER. It gets you rid of all the headaches when moving to a new PC. It is the only software that can move your applications, files, and even user settings fast and reliable.
You can move from a PC to another PC or from an old operating system to a newer one. Moreover, the process is automatic after you install PC MOVER on both computers. It is also useful when you need to extract data from a hard drive on a broken PC. Or to restore old PC images to new operating systems.
Applications are transferred in a ready-to-use manner. This way you don’t need to install them from scratch. You don’t need kits or license numbers that you’ve already lost a long time ago.
In the moving process, you can select what PC MOVER transfers. You can choose the applications or folders that you want to transfer. There are many PC MOVER versions available.
You can find a free version in Microsoft Store which is great for small home jobs. However, we strongly recommend the Professional version. It has all the features and it includes free transfer assistance.
PC MOVER supports USB3.0, so you don’t have to worry about speed. It comes with an Ethernet cable or a USB cable to connect the source and destination computers.
Take our word for it and use PC MOVER whenever you need to make transfers between computers.
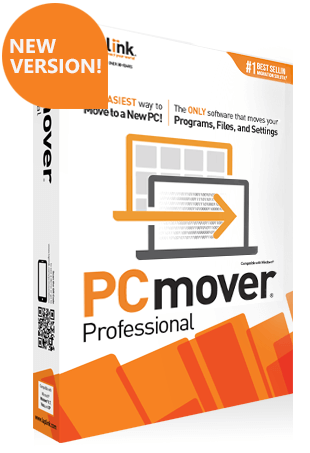
PC MOVER Professional
PC MOVER Professional is the best choice for moving content between two computers. Whether you need to move your whole drive or just files or folders, PC MOVER Professional is the best product money can buy.2. Move OVERWATCH to another drive by copying the installation folder
- Go to the location where Overwatch is installed.
- Move the installation folder to the new location using Cut+Paste.
- After that, start Battle.Net launcher. Check this article if you encounter problems starting Battle.Net.
- Now, Battle.Net assumes that Overwatch is uninstalled. You need to hit the install button.
- Change the installation folder to the new location.
- Wait a few minutes until the process is over.
This solution works only if the new drive is on the same computer as the one where OVERWATCH is already installed.
3. Clone your entire drive
Use this only solution only in special circumstances. For instance, when you upgrade from hard-disk to SSD. This way you copy the content of an entire drive to another drive. However, you don’t have the option to choose what to copy. It is going to clone everything from the operating system to the last file.
By following these steps and by using the right tools, you should be able to easily transfer your Overwatch game from one drive to another without the need for a reinstall. In fact, the methods above can be used for pretty much any game.
Let us know which method you prefer by leaving us a message in the comments section below.
[wl_navigator]


User forum
0 messages