How to Automate Tasks in Windows 11 Using Macros
Create macros to record your desktop and browser tasks
7 min. read
Updated on
Read our disclosure page to find out how can you help Windows Report sustain the editorial team. Read more
Key notes
- You can automate repetitive tasks in Windows 11 with the Power Automate app that comes pre-installed.
- Power Automate for desktop users can quickly and easily record task flows with that app’s desktop and browser recorders.
- The Task Scheduler can also come in handy for starting programs and sending emails automatically at specified times.
Some office applications, such as MS Office, include macro-recording tools. With those, users can record macros to automate repetitive tasks. Then, they can play macros to carry out their recorded tasks within their applications.
What is Power Automate?
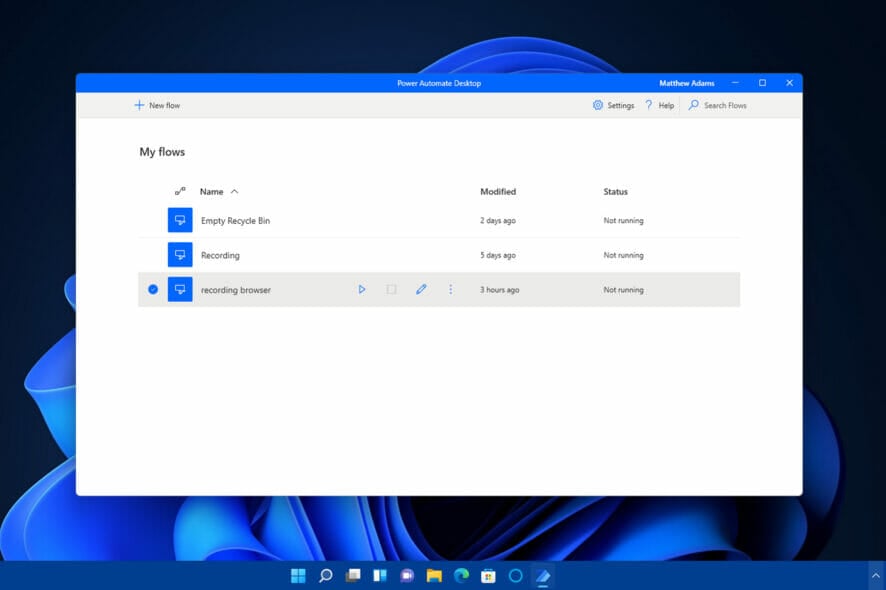
Now, you can automate repetitive tasks within Windows 11 much the same with its Power Automate Desktop app. Note that it comes pre-installed and enables users to record task sequences with flows, which are much the same as macros.
For example, a lot of users often manually empty their Recycle Bins in Windows to free up disk space. With Power Automate, you could record a flow that empties the Recycle Bin.
When played, that flow will carry out all the recorded mouse clicks for emptying the bin.
So, Power Automate can be a very useful app for any user who needs to carry out repetitive tasks in Windows 11 with regularity. You can record both desktop and browser task flows with that software as outlined below.
Is Power Automate only for Windows 11?
Power Automate is also available for Windows 10. However, it doesn’t come preinstalled with that platform. You must install the Windows 10 app by clicking the Get button on its Microsoft Store page.
This app is also available for mobile platforms. You can add Power Automate to Android mobiles from its Google Play page. The iOS version has a download page on the Apple Apple Store.
Is there any prerequisite software or account needed for Power Automate?
NET Framework 4.7.2 or higher must be installed on your PC to run Power Automate. Download the latest version from the .NET Framework 4.8 page if that software is seemingly missing on your computer.
Then install .NET Framework 4.8 with the downloaded installer for it. You’ll also need a Microsoft account to utilize Power Automate.
If you don’t have one already, open the Microsoft account page to set one up. Then, follow the steps below to sign in and record some flows with Power Automate.
How can I record flows with Power Automate in Windows 11?
1. Open and sign in to Power Automate
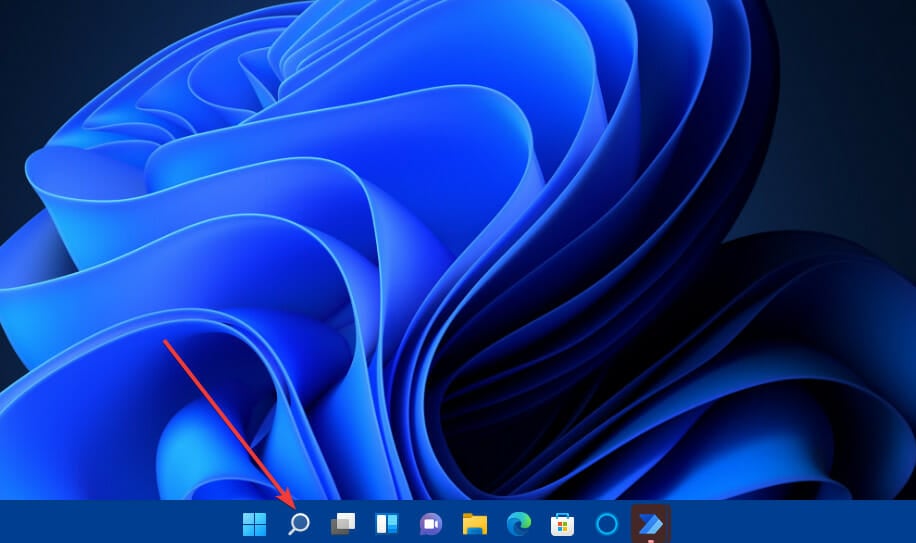
- Click the magnifying glass taskbar icon.
- Enter the keyword Power Automate within the search utility’s text box.
- Select Power Automate in the search tool’s results to open a Power Automate Desktop window.
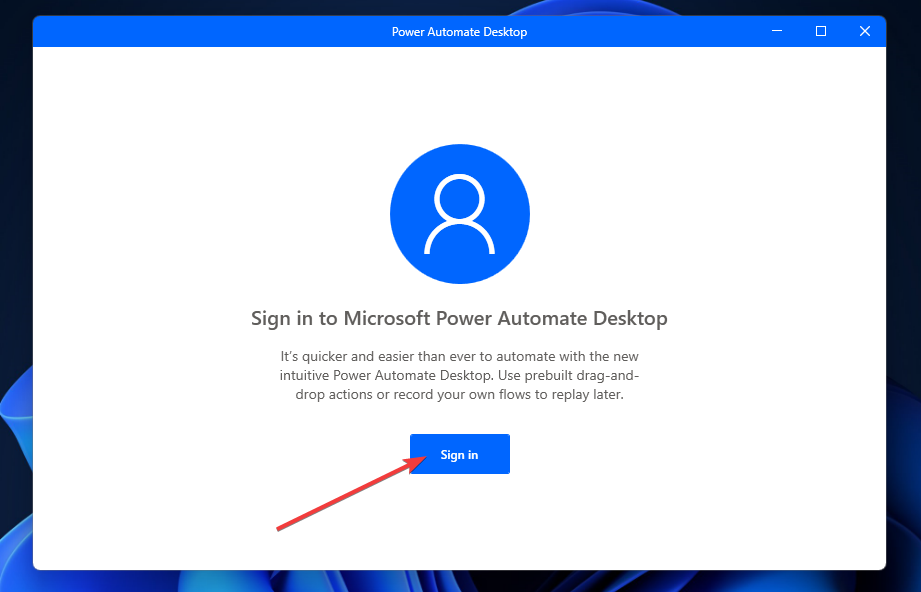
- Click the Sign in button on that window.
- Enter the email address for your Microsoft account within the email address box, and press the Sign in button.
- Type in your MS account password, and click Sign in again.
2. Record a desktop flow task
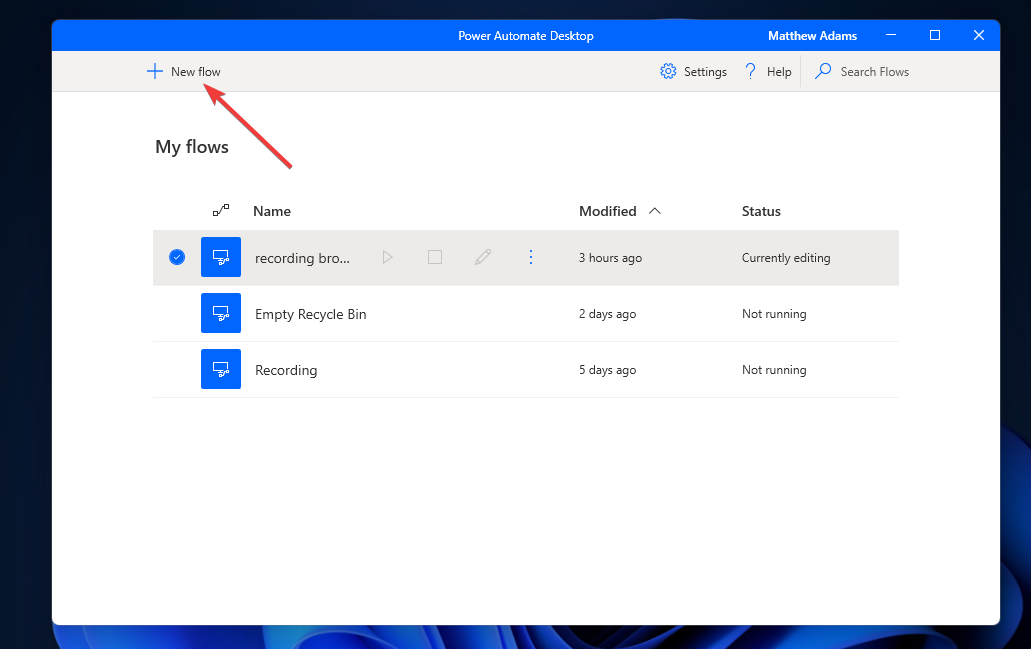
1. First, click the + New Flow button.
2. Type a name for the flow in the text box, and then press the Create button.
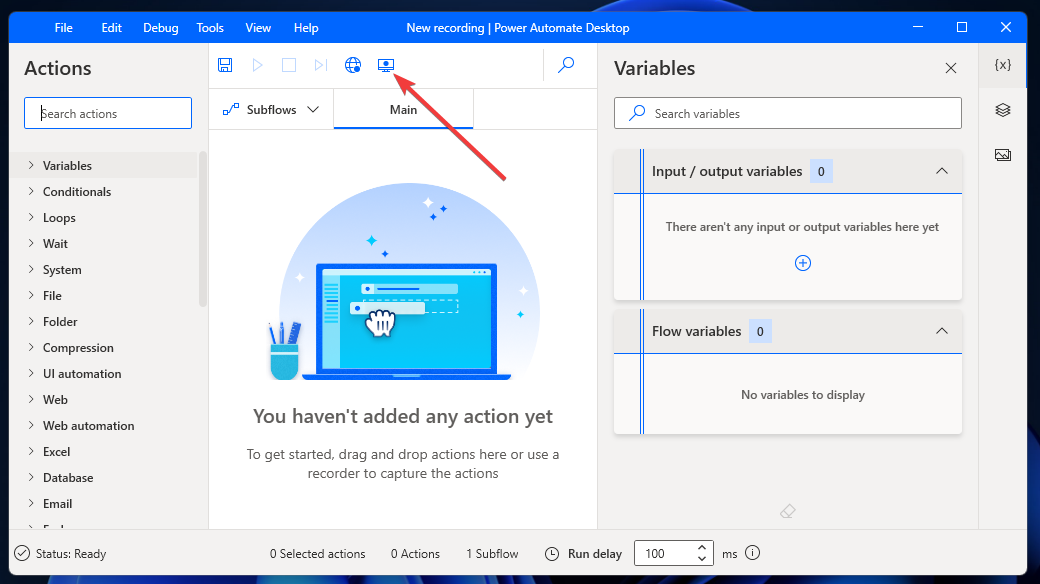
3. Click the Desktop recorder button.
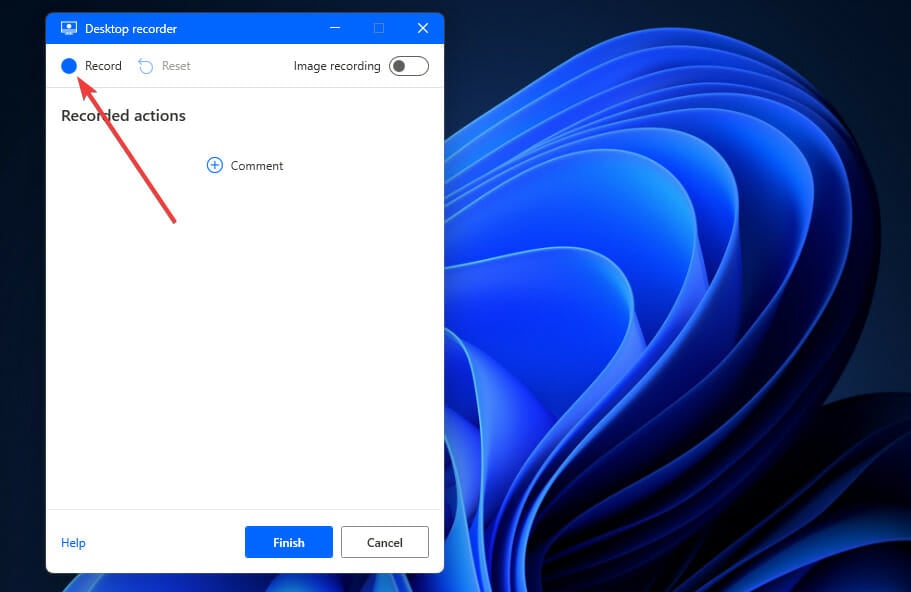
4. Press the Record button.
5. Minimize the Desktop recorder window after starting the recording.
6. Carry out the task you need to record.
7. Click the Finish button on the Desktop recorder window when you’re done.
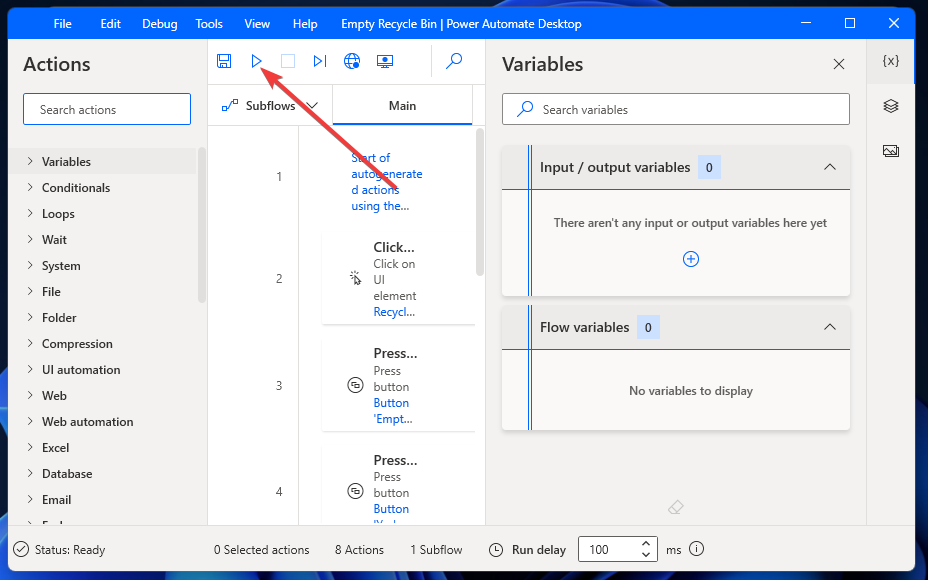
8. Thereafter, click the Run button on the editing window for your recorded flow to play it. Alternatively, you can select to play the recording from your My flows list.
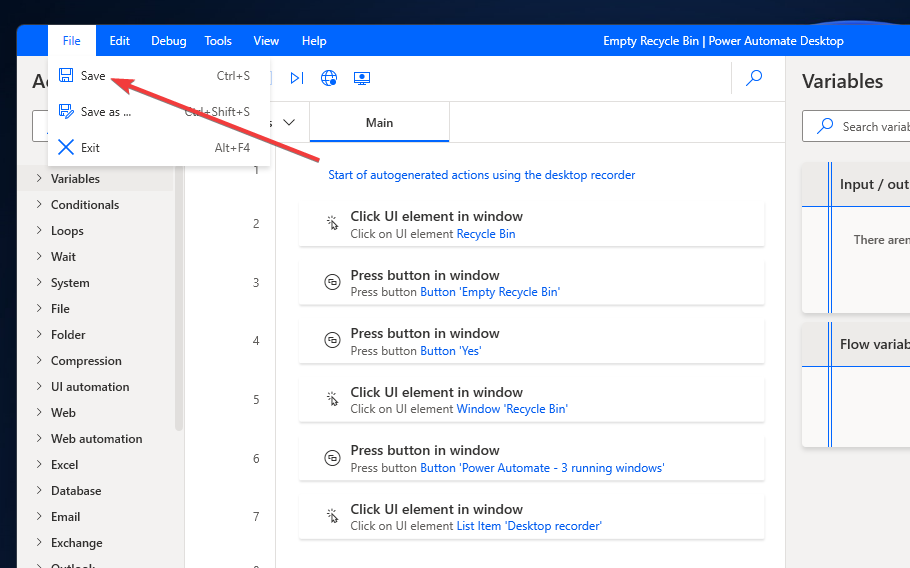
9. Click File and Save on the menu.
10. Press the OK button to confirm.
With Power Automate, you can create a macro that records your desktop. You can configure all the settings in the tool, and it will do the task for you.
3. Record a browser task
- First, click the + New flow button on the Power Automate Desktop window.
- Enter a title for your new flow, and click the Create button.
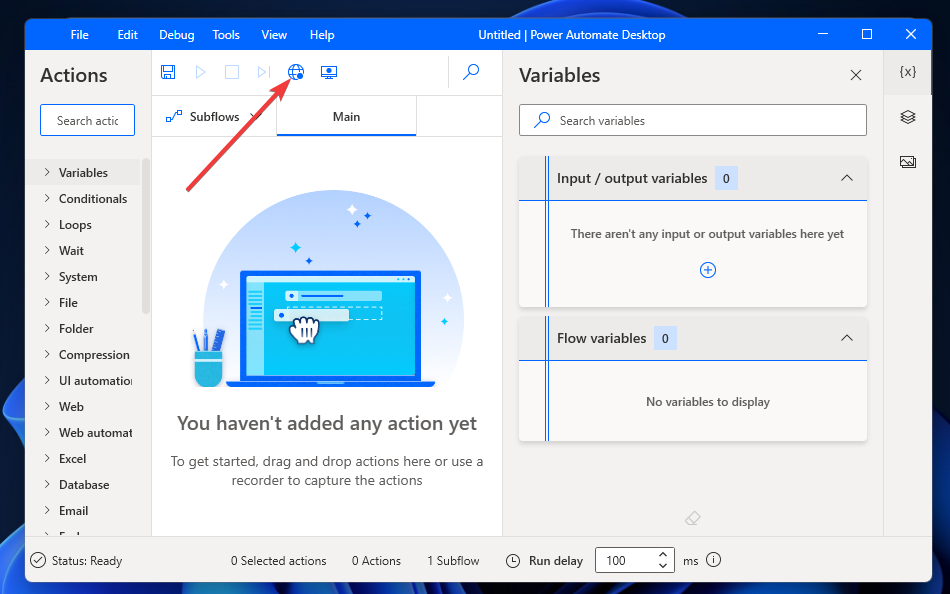
- Click the Web recorder option.
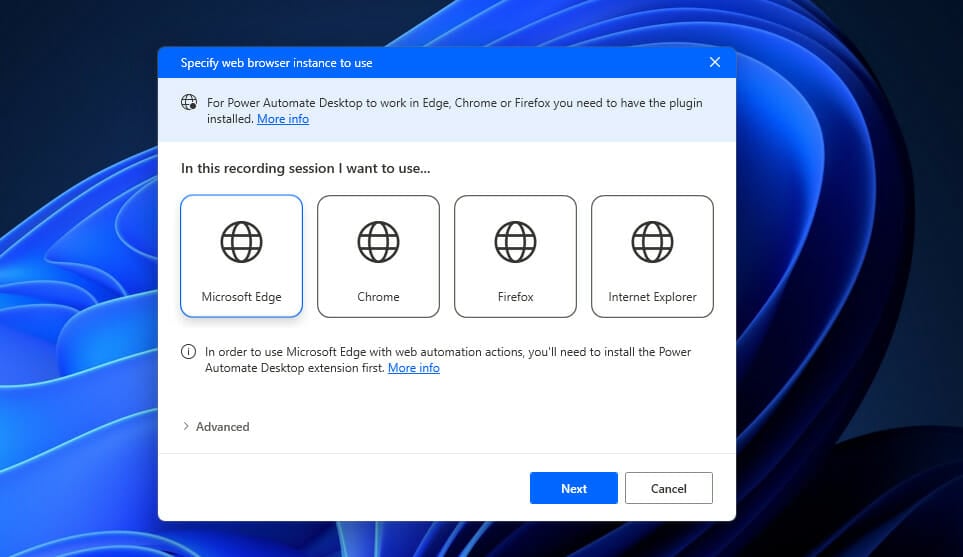
- Select a browser to record the flow for.
- When the Web Recorder window opens, it will say that you need to install the Power Automate extension for a selected browser if it’s not installed. Click Get Extension on the dialog box.
- Then click the install button for the extension on its web page to add it. Make sure the extension is also enabled in your browser after installing it.
- Thereafter, you’ll need to repeat steps three and four to bring up the Web Recorder window.
- Click the Record button on that window.
- Then carry out the task to record in your browser.
- Press the Finish button on the Web Recorder window.
- Click the Save (disk icon) within Power Automate’s editor window.
- Press the OK button to confirm.
For a boost of productivity in your daily workflow, check out how the Scribe Chrome extension may be a better fit or this guide on how to automate browser actions on Windows 10. The same tips may be applied in Windows 11 as well.
What are the best alternative apps to Power Automate?
There are various third-party automation software solutions available for Windows 10 at least. Macro Express, Robo Task, and JitBit Macro Recorder are three notable applications that incorporate macro recorders. Our list including the best programs to automate PC tasks provides further details.
Keep in mind that Windows 11 is a very new platform at the moment. Double-check that those applications are compatible with the latest OS.
Try out their trial packages to check if you can install and run them on your Windows 11 PC.
Even more, feel free to record browser macros with the iMacros extension. That’s an extension you can record tasks in Chrome, Firefox, and Internet Explorer. Since it’s a Chrome extension, you should also be able to install it on other Chromium browsers.
As it comes with Windows 11, and even with occasional network errors, Power Automate is well worth a look before considering other alternatives. It’s a relatively straightforward app with which you can record automated repetitive and monotonous tasks that can be useful for business and home users.
Although more limited than Power Automate, Task Scheduler is ideal for automating tasks. With that utility, you can schedule all kinds of software and files to open at specified times. Task Scheduler is certainly worth noting if you want programs to start automatically.
So, you don’t need to be a programmer to automate tasks in Windows 11. With Power Automate and Task Scheduler, you can automate almost anything in Windows 11 without needing to manually code any complex scripts.
Can I automate tasks with Task Scheduler?
Task Scheduler remains in Windows 11, but it hasn’t changed much. You can still utilize that tool to set up scheduled tasks for opening programs, sending emails, and displaying messages at specific times.
However, you can’t record macros with Task Scheduler. Nevertheless, Task Scheduler is a viable alternative to Power Automate for automating startups for software.
You can also use it to automatically execute Command Prompt commands by adding in arguments. That’s how you can set up tasks for opening programs with this utility:
- First, click the search tool’s magnifying glass button on the taskbar.
- Next, type the keyword Task Scheduler in the window.
- Then select Task Scheduler in the search results to open that tool.
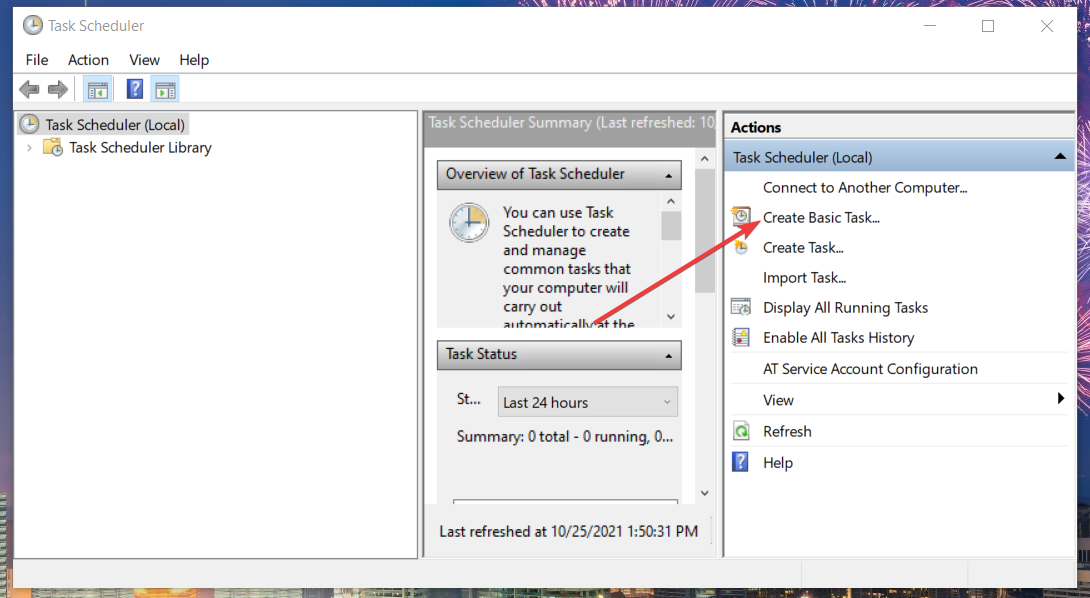
- Click Create Basic Task on the right side of the Task Scheduler window.
- Enter a title and description for the scheduled task, and press the Next button.
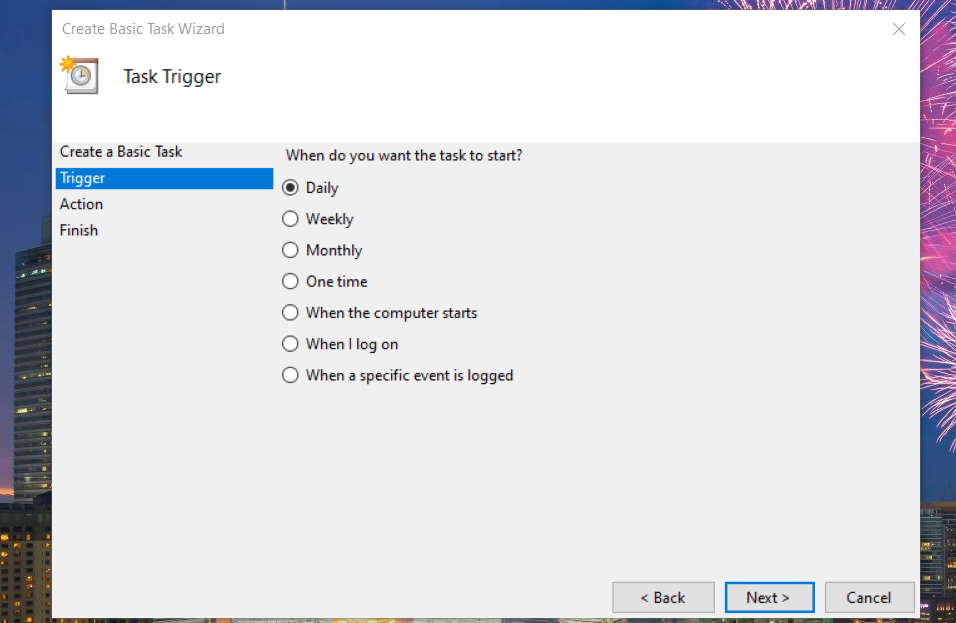
- Select a trigger option, and click Next to continue.
- Then select more specific time settings, and select the Next option.
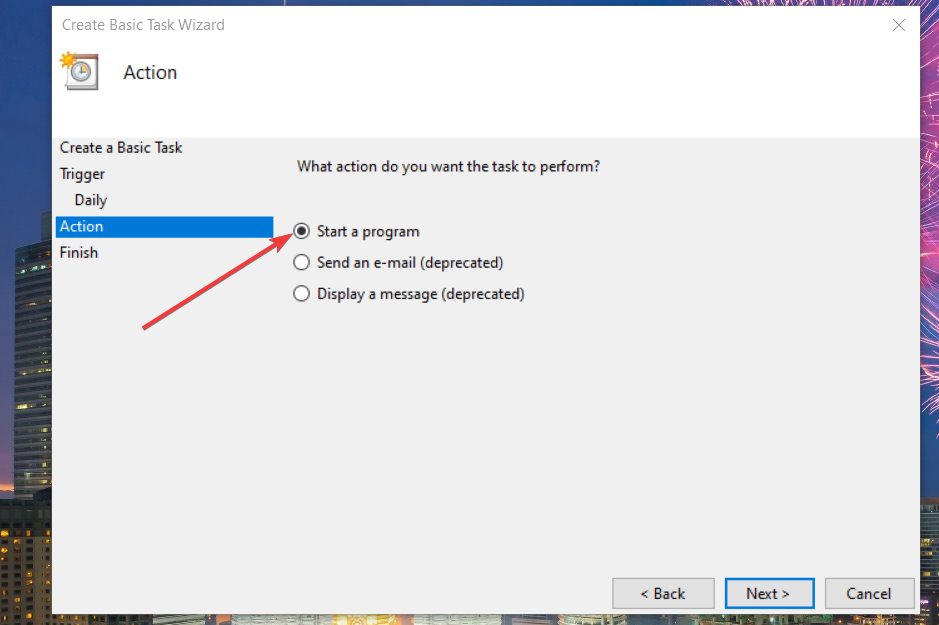
- Choose the Start a program option.
- Click Next to proceed.
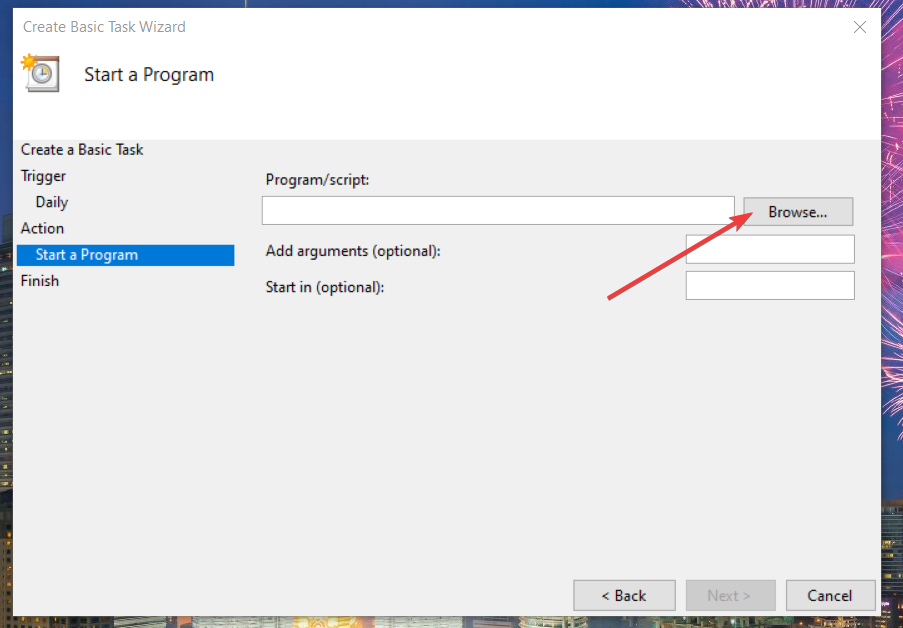
- Then click Browse on the Create Basic Task Wizard.
- Select a program for the task to start, and click the Open button. Alternatively, you could select a file to open with its default software.
- Press the Next button again.
- Finally, select the Finish option.
After that, the program you selected will automatically start at the time you configured it. You can edit the task anytime by right-clicking it in Task Scheduler and selecting Properties. Then click the Edit buttons for actions and triggers on its properties windows.
To set up a task that executes a command, you must select it to open PowerShell or Command Prompt. Then, enter the command to start within the Add arguments box. For example, you could set up a task to run a system scan by entering this command: sfc /scannow
For more information about using the Task Scheduler in Windows 11, check out our dedicated article.
Just as you can see in this guide on how to schedule tasks in Windows 10, as a Windows 11 user, you may also enable various scripts and schedules to run at a specific time or event, depending on your needs.
Even more, take advantage of the best Windows task scheduler software if you want to rapidly automate repetitive tasks.
For any questions and more suggestions, don’t hesitate to access the comments section below.






User forum
0 messages