Task Scheduler on Windows 11: Best 6 Scheduling Tips
Learn to schedule tasks on your device in no time
5 min. read
Updated on
Read our disclosure page to find out how can you help Windows Report sustain the editorial team Read more
Key notes
- Windows 11's Task Scheduler is one of the most exceptional preset Windows applications because it can streamline your work.
- You can take advantage of it to schedule a task, using basic options, such as a date or time.
- Thanks to its advanced settings, you'll also be able to set the triggers, actions, or conditions of the task.
![How to use Windows 11 Task Scheduler [Easy Guide]](https://cdn.windowsreport.com/wp-content/uploads/2021/08/wh9FQy58Oi-1-886x590.jpg)
For those unfamiliar with this feature, Task Scheduler is a component tool of Microsoft Windows. It allows you to schedule the PC’s programs/scripts to launch at pre-defined times or after specified intervals.
Task Scheduler is available on Windows 11, too. And because it is required to understand better how this can be used, we’ve prepared a dedicated article. However, keep in mind that you can also consider downloading additional Windows task scheduler software, but today’s subject is less time-consuming.
What does Task Scheduler do?
This is an essential utility that can help in the following:
- Start time scheduling – As mentioned before, with Task Scheduler, you can organize when to start specific apps and programs.
- Message delivery – You may also apply a particular time to send specific email messages.
- Notification schedules – The utility can also be configured to send notifications automatically. This is well-known as job scheduling, which will simplify both individual and business digital work.
- Increases planning time – By using Windows 11’s Task Scheduler, you’ll save much more planning time and won’t have to execute specific actions manually, such as opening a site at a scheduled time.
There are few limits to what it can do. If the required conditions are met, you can schedule a task to run a backup script every night or send an e-mail whenever a specific system event occurs.
You should check out the full Microsoft guide for more information about the Task Scheduler tool.
How can I use Windows 11’s Task Scheduler?
1. Schedule tasks with basic settings
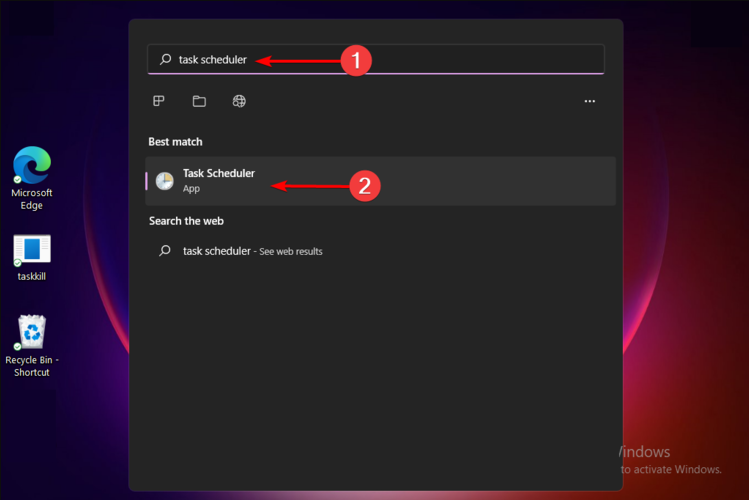
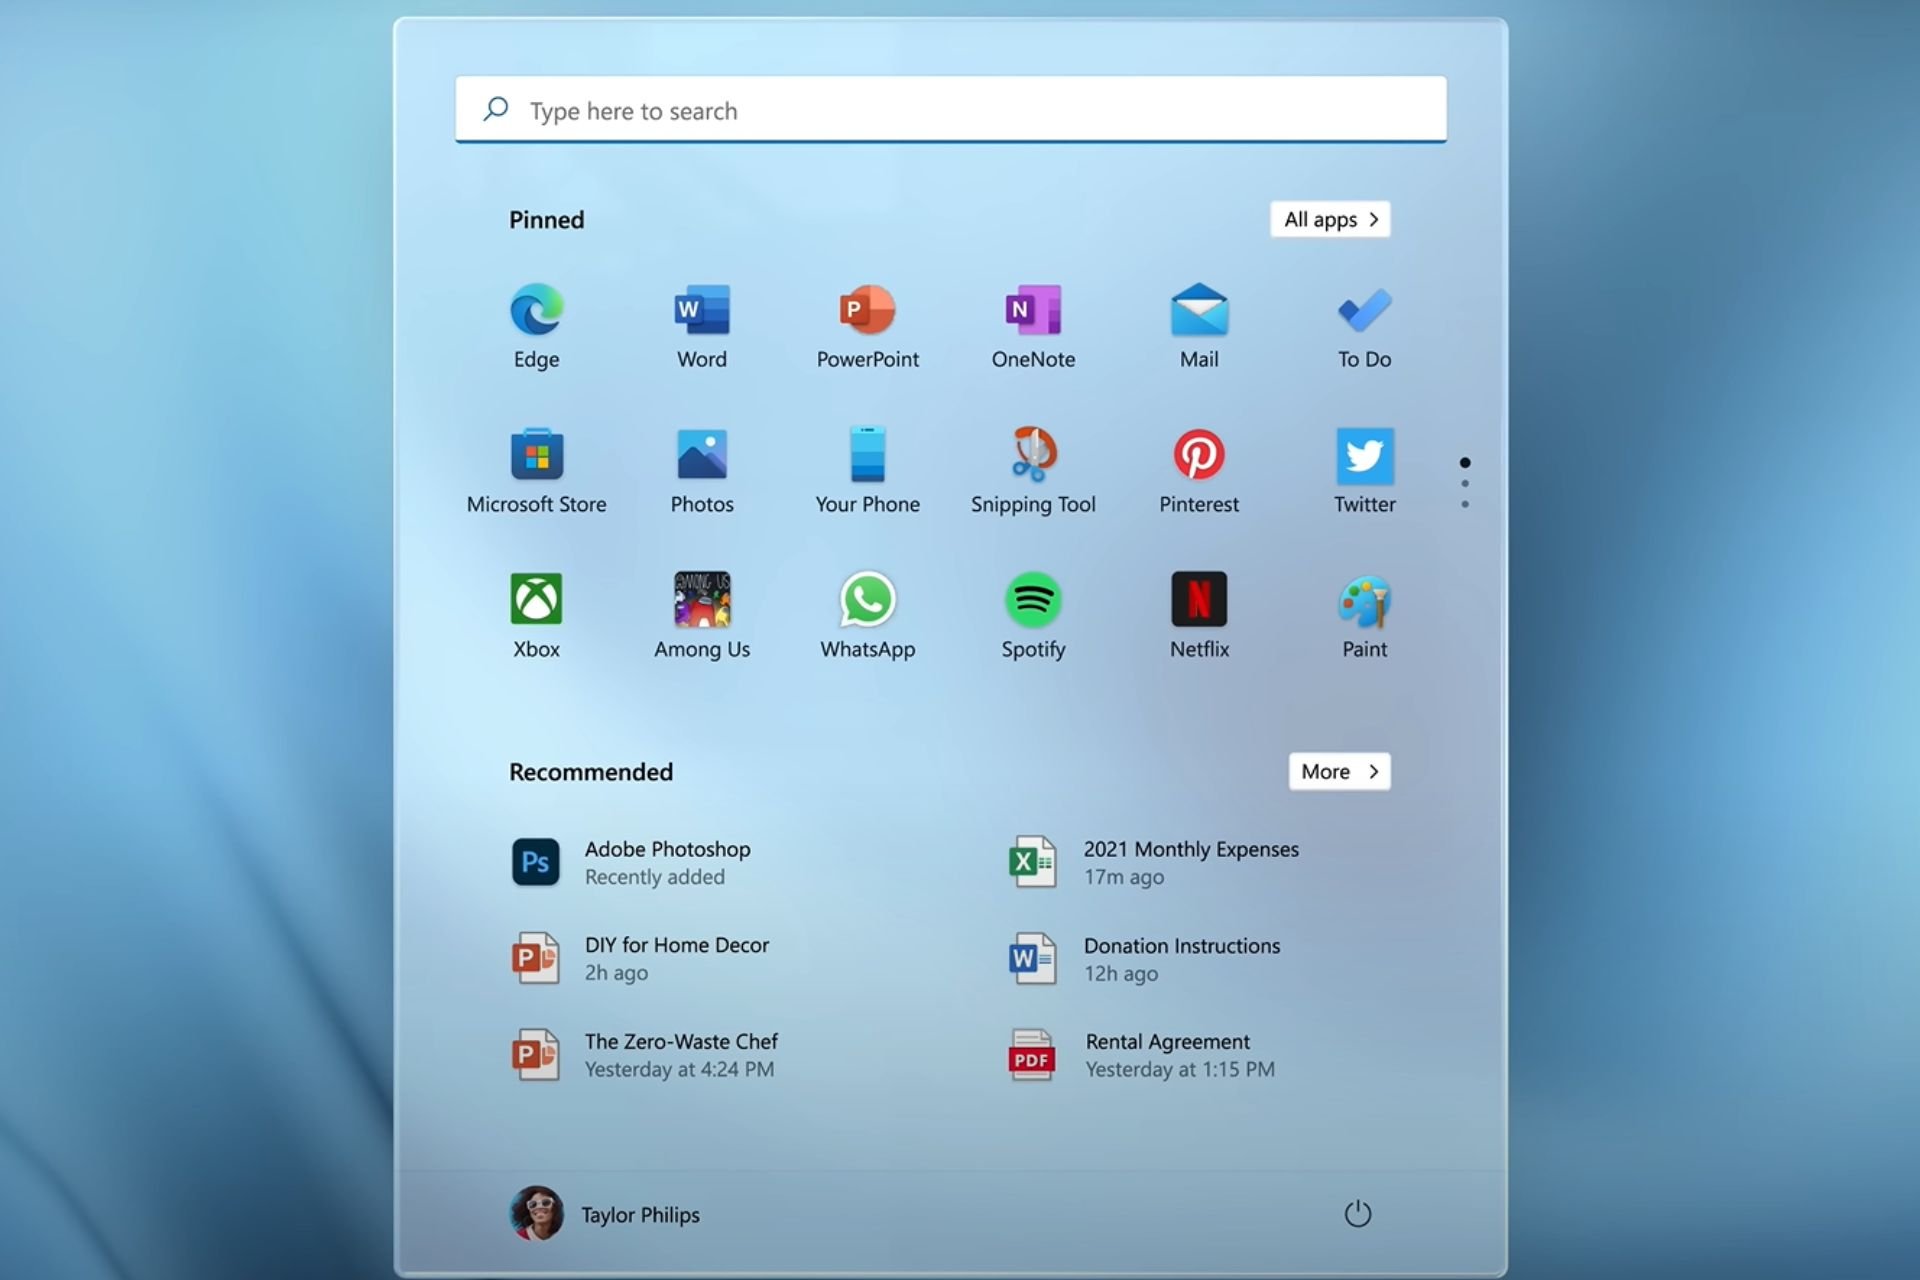
1. Open the Start menu by hitting the Windows key.
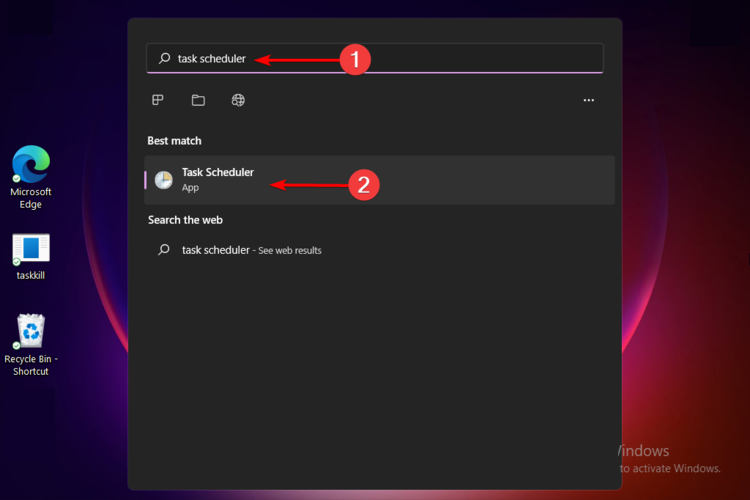
2. Type task scheduler in the search box, then click on the result to open the app.
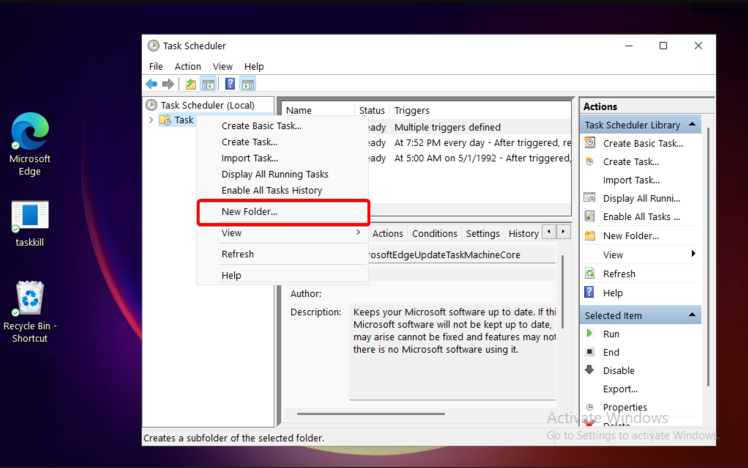
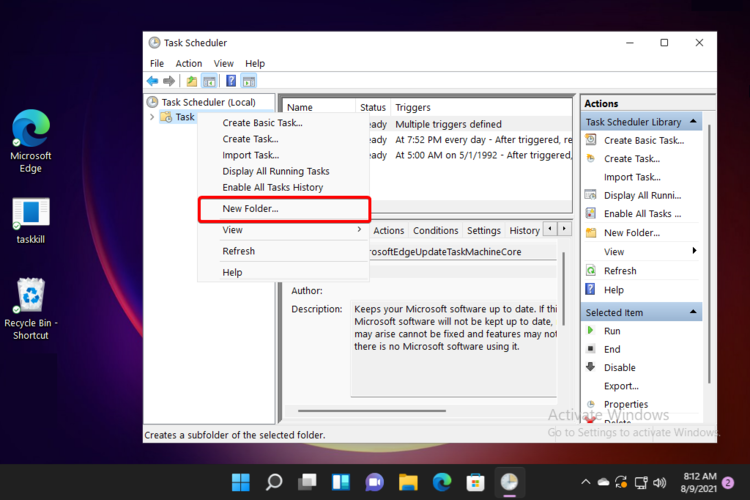
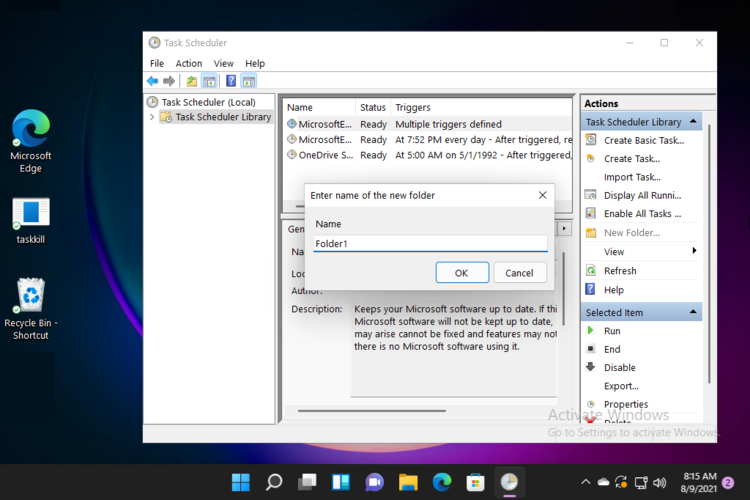
3. Look at the left window pane, then right-click on Task Scheduler Library and select the New Folder option.
4. Give a name to that folder, then click on OK.
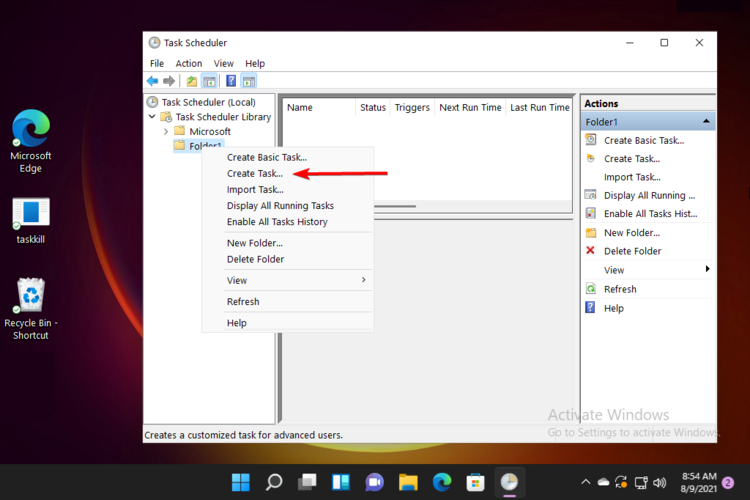
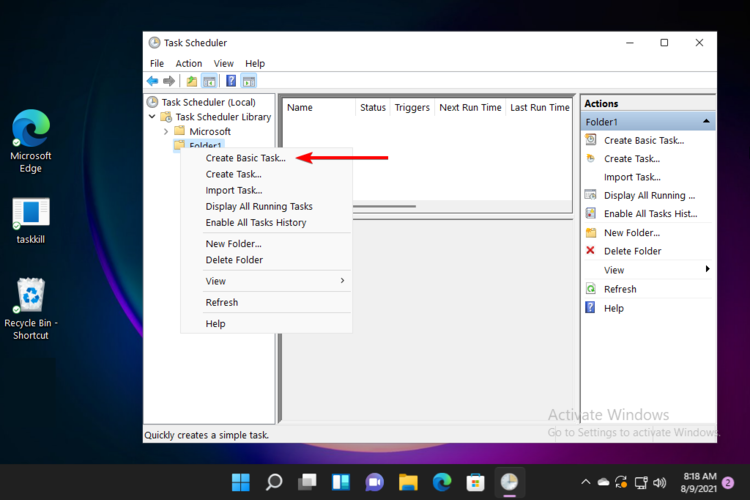
5. Expand the Task Scheduler Library, then right-click on the folder you’ve just created, and choose to Create Basic Task.
6. Once the Create a Basic Task Wizard window is opened, enter the name and description of the task.
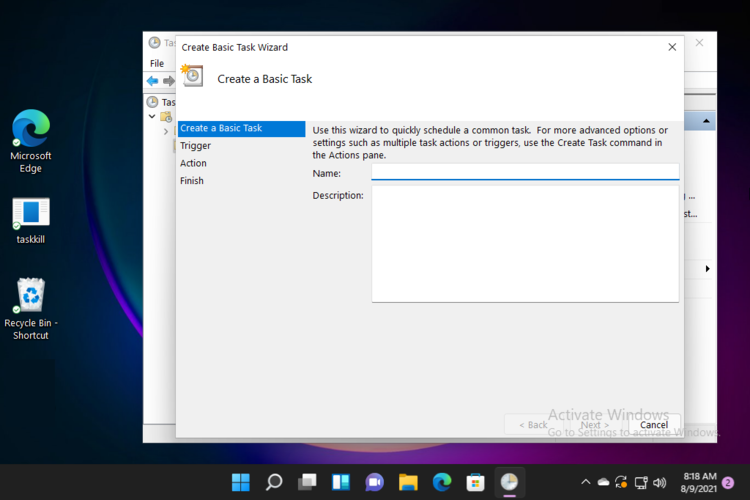
7. After all is set, click on Next.
8. Choose when do you want the task to start, then click on Next.
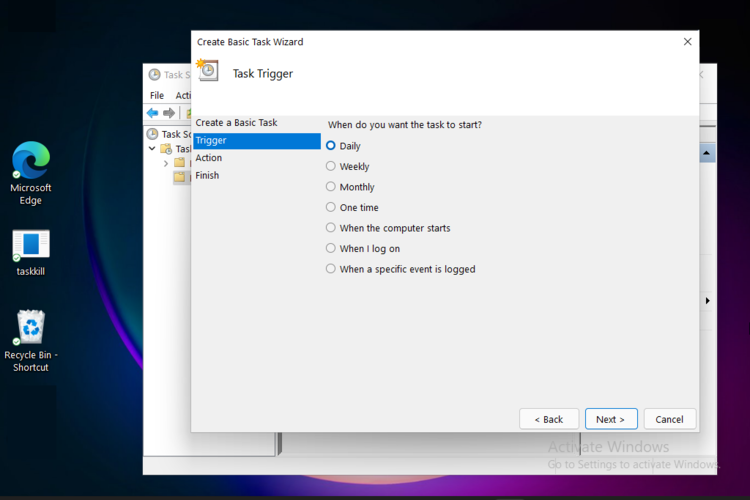
9. Now you will be asked to set the time for the program to start. After you set it, click on the Next button.
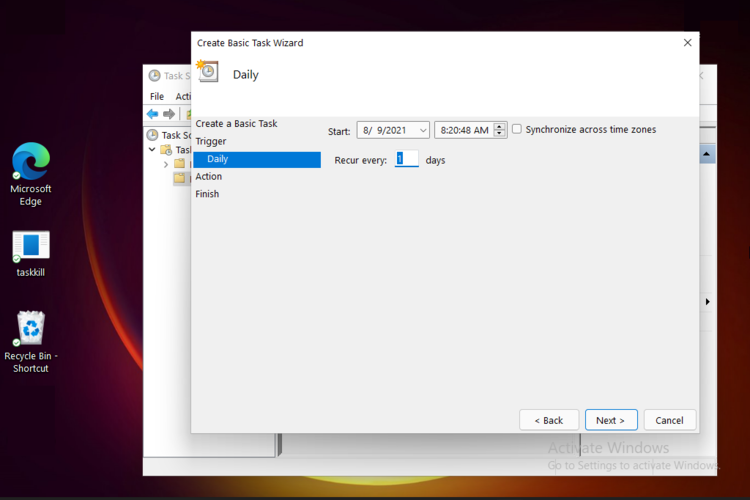
10. Then, you’ll have to set the task you want to perform.
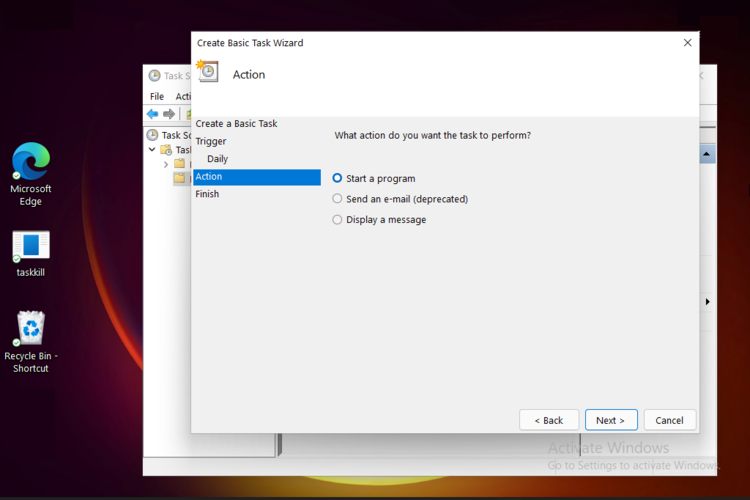
11. After all is set, click on Finish.
Using Windows 11’s built-in Task Scheduler is very easy and can be done by anyone. You can give your task a name and description, trigger, and many other configurations.
2. Schedule tasks with advanced settings
- Open the Start menu by hitting the Windows key. Type task scheduler in the search box, then click on the result to open the app.
- Look at the left window pane, then right-click on Task Scheduler Library and select the New Folder option.
- Give a name to that folder, then click on OK.
- Expand the Task Scheduler Library option, then right-click on the folder you created and choose to Create Task.
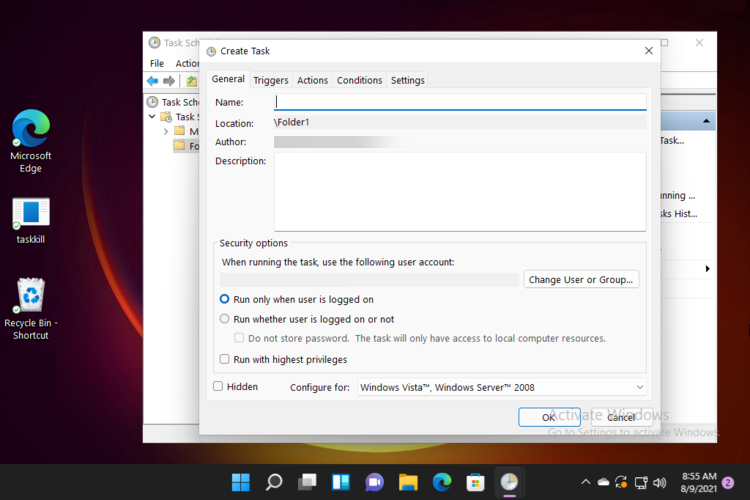
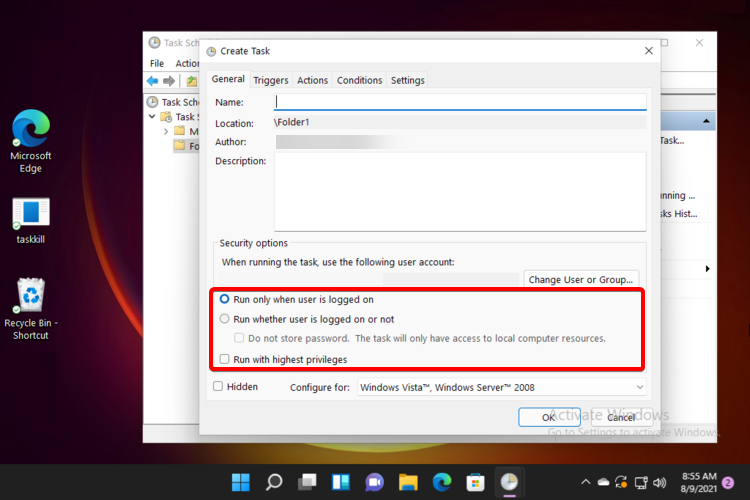
- Set a name and description for the task. Note that you can also change the user or group for which you want to run the task.
- On the same window, you’ll have other options to set, like whether to run the program when the user is logged in, whether logged in, or whether you want to run it with the highest privileges.
- Once done, click on OK.
3 Manage Windows 11’s Task Scheduler Triggers
- Open the Start menu by hitting the Windows key. Type task scheduler in the search box, then click on the result to open the app.
- Look at the left window pane, then right-click on Task Scheduler Library and select the New Folder option.
- Give a name to that folder, then click on OK. Then Expand the Task Scheduler Library option, right-click on the folder you created and choose to Create Task.
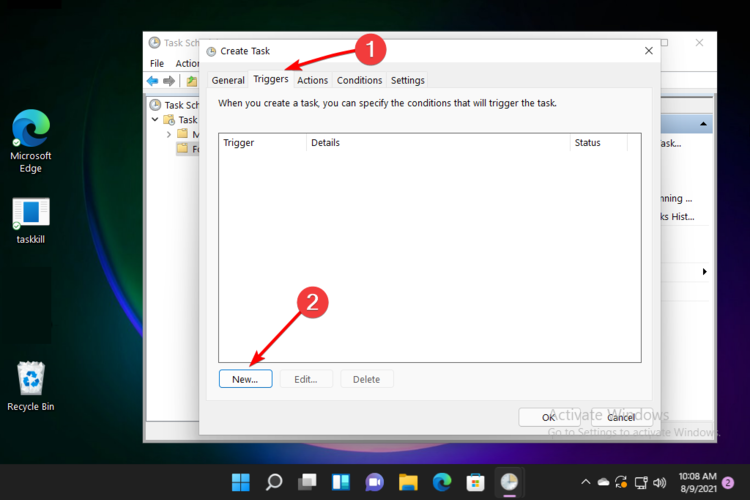
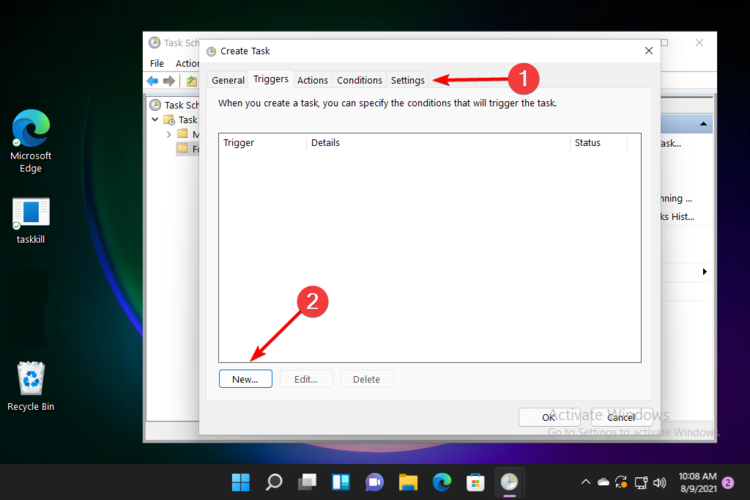
- To specify the triggering condition of the task, click on the Triggers tab, then on the New button.
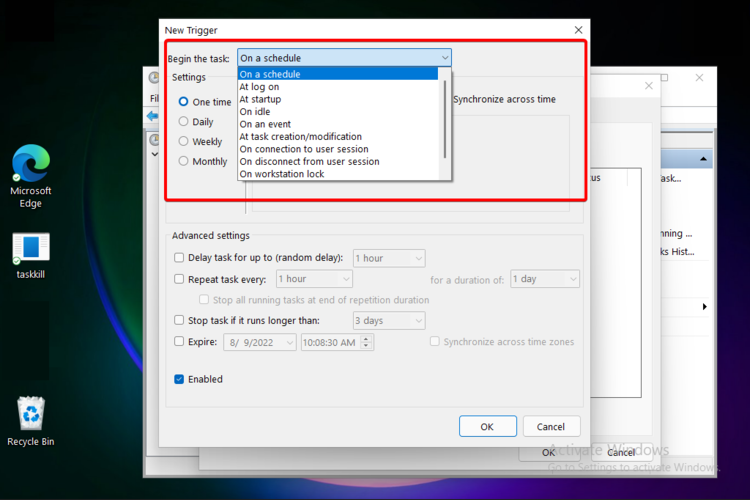
- You can run the task on a schedule, log on, idle, on an event, at task creation/modification, connected or disconnected from the session, etc.
- After doing so, click on OK.
4. Adjust Windows 11’s Task Scheduler Actions
- Perform steps one to three of method 3.
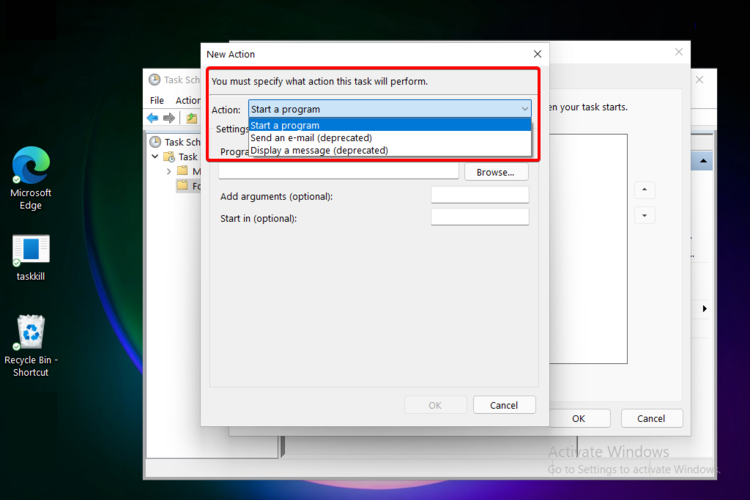
- To set the task’s action, click on the Actions button, then click on the New button.
- You can select whether the action will start a program, send an email, or display a message. Customize the task according to your preferences.
- Click on OK to apply the changes.
5. Personalize Windows 11’s Task Scheduler Conditions
- Perform steps one to three of method 3.
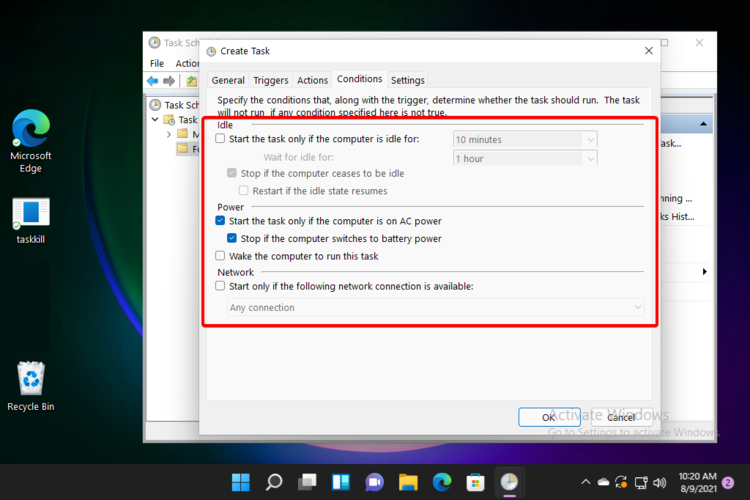
- To adjust the task’s conditions, click on the Conditions tab, then on New.
- You can set conditions for idle state, power, and network. Each of them has certain specifications that should be chosen according to your necessities.
- Click on OK to apply the changes.
6. Take a look at Windows 11’s Task Scheduler Settings
- Perform steps one to three of method 3.
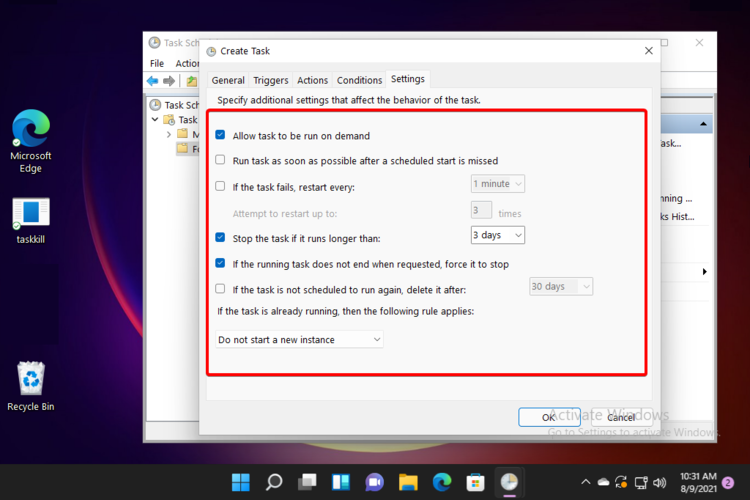
- You can personalize settings by selecting the Settings tab, then clicking on New.
- In this window, you can adjust additional settings affecting the task’s behavior.
- Once done, click on OK, and the task will be created.
 NOTE
NOTE
Windows 11 problems are usually not so different from the previous OS. So, if you experience issues with this tool, check out what to do if Windows Scheduled Tasks can not properly run on Windows 10.
Even if, like any other app, Windows 11 Task Scheduler can get into specific issues, there are plenty of solutions for each.
If you are looking for ways to enable Task Scheduler History to check information related to tasks, including the date and time of execution or status of the task, check out our guide.
We prepared this article to present its best features. Remember that it will guarantee a digital environment organization and simplify your work.
Are there other curiosities regarding this subject? Do not hesitate to leave a comment in the section below.

