OpenVPN Not Working in Windows 11? Here's What to do
3 min. read
Updated on
Read our disclosure page to find out how can you help Windows Report sustain the editorial team. Read more
Key notes
- OpenVPN is a popular client, but users have been reporting that it's not working in Windows 11.
- This could be due to a third-party antivirus, Windows Defender Firewall, or the absence of critical services.
- To fix the error, add an exception for OpenVPN in Windows Firewall, uninstall the antivirus, or try the other methods here.
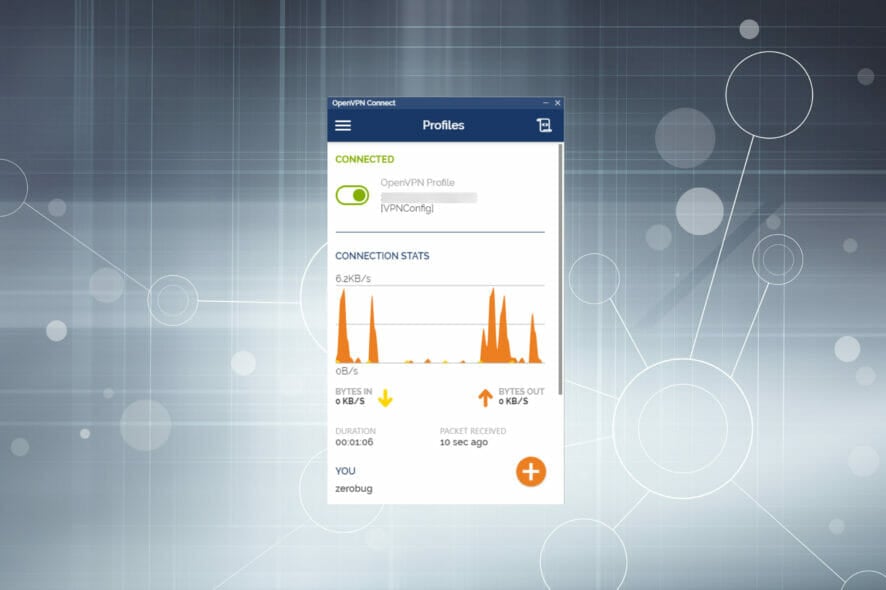
The popularity of VPNs has soared in recent years, owing to cyber threats and regional restrictions on accessing websites. Many users who went with the OpenVPN client reported that it’s not working in Windows 11.
This particularly happens when an installed third-party antivirus is blocking the VPN connection, or it could be the Windows Defender Firewall. Other than that, there are some critical services to be run in order to have a stable connection, so make sure these are running.
Now that you have a basic understanding of the underlying causes, let’s walk you through the most effective fixes for OpenVPN not working issue in Windows 11.
What do I do if OpenVPN is not working in Windows 11?
1. Add an exception to the firewall
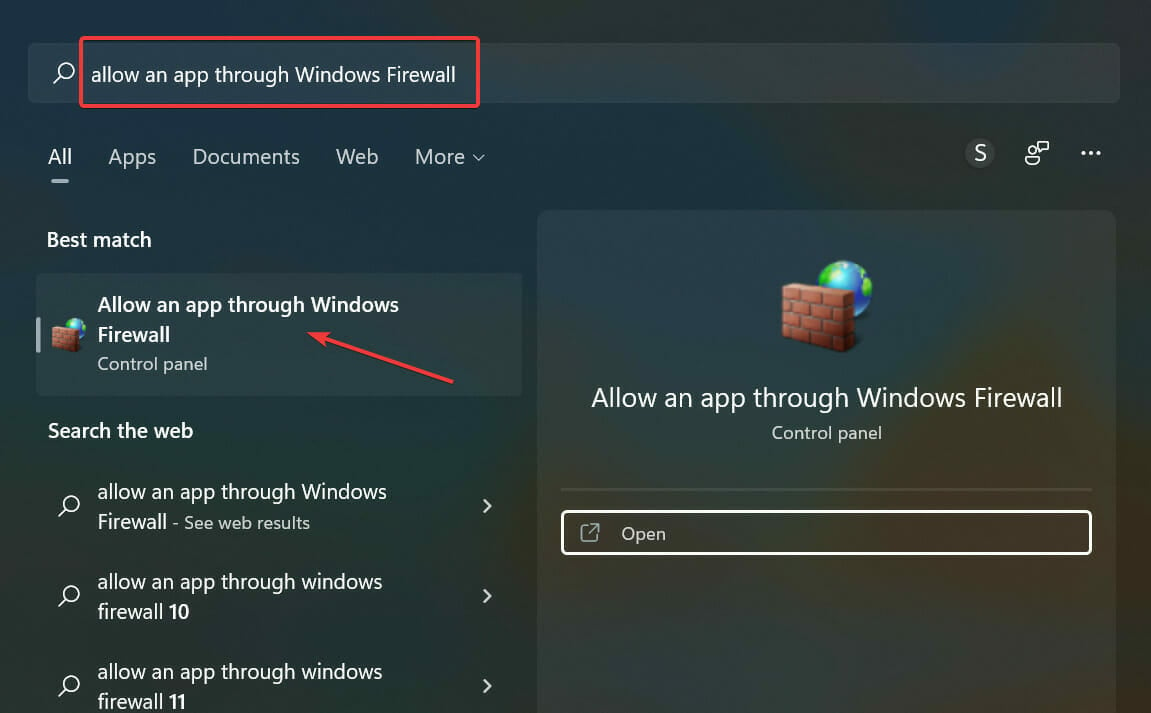
- Press Windows + S to launch the Search menu, enter Allow an app through Windows Firewall in the text field, and then click on the relevant search result that appears.
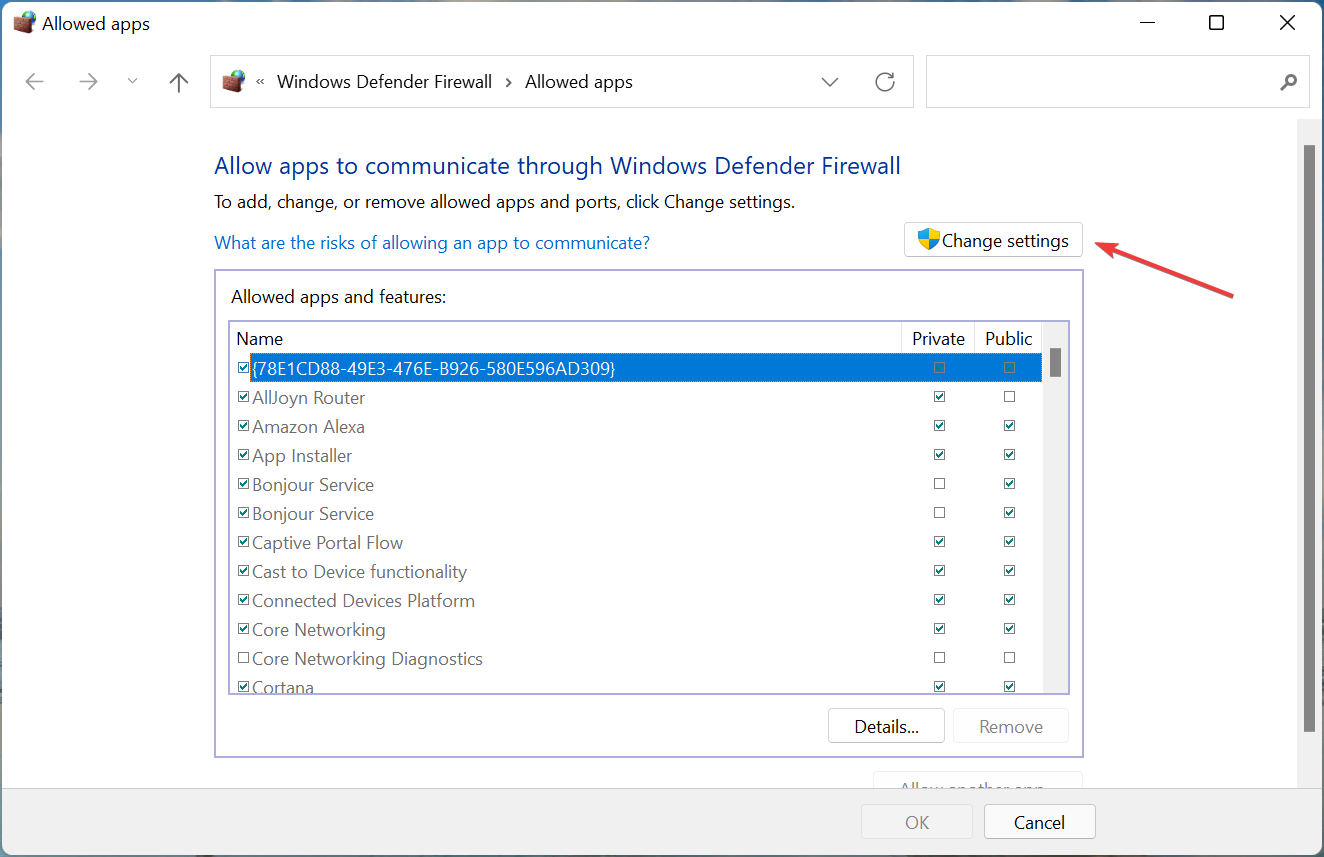
- Click on the Change settings button near the top-right corner in the Allowed apps window.
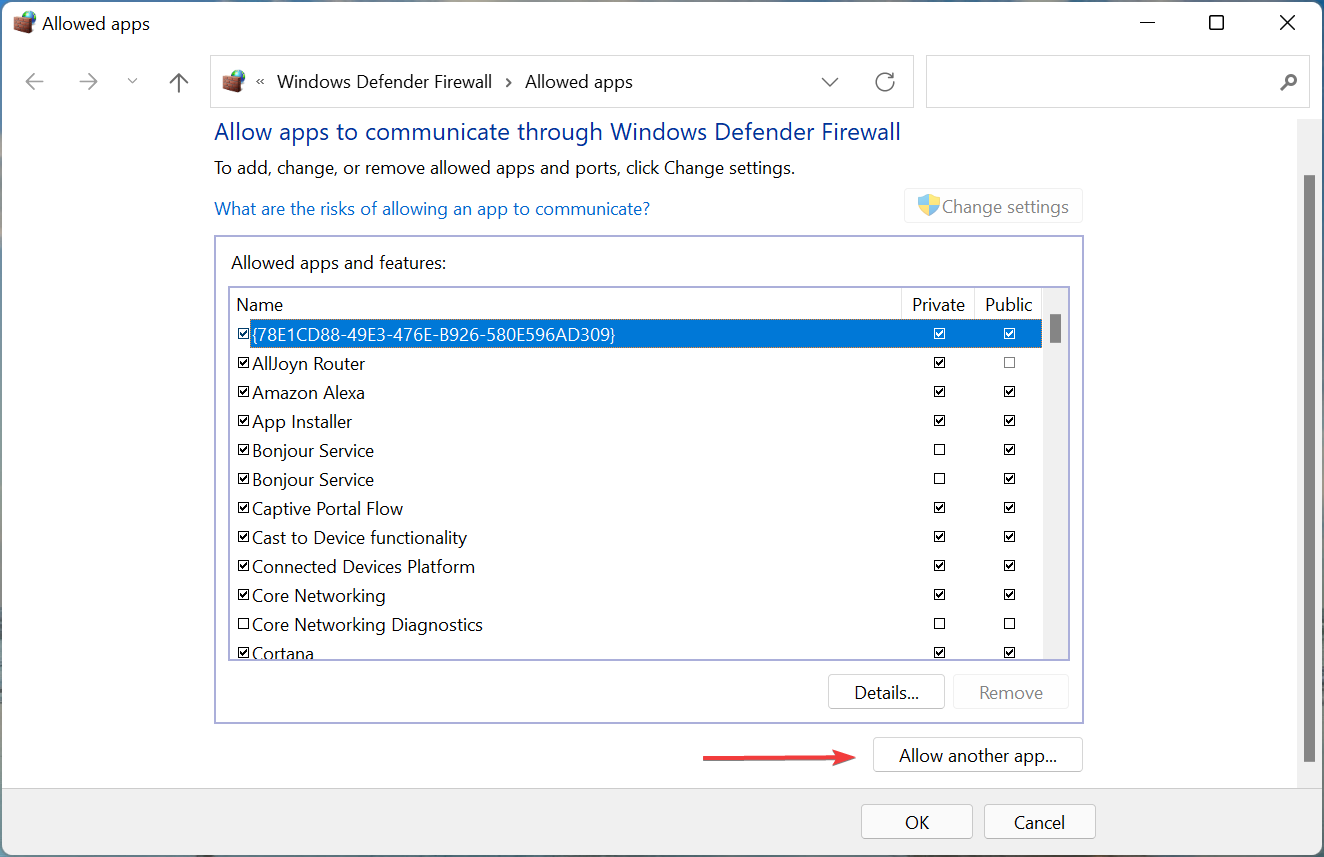
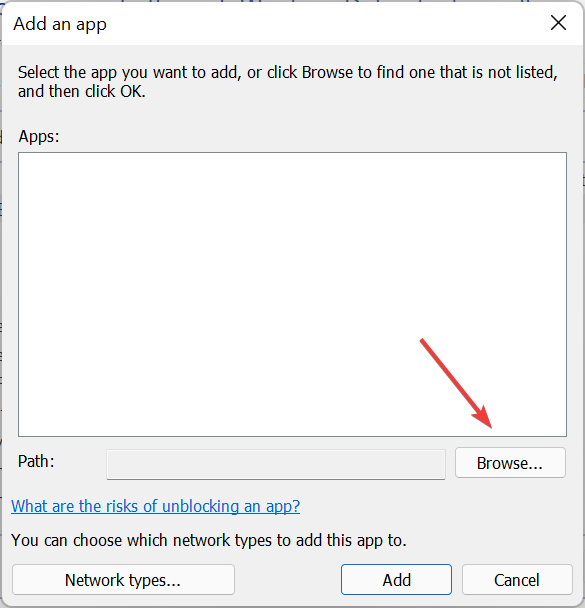
- Next, click on Allow another app at the bottom.
- Click Browse.
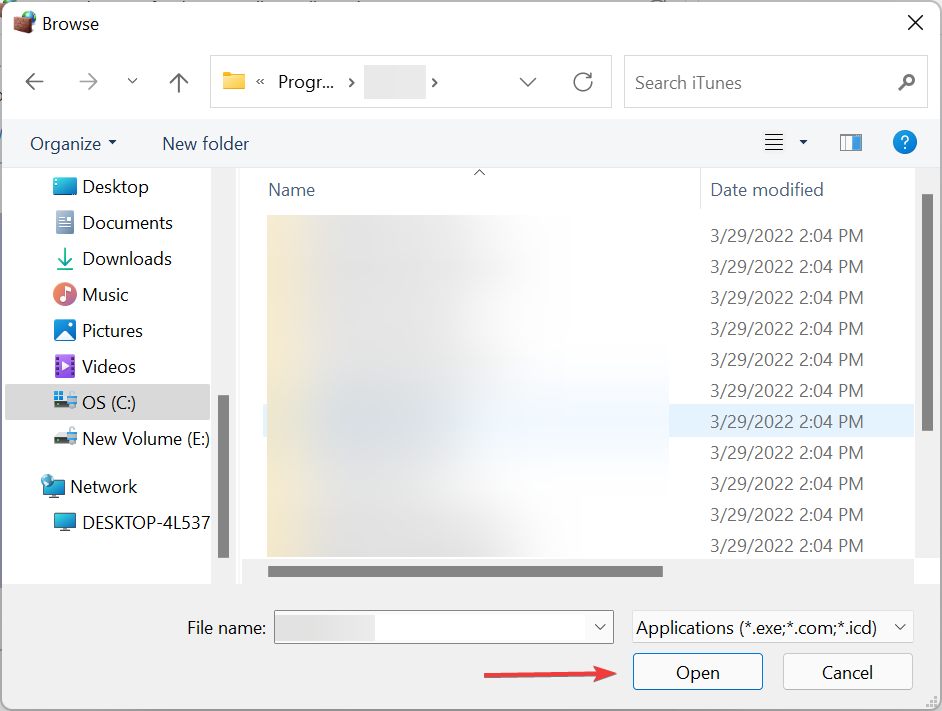
- Go to the folder where OpenVPN is stored, select it, and then click on Open.
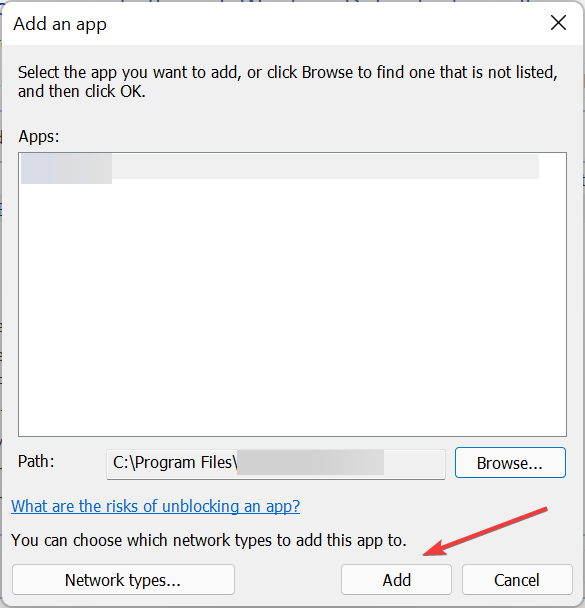
- Now, click on Add at the bottom.
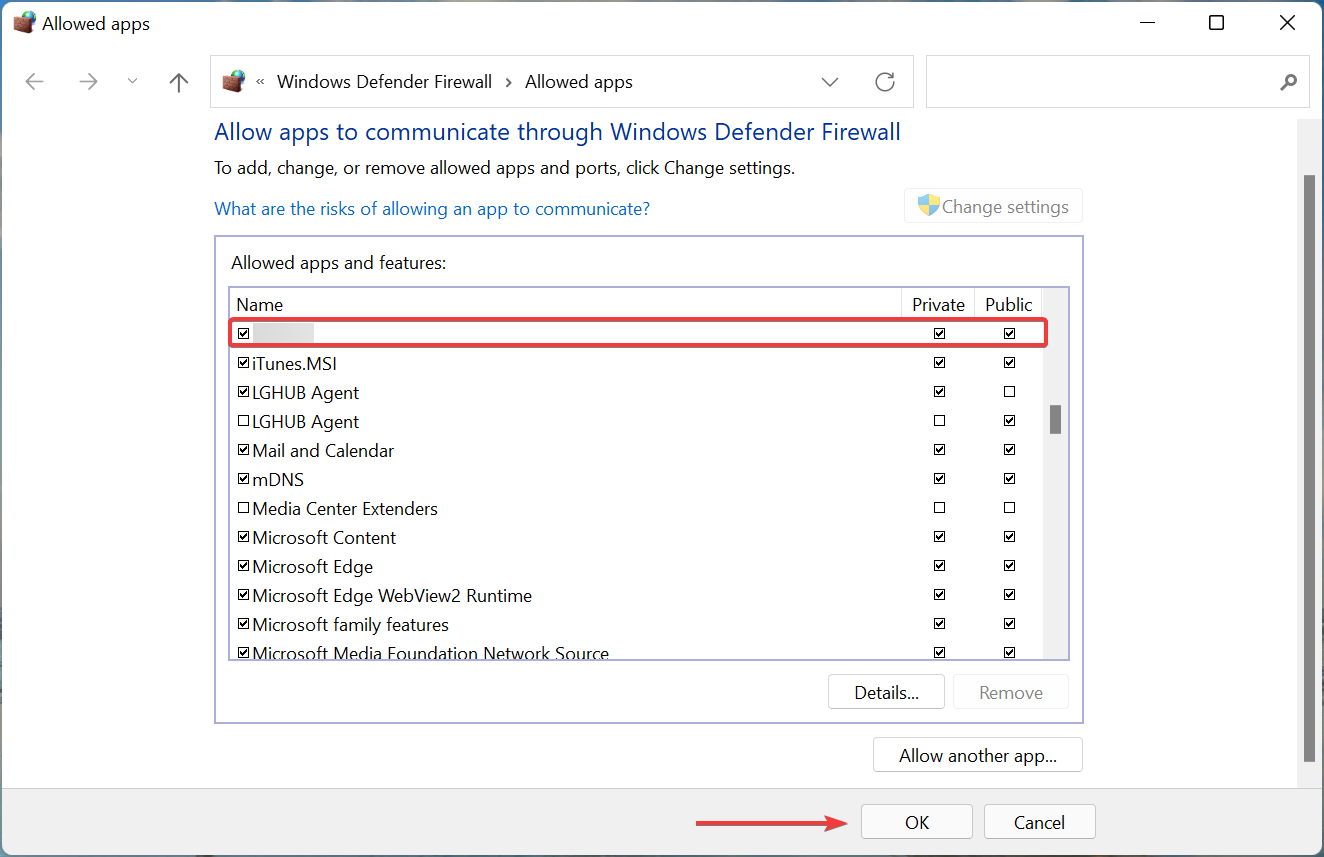
- Once OpenVPN is added to the list of allowed apps, make sure the checkboxes for both Private and Public networks are checked, and then click on OK at the bottom.
After making the changes, restart the computer and check if OpenVPN now starts working in Windows 11.
2. Make sure the DHCP Client service is running
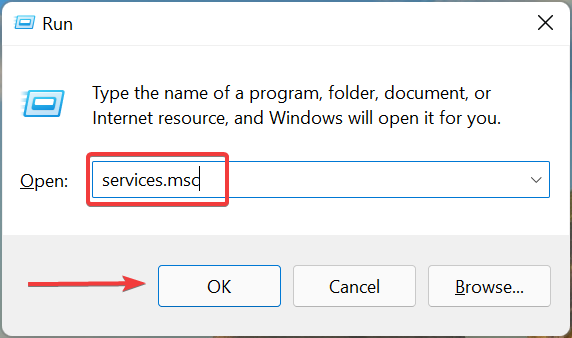
- Press Windows + R to launch the Run command dialog box, enter services.msc in the text field, and click on OK to launch the Services app.
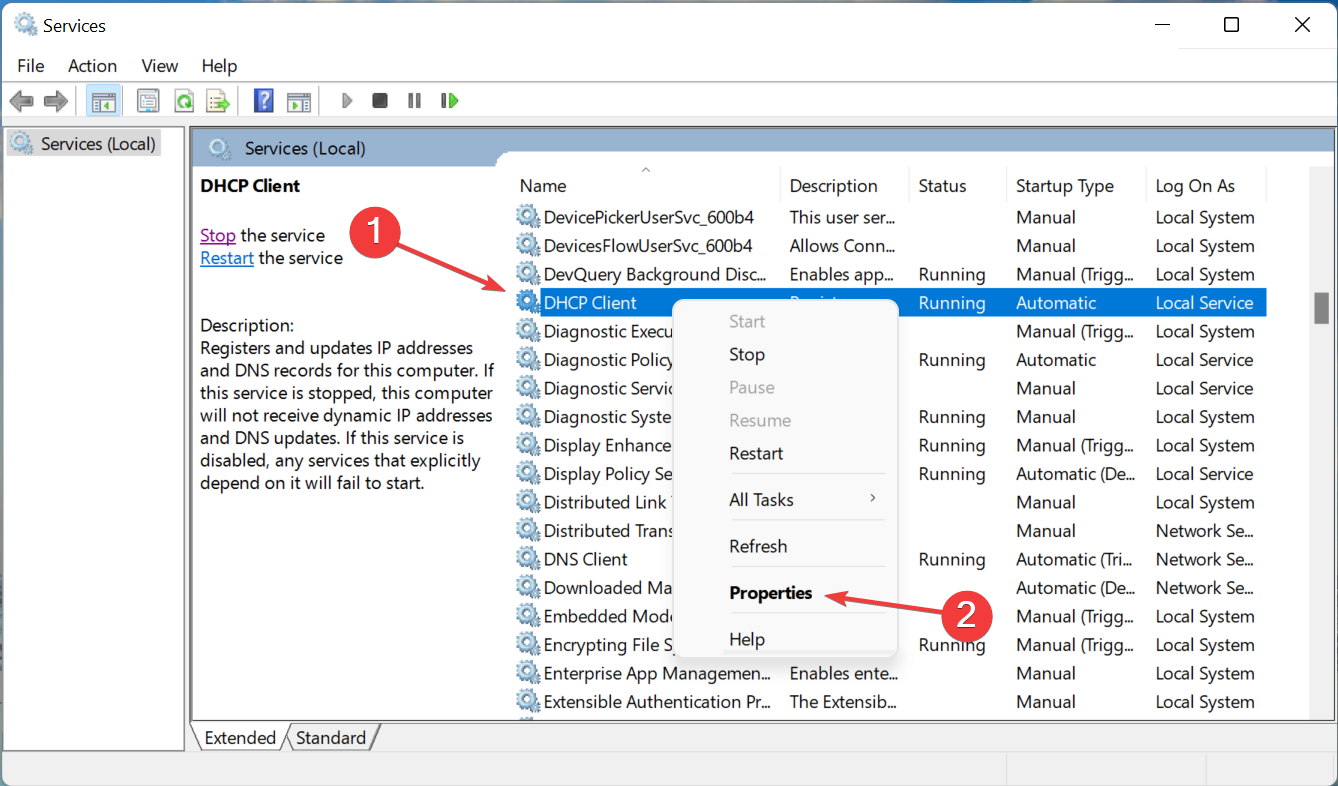
- Now, locate the DHCP Client service, right-click on it, and select Properties from the context menu.
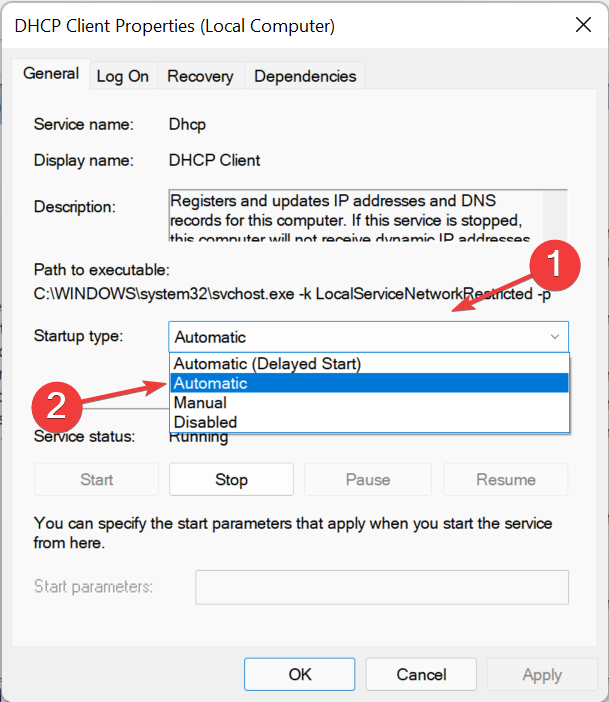
- Click on the Startup type dropdown menu, and select Automatic from the list of options.
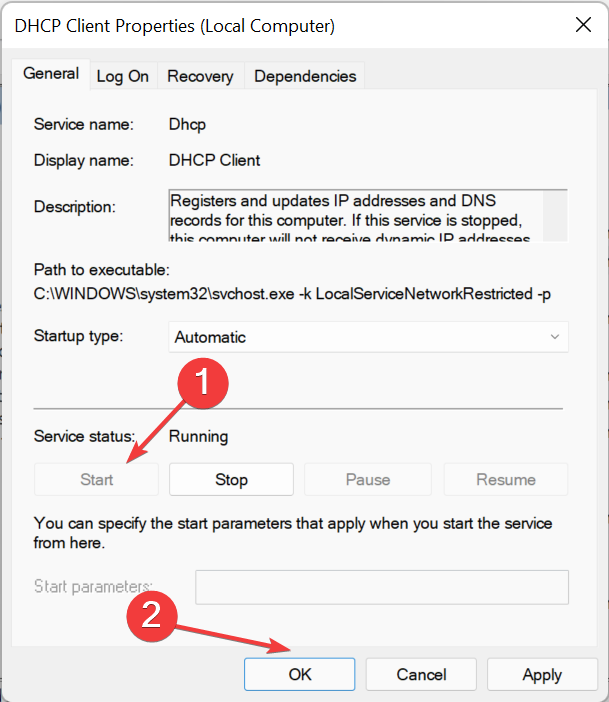
- Next, if the service is not running, click the Start button under Service status, and click on OK at the bottom to save the changes.
3. Use a reliable VPN client
If the methods listed above have not worked, you may consider switching to another VPN client. And, if you do, we recommend going with PIA (Private Internet Access). It’s a fast and secure VPN with over 3000 servers in 78 countries.
Also, you can access up to 10 devices with the same account. The best part, PIA does not store any browsing history and offers the feature to block ads and trackers for a safe browsing experience.
4. Uninstall third-party antivirus
- Press Windows + I to launch Settings, and then select Apps from the tabs listed in the navigation pane on the left.
- Click on Apps & features on the right.
- Locate the third-party antivirus, click on the ellipsis next to it, and then select Uninstall from the menu.
- Again, click Uninstall in the prompt that pops up.
Once done, you can restart the computer, and OpenVPN should now be working in Windows 11. Also, the built-in Windows Security is more than capable of keeping your PC secure, so you should worry about that aspect.
If you have another system running the previous iteration, learn what to do if OpenVPN is not working in Windows 10. Also, if you plan to go with another one, check out the 5 best VPNs as per experts after 3 months of usage.
Tell us which fix worked, and your experience with the OpenVPN client, in the comments section below.







User forum
0 messages