OpenVPN Not Connecting on Windows 10: How to Fix it
Tweak your settings to secure an unbreakable VPN connection
Key notes
- OpenVPN is one of the most popular VPN protocols, thanks to its superior security and connection speed.
- You can also use an official OpenVPN client for free.
- Many users report that OpenVPN is not working on their Windows 10 PCs.
- If you're one of them, discover our easy workarounds, like adding an exception to the system firewall.

OpenVPN is an open-source VPN client and VPN protocol with immense popularity, thanks to high security and excellent connection speed.
You can separately download and install the OpenVPN client on all popular devices for free if you want to create a secure tunnel to the web.
Or, you can turn to a commercial VPN provider that adopts OpenVPN.
However, OpenVPN may stop working on Windows 10 computers, due to various issues. If you’re encountering this scenario, here’s what you need to do.
Speaking of scenarios, there are several errors that may appear when you have problems with OpenVPN, many users report issues when attempting to start up the app:
- OpenVPN GUI not opening
- Openvpnagent request error in Windows 7, Windows 10 or Windows 11
- Connecting to the Management interface failed in OpenVPN
Meanwhile, others manage to launch it only to encounter severe disruptions afterward:
- OpenVPNcrashing in Windows 10 or OpenVPN stopped working all of a sudden
- OpenVPN connected but not working windows 10
- DNS not working in Windows 10 with OpenVPN
- TAP mode is not supported in OpenVPN
- OpenVPN service is not available
- Error attempting to connect to the selected server in OpenVPN
- OpenVPN socket protect error
- OpenVPN Windows Firewall not working
Below you will find easy-to-follow instructions that should help fix any of the above-mentioned errors and be able to browse the web through a secure OpenVPN tunnel.
How do I enable OpenVPN in Firewall on Windows 10?
In case you have OpenVPN connected but not working in Windows 10, you can enable it by changing a few settings in your firewall security.
Hence, these are the short steps on how to enable OpenVPN in your Firewall:
- In the Start Menu, access Firewall settings.

- Click on the Advanced Settings.

- In the next windows, go to Inbound Rules.
- Click on the New rule button.

- Select the Program option and Next.

- Go to Program’s path and choose OpenVPN.

- On the Action window, select Allow the connection.

- Let all the three options checked and click Next.

- Set the name and description, and then click Finish.
At the same time, this step-by-step guide should resolve OpenVPN not working on Windows 11, so you can use the method on the newest OS version without problems.
How can I fix OpenVPN not working on Windows 10?
1. Add an exception to the firewall
- Press the Win key, type firewall, and open Firewall & network protection
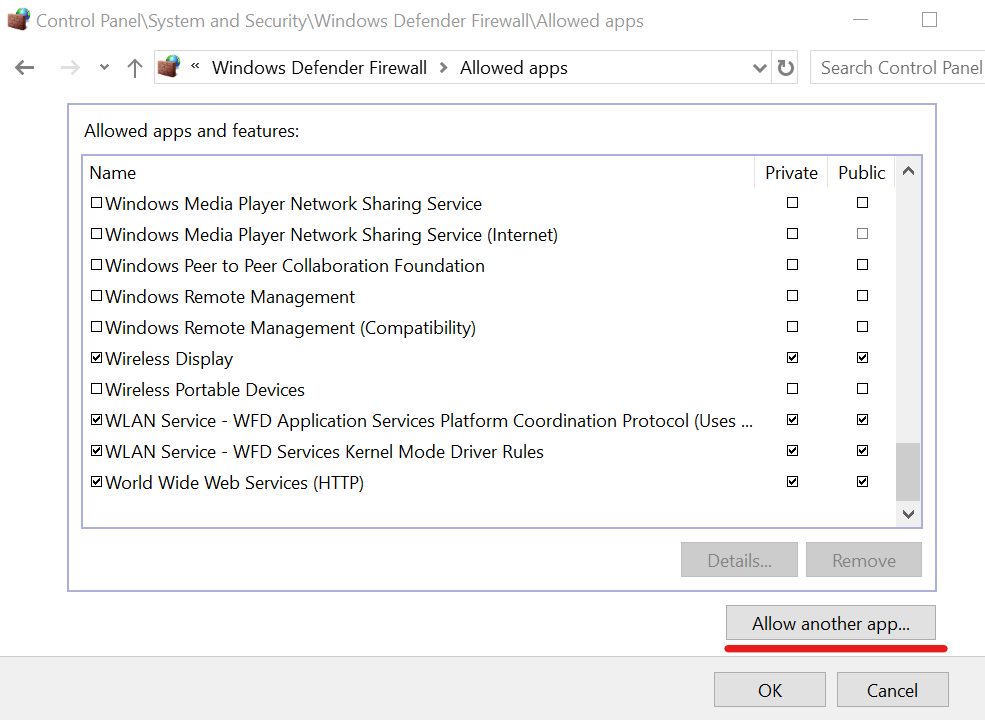
- Click Allow an app through the firewall
- Click Change settings (you need admin rights)
- Search for OpenVPN in this list and check its boxes for Private and Public
- If it’s not in this list, click Allow another app to browse and select it
It’s possible that your firewall didn’t whitelist OpenVPN when you installed the client. In that case, you have to manually add an exception for it in the system firewall.
If another application is responsible for your computer’s firewall, make sure to adjust the above settings accordingly.
To quickly test this theory, you can temporarily disable the firewall and check if OpenVPN works properly on Windows 10 now.
But don’t forget to turn it back on since you risk exposing your home network to vulnerabilities.
2. Use a reliable VPN client with OpenVPN support
If you’re trying and failing to get the OpenVPN to work on Windows 10, consider getting a commercial VPN app that supports the OpenVPN protocol.
And we can’t think of a better option than Private Internet Access. This software supports multiple protocols, including OpenVPN.
This VPN is compatible with all major operating systems and also has a manual configuration option for OpenVPN for those of you who want to add it directly to a supported router.
More about Private Internet Access
- 35 000+ servers in 80+ countries
- Split tunneling functionality
- Private DNS address on each server
- Zero-logs policy
- Bypass geo-blocking restrictions from other regions
- Compatibility with any devices like Windows, macOS, Android, or iOS
Private Internet Access
Utilize this leading VPN software to set up OpenVPN on your Windows device for complete privacy.3. Whitelist OpenVPN in your antivirus
If your anti-malware application throws errors when you try to use OpenVPN on Windows 10, it could mean that it’s blocking the client or protocol.
However, it’s a false positive. In that case, make sure to add OpenVPN to the whitelist to prevent your antivirus from blocking your VPN.
As in the previous solution, you can quickly test it by temporarily deactivating the real-time detection engine of your anti-malware tool.
But we suggest turning it back on as soon as you finish the test and not leave your computer exposed to malware attacks.
If you’re interested in an anti-malware tool with built-in VPN functionality, check out our best picks.
4. Reset the TAP adapter

- Right-click the Start button and select Device Manager
- Expand the Network adapters menu
- Look for any TAP drivers, right-click and select Uninstall device
- Open the Action menu and select Scan for hardware changes
The OpenVPN client requires a TAP driver to work properly. If its functionality is broken, it could be the reason why OpenVPN is not working on your Windows 10 PC.
However, you can easily fix this by uninstalling the TAP driver from Device Manager – it should get automatically reinstalled.
As a general rule, it’s essential to keep Windows drivers updated to the latest version.
5. Check if the DHCP service is running

- Press the Win key, type services, and open Services
- Right-click DHCP Client and select Properties
- Set Startup type to Automatic
- Click OK
Many OpenVPN users report seeing the Initialization Sequence Completed with errors message on Windows 10.
It signals a problem with the DHCP client, which you can restart using the instructions above.
6. Flush DNS and reset Winsock
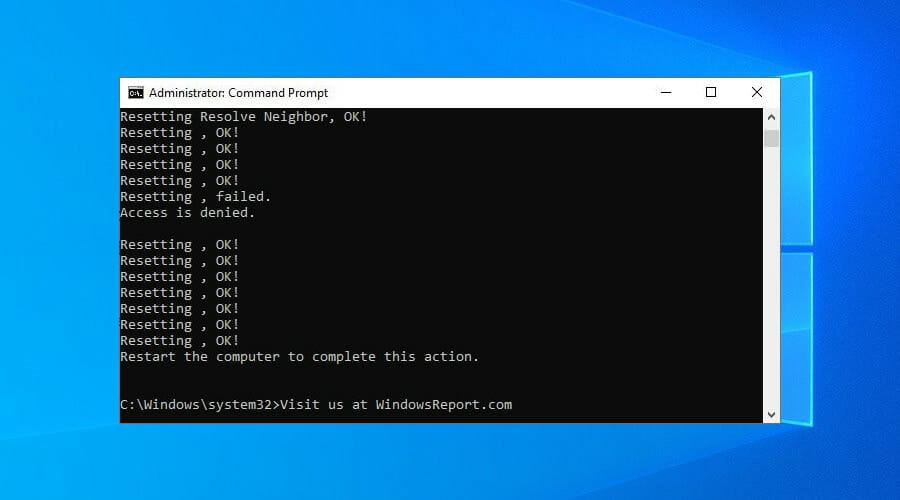
- Run Command Prompt as admin: press Ctrl + R, type cmd, hold Ctrl + Shift, and press Enter
- Copy and paste the next lines (press Enter between each line)
ipconfig /flushdns

ipconfig /registerdns

ipconfig /release

ipconfig /renew

NETSH winsock reset catalog

NETSH int ipv4 reset reset.log

NETSH int ipv6 reset reset.log

exit
Restart your PC to apply the new changes.
The DNS cache and Winsock configuration are responsible for your computer connectivity.
If they’re not initialized properly, it could be the reason why OpenVPN isn’t working on Windows 10.
To recap, if your OpenVPN configuration fails to work on Windows 10, you can fix this issue by adding an exception to the firewall and whitelisting OpenVPN in your antivirus.
You can also reset the TAP adapter, check if the DHCP service is running, as well as flush your DNS and reset Winsock.
But we suggest opting for a trustworthy VPN like Private Internet Access It has built-in support for the OpenVPN protocol, which means that you shouldn’t see any errors anymore.
Learn everything about OpenVPN to master this VPN protocol and client. Also, visit our VPN Troubleshooting Hub whenever you need a VPN quick fix.
Read our disclosure page to find out how can you help Windows Report sustain the editorial team. Read more


Improve this guide


User forum
0 messages