How to Clear Protection History on Windows 11 [Multiple Ways]
Learn to delete Windows Defender's Protection History
6 min. read
Updated on
Read our disclosure page to find out how can you help Windows Report sustain the editorial team. Read more
Key notes
- Protection history is a log of the actions taken by Windows Defender or any critical services that are not running, but it's imperative that you clear it from time to time.
- Clearing the protection history will help clear storage space and also improve the performance of Windows Defender.
- Here, you can find out how to clear protection history using the File Explorer and Event Viewer.
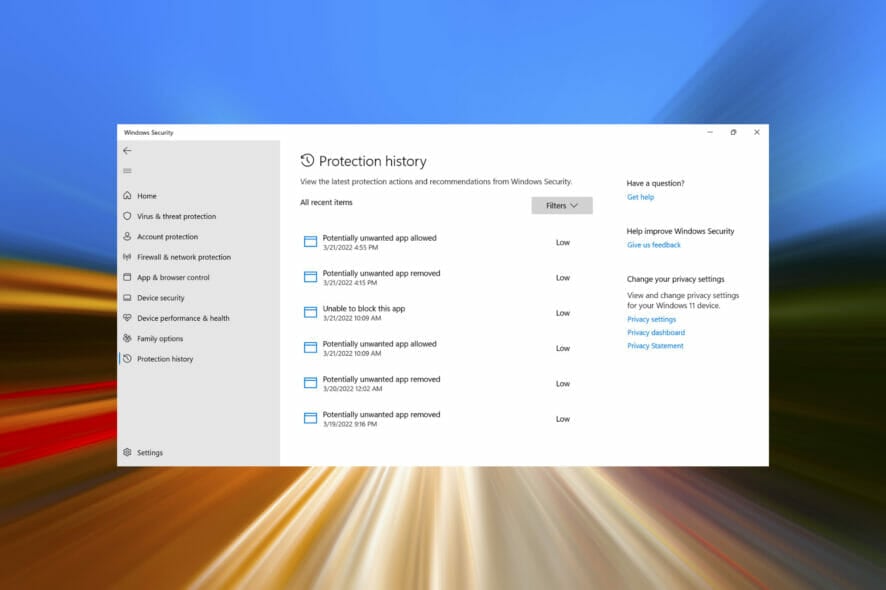
When your PC is running low on storage, there are a lot of folders you immediately look into to free up space. One of these that consumes a large portion is the Windows Defender protection history.
So, let’s find out what is protection history, all the ways you can clear Protection History in Windows 11, and how to configure it to clear automatically after a set period of time.
What is Protection History?
Microsoft offers a built-in antivirus, Windows Defender, to keep your system secure and free from any threats and viruses.
In order to achieve that, Windows Defender will run regular scans in the background, given it is enabled, and keep a log of problems that it identifies, along with the actions taken. It will list out the potentially unwanted apps that were blocked or removed, or if any critical services are turned off.
These logs or the information are referred to as the Windows Defender Protection History or simply Protection History. It categories the problems based on their severity level. Remember, you need to have administrator privileges to view the details of these actions.
Now that you have a fair understanding of the process, let’s walk you through the ways you can clear the protection history in Windows 11.
How do I manually clear protection history in Windows 11?
1. Use the File Explorer
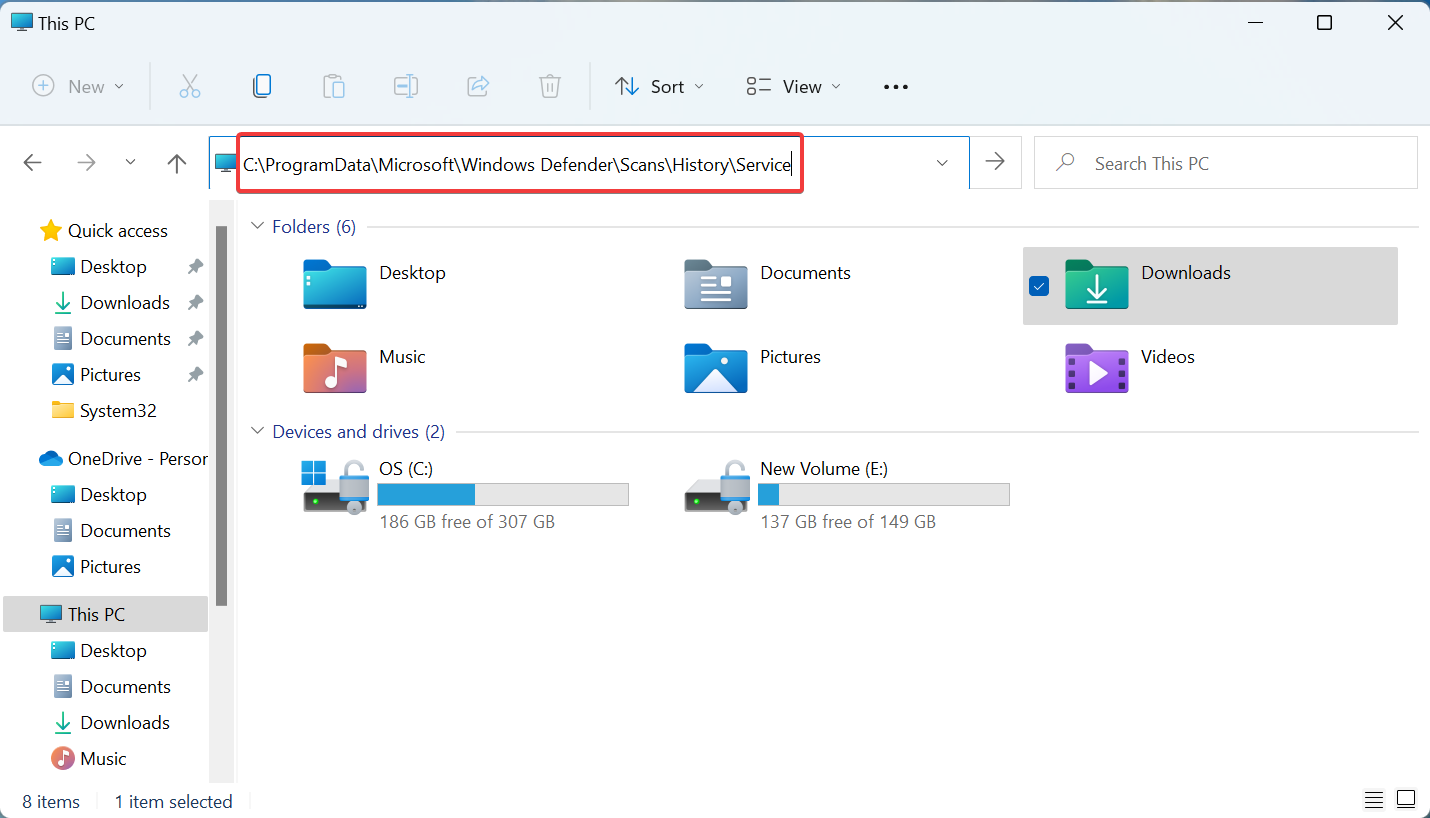
- Press Windows + E to launch the File Explorer, paste the following path in the address bar at the top, and hit Enter. Alternatively, you can navigate this path as well, just make sure to make the hidden files visible:
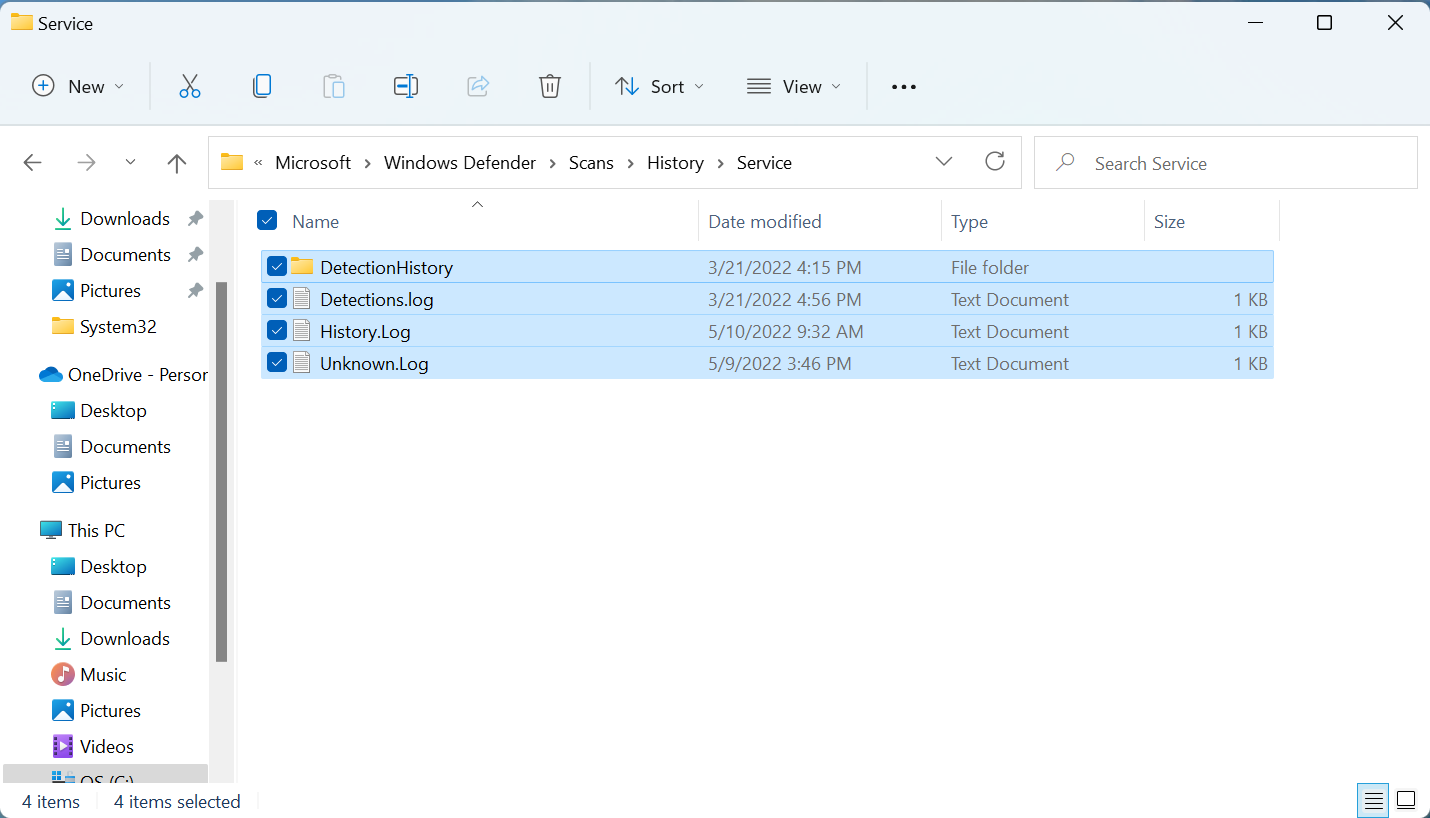
C:\ProgramData\Microsoft\Windows Defender\Scans\History\Service - Once there, press Ctrl + A to select all the files, and hit Delete to clear them.
- Choose the appropriate response in case a confirmation prompt pops up.
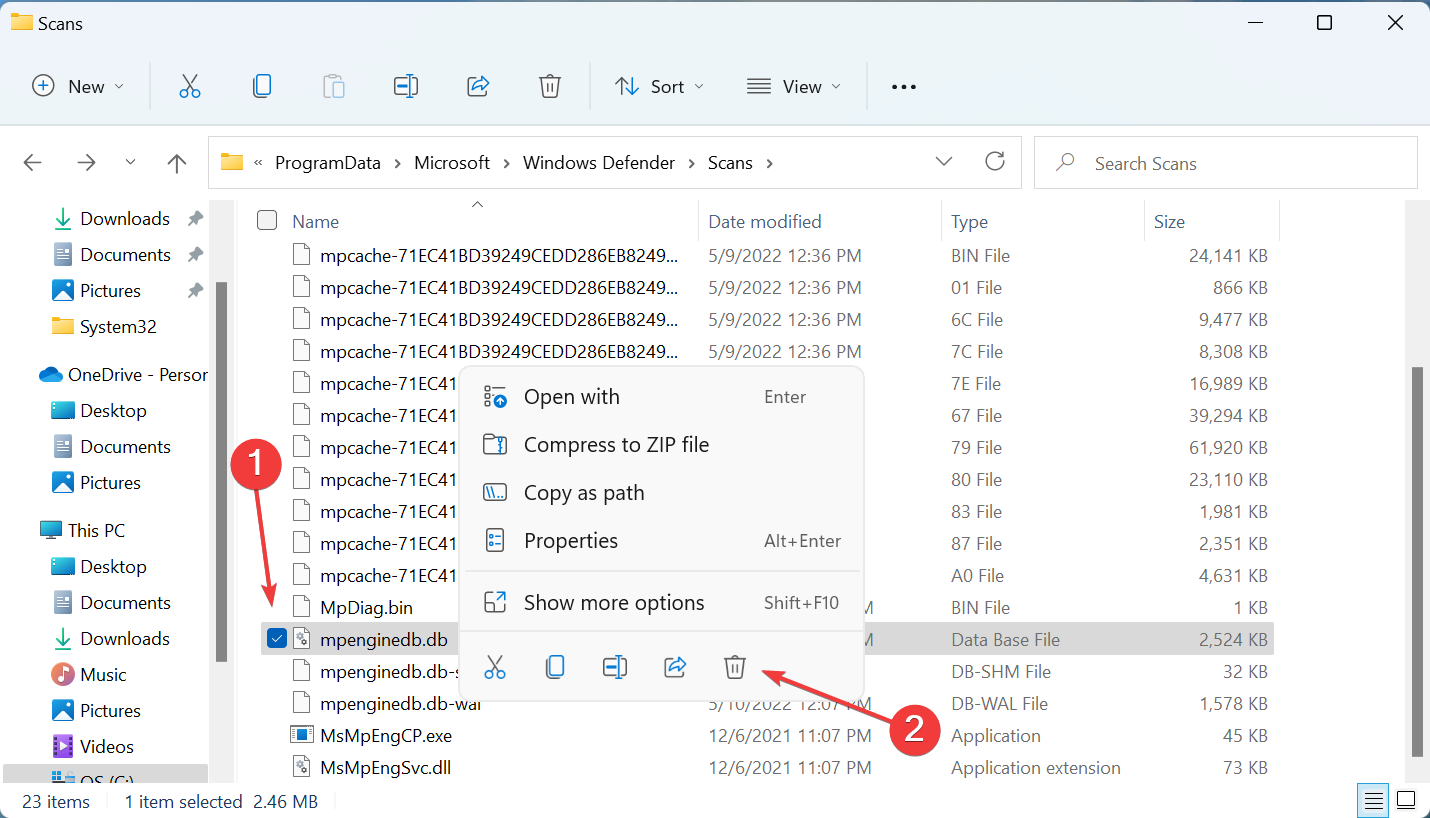
- Now, go to this path
:C:\ProgramData\Microsoft\Windows Defender\Scans - Locate the mpenginedb.db file, right-click on it and select the Delete icon from the context menu.
- Again, choose the appropriate response if a confirmation prompt appears.
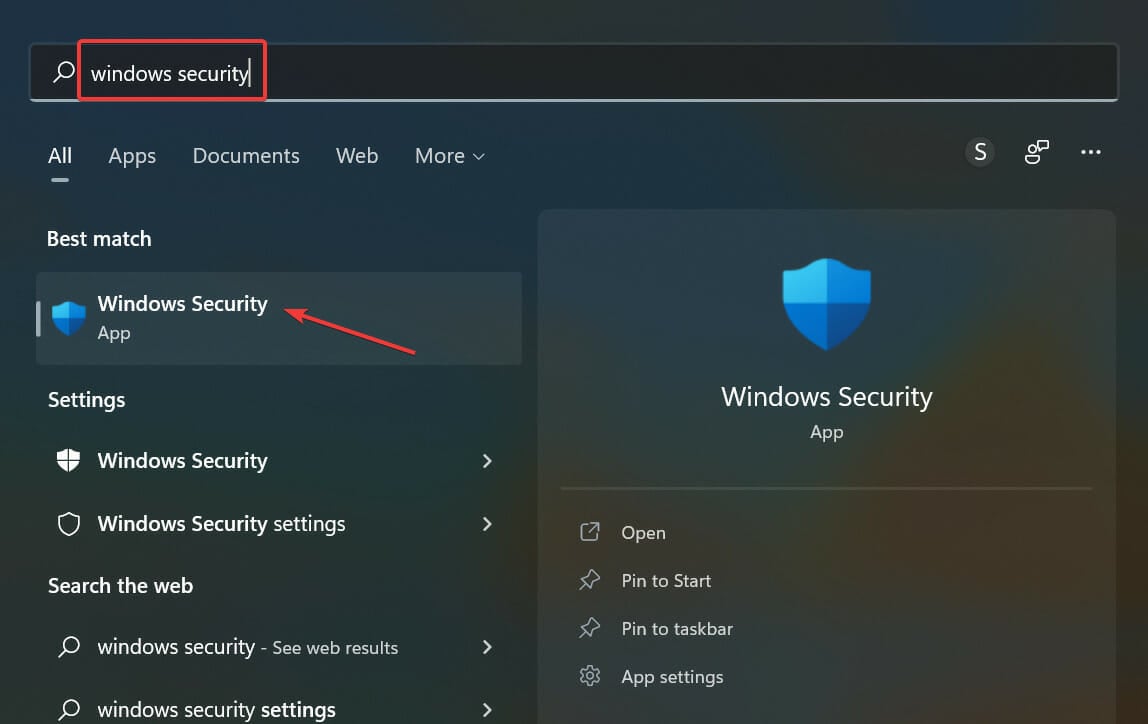
- Once done, press Windows + S to launch the Search menu, enter Windows Security in the text field, and click on the relevant search result.
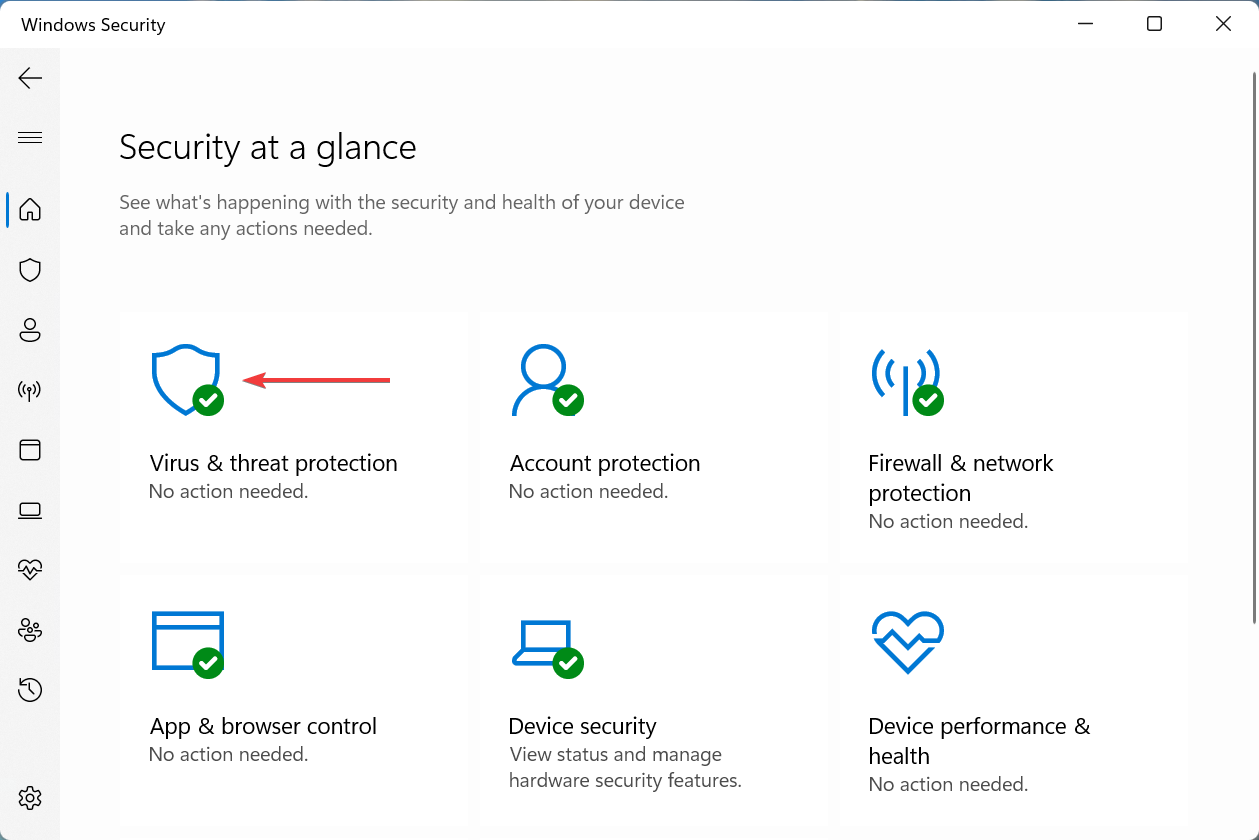
- Click on Virus & threat protection from the options here.
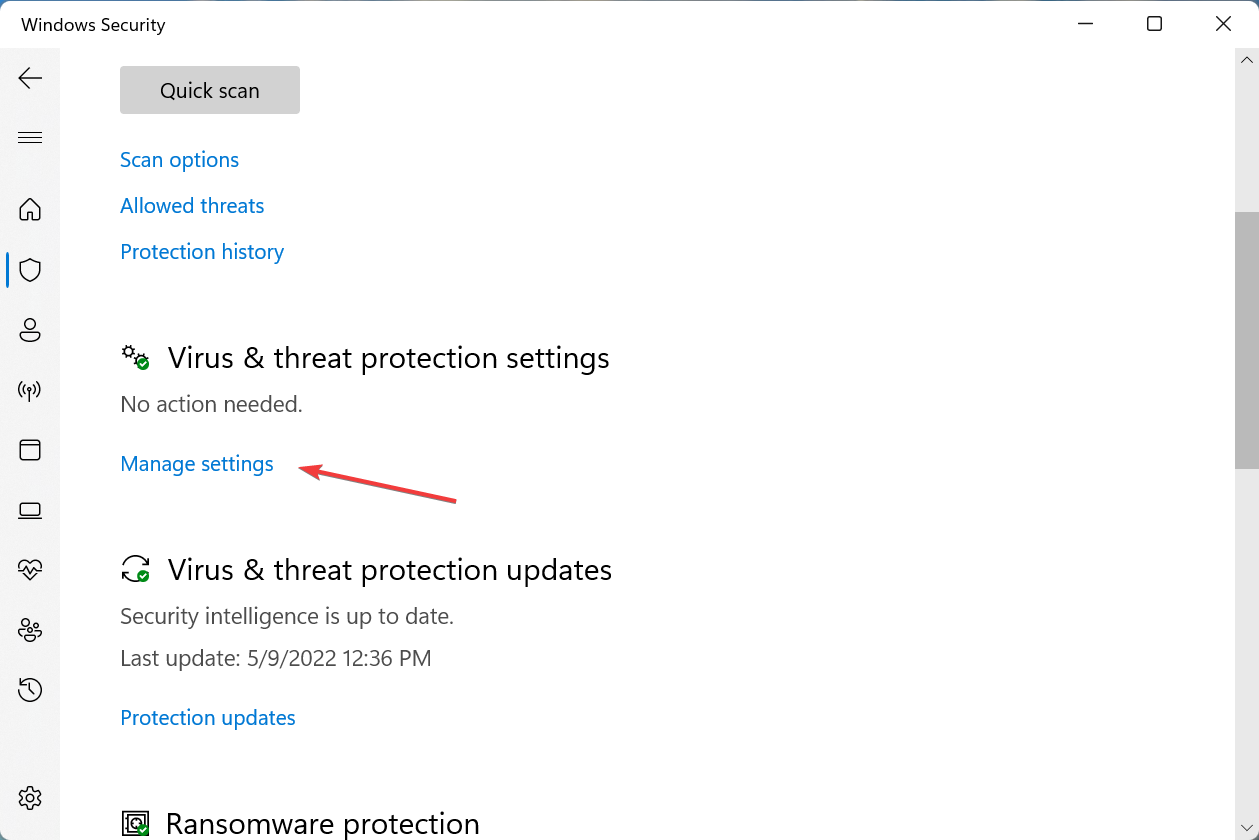
- Next, click on Manage settings under Virus & threat protection settings.
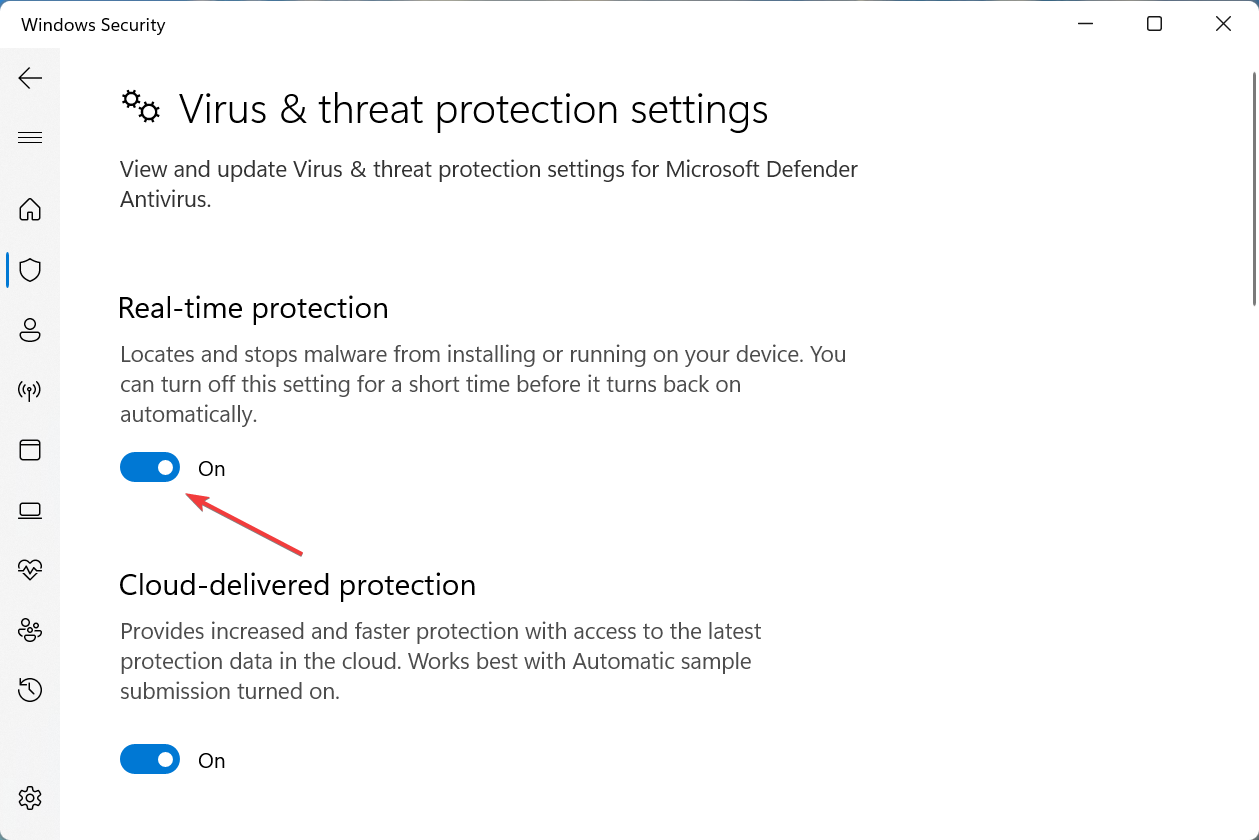
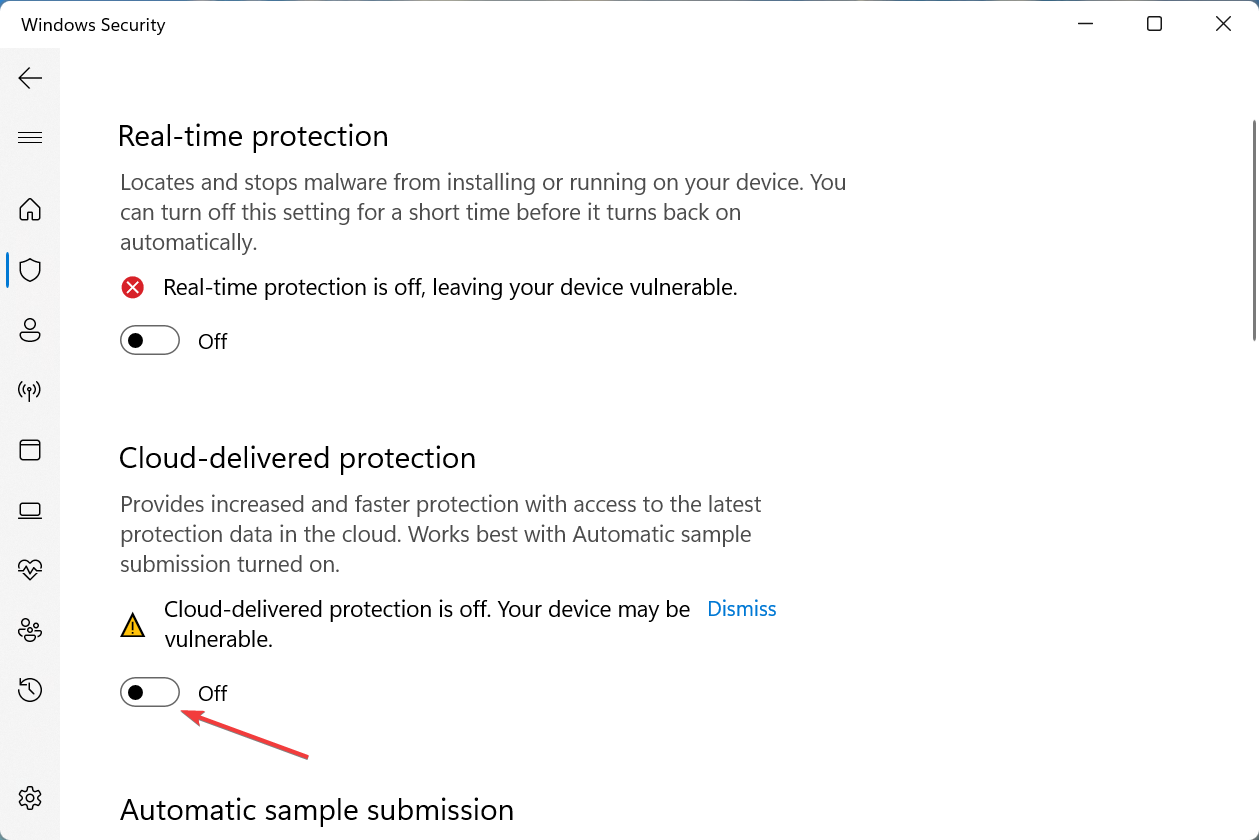
- Click on the toggle for Real-time protection to disable it.
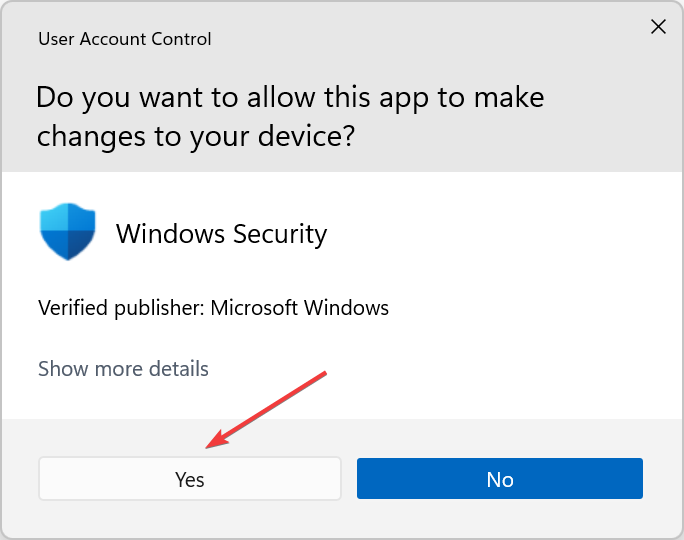
- Click Yes in the UAC (User Account Control) prompt that pops up.
- Similarly, disable Cloud-delivered protection under it.
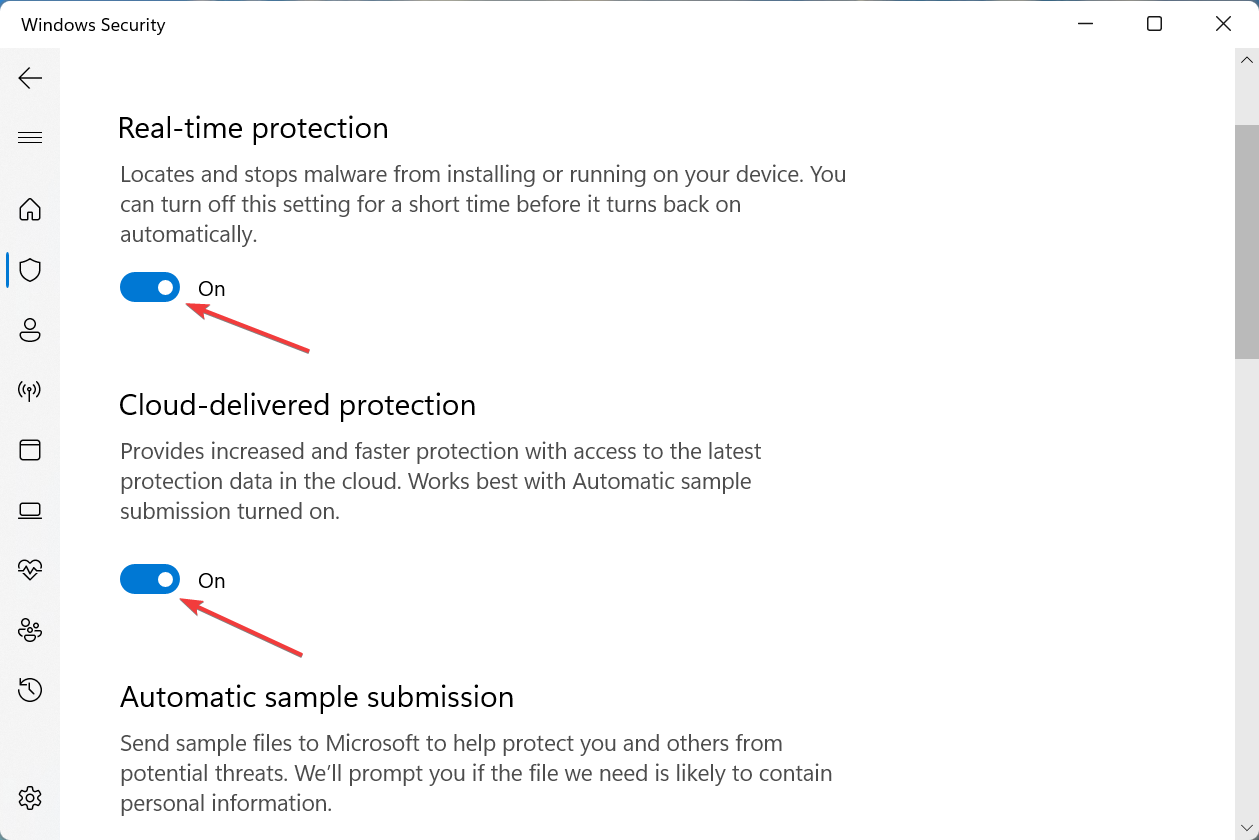
- Wait for a few moments, and then re-enable both the features.
The protection history in Windows 11 has been successfully cleared. Also, you now know the Windows Defender History location on the PC, and can easily delete it the next time onwards.
2. Via Event Viewer
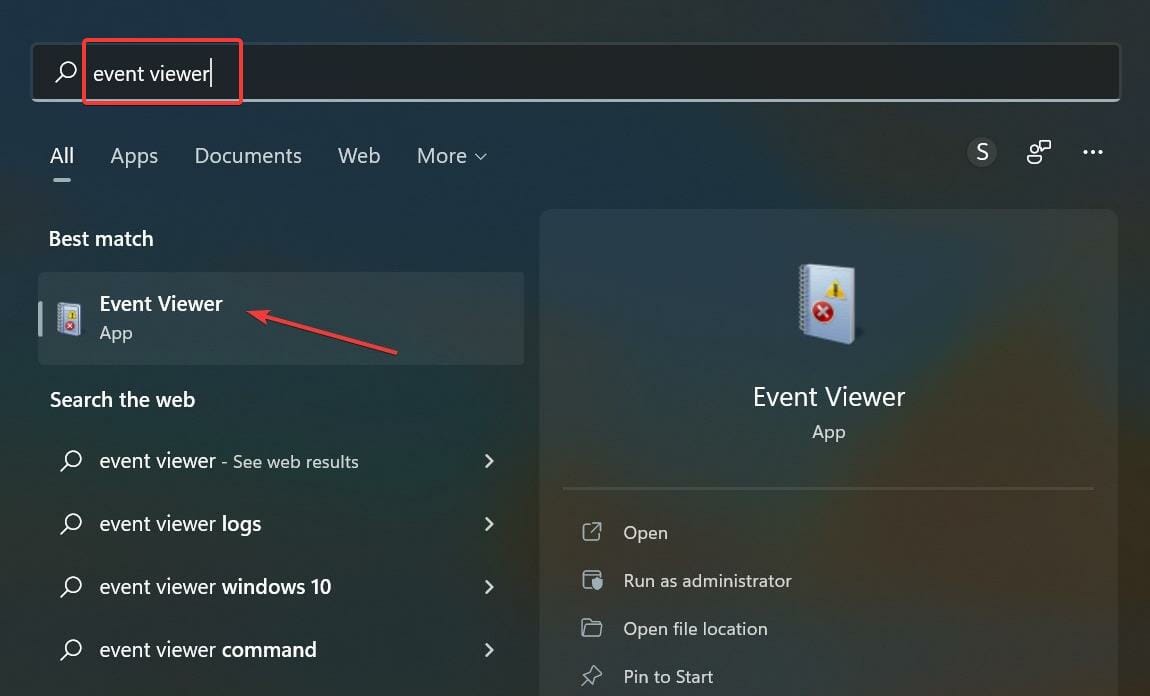
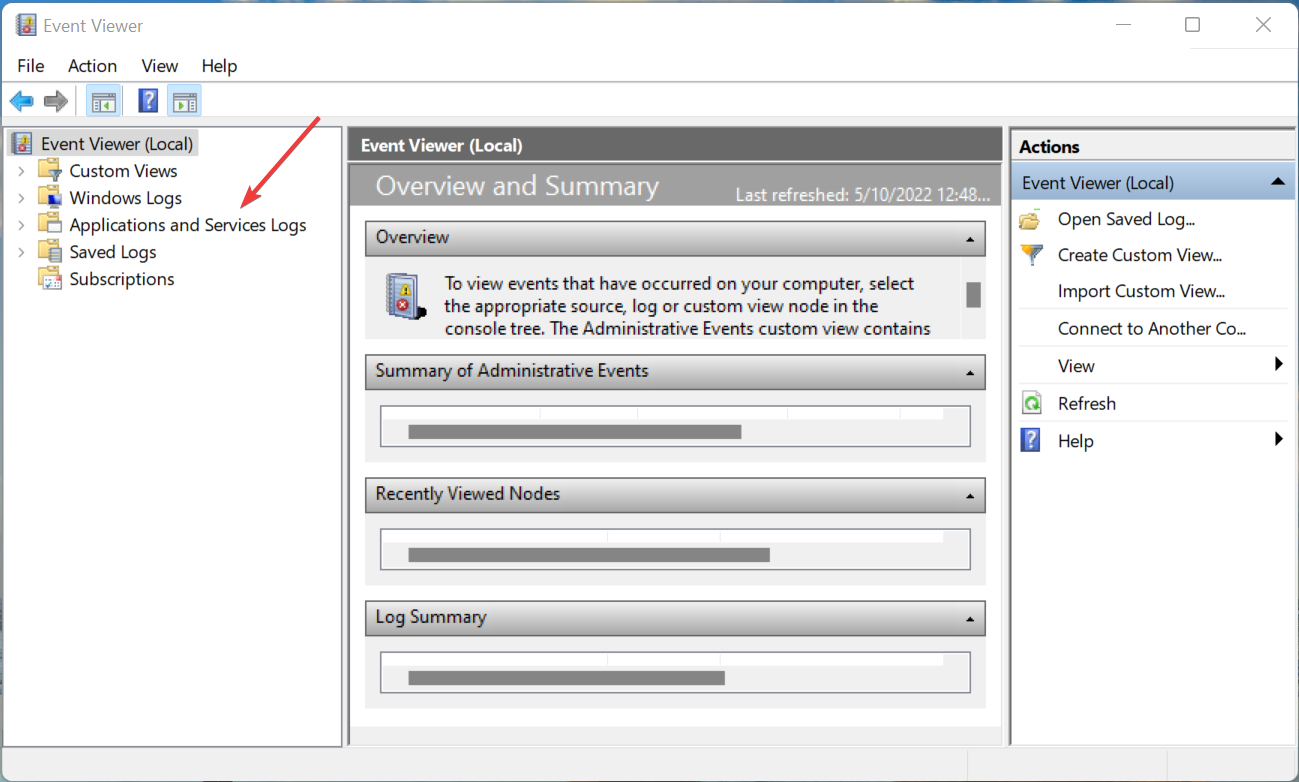
- Press Windows + S to launch the Search menu, enter Event Viewer in the text field, and click on the relevant search result.
- Double-click on Applications and Services Logs in the navigation pane on the left.
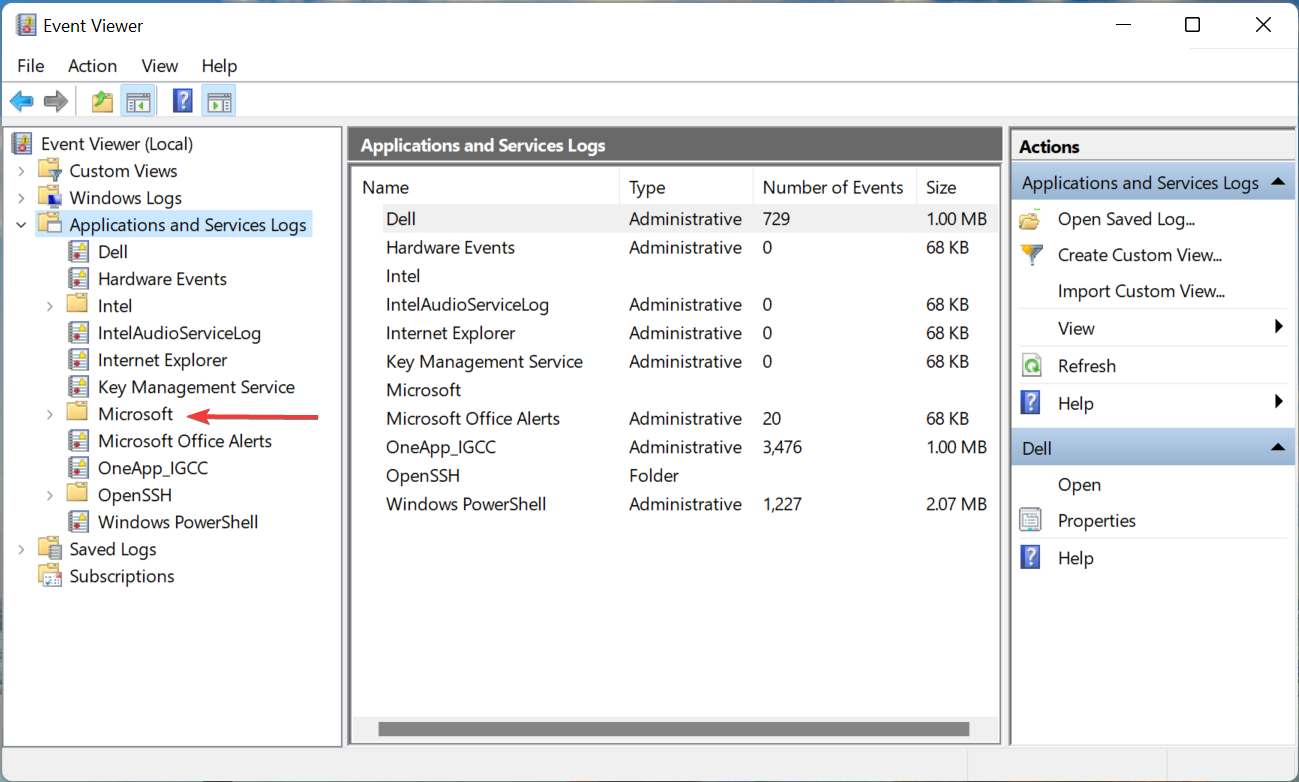
- Now, expand Microsoft to view the options under it.
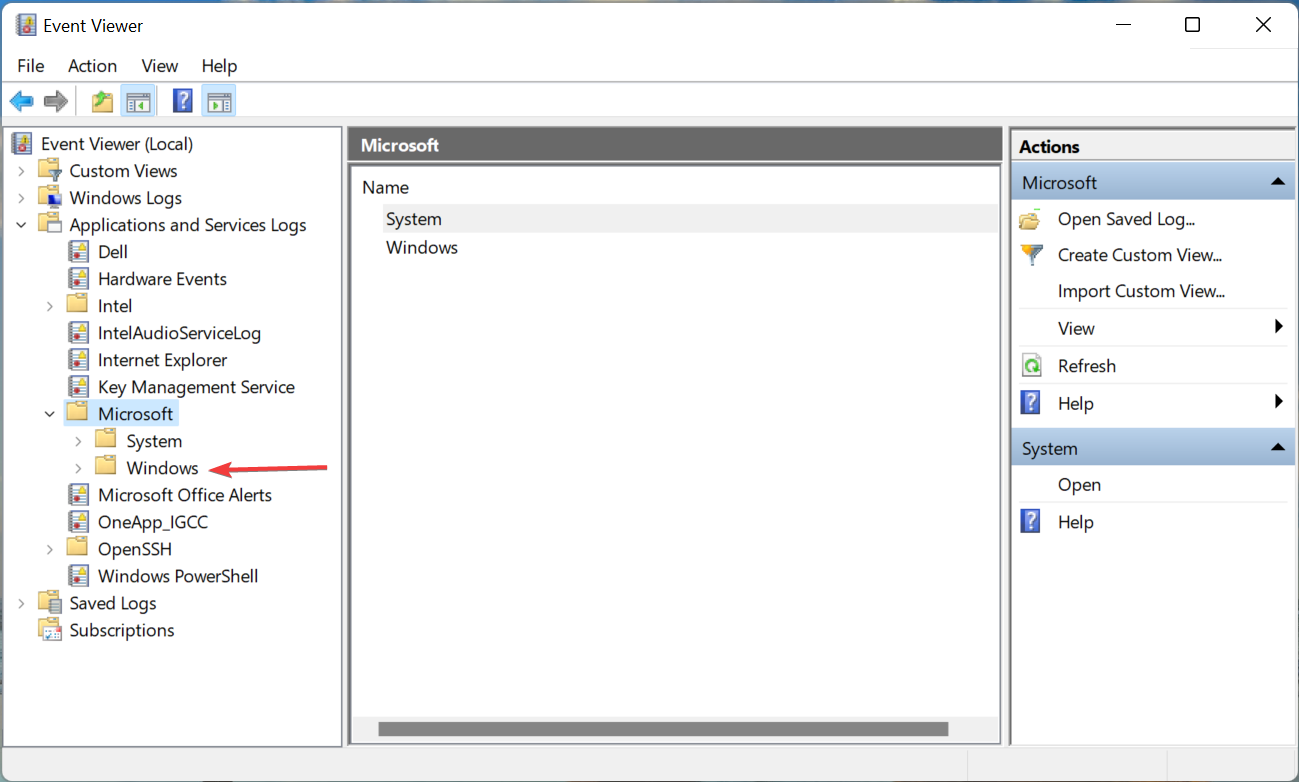
- Next, double-click on Windows.
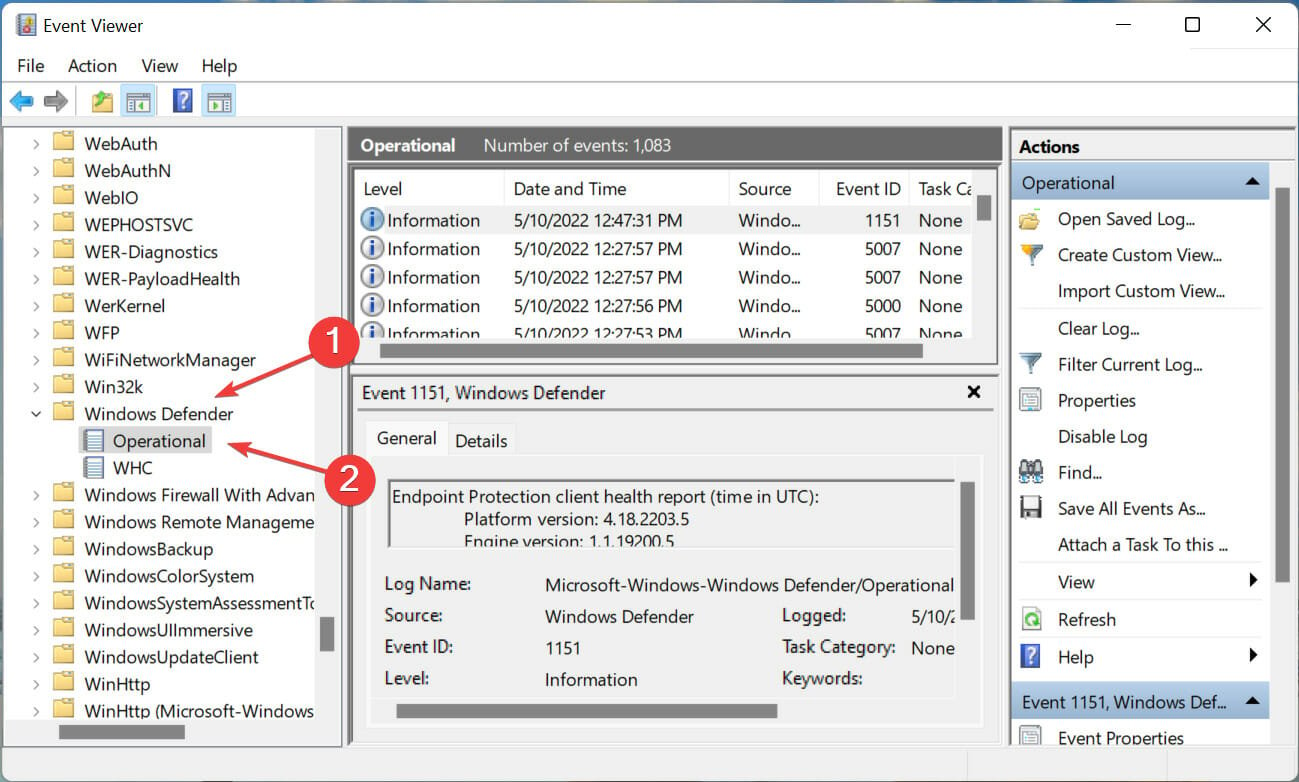
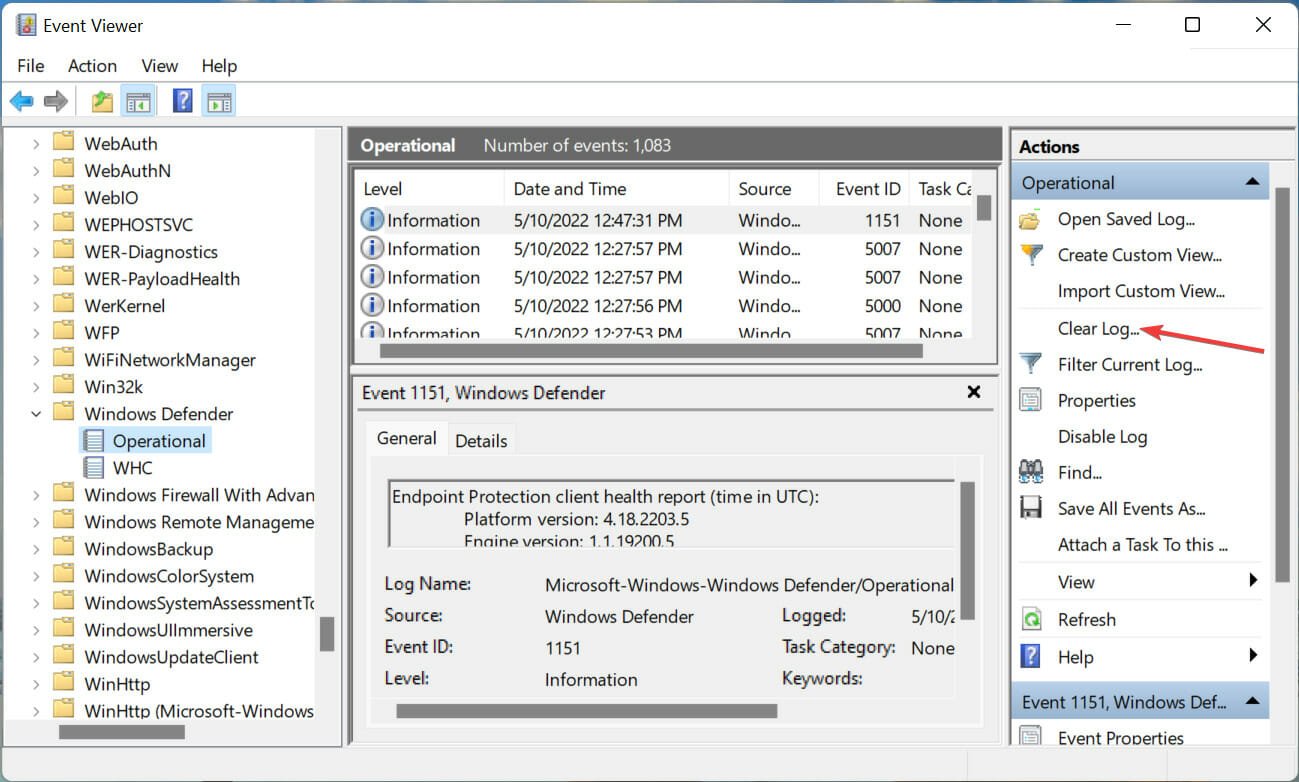
- Expand Windows Defender and click on the Operational entry under it.
- Click on Clear Log on the right.
- Now, select the appropriate response from the confirmation prompt depending on whether you want to save its contents or delete it completely. We recommend the latter.
This is how you clear protection history in Windows 11 using the Event Viewer. The method is relatively simple and far more efficient for those who regularly check the error logs in Windows 11.
Both these methods help manually clear protection history, but what if you want it to be cleared automatically? There are a couple of ways to do that. Read the next section to find out.
How do I set the protection history to clear automatically?
1. Use Windows PowerShell
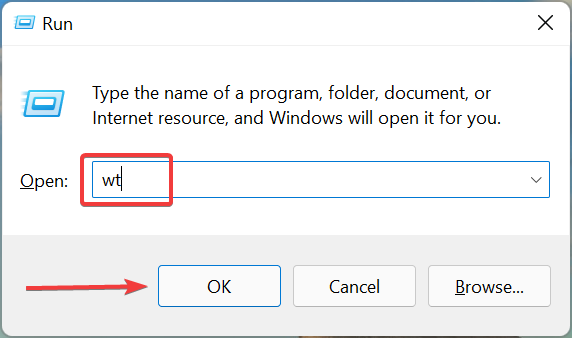
- Press Windows + R to launch the Run command, enter wt in the text field, press and hold the Ctrl + Shift key, and either click on OK or hit Enter to launch an elevated Windows Terminal.
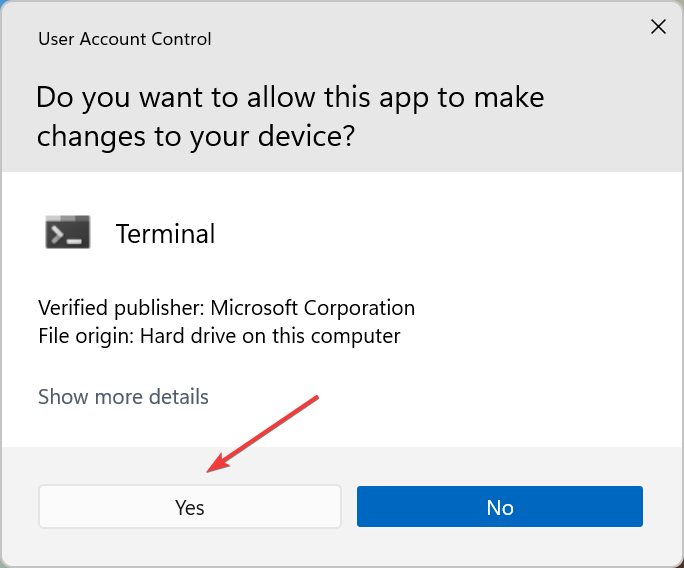
- Click Yes in the UAC prompt that pops up.
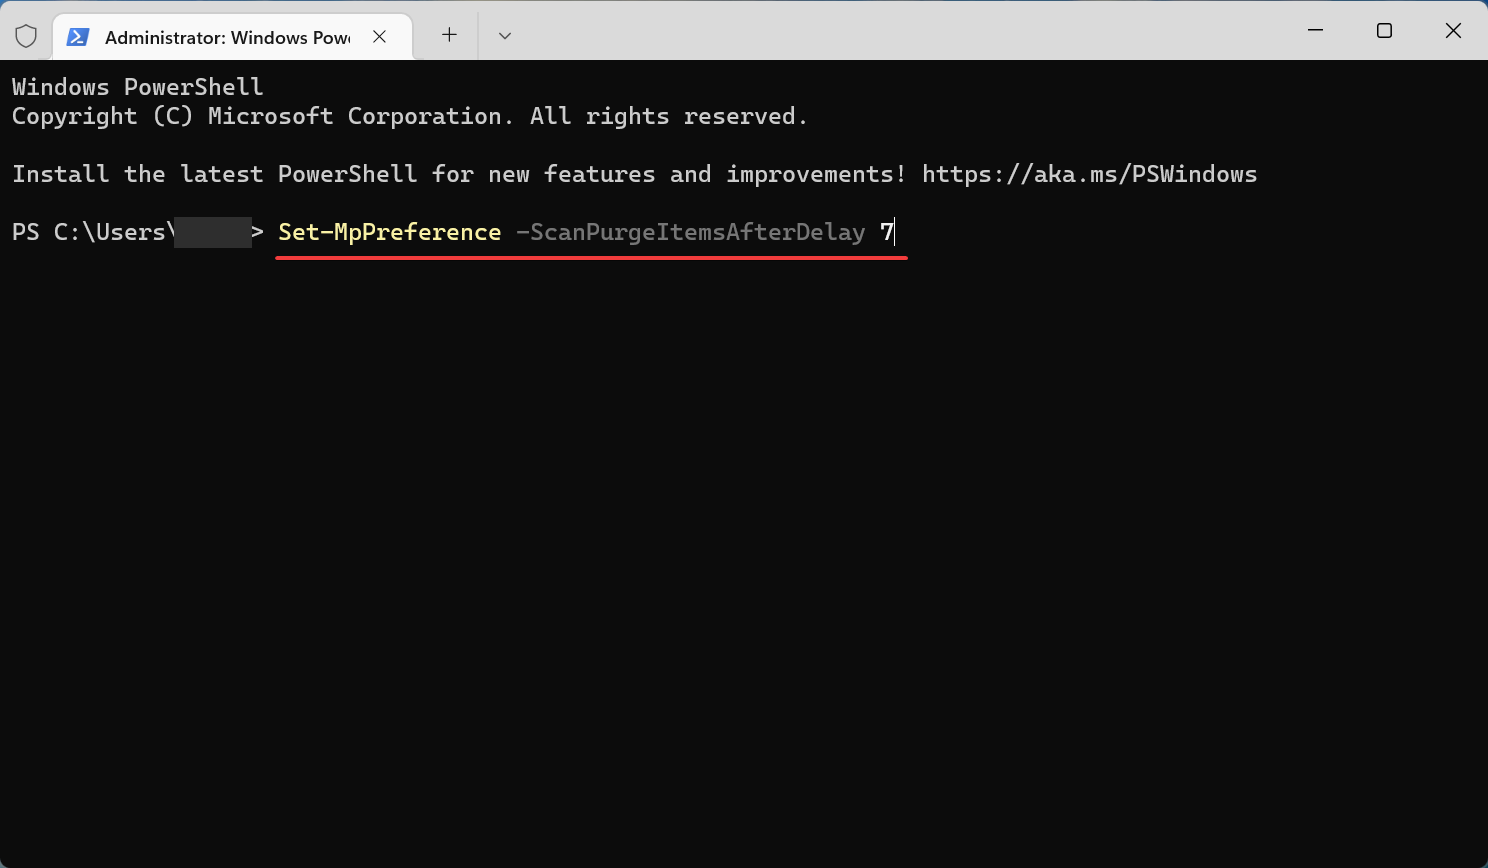
- Now, paste the following command in the PowerShell tab and hit Enter to execute it. Just make sure to replace N here with the number of days after which you want the protection history to be automatically cleared.
Set-MpPreference -ScanPurgeItemsAfterDelay N - For instance, if you want the protection history to be cleared automatically after 7 days, the command becomes as follows:
Set-MpPreference -ScanPurgeItemsAfterDelay 7
This is probably the easiest method to automatically clear protection history in Windows 11 using PowerShell. But in case you are not a big fan of the command line, try the next method.
2. Use Local Group Policy Editor (Gpedit)
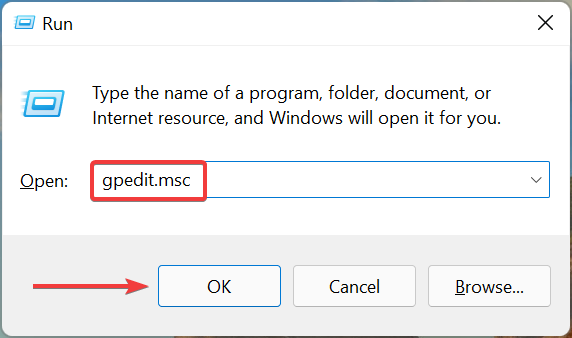
- Press Windows + R to launch the Run command, enter gpedit.msc in the text field, and either click OK or hit Enter to launch the Local Group Policy Editor.
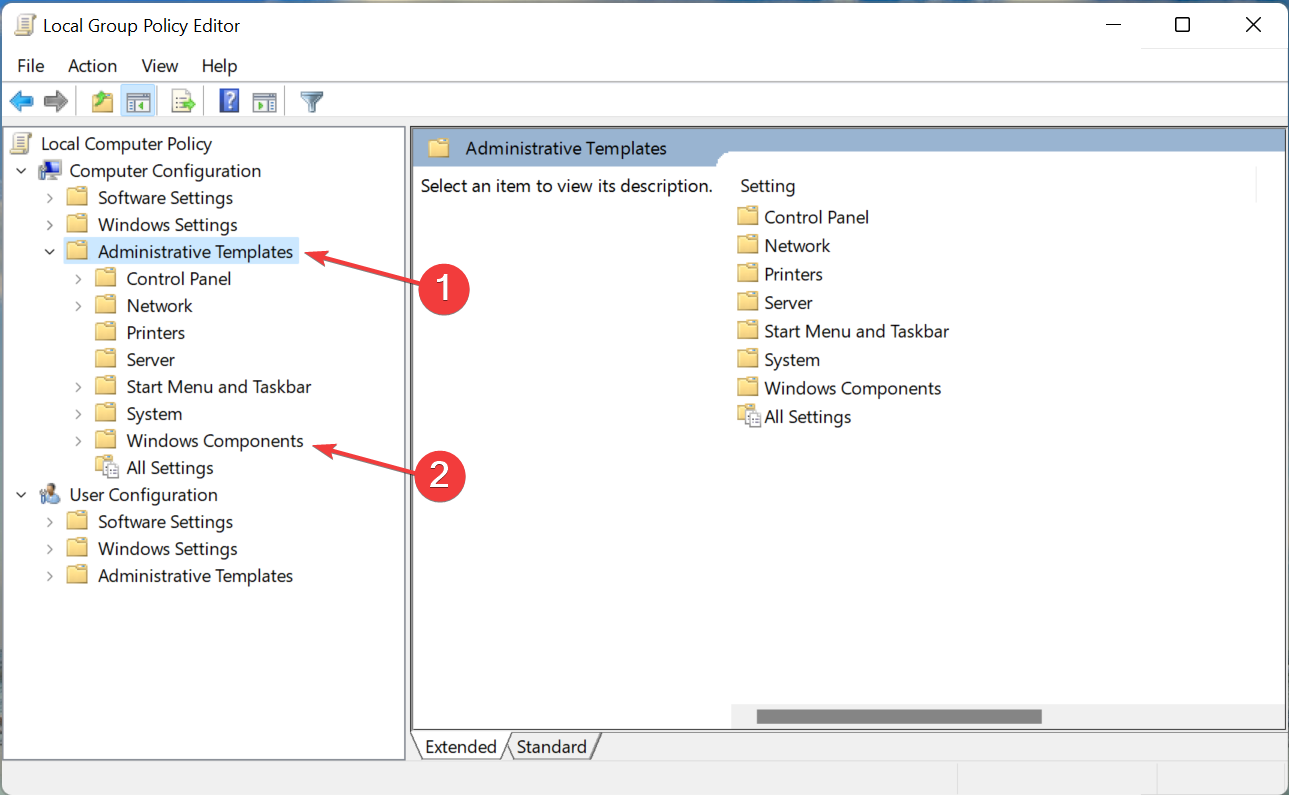
- Expand Administrative templates and then double-click on Windows Components.
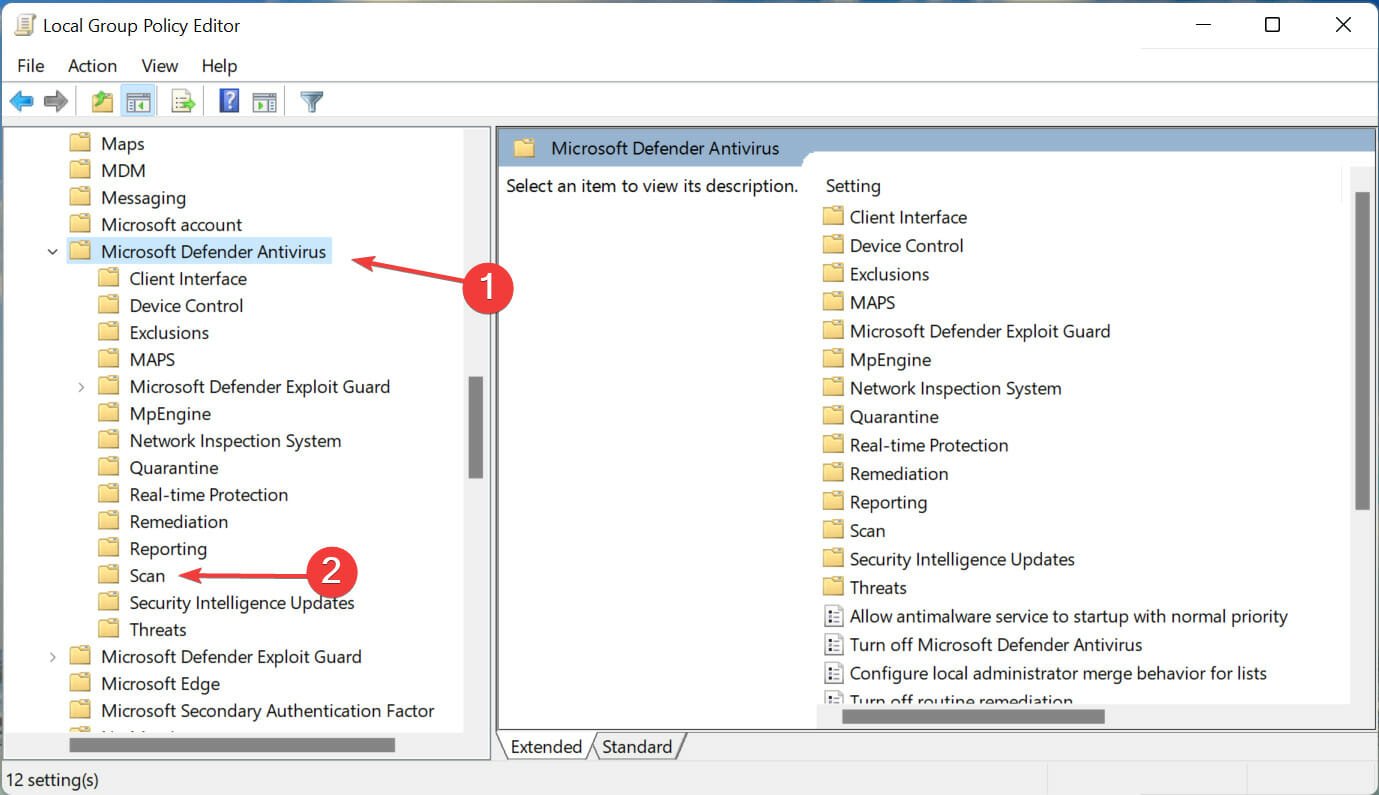
- Next, double-click on Microsoft Defender Antivirus and then on Scan under it.
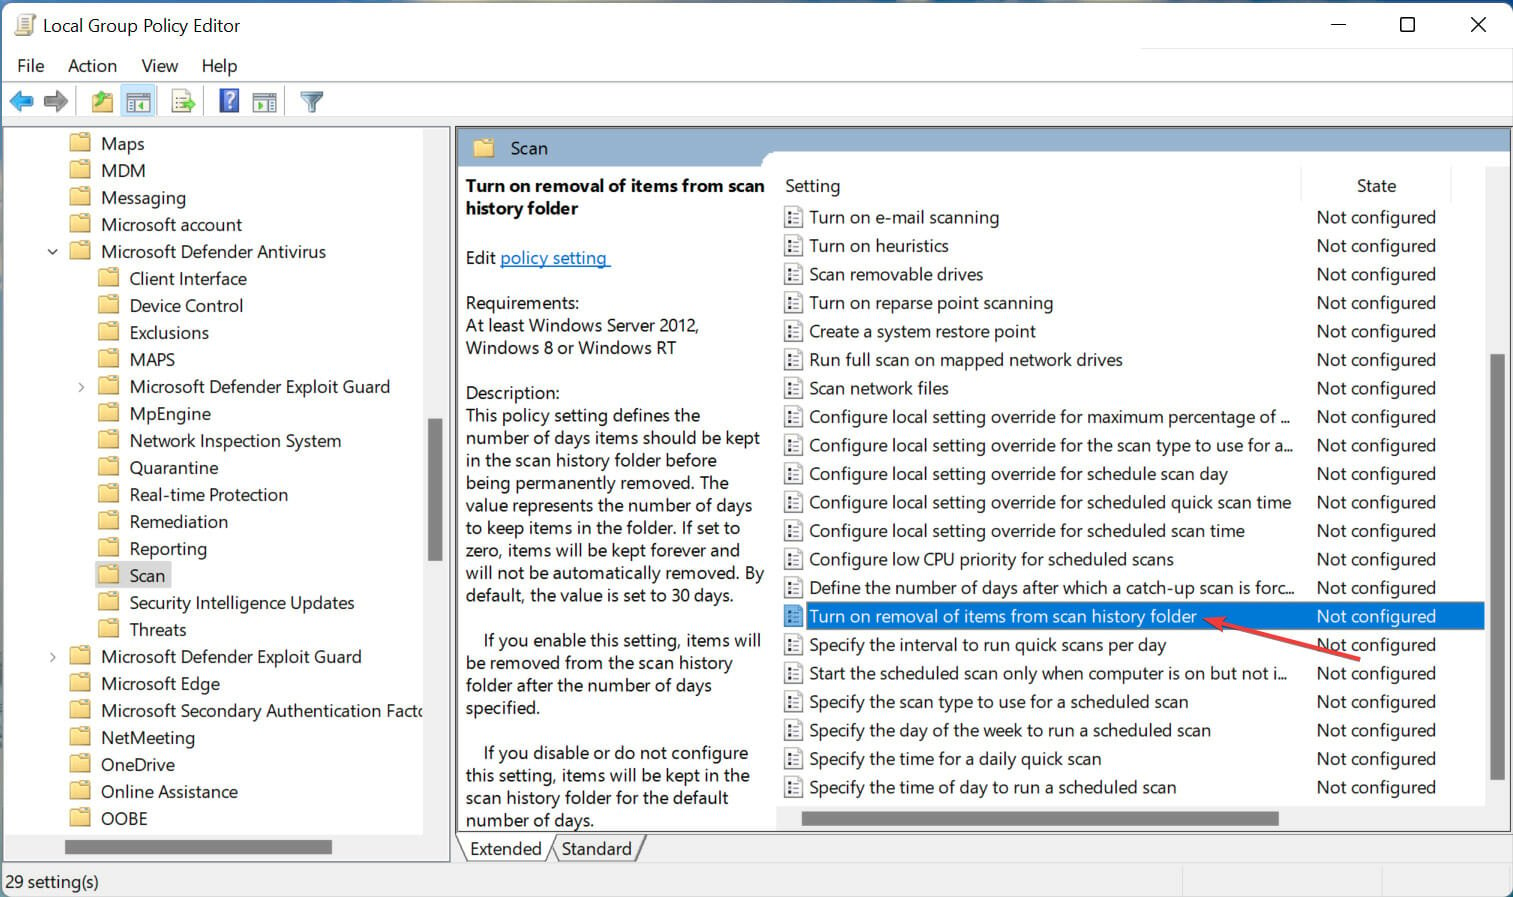
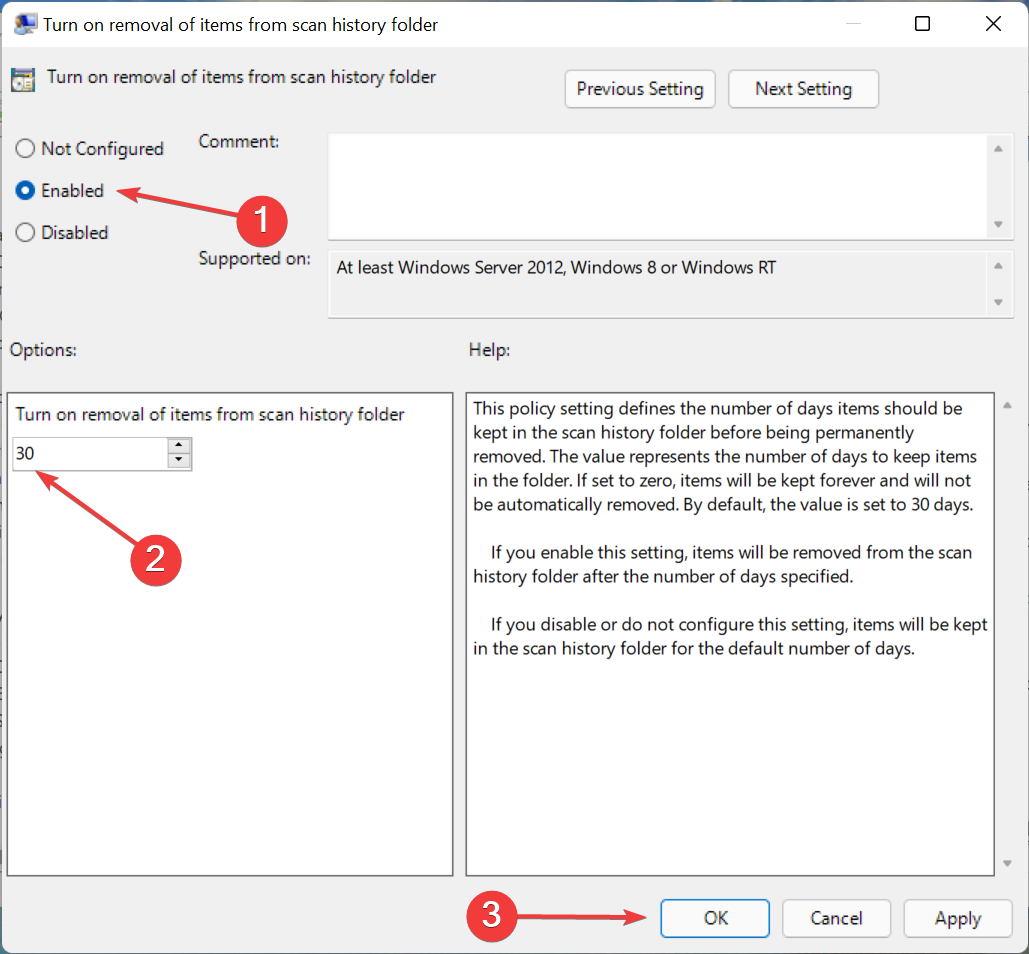
- Double-click on the Turn of removal of items from scan history folder policy here.
- Select Enabled from the top, enter the number of days before the history is deleted, and then click OK at the bottom to save the changes.
That’s it! The protection history will now automatically be cleared after the set number of days. In case you want to keep the protection history forever, enter 0 in the field for the number of days.
In case you are running the Home Edition of the OS, learn how to install Local Group Policy Editor in Windows 11.
Should I delete Protection History?
Though not entirely necessary, deleting the protection history actually helps clear some storage space on the system.
For some users, these files took 20-25 GB of space, and that can be intimidating if your computer is running low on storage.
Is it safe to clear the protection history in Windows 11?
There’s no harm in clearing the protection history in Windows 11 and it certainly wouldn’t affect the functioning of the PC in any way. More so, these files appear in Disk Cleanup if you run a scan.
And it doesn’t matter whether Windows Defender is now disabled and you are using a third-party antivirus, you can still clear the old log files.
Also, if the files have accumulated over time and their size has increased considerably, it could cause a crash each time you open Windows Defender protection history. All the more reasons to clear protection history
That’s all there is to the concept. Also, the methods listed here would help manually clear the Windows Defender protection history in Windows 10 as well.
In case the Virus & threat protection is not working, learn how to fix it since the issue is common, and without it, you wouldn’t be able to access the protection history through Windows Defender.
Besides, if your PC is running low on resources, you may consider disabling Antimalware Service Executable (Windows Defender process), since it’s known to hog the system resources.
If you have any queries, drop a comment in the section below.



User forum
0 messages