Windows 11 Error Logs: How to Quickly Check the Crash Log
Learn how to check, understand, and filter error logs on your PC
When Windows throws an error, most of us just click it away. But your error logs quietly record everything: what failed, when it happened, and which program caused it.
Learning to read these can help you fix crashes faster, avoid repeat issues, and even spot deeper problems before they get worse.
How do I view error logs in Windows 11?
Here are a few ways to see error logs in Windows 11:
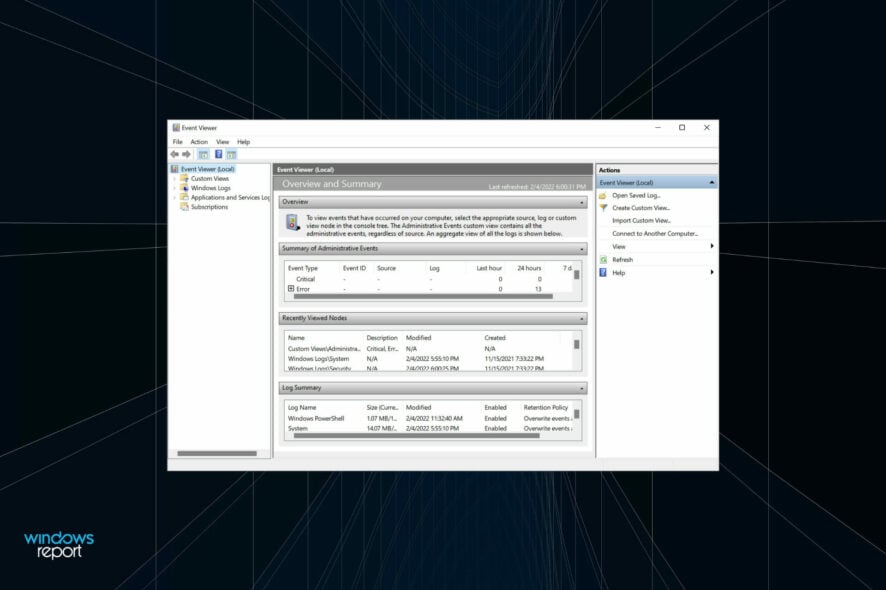
1. Press Windows + S to launch the Search menu, enter Event Viewer in the text field at the top, and click on the relevant search result.

2. Double-click on Windows Logs in the navigation pane on the left.

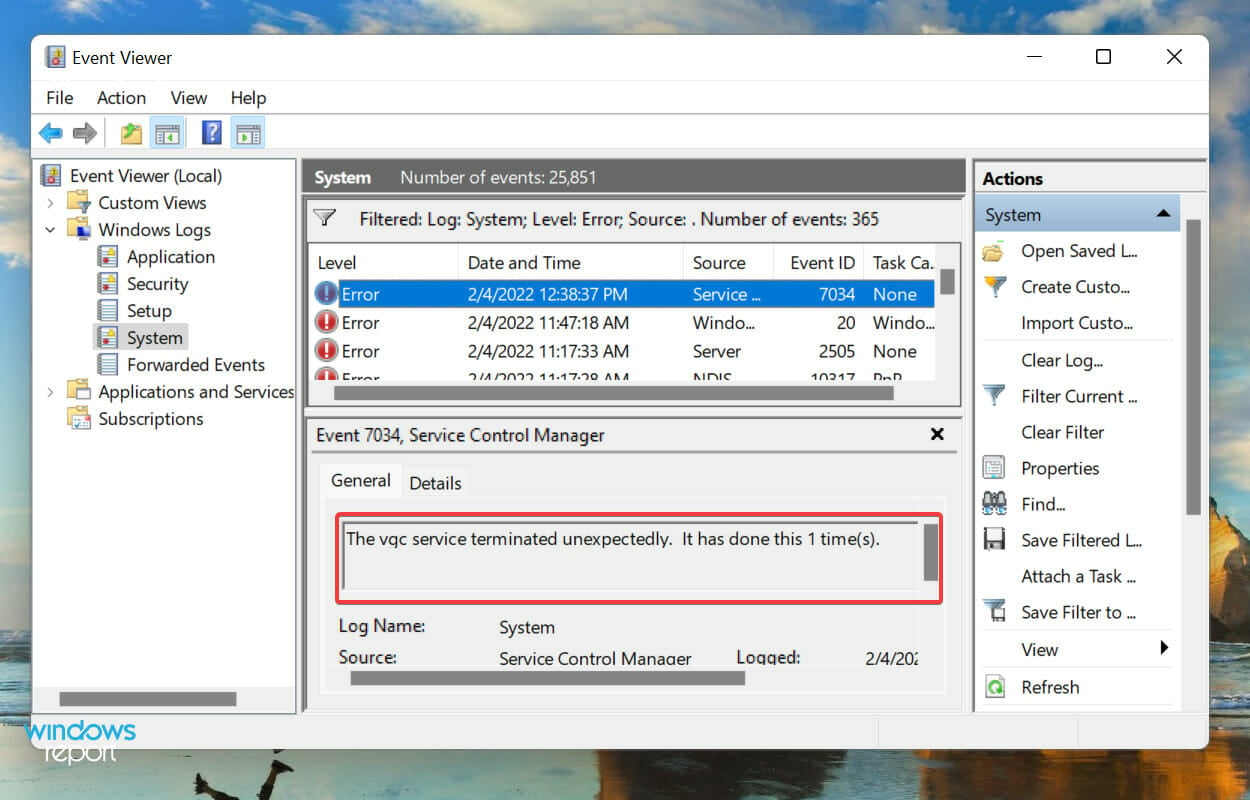
3. You will now find the five different categories. Select any of these, and all the error logs under it will be listed on the right.

4. Now, click on any of the error logs to view all the relevant information about them.

DIFFICULTY
DURATION
4 minutesWHAT YOU NEED
Windows 11, Event ViewerIt’s pretty simple and quick to access the error logs on your Windows 11 OS, but in case you didn’t used before, the steps below will surely help you find them.
You now know how to check the Windows 11 error logs, but just knowing that won’t suffice. To better understand the logs you are viewing, take a look at what a CBS log file is and how it stores information about Windows updates and system repairs.
There’s still a lot out there to understand before you can actually make some sense out of these logs, and use them to your advantage.
How to understand Windows 11 error logs?
When you view a Windows 11 crash log, the general details and the Event ID is critical in identifying and eliminating the error. Apart from that, there’s an Event Log Online Help link at the bottom, which may provide some valuable insights.
For instance, here’s a Windows 11 error log when the relevant driver for a device failed to load.
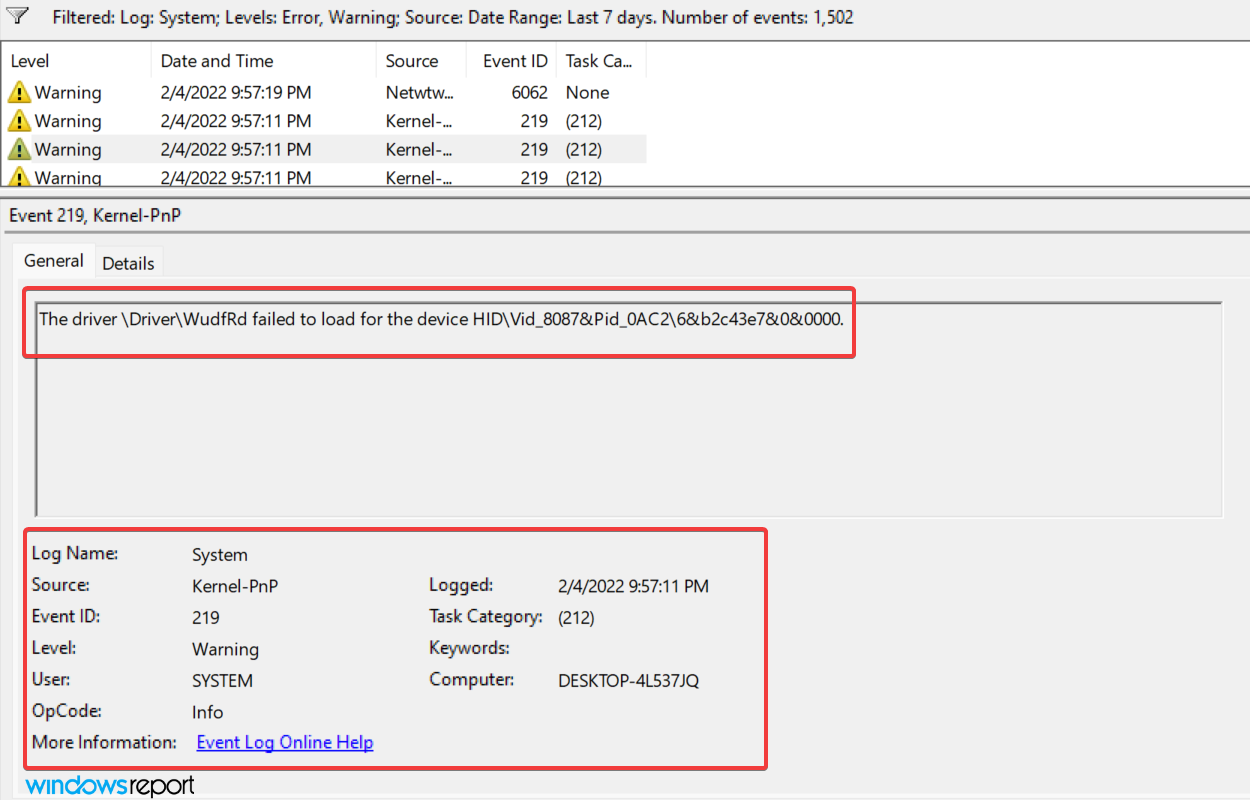
The 219 Event ID helped find out a lot of information along with the relevant fixes for the problem.
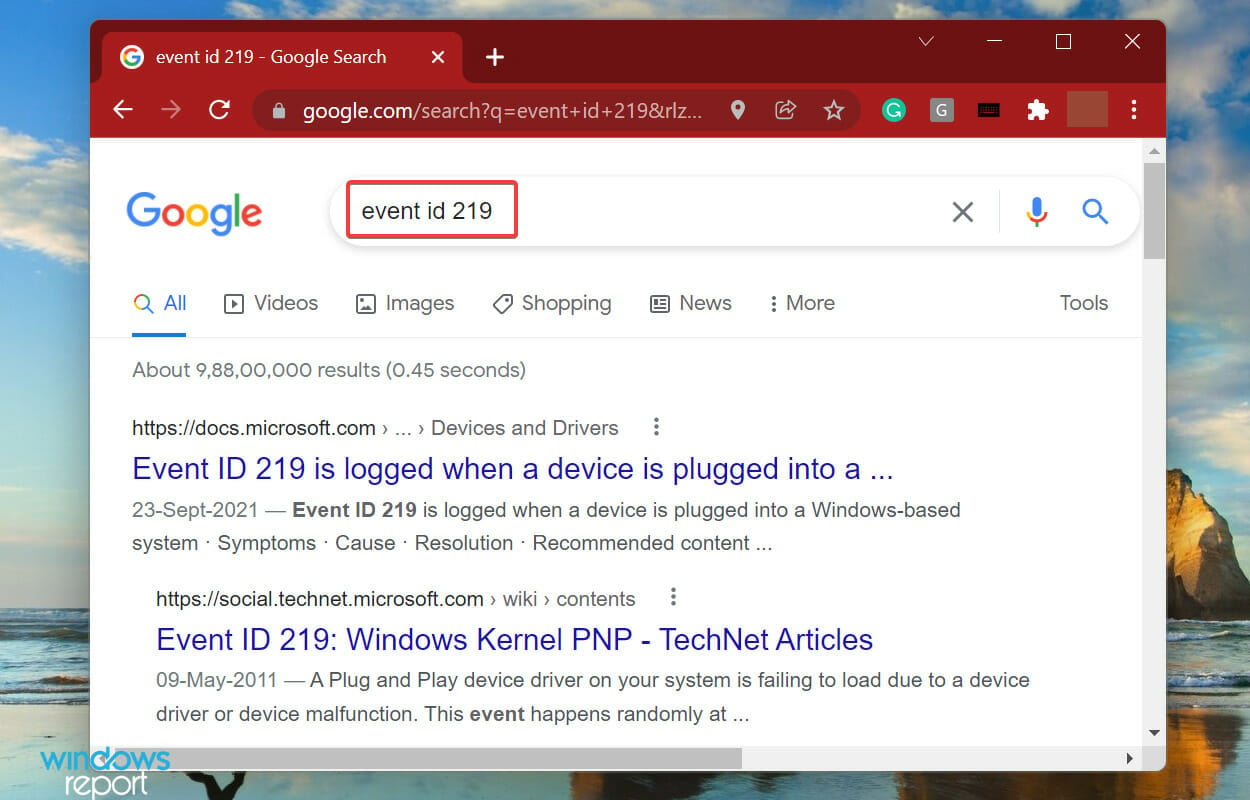
We just did a Google search for this Event ID and there were a plethora of results. But this requires a proper understanding of Windows 11 error logs.
But, it’s important to mention here that not all error logs will be as descriptive. Some might have things that you wouldn’t be able to comprehend or use jargon excessively. No matter the case, a simple Google search would suffice.
And if Event Viewer is not working in Windows 10 and 11, rest assured that our detailed guide will help you.
What are the different types of error logs?
When you go through the Windows 11 error logs, there are three important categories, referred to as Event Level, under which these are placed.
And, the categories define the severity of the event for which the log is created. The three categories are as follows:
- Information: These are created when an operation goes through successfully. For instance, when a driver is loaded or an application is launched without encountering any issues.
- Warning: These are created when the OS finds an issue with the system. These issues do not pose an imminent risk, but could be problematic in the future. For instance, if you are running low on disk space, a log will be created.
- Error: These indicate a major problem, though most of the time, Windows takes care of these as well. For example, an error log will be created if a driver or service does not load. But, these are the most critical ones of all.
If you are identifying problems with the PC, ignore the Information logs, go through the Warning logs, but pay special attention to the ones categorized as Error, since these are most likely to record the problem you are looking for.
When you open the Event Viewer in Windows 11, it will list out all three. The view will remain the same if you have not changed the Windows 11 Error Reporting logs location in the in the Group Policy.
However, identifying all logs for one of these levels will take up a lot of your time. This is where filtering error logs come to your aid. Check the next section to find out how you can do that.
How can I filter error logs?
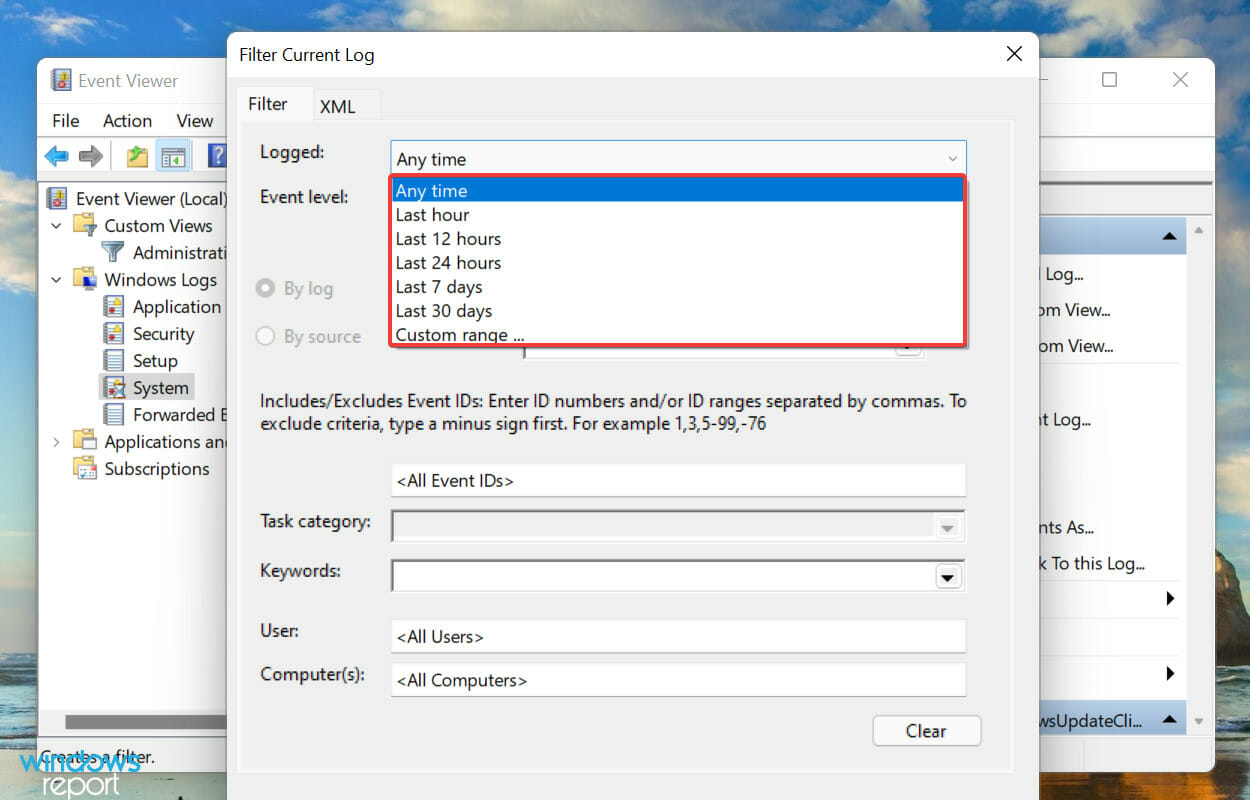
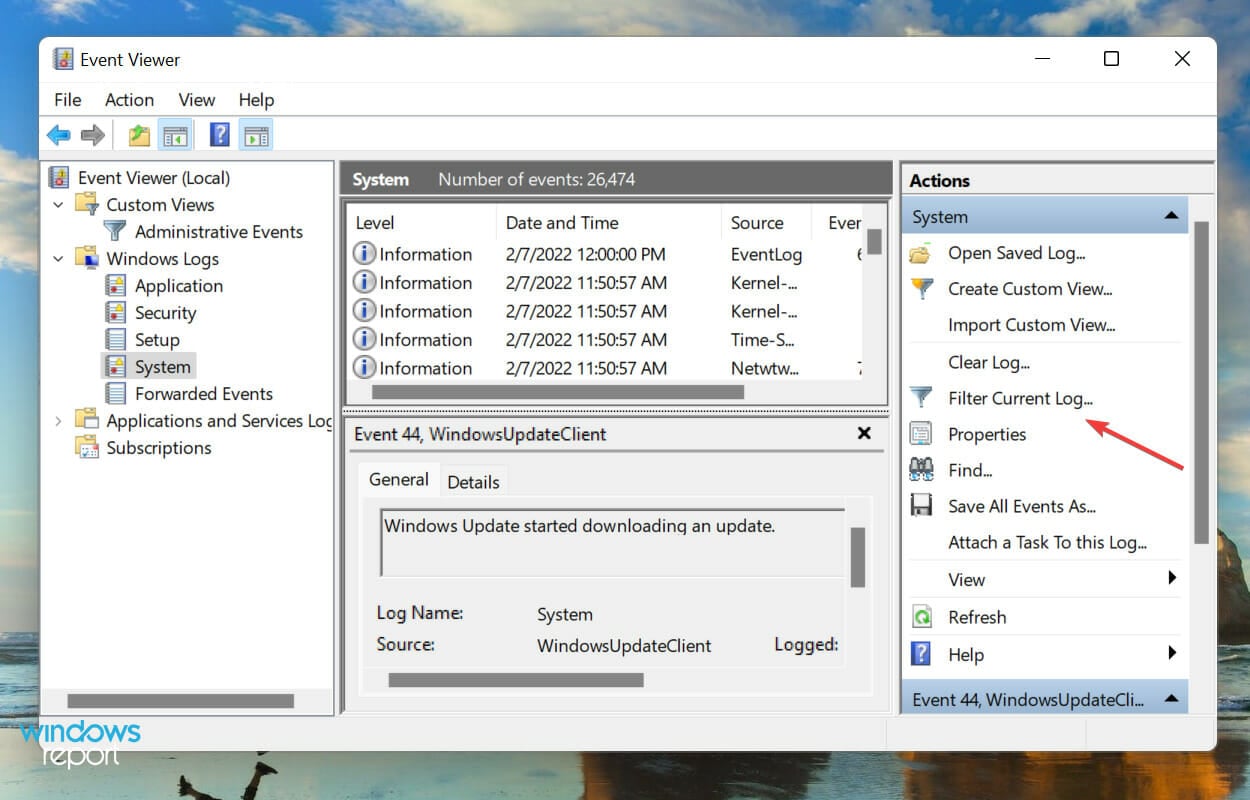
- Open the Event Viewer, navigate to the particular category of logs from the left, and then click on Filter Current Log on the right.

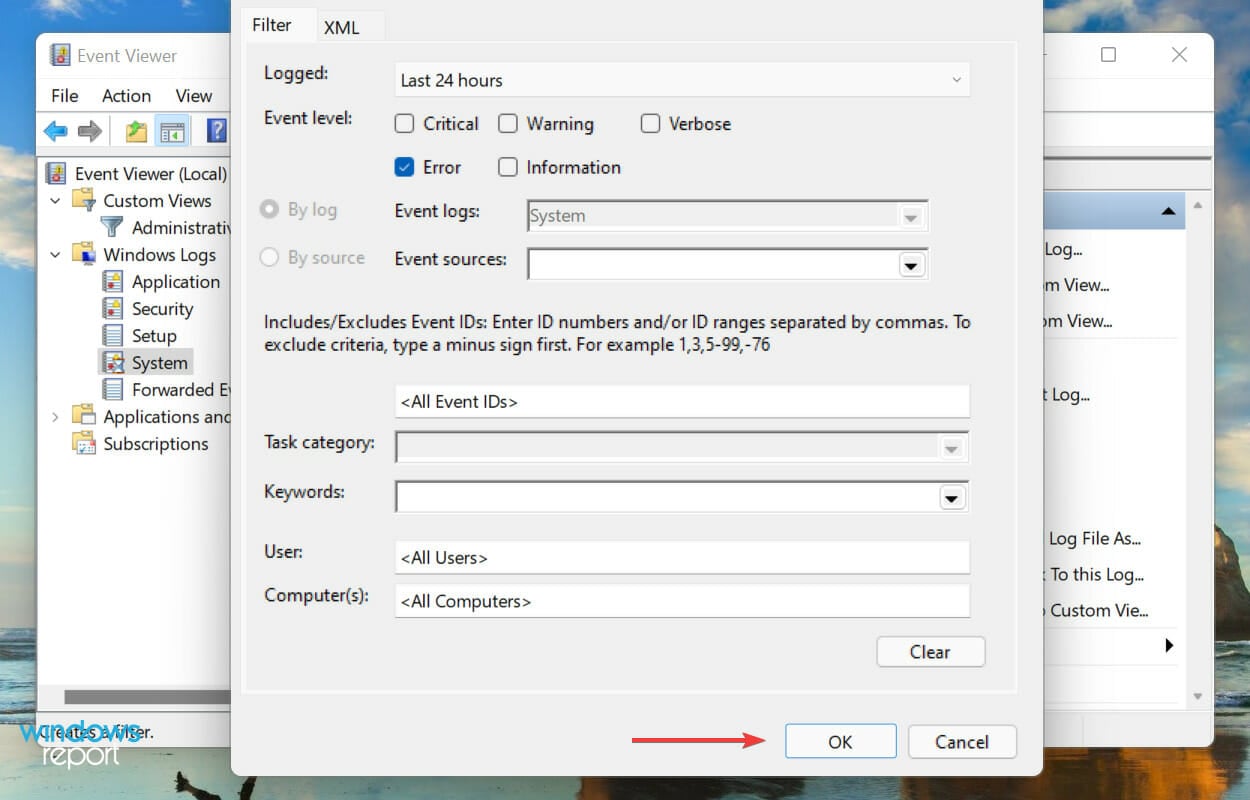
- Next, click on the Logged dropdown menu to select the duration for which you want to check the logs.
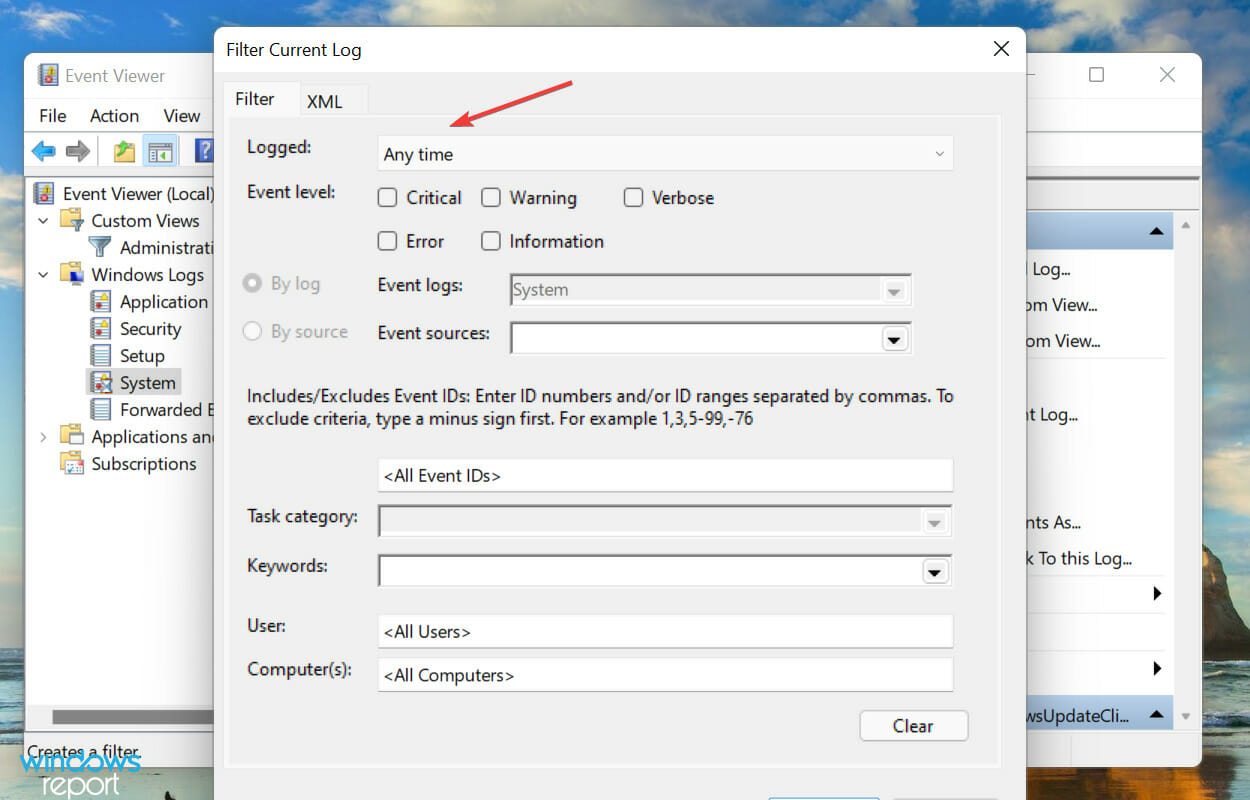
- Now, select a time duration from the list of options. You can also choose the last option to create a custom range.
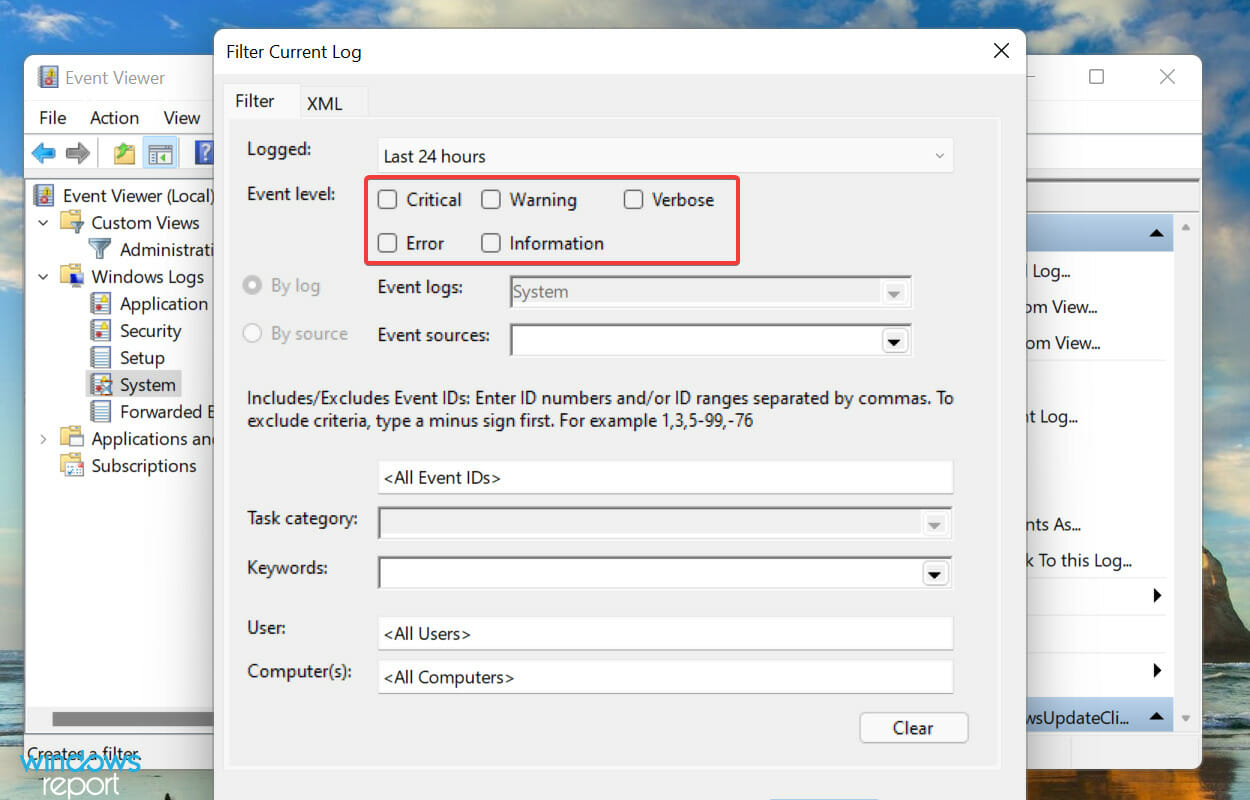
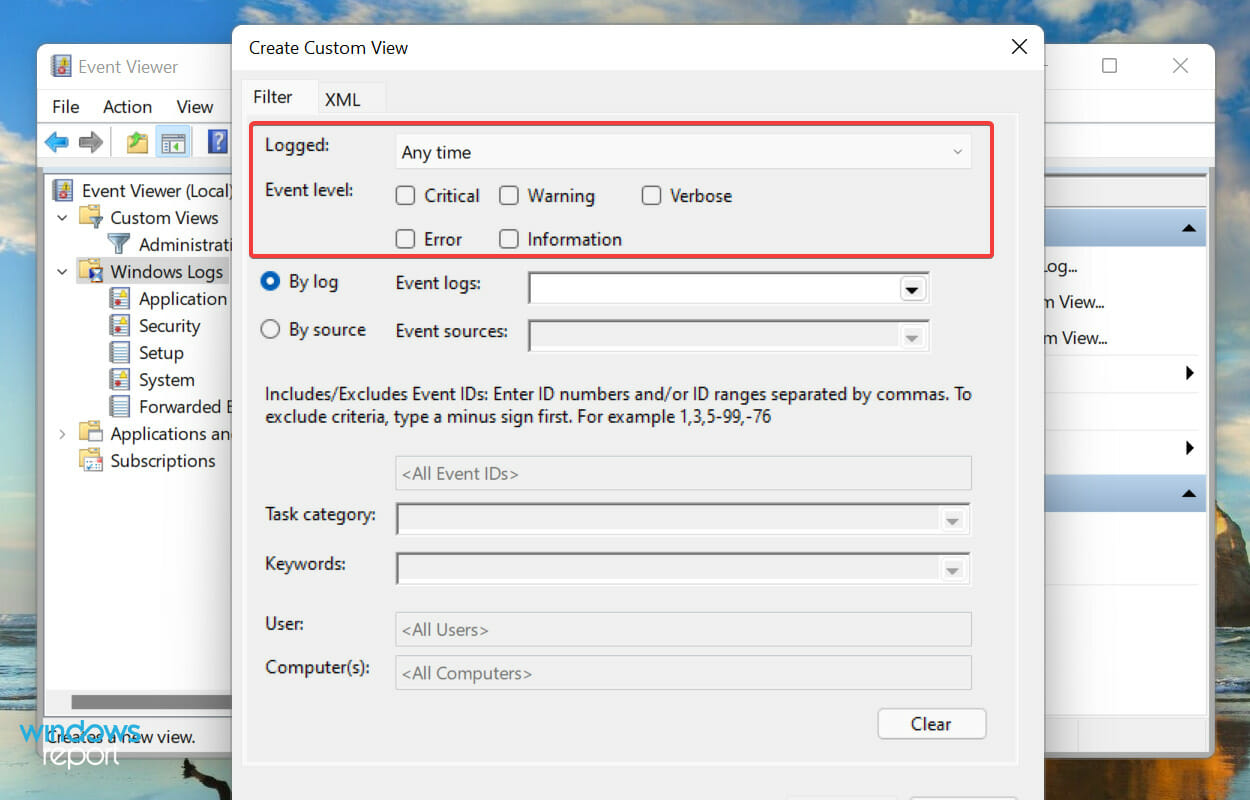
- Once done, tick the checkboxes for the Event Levels that you want to filter.
- Finally, click on OK at the bottom to filter the error logs.
- All the errors logs that fall under the choosen filters will now be listed.
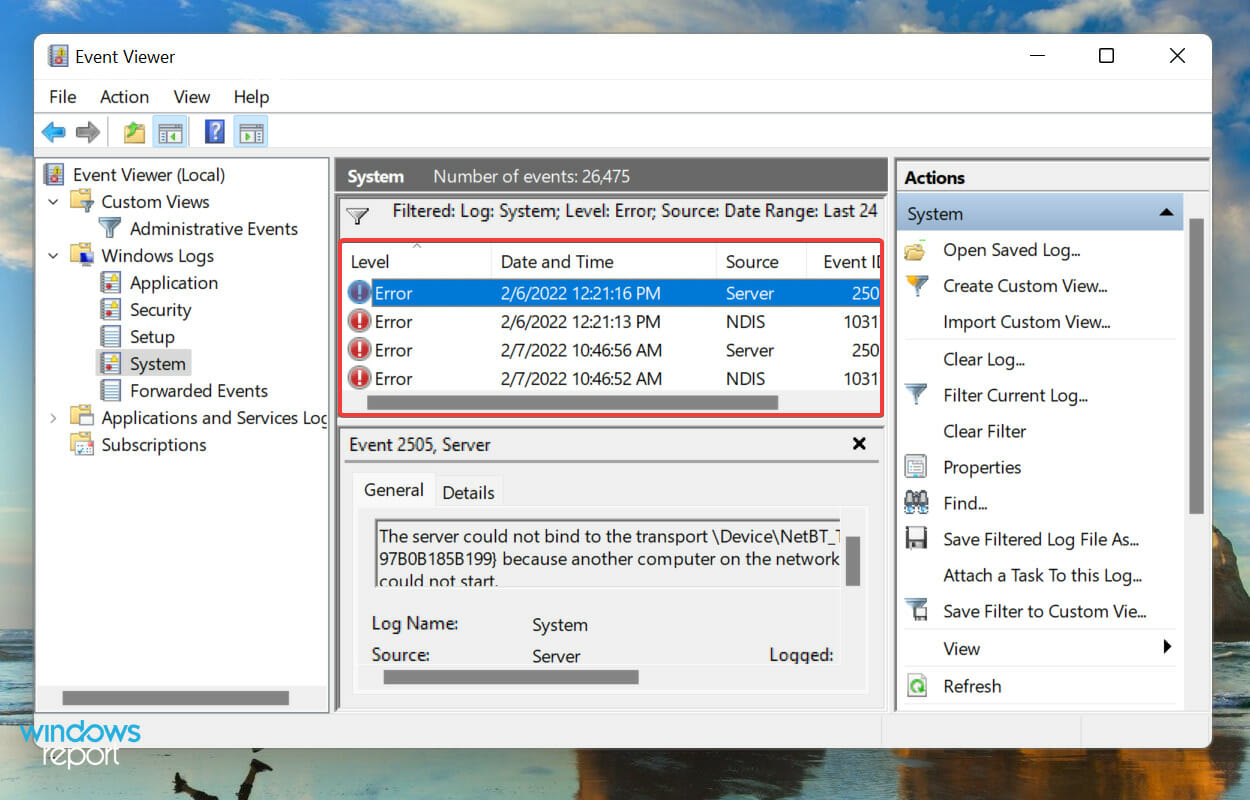


We selected the duration as 24 hours, and level as Error, and filtered the logs. Event Viewer then listed the four Windows 11 error logs that were created during that time.
How to create a custom view to check a particular category and level of logs in Windows 11?
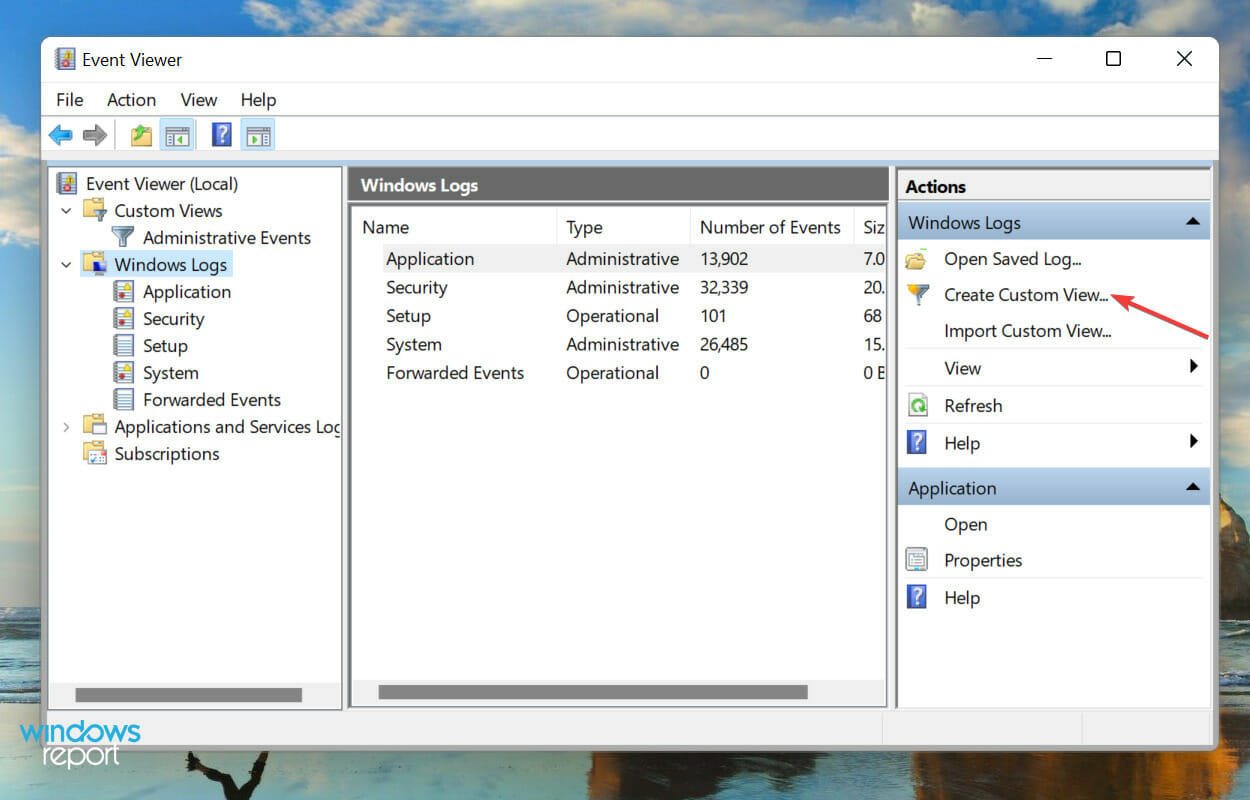
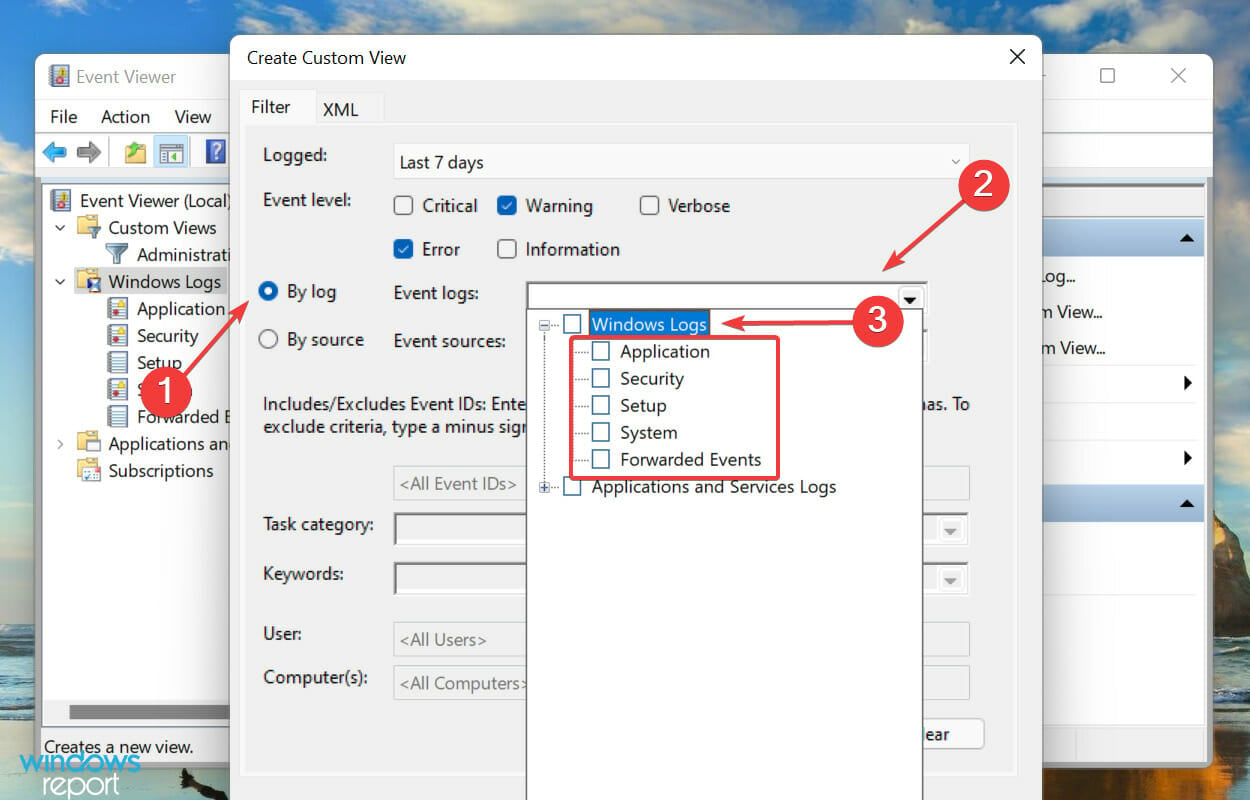
- Open the Event Viewer and click on Create Custom View on the right.
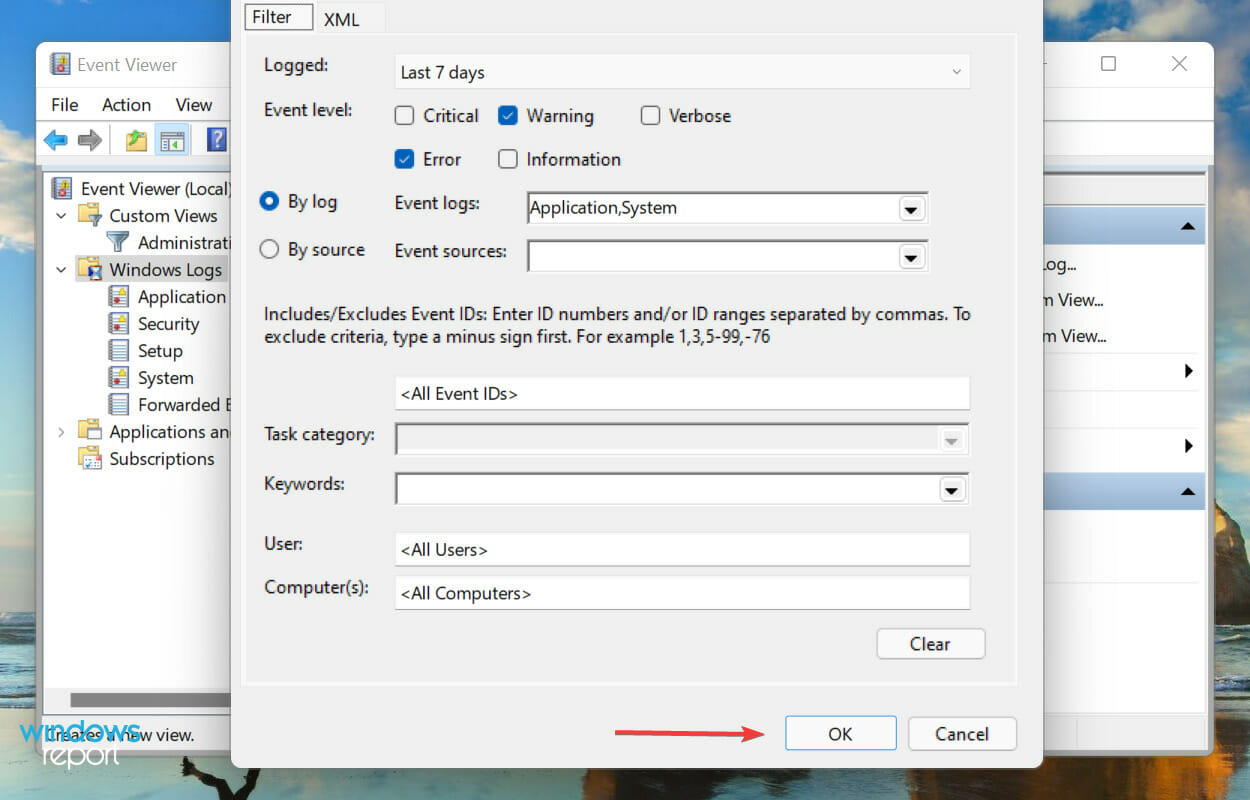
- Next, select the duration and Event Level, as you did earlier when creating a filter.
- With the By logs option selected, click on the Event logs dropdown menu, double-click on the Windows Logs entry to expand and view the various categories, and tick the checkboxes for the desired ones.

- Now, click on OK at the bottom to set filters for the new custom view.
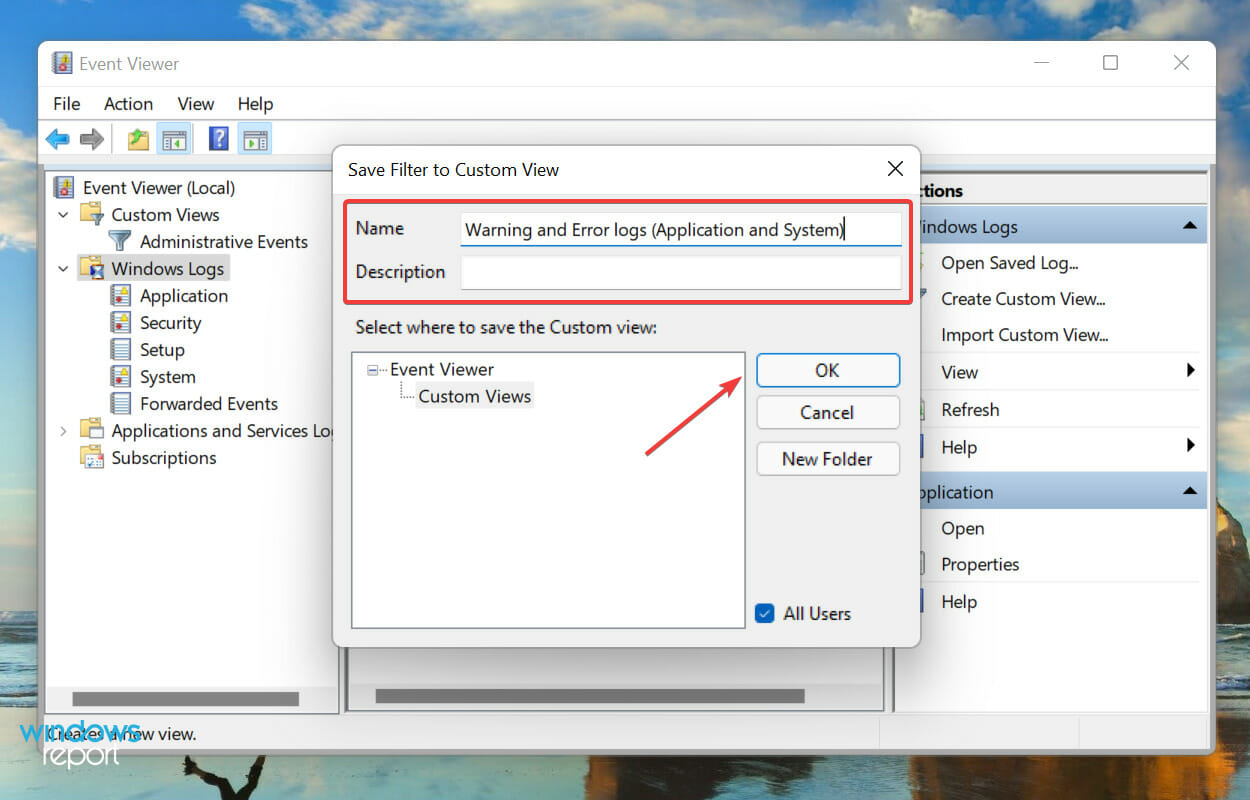
- Enter a Name and Description for the custom view and click on OK.
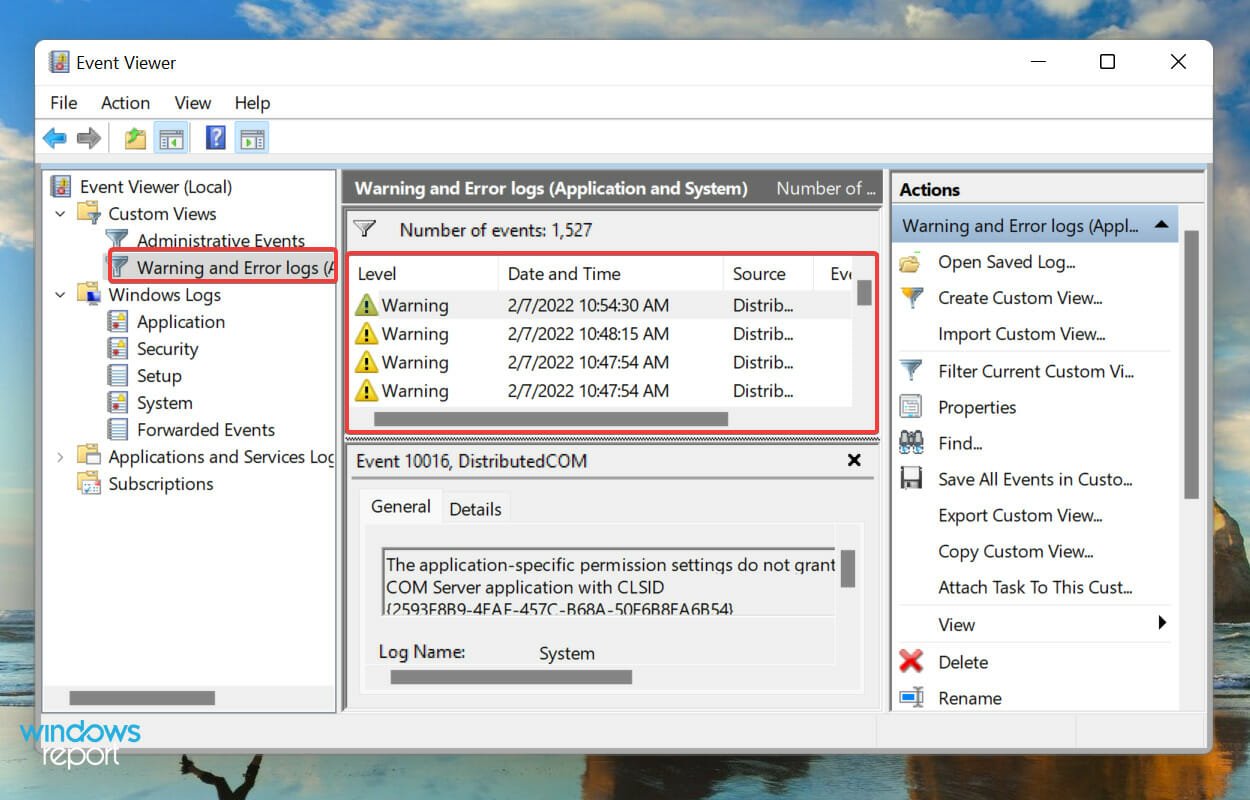
- The new custom view will now be listed on the left, and all logs falling under it on the right.


How can I clear error logs in Windows 11?
- Launch the Event Viewer, navigate to the relevant category, and click on Clear Log from the list of options on the right.
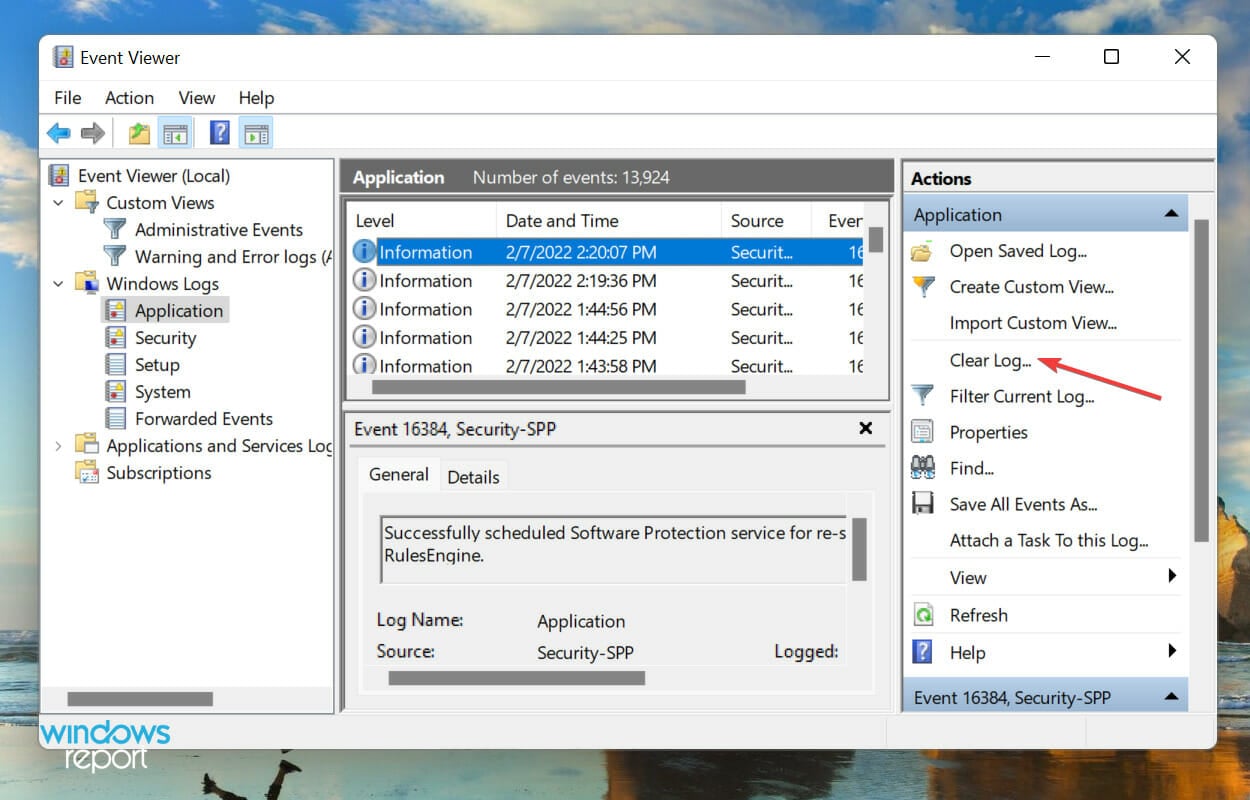
- You now have two options, either Save and Clear the error logs or directly Clear them. Choose the desired option.

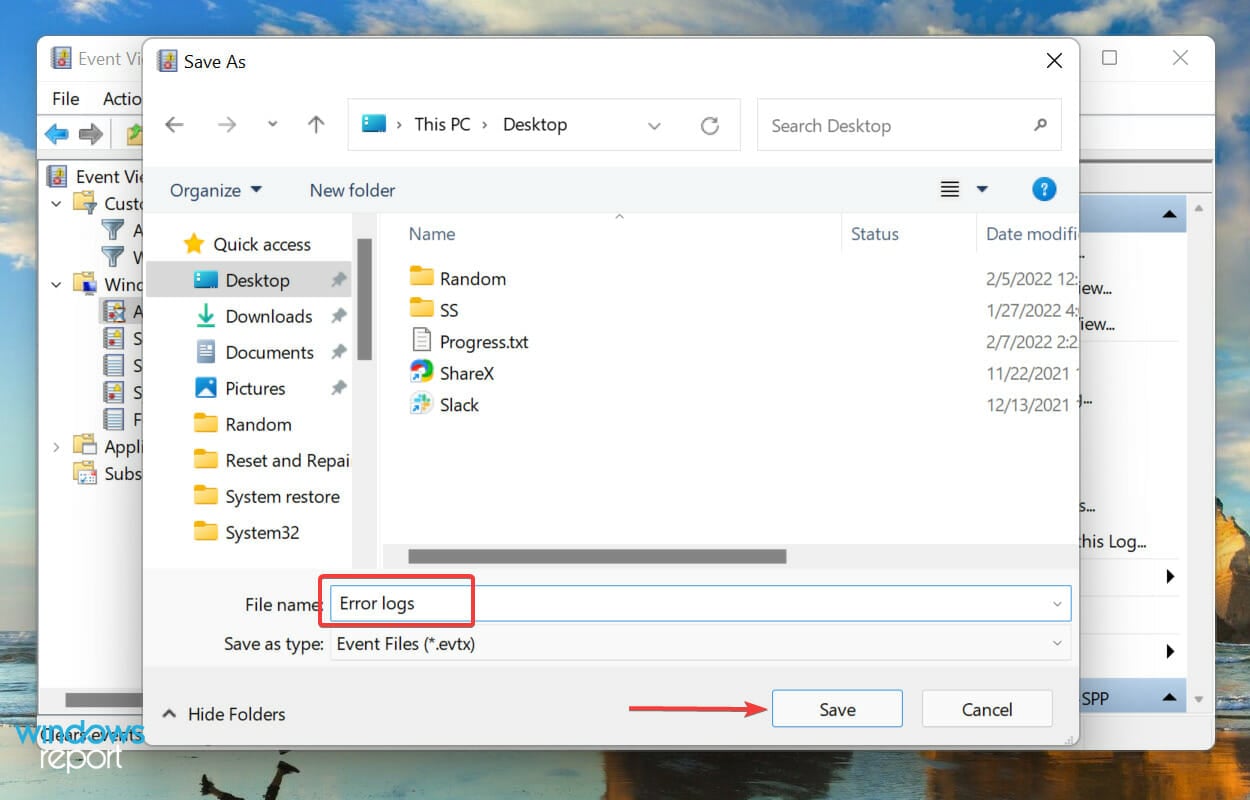
- If you selected Save and clear, choose the location for the file, add a name for it and click on Save.

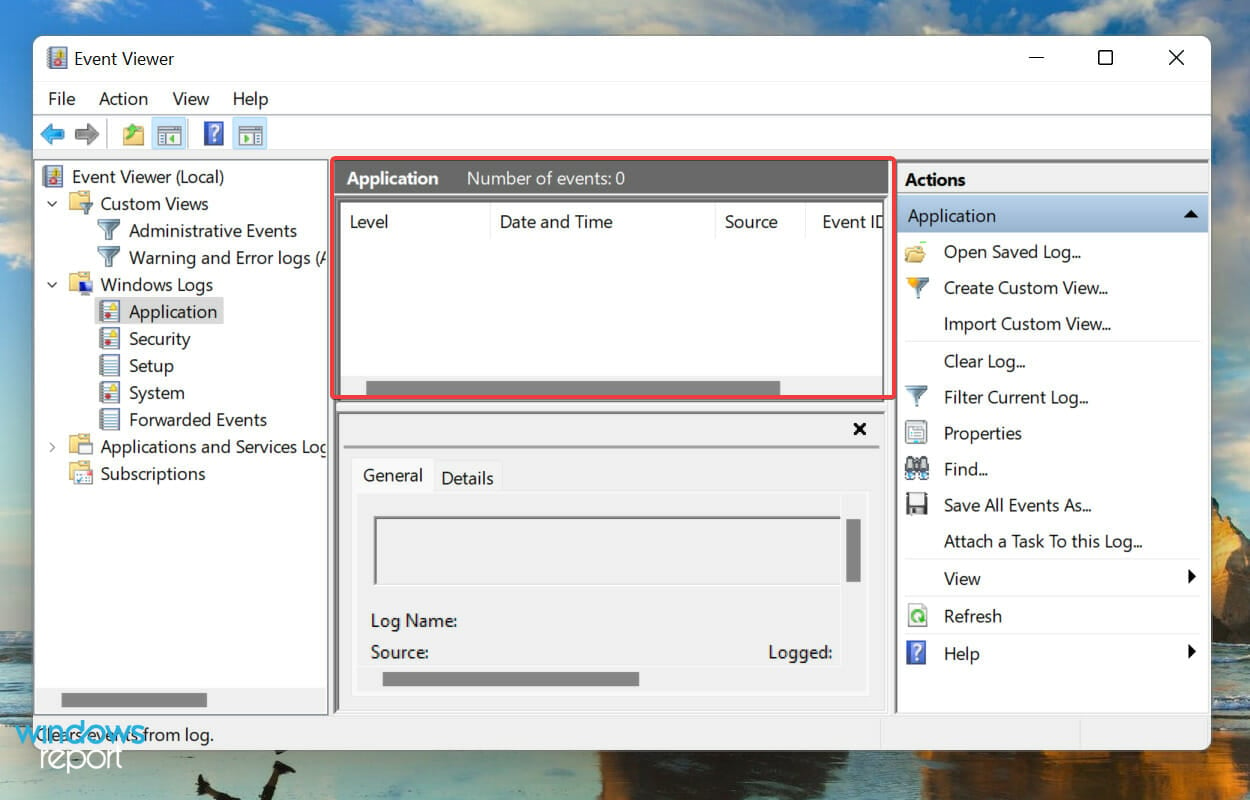
- Once saved, they error logs will be cleared right away and there will be none listed under that particular category.

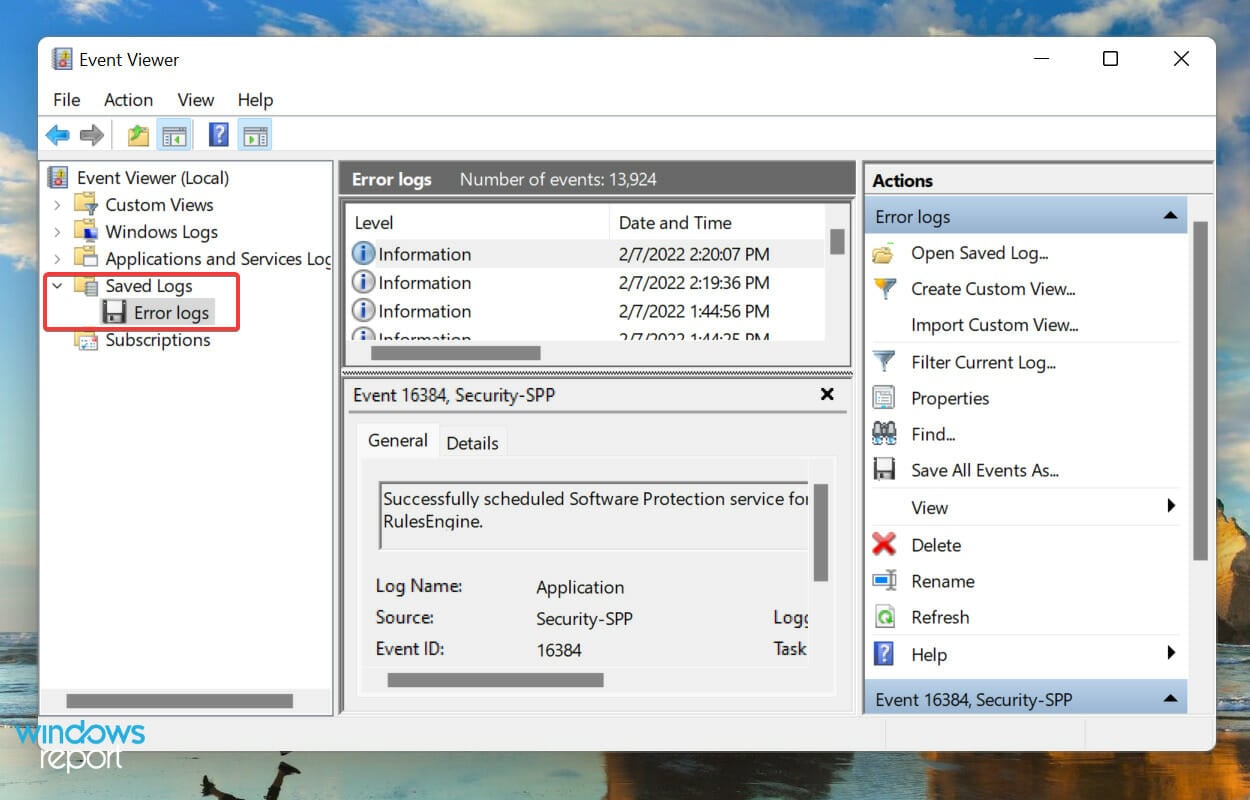
- In case you saved the error logs before deleting them, these can be found under Saved Logs in the navigation pane on the left.


The OS creates thousands of logs for each type of event, be it the successful launch of a driver and service or the most fatal errors. Like any other file, these too consume space on your hard disk, no matter how small it is.
So, if you are running out of space, or just want a more organized Event Viewer, clearing the Windows 11 error logs may help.
Checking the error logs can help you understand the BSoD errors like 139, and point you in the right direction to fix it.
How do I create my own log file in Windows 11?
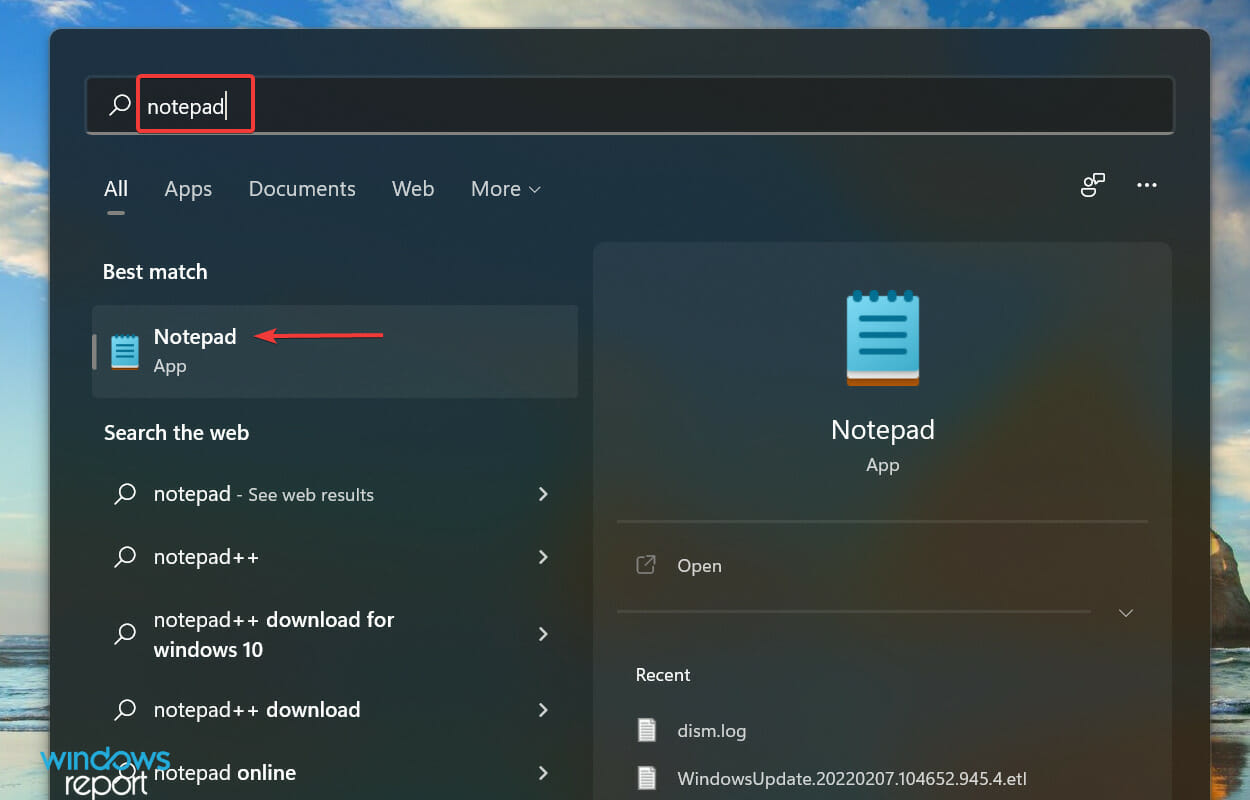
- Press Windows + S to launch the Search menu, enter Notepad in the text field at the top, and click on the relevant search result that appears.
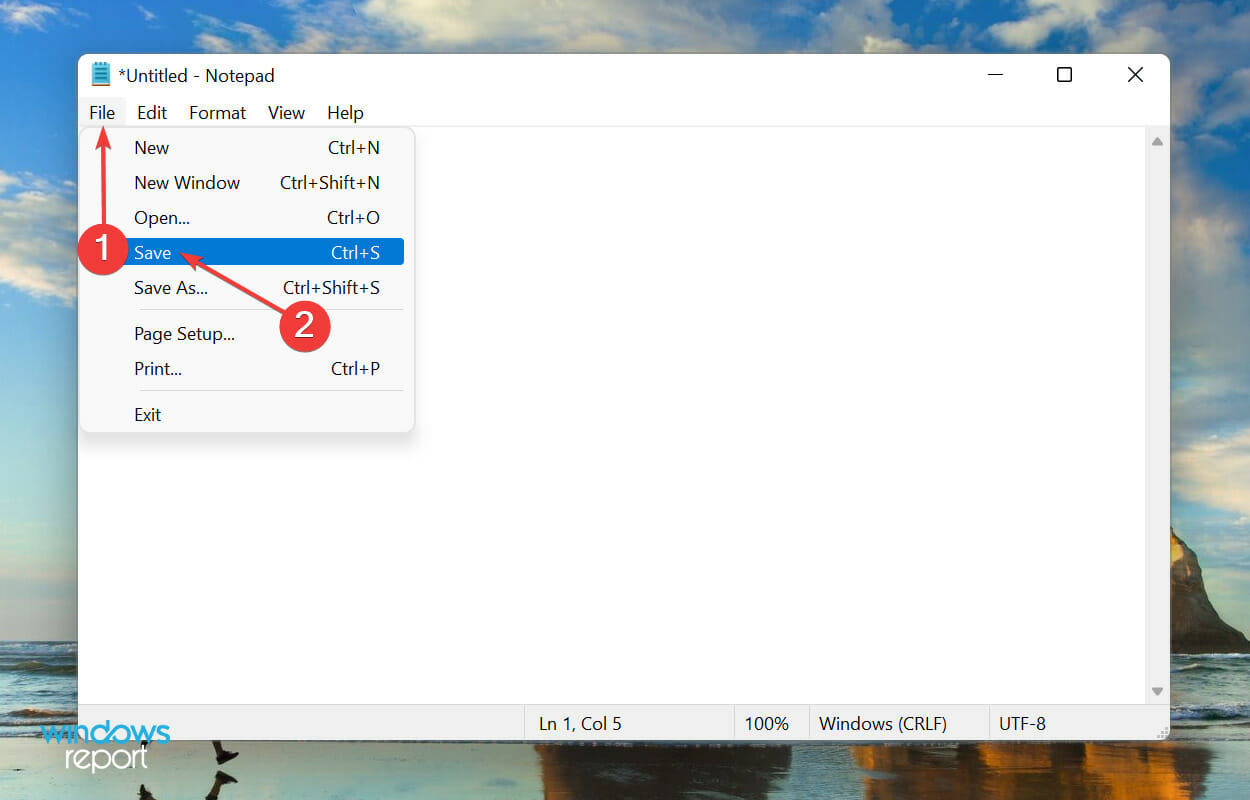
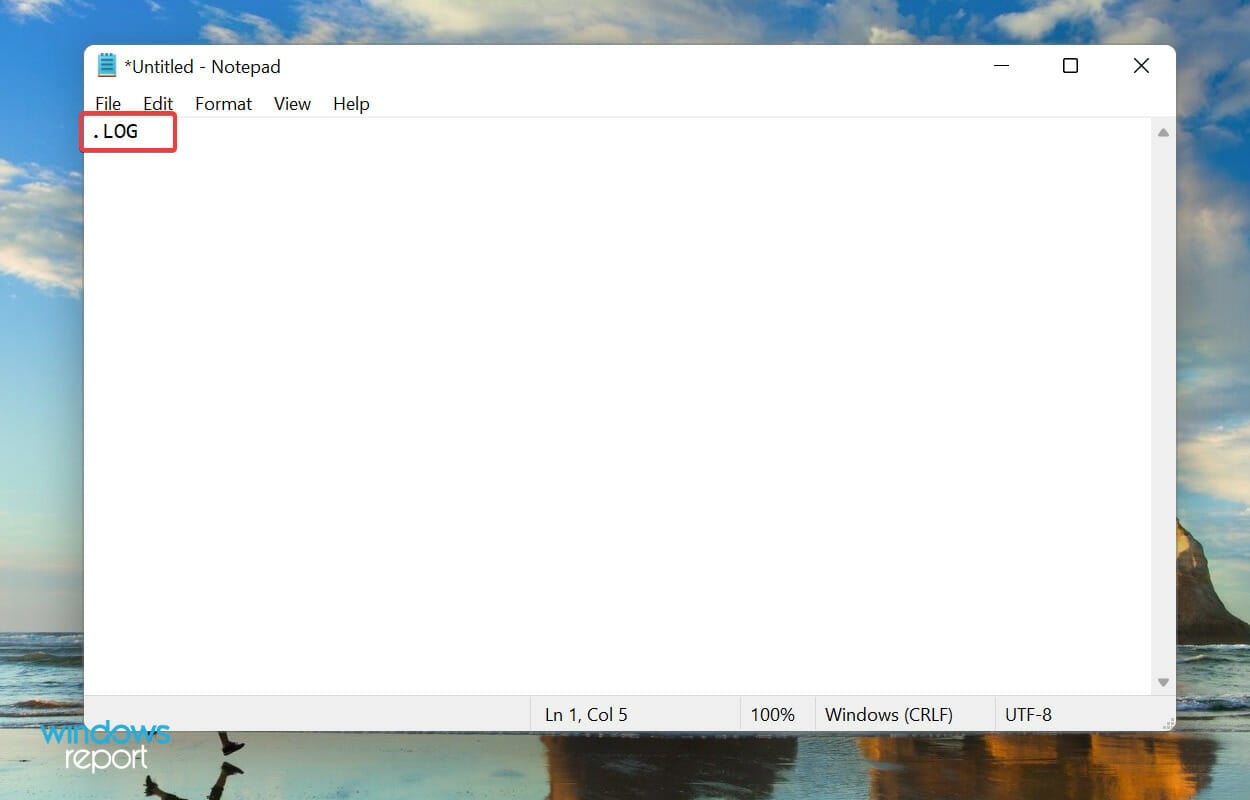
- Enter .LOG in the very first line of the Notepad.

- Click on the File menu, and select Save from the list of options.
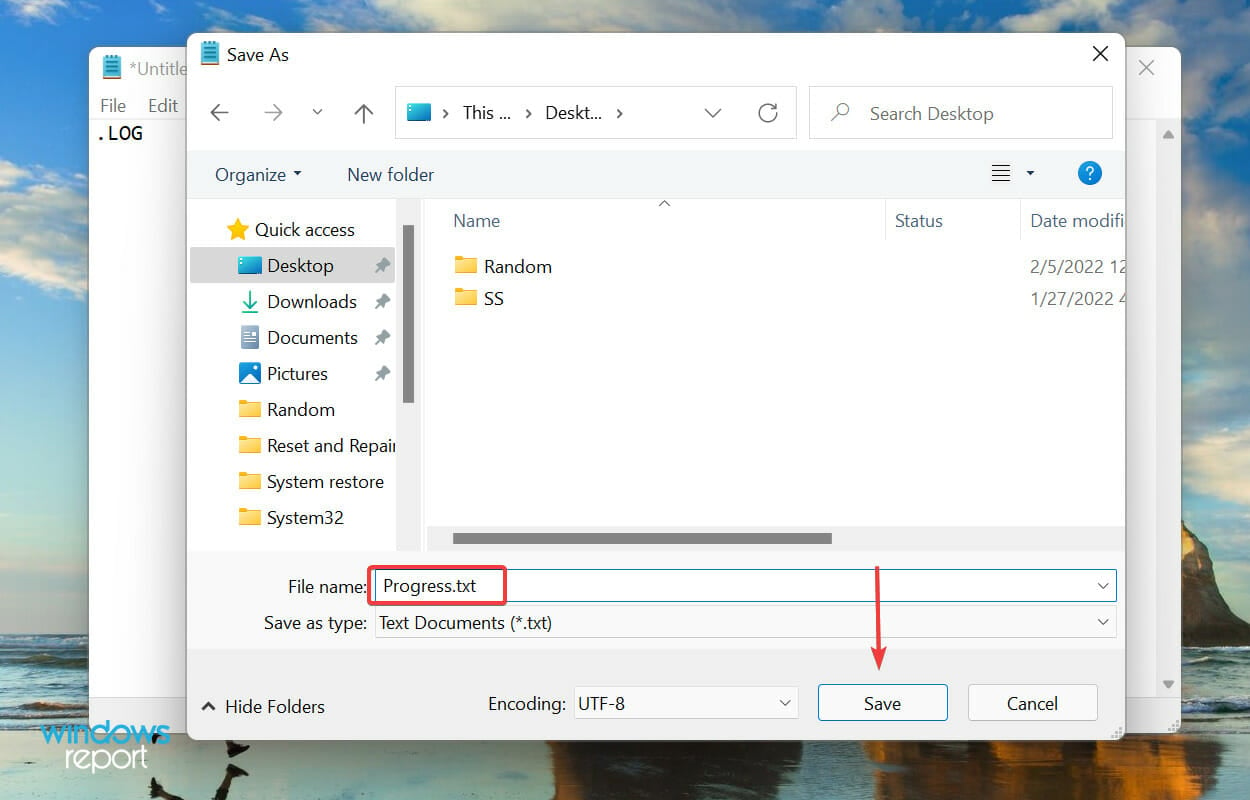
- Next, choose the location and name for the file, and click on Save at the bottom. Now, close the Notepad.
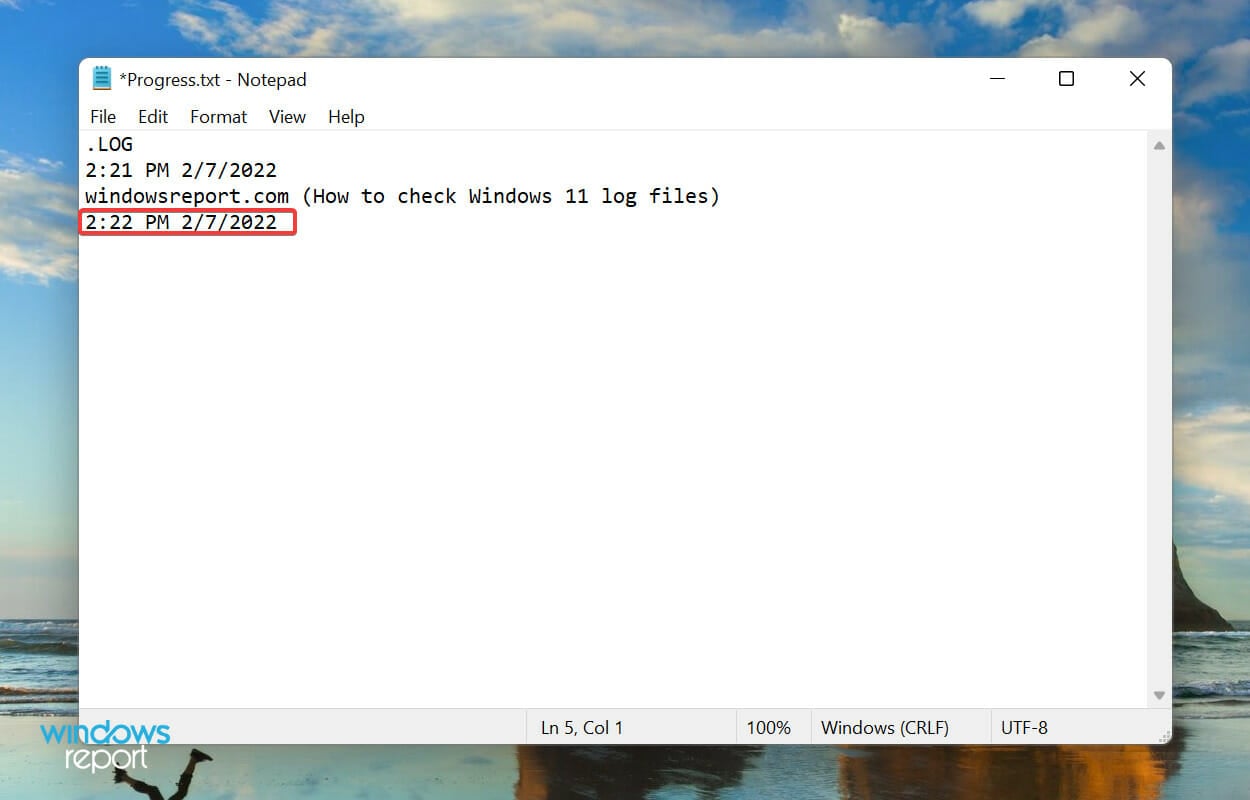
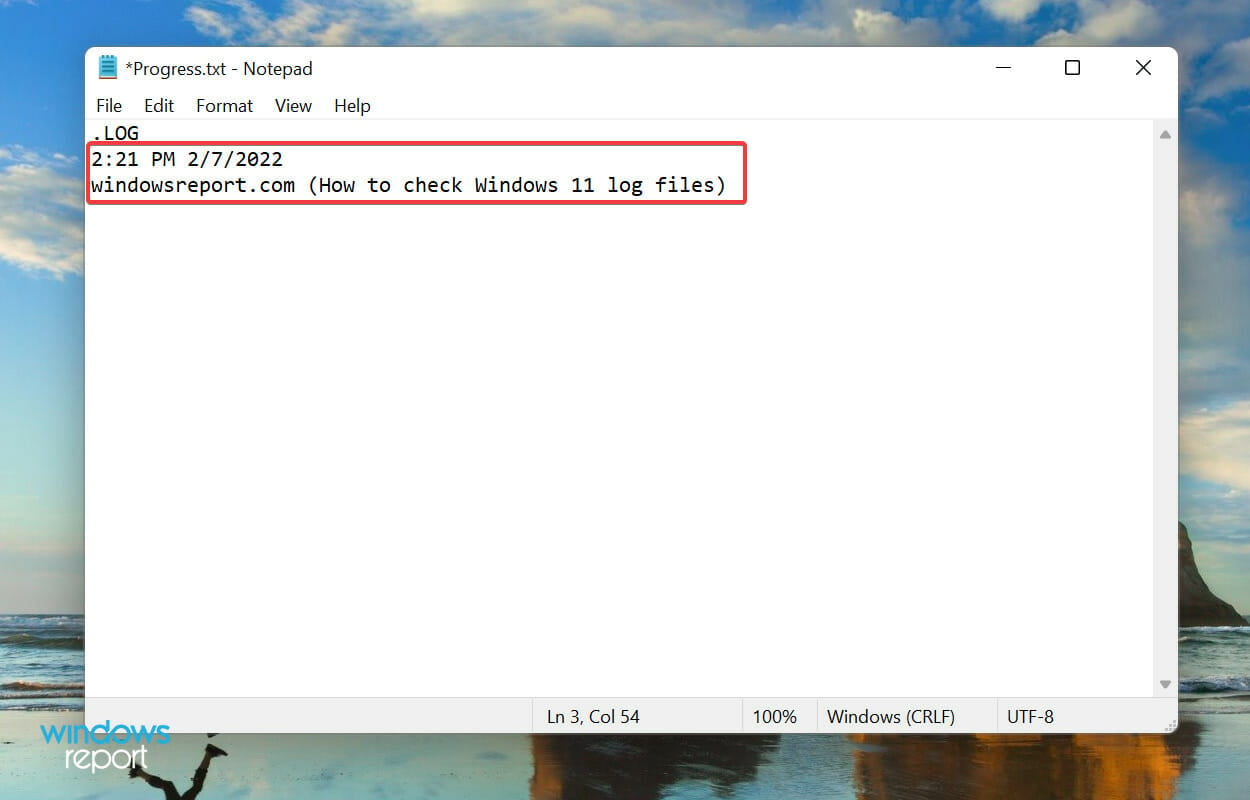
- Once the log file is created, the current date and time will be mentioned everytime you open it, and you can enter whatever you want to and hit Ctrl + S to save it.

- Now, when you open the same log file the next time, the previously added entry will be listed under that date and time, and the current date and time will again be mentioned below the last entry.


A log file is used to record data. Windows uses it for errors, warnings, and information, while you can use it for other purposes.
Creating a log file is simple, and so is maintaining it. Say you want to record the progress for a book you are reading, just create a log file and enter the number of pages you read each day, or as you may please.
Why do I need to check Windows 11 error logs?
Checking error logs on Windows 11 allows you to find the underlying cause of an issue such as a BSOD (Blue Screen of Death).
That’s all you need to know about Windows 11 system logs. From now on, identifying the underlying cause of errors should no longer be a problem.
Also, if you feel that Event Viewer does not meet all your requirements, check the best apps to view errors logs in Windows 11.
And if you want to know how to track system issues using tools like Event Viewer in Windows 10.
Do not hesitate to comment if you have any questions or would like us to add a related topic.
Read our disclosure page to find out how can you help Windows Report sustain the editorial team. Read more


Improve this guide


User forum
0 messages