Fix: Account Has Been Disabled. Please See Your Administrator
The reason for this error could be improper shutdown
Key notes
- The Your account has been disabled. Please see your administrator issue occurs if you restart your PC in the middle of restoring, or resetting.
- To fix it, you can use safe mode to create a new account with administrator rights or perform a system image restore.

If you see Your account has been disabled. Please see your system administrator while trying to logon on to your Windows computer; this guide can help!
We will discuss some expert-recommended solutions to fix the problem so that you can easily access your PC.
What does account disabled by server administrator mean?
Your account has been disabled; please see your system administrator error occurs when you try to log in to your Windows PC. It indicates that the Administrator user account has been disabled, and you are logged out of the account until it is enabled again.
This is a complex issue for an average computer and can be frustrating as you can’t access your computer.
Why has my account been disabled by the administrator?
There could be various reasons for a disabled admin account; some of the common ones are mentioned here:
- Administrator action – The obvious reason would be that the administrator disabled your account for some reason. Communicating directly with him/her, will hopefully clear this problem.
- Improper shutdown – If you have shut down your computer during restart, reset, or restore, you may face this issue. To fix it, you need to create a new account with admin rights in safe mode.
- Malware infection – Viruses on computers could cause all kinds of issues, including this one. Try running a deep scan using a reliable antivirus tool to get rid of malware.
If you work on a device operated by an organization, the only solution to this problem is to find the reason for account disabling. If you’re not in this situation and you own the device, follow the solutions below.
What can I do if the account has been disabled?
1. Creating a new account with administrative privileges in Safe Mode
1.1 Enter the Safe Mode
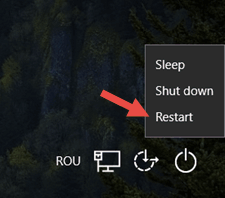
- Press & hold the Shift key on the login screen, then click the Power button. A menu will appear; click Restart while pressing the Shift key.
- Remove your finger from the Shift key as you see the Advanced Recovery Options screen.
- Now on the Choose an option page, click Troubleshoot.

- Next, select Advanced options.

- From the Advanced options screen, click Startup settings.

- Click Restart.

- Your computer will reboot, and you will get a blue screen with options, press the number key on your keyboard next to Enable Safe Mode with Command Prompt.

Your computer will reboot in safe mode, and you will see the built-in administrator account; then log in on it.
1.2 Create a new user with admin rights
- Press and hold the Shift key, then click the Power button. You will see a menu; click Restart while pressing the Shift key.
- Stop pressing the Shift key once you see the Advanced Recovery options screen.
- Click Troubleshoot.
- Next, select Advanced options.
- Click Command Prompt.

- Copy & paste the following commands one by one and press Enter after every command:
net user /add <username for the account that you want to create>net localgroup administrators <username for the account that you want to create> /add
- Once the commands are executed, you will get a new account with admin rights.

- Type the following command to reboot your PC, and press Enter:
shutdown /r - Close the Windows Command Prompt window.
2. Performing a System Image Restore
- Press and hold the Shift key, then click the Power button. You will see a menu; click Restart while holding down the Shift key.
- When you see Advanced Recovery options screen, let go of the Shift key.
- From the Advanced Recovery options menu, click Troubleshoot.
- Next, select Advanced options.
- Click System Image Restore.

- You will get a list of restore points; select the point to which you want to restore your system settings and initiate the process. If you get a prompt to select a user account, choose the one with Administrator rights.
- Wait for the process to complete, and restart your computer.
3. Enable the previously disabled account
 NOTE
NOTE
- Log in to your computer with another user account with administrator privileges. Press Windows + E to open the Windows File Explorer.
- Locate, right-click This PC and press the Shift key to get advanced options. From the context menu, click Manage.

- On the Computer Management window, go to the left pane, and click Local Users and Groups to expand it.
- Click Users to get the list of users.

- On the right pane, locate the disabled user account, right-click it, and select Properties.
- On the Properties window, locate the Account is disabled option, remove the checkmark, and click OK to confirm the action.

Reboot your computer to let the changes take effect.
4. Use the Registry Editor
4.1 Make changes to a registry entry
- Press and hold the Shift key, then click the Power button. You will see a menu; click Restart while holding down the Shift key.
- When you see Advanced Recovery options screen, let go of the Shift key.
- From the Advanced Recovery options menu, click Troubleshoot.
- Go to Advanced options.
- Now under Advanced options, select Command Prompt.
- On the command prompt, type the following command and hit Enter:
regedit
- In the Registry Editor window, select HKEY_LOCAL_MACHINE, go to File, then click Load Hive.

- In the Load Hive window, choose This PC, then navigate to this path:
Windows\System32\Config - Under the Config folder, locate and double-click the SAM file; you will get a Load Hive window; there you will have to create a new key.
- Next, rename the new key as testkey and click OK.

- Navigate to this path:
Computer\HKEY_LOCAL_MACHINE\testkey\SAM\Domains\Account\Users\000001F4 - From the right pane, locate and double-click F.
- It will open the Edit Binary Value window, locate the line starting with 0038, then double-click 11, replace it with 10, and click OK to save the changes.

- Next, close the Registry Editor and Command Prompt. You will be back on Choose an option screen; click Continue.
- Now, your computer boot and sign in to a hidden administrator account.
4.2 Enable the user
- Locate, right-click This PC and press the Shift key to get advanced options. From the context menu, click Manage.
- On the Computer Management window, go to the left pane, and click Local Users and Groups to expand it. Click Users to get the list of users.
- On the right pane, locate the disabled account, right-click it, and select Properties.
- On the Properties window, locate the Account is disabled option, remove the checkmark, and click OK to confirm the action.
In case the sign-in option is disabled for you, you can check out this guide to find quick and easy fixes.
5. Use the Command Prompt
- While on the lock screen, press & hold the Shift key, then click the Power button. Now you will get the menu; click Restart while holding down the Shift key.
- Stop pressing the Shift key once you see the Advanced Recovery options screen.
- Click Troubleshoot.
- On the Troubleshoot page, select Advanced options.
- Now click Command Prompt.
- On the CMD window, copy & paste the following command and hit Enter:
net user administrator /active:yes
Now restart your PC; it will allow you to log in using the administrator account.
So, these are the methods to fix the Your account has been disabled. Please see your administrator error and regain access to your user account.
If you are facing the administrator account disabled, Windows 10 cannot log in; we recommend you check out this article to find quick solutions.
Please feel free to give us any information, tips, and your experience with the subject in the comments section below.
Read our disclosure page to find out how can you help Windows Report sustain the editorial team. Read more


Improve this guide


User forum
0 messages