Apex Legends: Memory Could Not Be Read [Solved]
First, end all processes for EA and Apex Legends app
5 min. read
Published on
Read our disclosure page to find out how can you help Windows Report sustain the editorial team. Read more
Key notes
- To fix the Apex Legends: Memory could not be read issue, you can edit the compatibility settings for your game file, or delete the assets folder.
- Continue reading to learn the detailed steps.
![Apex Legends: Memory Could Not Be Read [Solved]](https://cdn.windowsreport.com/wp-content/uploads/2023/12/App-error-1-886x590.png)
Many users have encountered the Memory could not be read issue while trying to launch or play Apex Legends, causing the game to crash.
In this guide, we will discuss common causes for the issue and delve into WR experts’ tested methods so that you can resume playing the game.
What causes the Memory could not be read issue?
The error mostly appears on your computer if you have damaged game files, an outdated Windows version, a corrupted GPU driver, or conflicting background apps.
How can I fix the Apex Legends: Memory could not be read issue?
Before proceeding with any steps to fix the Memory could not be read issue, go through the following preliminary checks:
- Ensure your Windows OS and graphics drivers are up to date, then restart your computer.
- Check the EA server status for downtime and technical issues.
- Press Ctrl + Shift + Esc to open Task Manager, select all the unwanted processes one by one, and choose End task.
1. Delete the contents of the assets folder
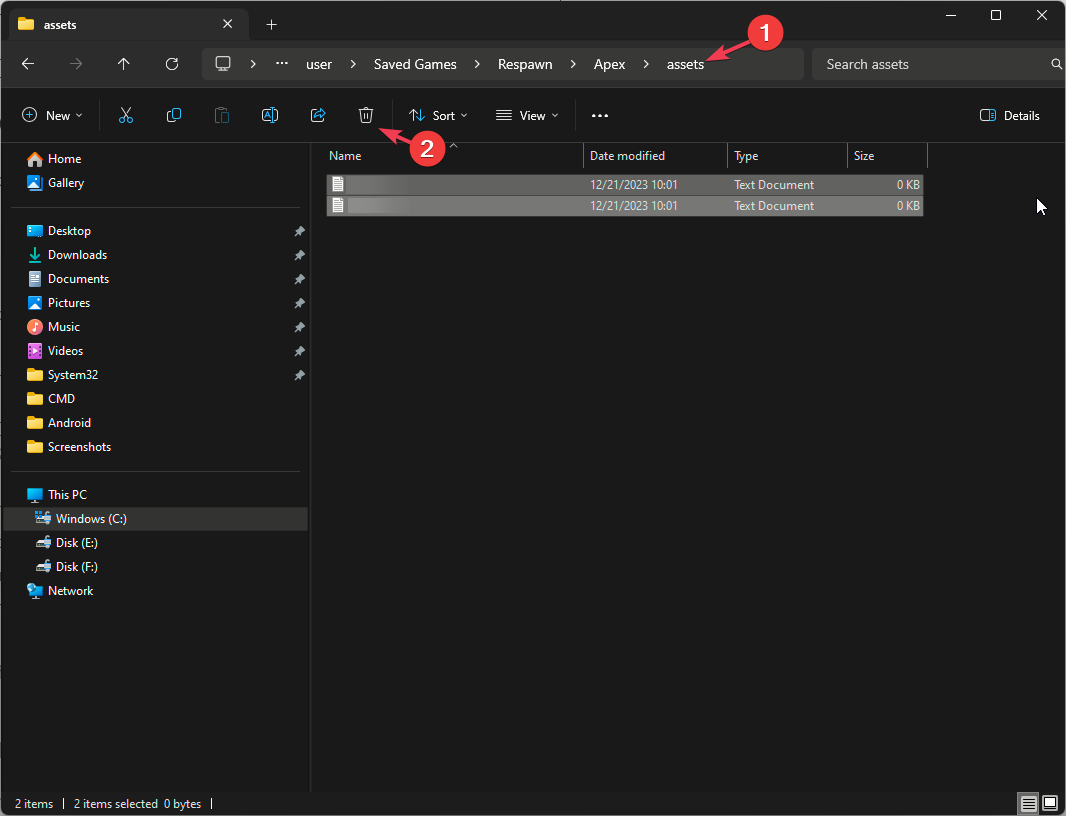
- Navigate to this path after replacing Username with your current user profile name:
C:\Users\Username\Saved Games\Respawn\Apex\assets - Open the local folder, press Ctrl + A to select all files, and press the Delete icon to remove all content.
- Launch the game and check if the issue persists.
2. Delete the certification folder
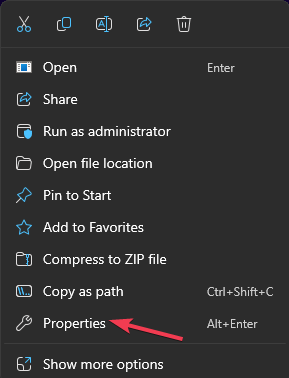
- Right-click Apex Legends from the desktop and select Properties from the context menu.
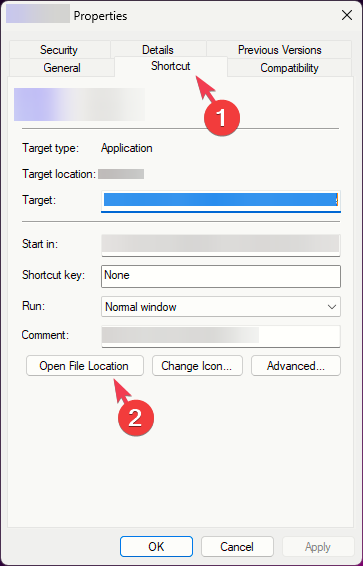
- Go to the Shortcut tab and click the Open File Location button.
- Look for Easy Anti Cheat, then locate and delete the certification folder.
3. Modify the Compatibility settings
- Right-click Apex Legends from the desktop and select Properties from the context menu.
- Go to the Compatibility tab, under Compatibility mode, and place a checkmark next to Run this program in compatibility mode for.
- From the drop-down menu, select Windows 8.
- Now, go to the Settings section, and place a checkmark next to Run this program as administrator and Disable fullscreen optimizations.
- Click Apply, then OK to save the changes.
Running the game as administrator can help you prevent other issues like Apex Legends not launching; read this guide to learn more.
4. Repair the game file
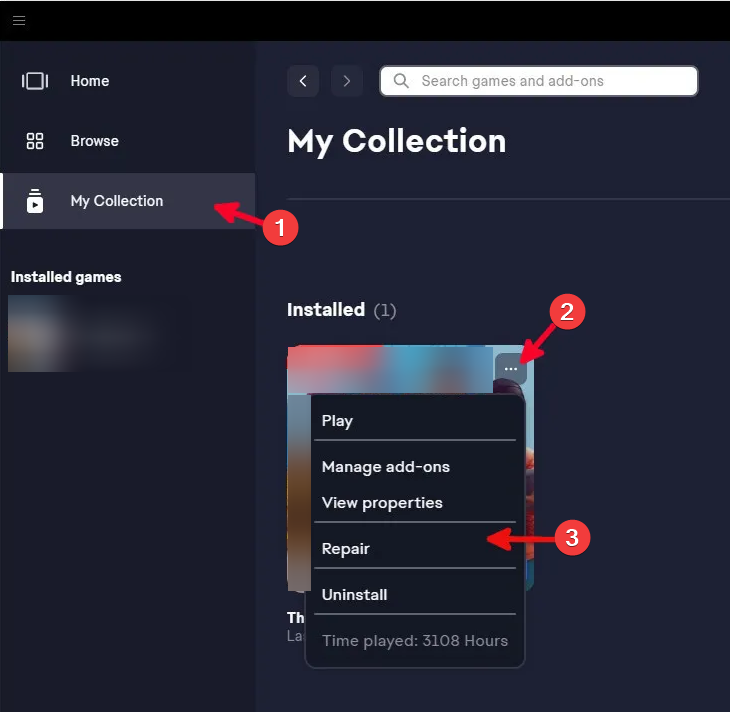
- Press the Windows key, type ea, and click Open.
- Click My Collection from the left pane.
- Locate Apex Legends and click the three dots icon to open Settings.
- Choose Repair.
These steps will verify the integrity of the game files and download any damaged or missing content necessary to ensure your game runs without glitches.
5. Repair the EasyAntiCheat service
- Right-click Apex Legends from the desktop and select Properties from the context menu.
- Go to the Shortcut tab and click the Open File Location button.
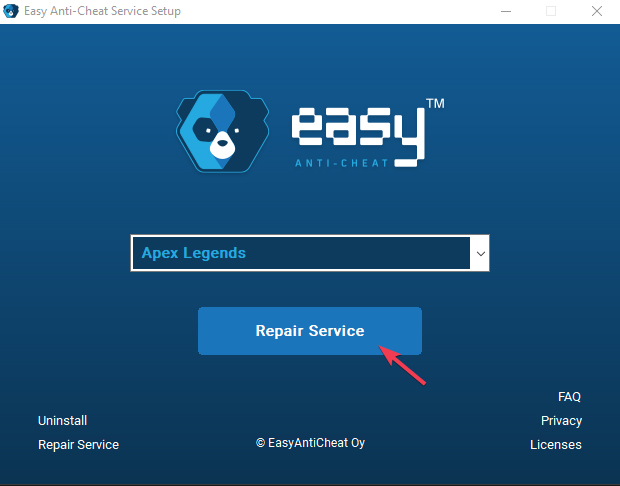
- Open the EasyAntiCheat folder, locate and double-click EasyAntiCheat_Setup.exe to run it.
- On the next screen, choose Repair Service to initiate the repair process.
- Once it is complete, reboot your computer and see if the issue persists.
6. Disable the Windows firewall temporarily
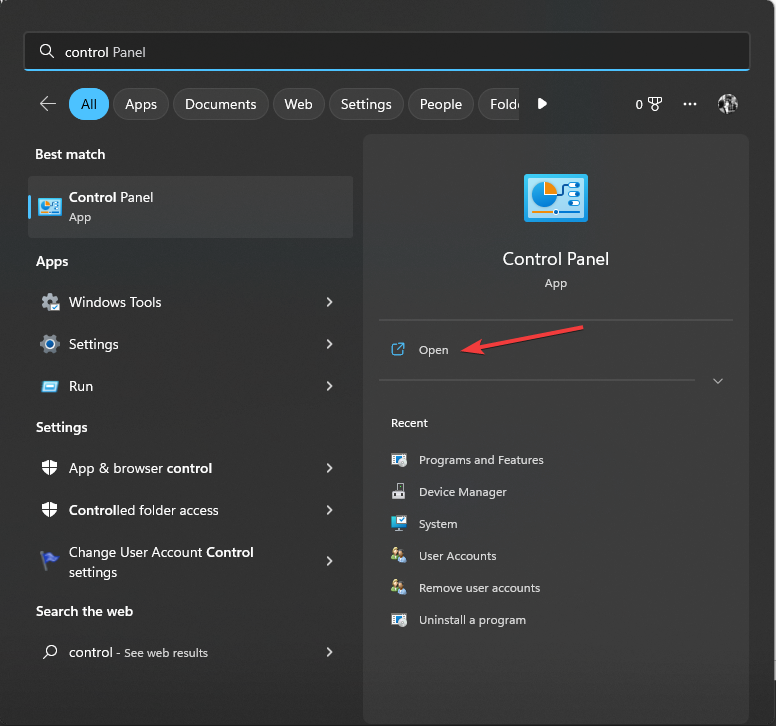
- Press the Windows key, type control panel, and click Open.
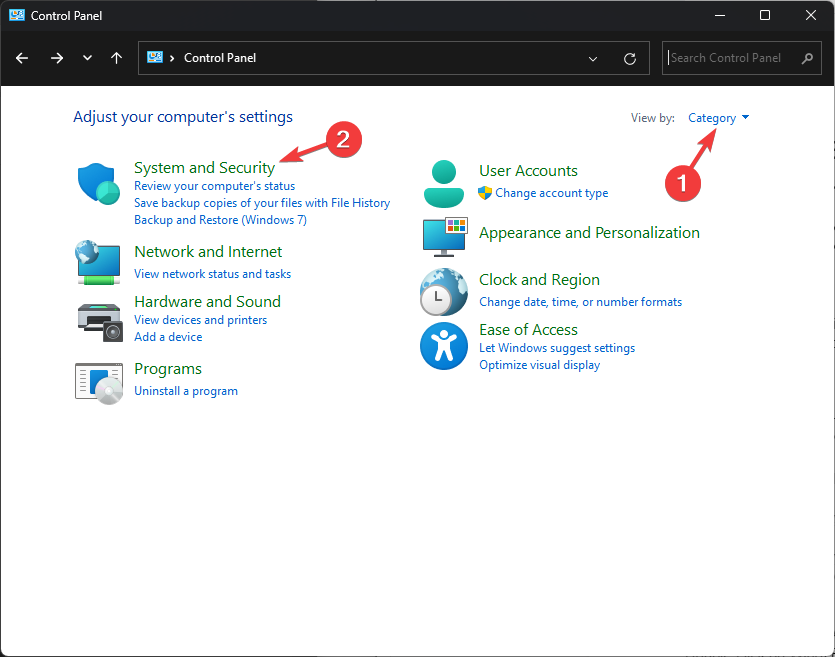
- Select Category from View by and click System and Security.
- Click Windows Defender Firewall.
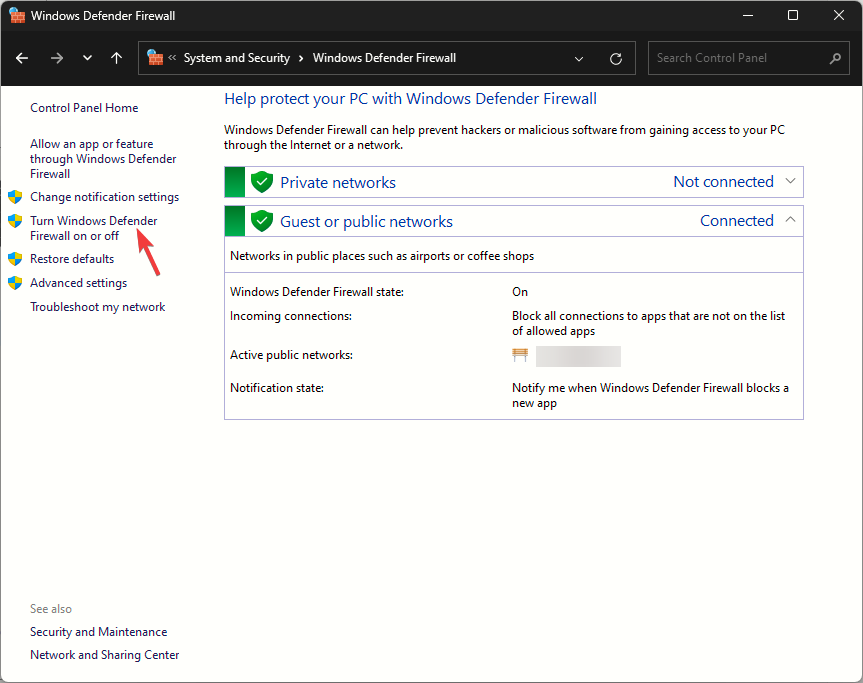
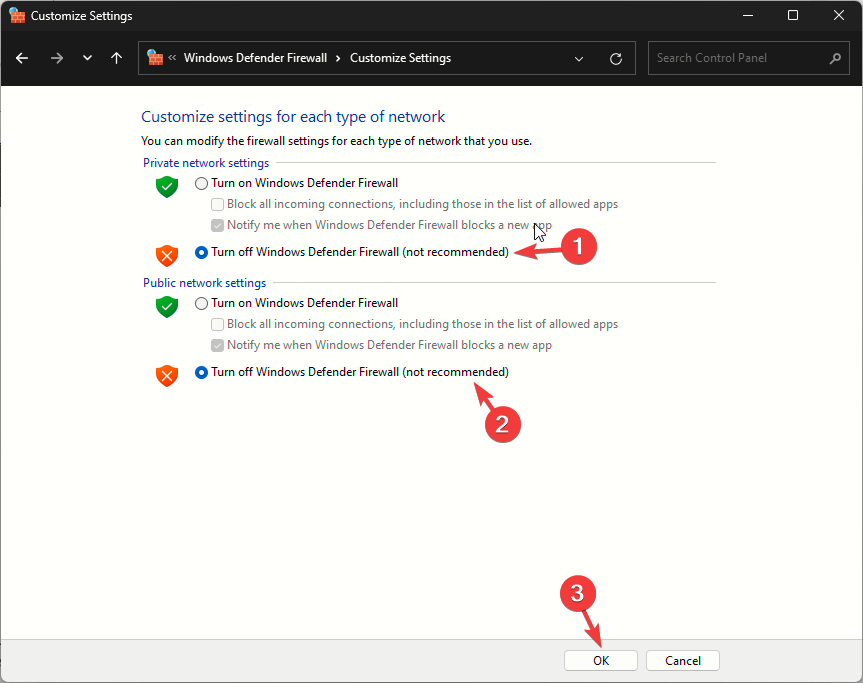
- Select Turn Windows Defender Firewall on or off.
- Next, place a checkmark next to Turn off Windows Defender Firewall (not recommended) for both Public & Private network settings.
- Click OK to confirm.
Now, if the game works fine, then follow these steps to add the game file to the exclusion list of your Windows Security.
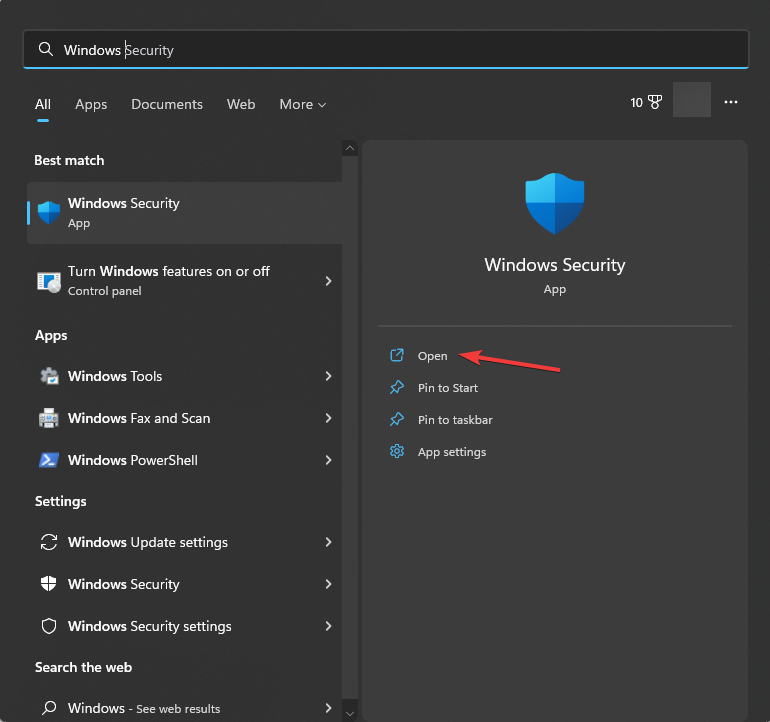
- Press the Windows key, type windows security, and click Open.
- Go to Virus & threat protection, locate Virus & threat protection settings, and choose Manage settings.
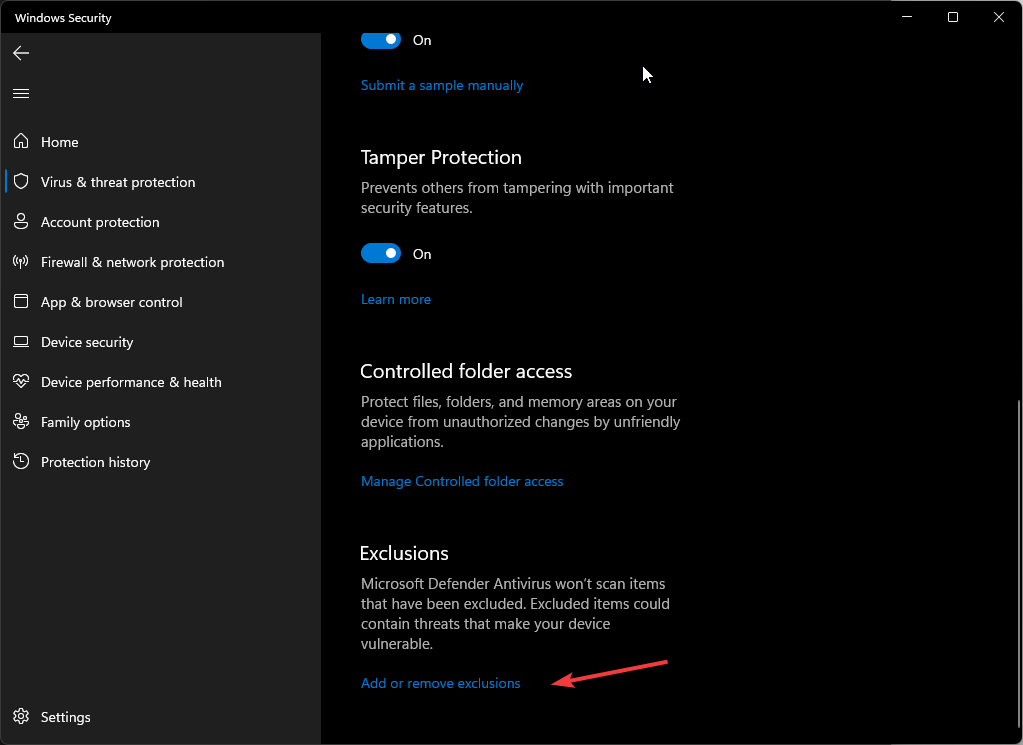
- Go to Exclusions, and select Add or remove exclusions.
- Click Yes, then click the Add an exclusion button, choose File, then select R5apex.Exe, and click Open.
Now reboot your PC and reverse engineer the steps to turn the Firewall back on. Adding the game files to an exception list on your antivirus can also help you fix Apex’s anti-cheat error; read this guide to learn more.
7. Modify registry entries (Only for Windows 7 users)
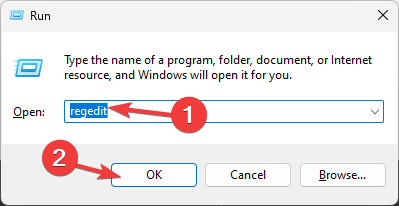
- Press Windows + R to open the Run window, type regedit, and click OK to open the Registry Editor.
- Navigate to this path:
HKEY_LOCAL_MACHINE\SOFTWARE\MicrosoftWindows NT\CurrentVersion\Image File Execution Options - Right the Image File Execution Options folder, select New, then Key, and name it r5apex.exe.
- Now select r5apex.exe, choose New, then Key, and name it PerfOptions.
- Right-click PerfOptions, select New, then choose DWORD (32-bit) Value, then name it CpuPriorityClass.
- Double-click CpuPriorityClass, set Base to Hexadecimal and change the Value data to 3, then click OK.
- Restart your PC to let the changes take effect.
If nothing has worked for you, you can go to the official Apex Legends support forums and ask for help. The developers and EA admins respond to the queries very fast.
In conclusion, to fix the Memory could not be read issue, you need to ensure that your antivirus is not interfering with any of the game-related processes.
Also, you can adjust the compatibility settings, repair the game, and the anticheat service to try and resolve the issue.
Furthermore, always ensure your Windows operating system and network drivers are updated to the latest version, as they can also help you avoid high CPU usage issues.
If you have any questions or suggestions about the subject, feel free to mention them in the comments section below.






User forum
0 messages