How to Automatically Detect LAN Settings Windows 10
Here's how to set your PC to detect the LAN settings automatically
3 min. read
Updated on
Read our disclosure page to find out how can you help Windows Report sustain the editorial team. Read more
Every device should be able to automatically detect LAN settings with Windows 10. LAN is short for Local Area Network, and it basically defines your personal Internet space.
In the course of this article, we will detail exactly what options need enabling in order for Windows 10 to automatically detect and assign the correct proxy settings for your LAN.
We will mention some technical terms such as LAN, proxy, and Internet Protocol, quite repeatedly throughout the course of the article.
We will explain each of them individually, so by the end of this read, you will have a clear grasp of not only how to automatically detect LAN settings in Windows 10, but also what this process fully implies.
But, before we get to that, let’s see exactly how to tweak those settings in order to obtain that automatic connection. The process is twofold but easy to follow.
How to automatically detect LAN settings in Windows 10?
1. Change your Adapter Settings to automatically detect LAN and proxy settings
- Click the Start button, type control panel, and click on it from the results.
- Go to Network and Sharing Center.
- On the left menu, choose Change Adapter Settings.
- Double-click to open your Ethernet connection and click Properties.
- Select Internet Protocol 4 TCP IPv4 and click Properties again.
- Enable automatic detection for both IP and DNS addresses.
Be careful not to select Internet Protocol 6 TCP IPv6. That’s a completely different protocol that doesn’t need any manual intervention as of yet. We will go over the differences between the two later in this article.
2. Changing the LAN settings to automatic detection
- Click on the Windows icon, type control panel, and open the app from the results.
- Now, select Internet Options.
- In the top bar, select Connections and click on LAN settings.
- Tick the Automatically detect settings box, and leave the Proxy server one unchecked.
We want a proxy server to be automatically assigned, that’s why we will leave that box unchecked. Or, if for any reason, yours is checked, make sure to uncheck by simply clicking on it.
Now that those settings are in place, Windows 10 should automatically generate your LAN settings. We went over some technical terminology, so maybe now it’s time to explain it a bit.
What is the difference between IPv4 and IPv6?
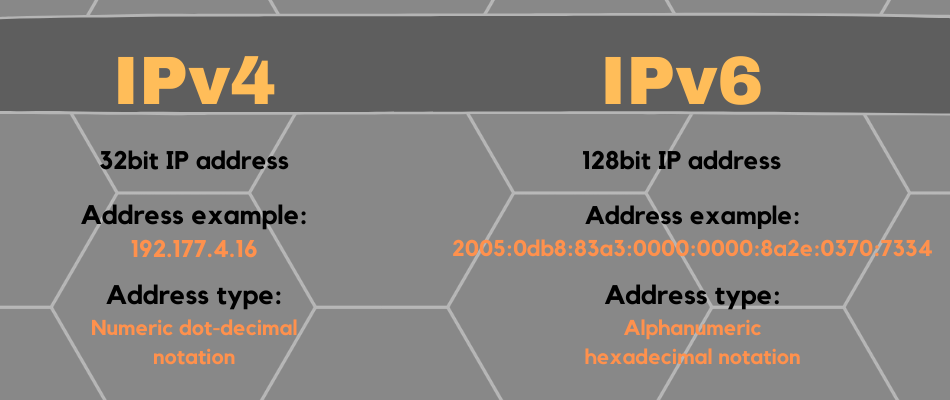
We already mentioned we’re gonna walk you through the difference between these two. So, IPv6 is still an Internet Protocol, but a newer version.
Why is this required? To put it simply, because there are a lot of people using the Internet and not a whole lot of IP addresses.
As you can see, IPv4’s address is much shorter. That’s because it uses a 32bit technology, whereas IPv6 uses a 128bit one. So that’s 2^128.
IPv6 automatically generates LAN settings in Windows 10, without you having to manually intervene. That’s part of the reason we said to leave it as it is.
Another reason is that although IPv6 is a newer technology, most devices still communicate through an IPv4 protocol. If Windows could not detect a network’s proxy settings, IPv4 is most likely the culprit.
That’s about it from us. Now you have a clearer understanding of how the setting changes you perform interact with each other, and what they ultimately represent in the larger picture.
We also recommend reading our guide on what to do if the Automatically detect settings option keeps being checked for the proxy.
What are your thoughts on this? Please feel free to let us know in the comments below!


User forum
0 messages