B1initializelibrary Failed: How to Fix Error 0xc00000BB
Try these tested fixes to resolve this error
4 min. read
Updated on
Read our disclosure page to find out how can you help Windows Report sustain the editorial team. Read more
Key notes
- The error could occur when your computer’s motherboard has been reset to default values due to BIOS issues.
- This guide will discuss all the probable causes and potential fixes to help you resolve the problem.
Trying to start your computer usually but are stuck with b1initializelibrary failed 0xc00000bb error? It could happen if a BIOS issue or any system files were infected.
In this guide, we will discuss the reasons for the issue along with all the available fixes. Let’s get started!
What is b1initializelibrary failed 0xc00000bb?
After researching and studying the use cases, we have made out a list of reasons which could cause the issue:
- Booting sequence is corrupted – If there is a booting problem, you might get the error code every time you will start your computer. You need to change the master boot record, boot sequence, and boot configuration data.
- Secure boot is enabled – If you have cloned HDD/SSD, you might get this error at startup. In this case, you need to disable Secure Boot to get rid of the error.
- 4G Decoding disabled – If 4G decoding is disabled, it could cause a problem. You need to enable the 4G decoding feature from UEFI firmware settings.
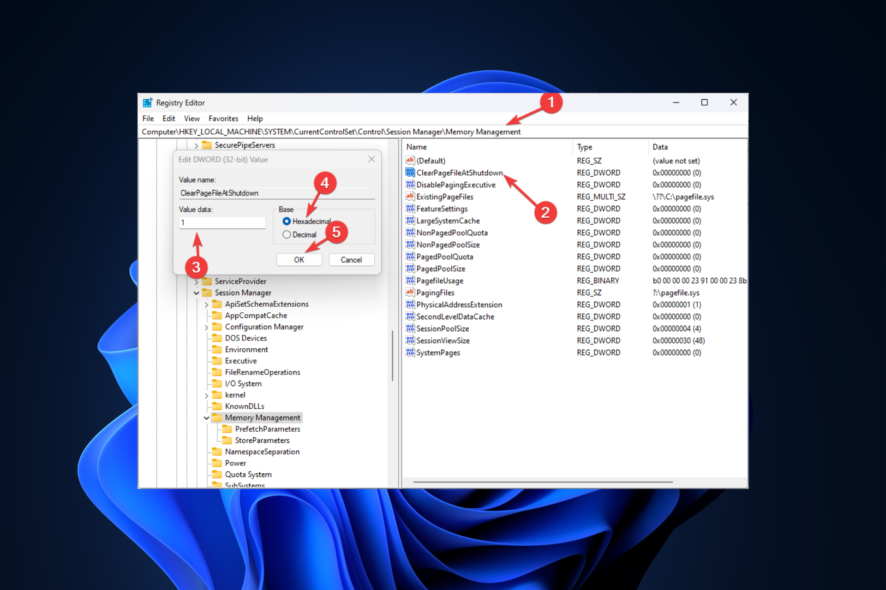
- Memory Management registry key – ClearPageFileAtShutdown DWORD is also found to be the culprit of the issue. To resolve the issue, you need to modify the key from Registry Editor.
- Corrupted system file – If there are corrupted system files, which can’t be repaired using bootrec.exe, chances are the files are the reason for your computer being stuck up on startup.
How do I fix error 0xc00000bb?
1. Enable 4G Decoding
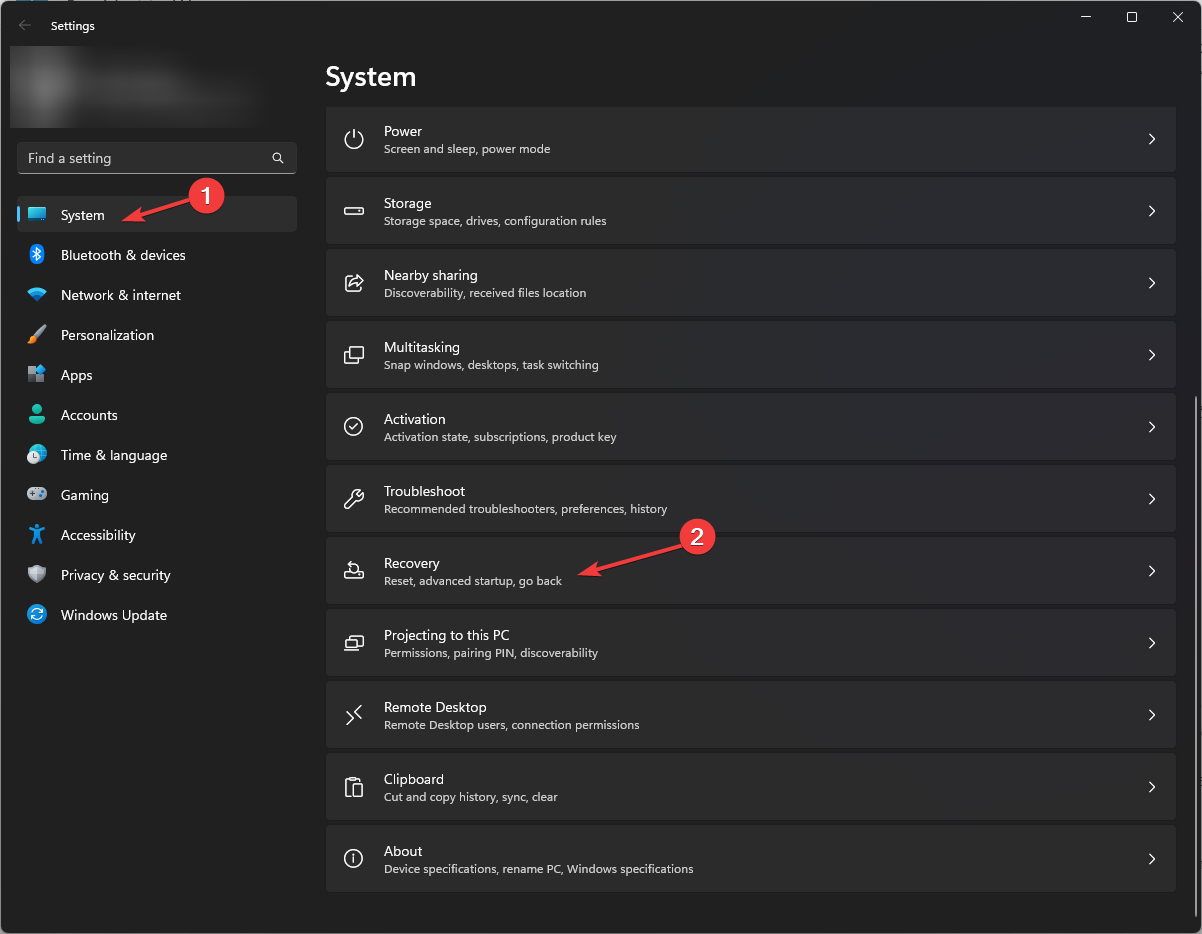
- Press Windows + I to open Settings.
- Go to System, then Recovery.
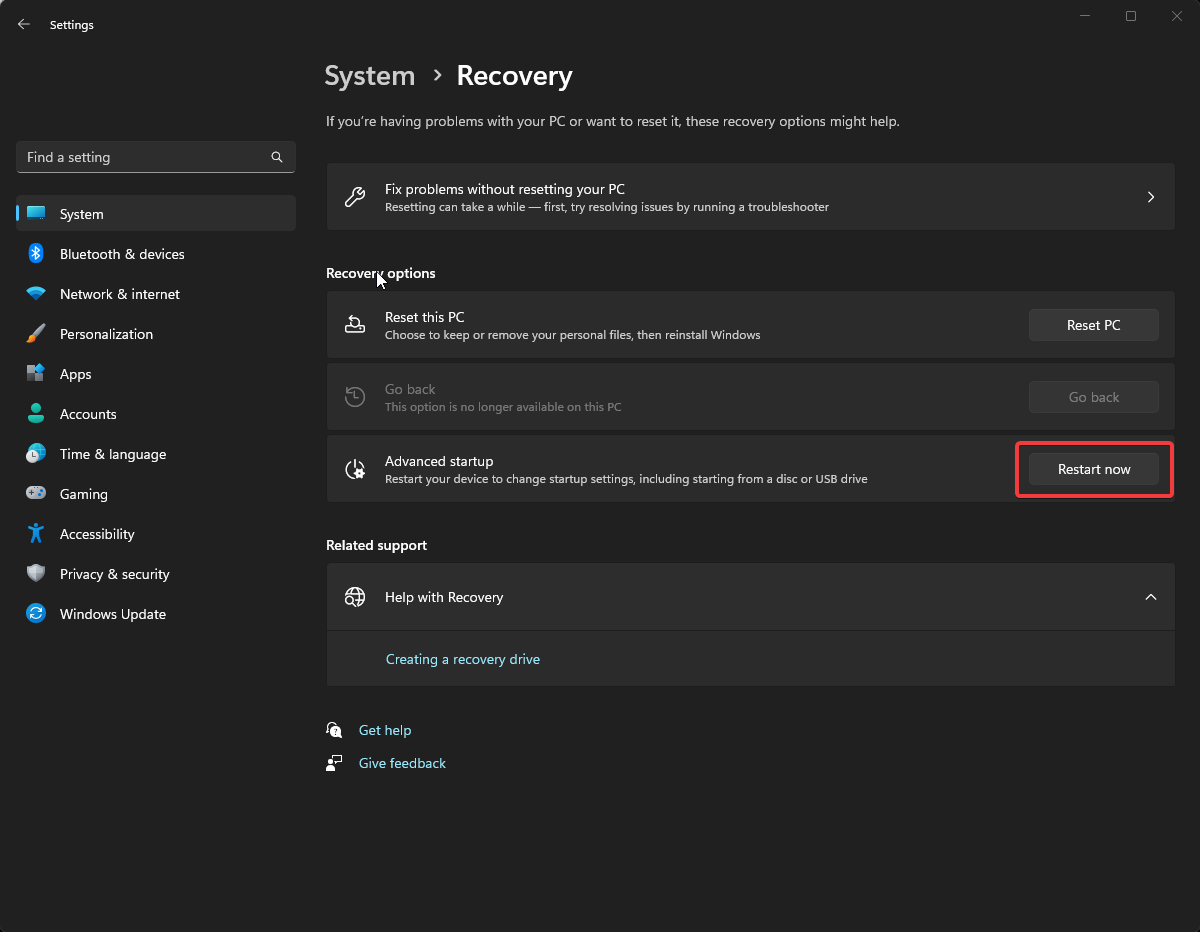
- Now go to Advanced startup and click Restart Now.
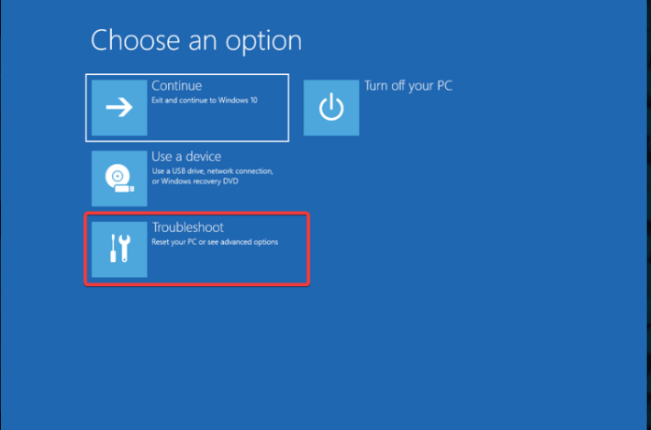
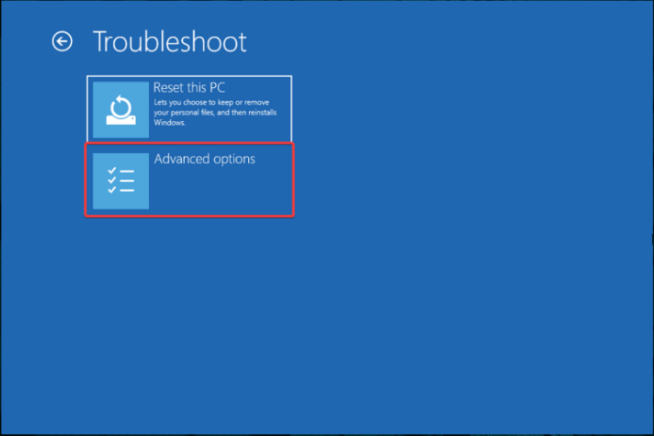
- On Choose an option screen, click Troubleshoot.
- Now select Advanced Options.
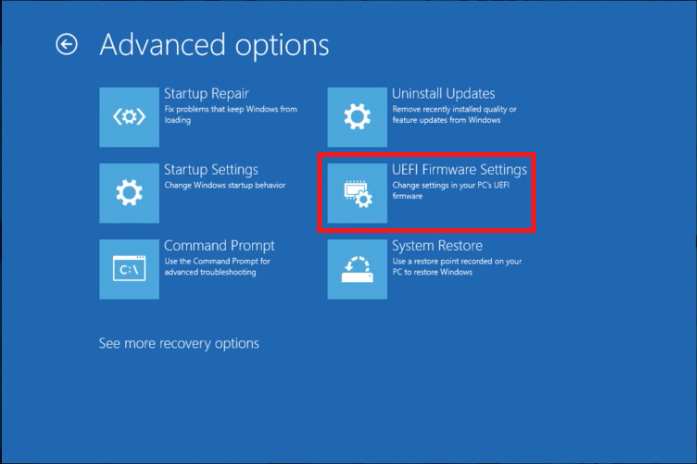
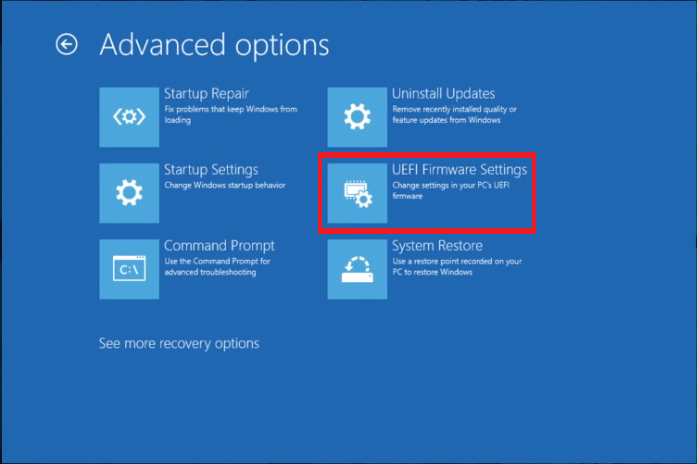
- On the next screen, select UEFI firmware settings and then click Restart.
- You will get a screen; click on the option available for BIOS Utility, like press F10 to go to BIOS utility.
- Navigate to 4G Decoding, and select Enabled.
- Go to the Exit tab, and click on Save changes & Exit to restart your computer normally.
2. Fix the Master Boot Record and rebuild the boot configuration data
- Go to the login screen, click the Shutdown icon, then press and hold the Shift key while choosing Restart.
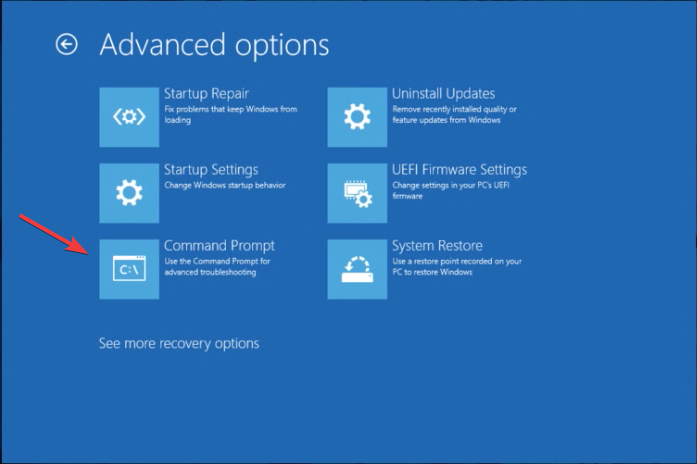
- From the Advanced Options screen, select Command Prompt.
- Choose your account and enter your credentials to launch the command prompt window.
- Type the following commands one by one and press Enter after each command:
bootrec.exe/fixmbrbootrec.exe/fixbootbootrec.exe/scanosbootrec.exe/rebuildbcd - Once the process is done, restart your computer.
3. Disable Secure Boot
- Press Windows + I to get Settings.
- Go to System, then Recovery.
- Navigate to Advanced startup, and click Restart Now.
- On the Next screen, choose Troubleshoot.
- Go for Advanced options, now click on UEFI firmware settings and click Restart.
- From the next screen, choose the option to enter BIOS.
- Go to Boot, then Secure boot and select Disabled.
- Switch to the Exit tab and select Save changes & Exit.
4. Make changes to the ClearPageFileAtShutdown key in Registry Editor
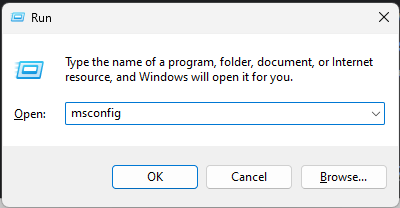
- Press Windows + R to get the Run window.
- Type msconfig and press Enter to open System Configuration.
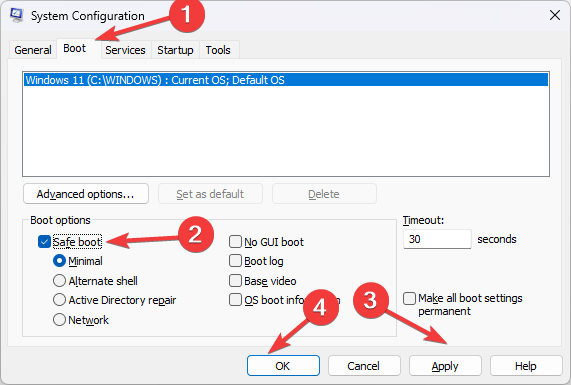
- Go to Boot, and click on the radio button beside Safe boot.
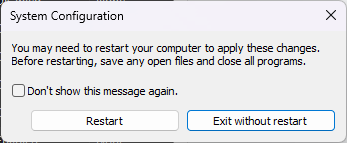
- Click Apply and OK. When prompted, click on Restart.
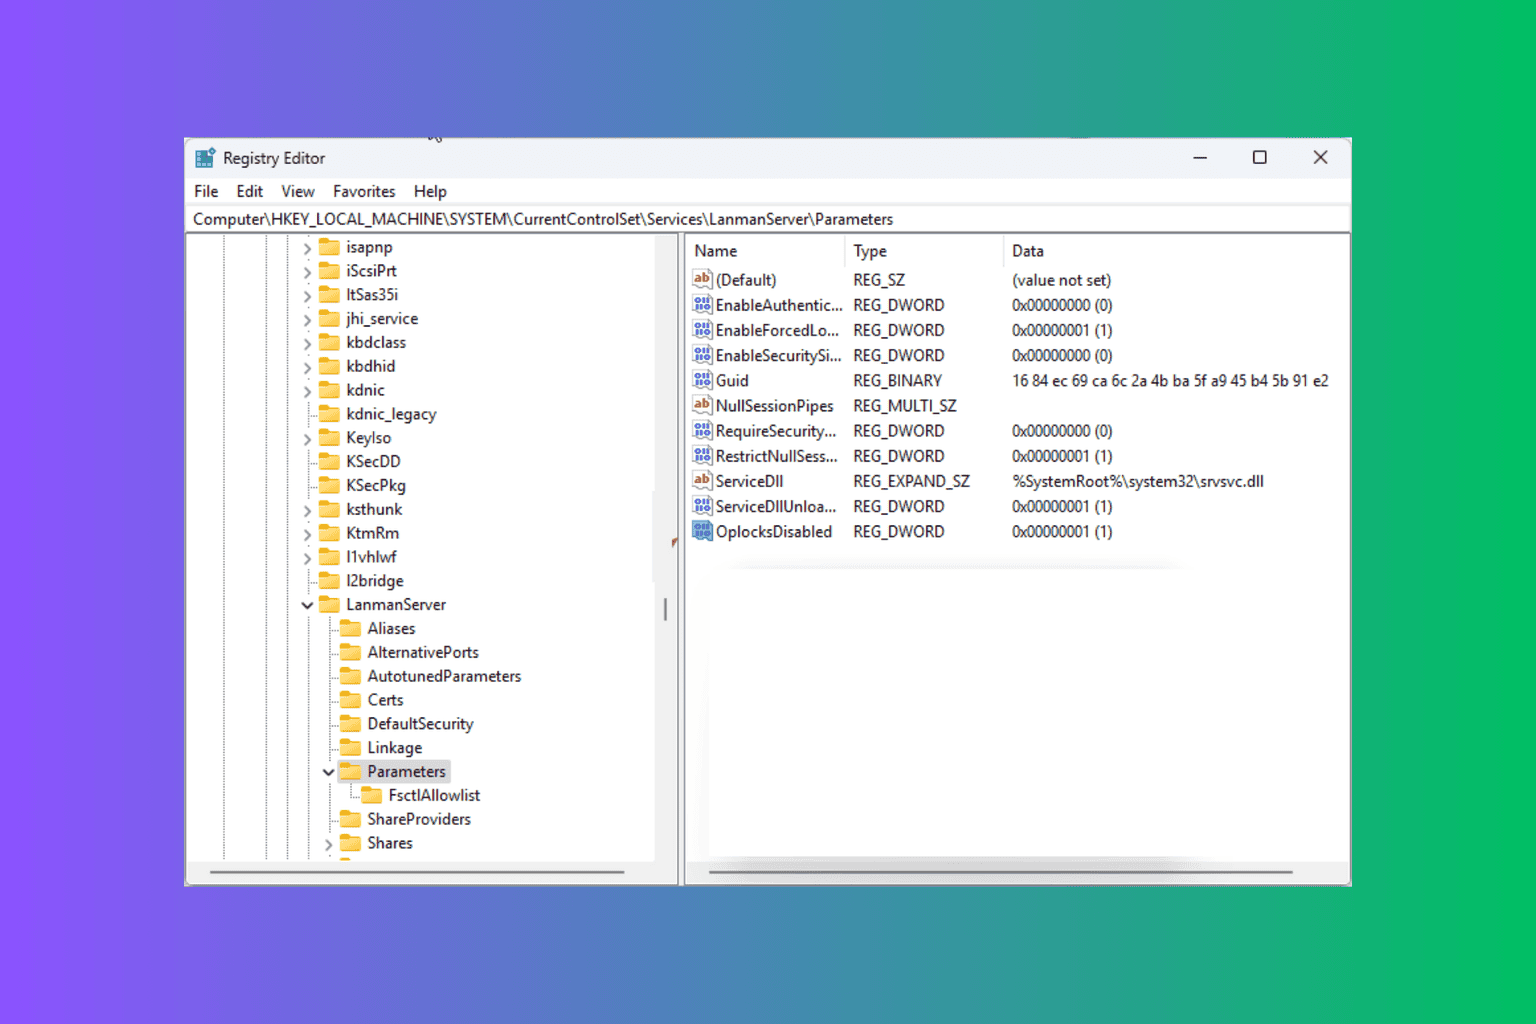
- Now, fire up the Run window again, type regedit, and press Enter.
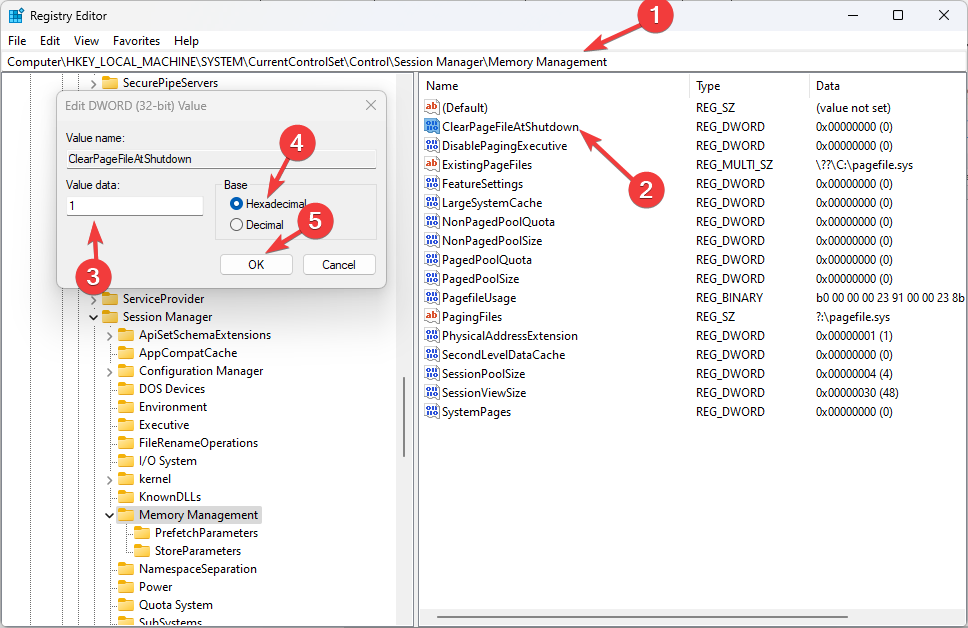
- Follow this path:
Computer\HKEY_LOCAL_MACHINE\SYSTEM\CurrentControlSet\Control\Session Manager\Memory Management - Locate and right-click on ClearPageFileAtShutdown and select Modify.
- Now change the Value data to 1 and choose Hexadecimal and click OK.
So, these steps you can follow to fix the b1initializelibrary failed 0xc00000bb error. If nothing worked for you, an in-place upgrade is advised. If you are stuck in the process somewhere, feel free to let us know in the comments section below, we will be happy to help!



User forum
1 messages