That's How You Can Repair BCDEdit in Windows 11
Key notes
- Windows 11's BCDEdit commands aren't any different than the previous ones, but they do require an administrator account.
- In order to change your account, you will need to access the Family & other users section.
- Follow along as we will show you how to fix the commands inside BCDEdit in Windows 11. Updating Windows often does wonders.

Users have been reporting that when they use the bcdedit /set {current} description “any name” or bcdedit /set testsigning on Windows 11 command lines, they do not get the desired result. Thus we will show you how to use BCDEdit in Windows 11.
BCDEdit is a command-line utility that is used to manage boot configuration information. If you wish to use it to modify the Boot Configuration Data, you will require administrator credentials in order to enable the Command Prompt under Windows Recovery Environment.
Follow along as we will show you how to fix the commands inside BCDEdit in Windows 11, right after we see in more detail what they do and are all about.
What do BCDEdit commands do?
BIOS Boot Configuration Data (BCD) files serve as a data storage area for information about the boot apps and their associated configurations.
To manage it, you’ll need to use BCDEdit, a command-line utility. Among the many things, it may be used for building new stores, changing current stores, and adding boot menu options to your computer.
In the percent WINDIR percent System32 folder, there is a program named BCDEdit. To make changes to this data, you must have administrative rights. In order to ensure that any modified settings are flushed to disk after modifying BCD data, you will need to reboot your PC.
When performing some typical actions, such as recovering a partition or setting up the system partition on a new PC, BCDboot may be a more convenient option than using the Windows command-line prompt.
How can I repair BCDedit in Windows 11?
1. Log in as an administrator
- Press Windows and I simultaneously to open Settings then navigate to Accounts. Here you need to check whether there is Administrator under your account name. If not, click on Family & other users.

- Now you need to scroll down to the Other users section and click on Add account. After you add the account you will be able to set it as an administrator.

Don’t skip this step as it is necessary in order to use Windows 11 BCDEdit commands.
2. Update Windows
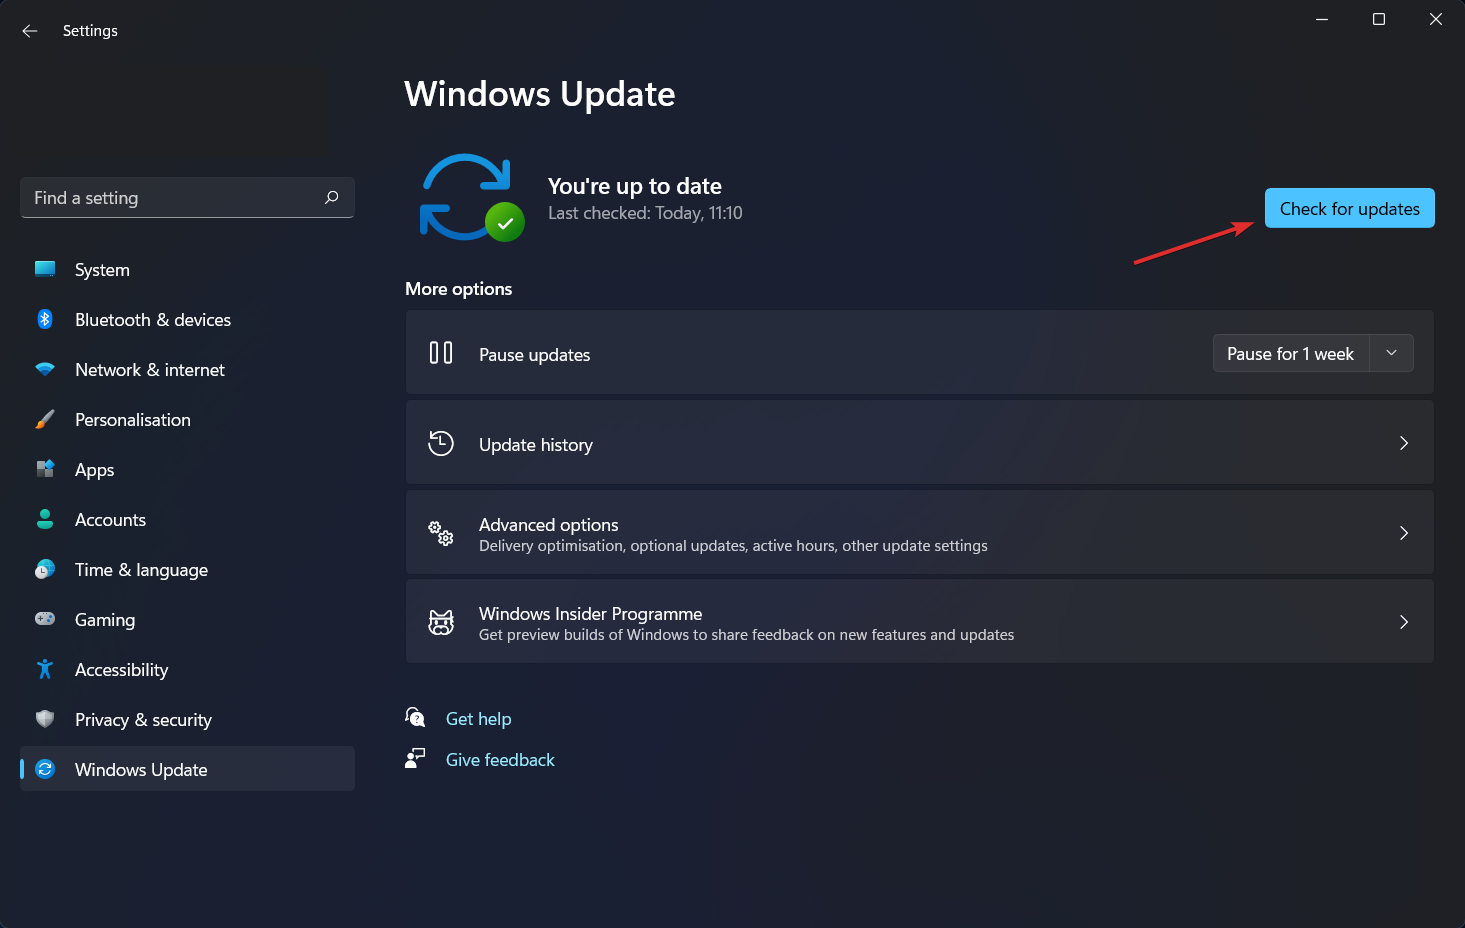
- First you will need to access the Settings app through Windows + S. Then navigate to Windows Update from the left-hand navigation bar.
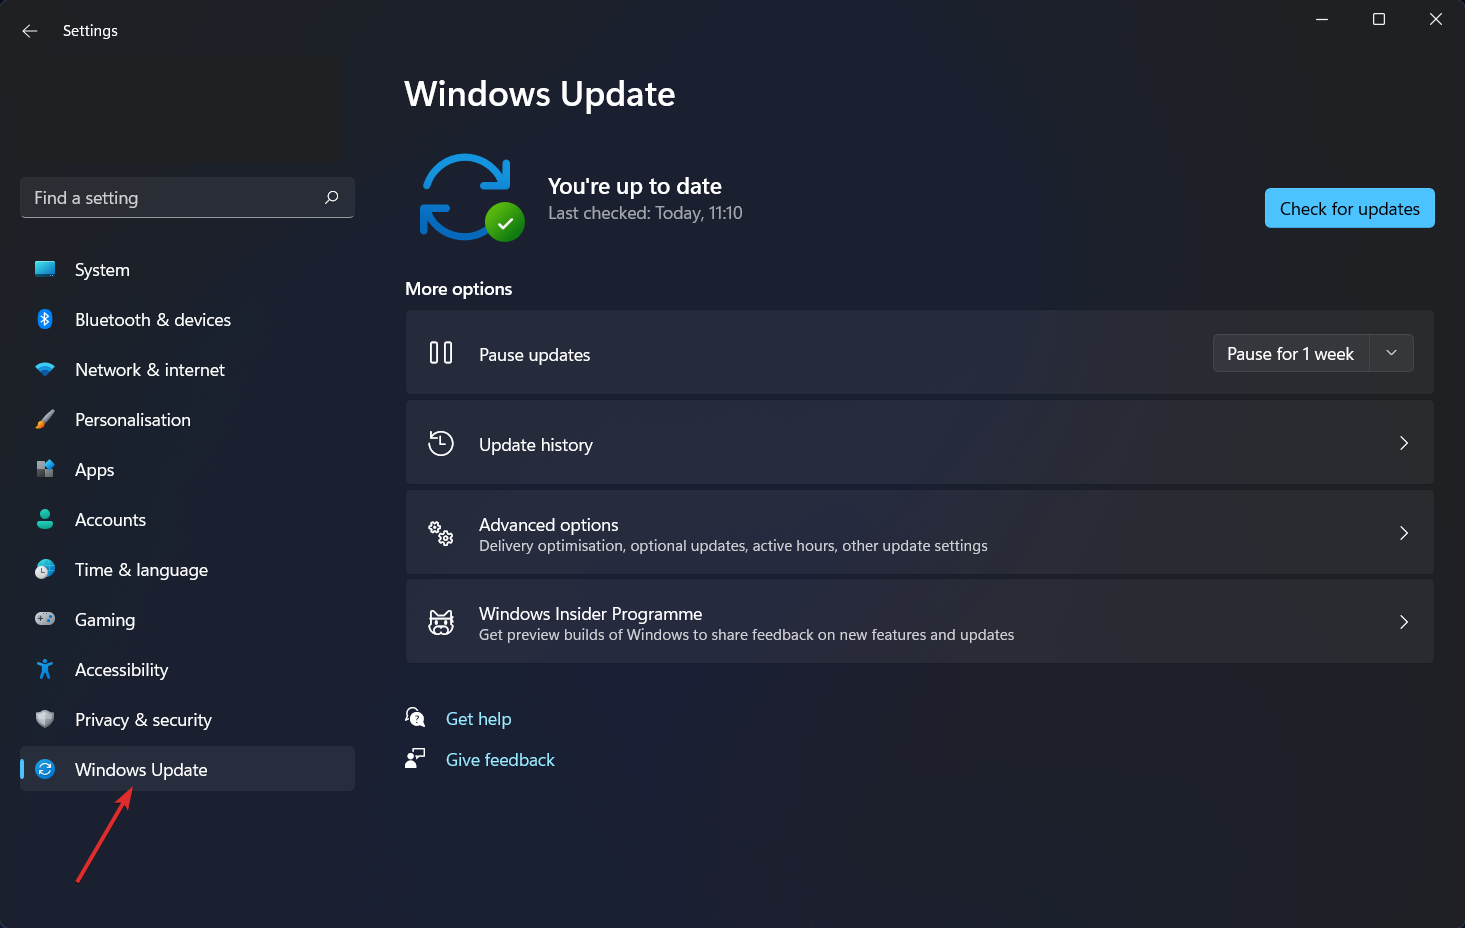
- Now click on the blue button as we have shown below which will either search for new updates or install existing updates.
Another important step, besides updating your Operating System, is updating your drivers. Outdated drivers are one of the most common causes of PC issues. We recommend that you use a specialized software tool that can automatically update your drivers, such as Outbyte Driver Updater, to save some time.
3. Start Windows 11 in Safe Mode
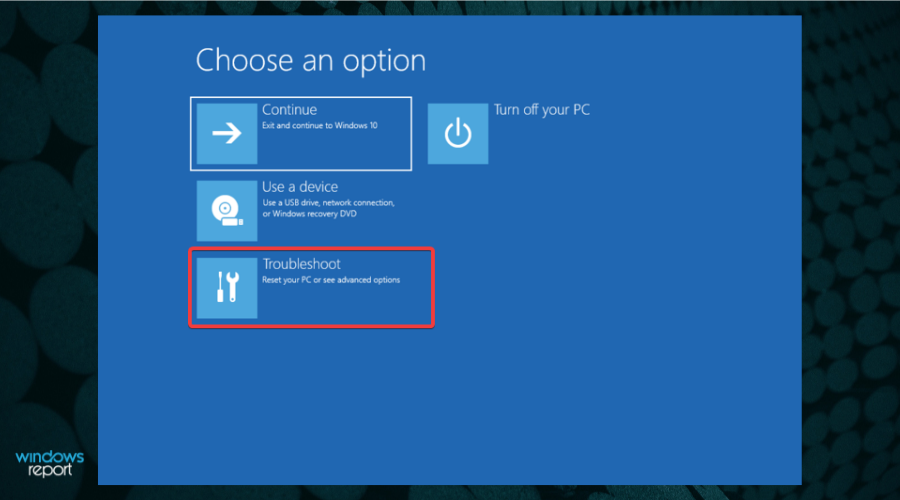
- Tap on the Start menu, then select the Power icon.

- Press and hold the Shift key from your keyboard, then choose the Restart option.
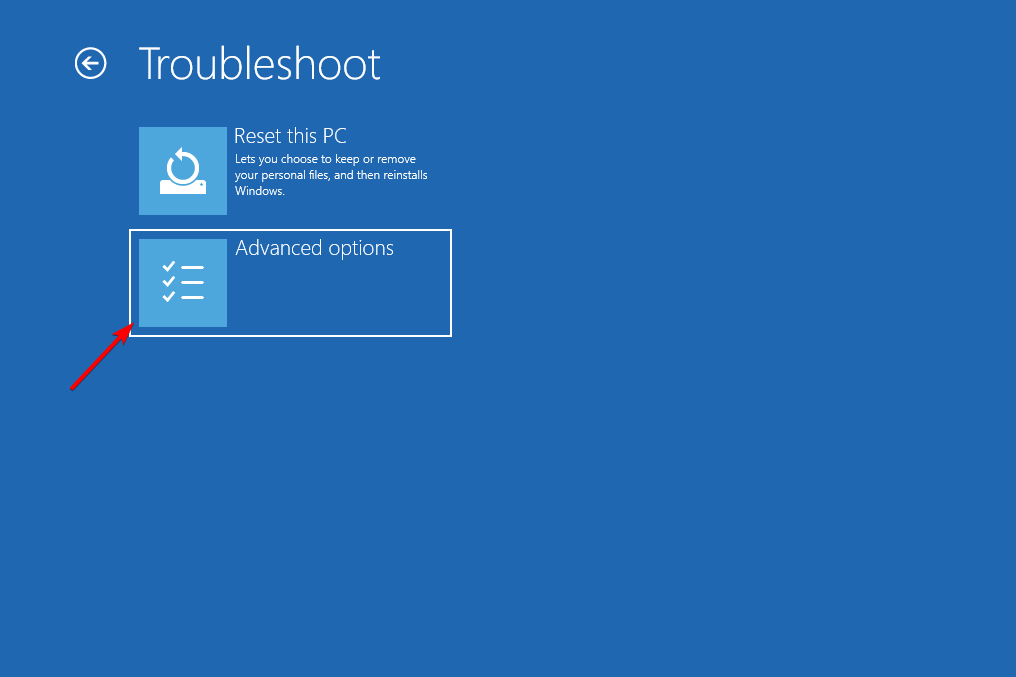
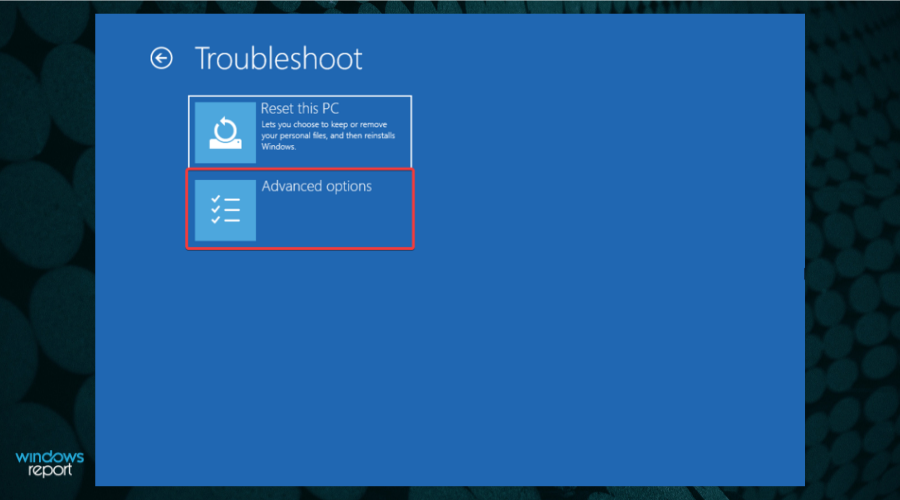
- Once you’re redirected to the below screen, you need to select Troubleshoot and click on Advanced options.
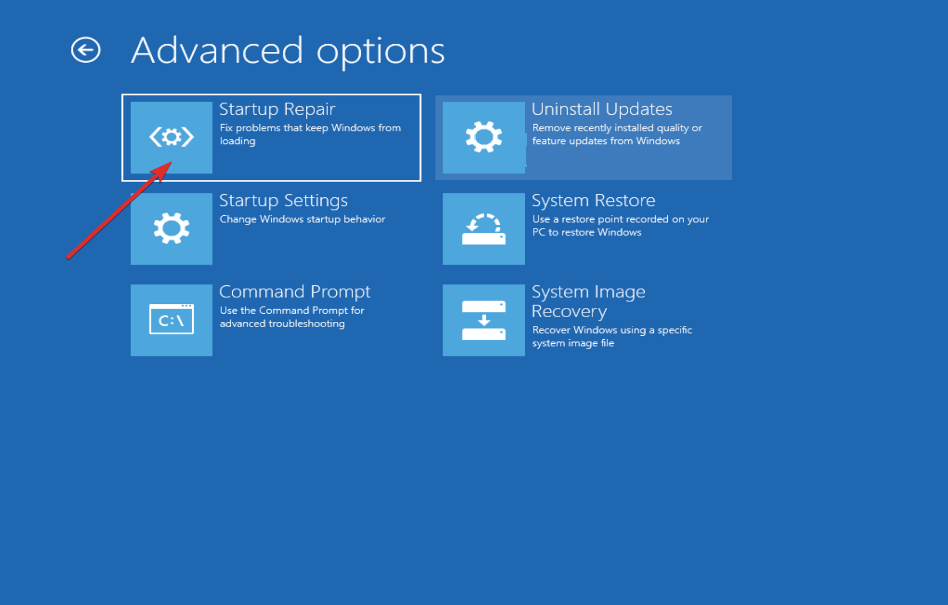
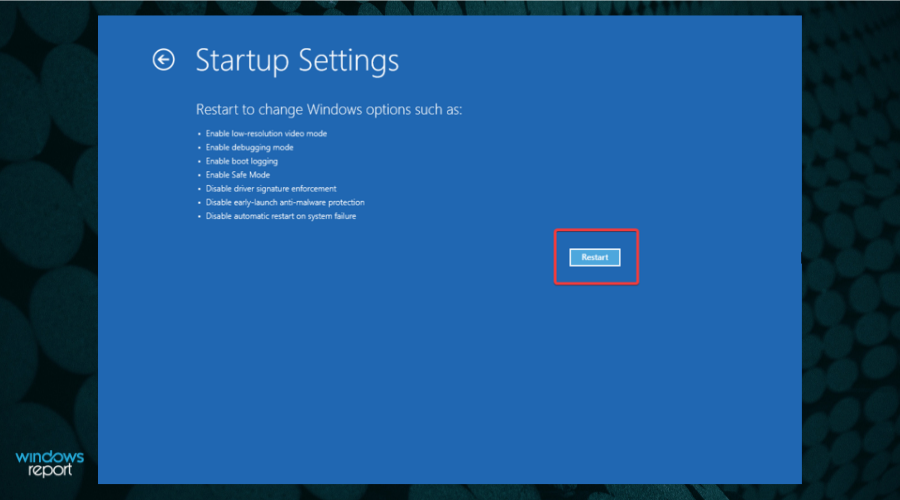
- Lastly, select Startup Settings and click on the Restart button.
After your computer has restarted, select the appropriate choice from the following screen by pressing the number 4 key on your keyboard. The machine will then enter the Safe Mode environment as the following step.
For further information and potential solutions to your error, check out our post on what to do if you get Windows 11’s BCD error.
Alternatively, we have already prepared an article on how to fix corrupt BCD in Windows 10/11. Take a closer look if you experience the same issues.
And lastly, if you are stuck on automatic repair loop on Windows 11, click on the link anchored to learn how to fix the error.
Let us know in the comments section below which solution worked best for you as well as whether you have additional ones in mind. Thanks for reading!
Read our disclosure page to find out how can you help Windows Report sustain the editorial team. Read more


Improve this guide


User forum
0 messages