How to Bypass Windows 11 Automatic Repair Loop and Boot Normally

If your PC keeps falling into the Windows 11 automatic repair loop, you’re dealing with one of the most frustrating boot problems. Instead of reaching your desktop, Windows cycles endlessly through recovery attempts, sometimes even showing the BitLocker recovery screen. The good news is that you can bypass the loop with a few troubleshooting methods.
Table of contents
- What can I do if I’m stuck in Preparing Automatic Repair loop on Windows 11?
- 1. Remove problematic files
- 2. Access the boot menu through the Command Prompt
- 4. Boot in Safe Mode
- 5. Reset your device
- 3. Run the Windows Startup Repair
- 6. Restore Windows Registry
- 7. System Restore your device
- 8. Hard Reboot Windows
- 9. Disable the Automatic Repair Tool
- 10. Reinstall Windows
- 11. Repair System Files with SFC and DISM
- 12. Check and Repair Disk Errors
- 13. Fix Boot Configuration Data (BCD)
- 14. Disable BitLocker (If Stuck on Recovery Screen)
- 15. Update or Roll Back Drivers
- Is it possible to disable Automatic Repair on Windows 11?
Why Does the Automatic Repair Loop Happen?
The automatic repair loop in Windows 11 often points to corrupted system files, driver conflicts, or hardware issues. It can also occur after a failed update, disk errors, or sudden power loss. In some cases, encrypted drives can trigger a stuck on BitLocker recovery screen problem.
What can I do if I’m stuck in Preparing Automatic Repair loop on Windows 11?
1. Remove problematic files
- Run Command Prompt and type in the following commands:
cd C:\Windows\System32\LogFiles\SrtSrtTrail.txt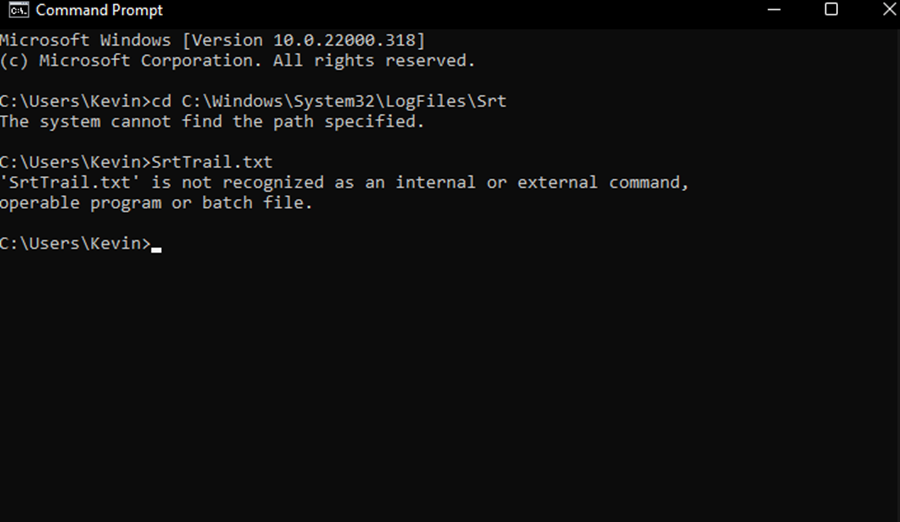
- Key in the following commands and press Enter after entering each one:
cd c:\windows\system32\driversDelvsock.sys
- Then, restart your device and check whether the problem has been resolved.
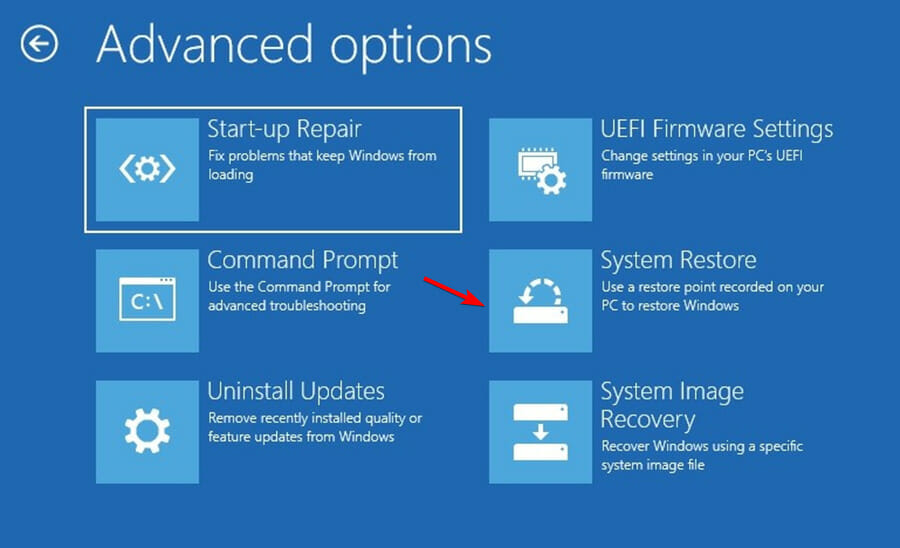
2. Access the boot menu through the Command Prompt
- Press the Windows key + I buttons to open Settings.
- Click on Recovery.
- Press the Restart now button for Advanced Startup.
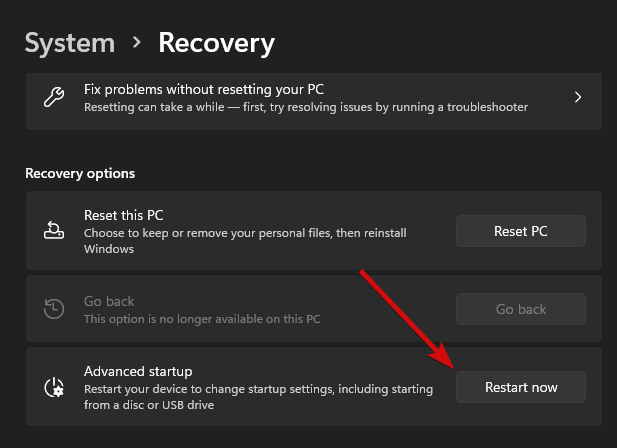
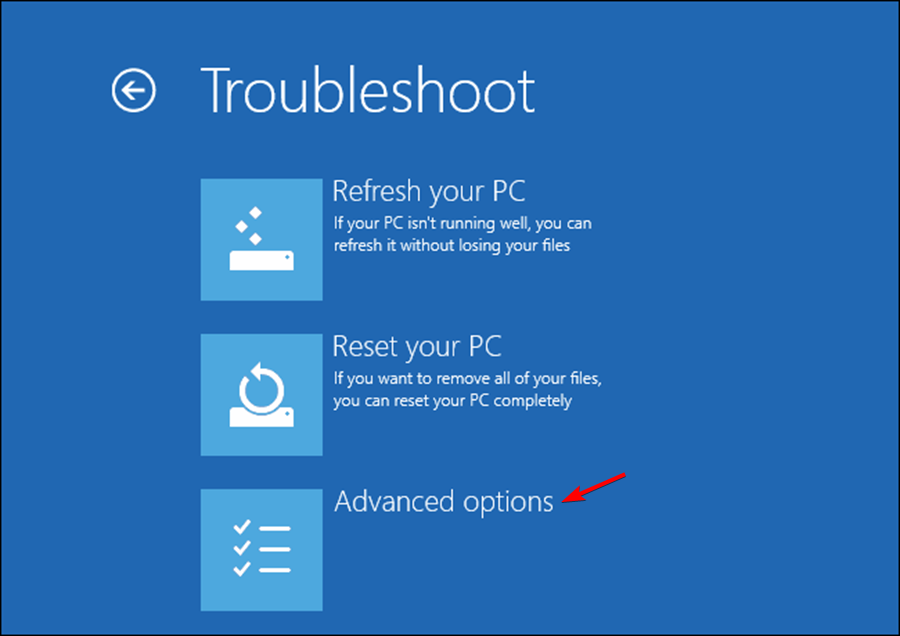
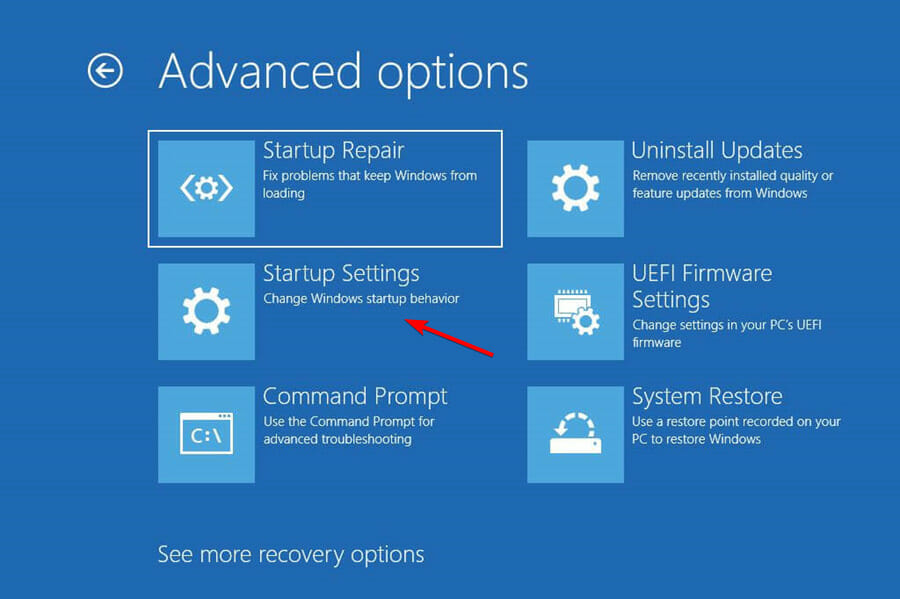
- Select the Troubleshoot option and then open Advanced options.
- Select Command Prompt.

- Key in the following commands when the Command Prompt window pops up:
bootrec.exe /rebuildbcdbootrec.exe /fixmbrbootrec.exe /fixboot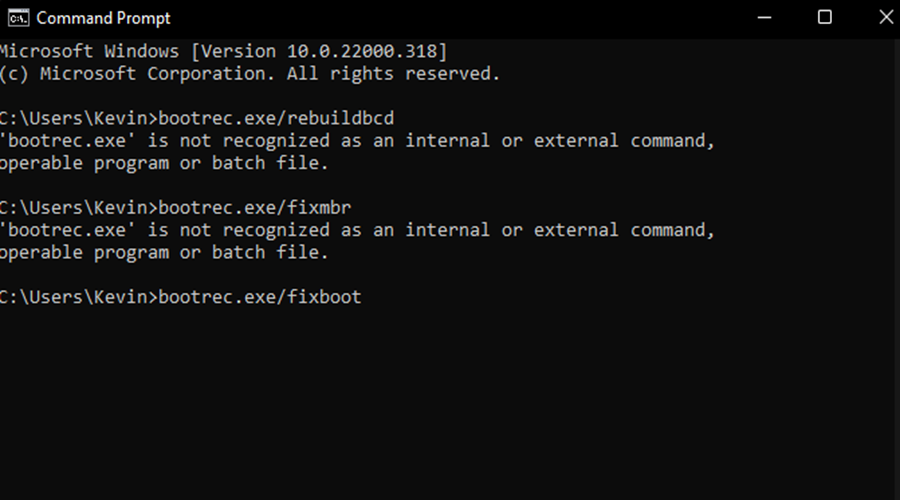
However, users are also advised to use the chkdsk command with bootrec.exe when faced with the automatic repair loop in Windows 11. This command diagnoses the metadata of the hard disk or errors, if any.
- Execute the following commands to run chkdsk:
chkdsk /r cchkdsk /r d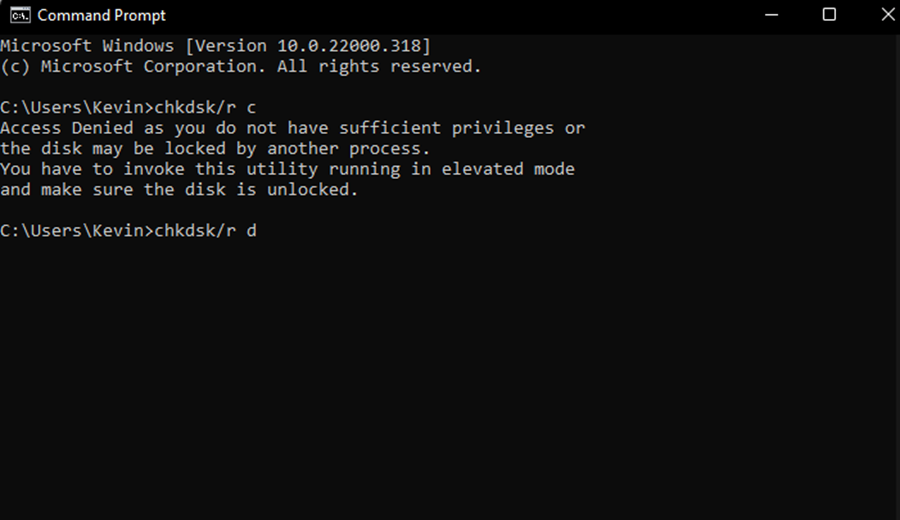
- Finally, restart your device and check whether the issue has been remedied.
4. Boot in Safe Mode
- Press the Windows + I keys to open Settings.
- Click on Recovery.
- Press the Restart now button for Advanced Startup.
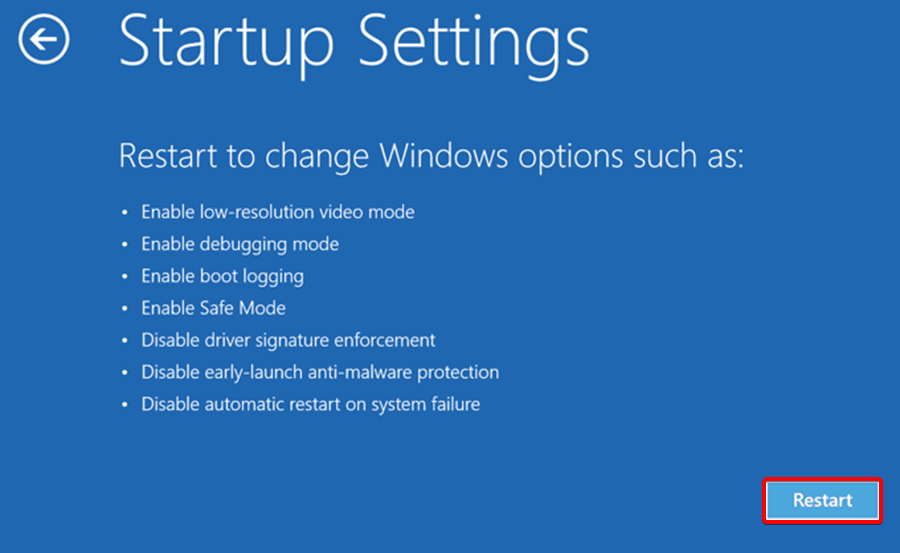
- Click on Troubleshoot, select the Advanced options, and click on Startup Settings on your Windows 11 PC.
- Select the option to Restart.
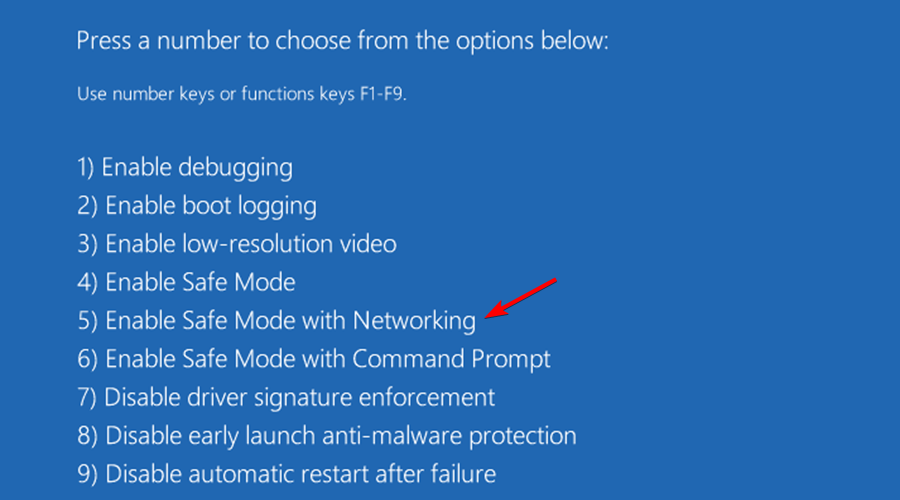
- When your PC restarts, choose the Enable Safe Mode with Networking option from the list. Your Windows 11 computer will start in Safe Mode.
- In Safe Mode, you may feel a driver issue in your software. In this case, visit the manufacturer’s website and install the updated driver.
- Then, press the Windows key and choose Command Prompt from the start menu, and type in the following command:
DISM /Online /Cleanup-Image /restorehealth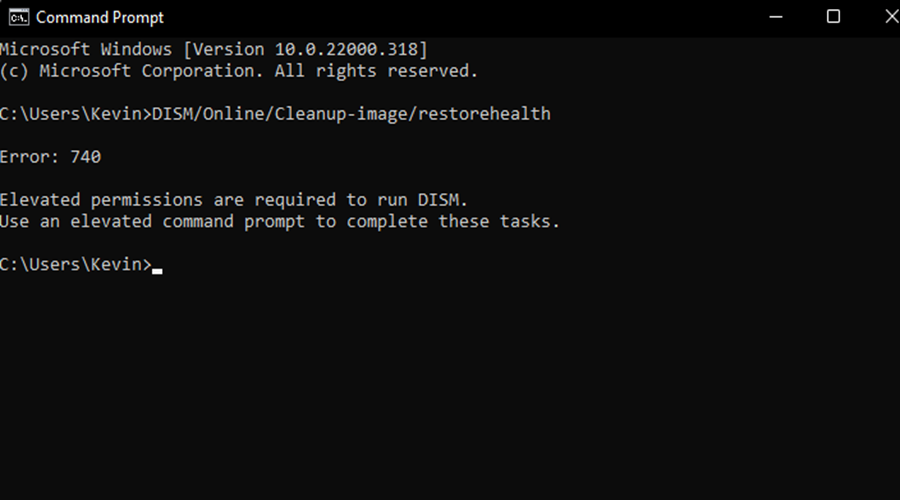
- Windows 11 will begin restoring the health of your PC, which will take some time.
- Once this cleanup is done, restart your Windows 11 PC and install the driver you’ve just downloaded.
The System File Checker can only detect and correct the corrupted file system using the Windows 11 recovery image. However, the SFC command cannot diagnose the issue if corrupted files are in the replacement image.
In such a situation, you will need to use Deployment Image Servicing and Management to fix the Preparing Automatic Repair message on Windows 11.
5. Reset your device
- Use the Troubleshoot menu, and select Reset your PC displayed from the available options.
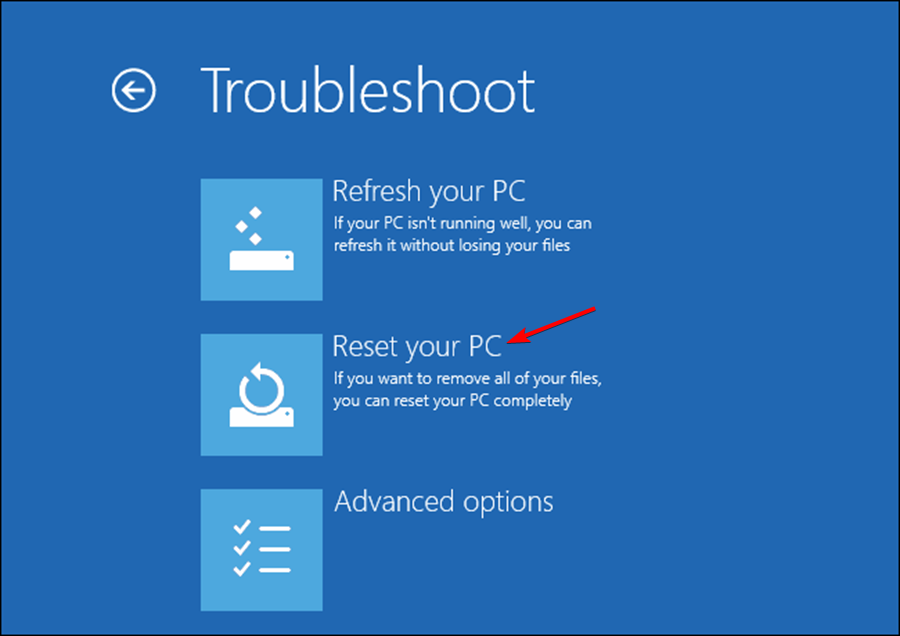
- This will automatically initiate the resetting process.
- Give the process some time, restart your device and check whether the problem is still there.
If the automatic repair loop constantly appears on your device, you might need to reset it. This helps you remove unwanted files from your drive.
3. Run the Windows Startup Repair
- Navigate to the Advanced option from the blue screen and press the Enter key.
- Press the Troubleshoot button and choose Advanced options.
- Choose the Startup Repair option.
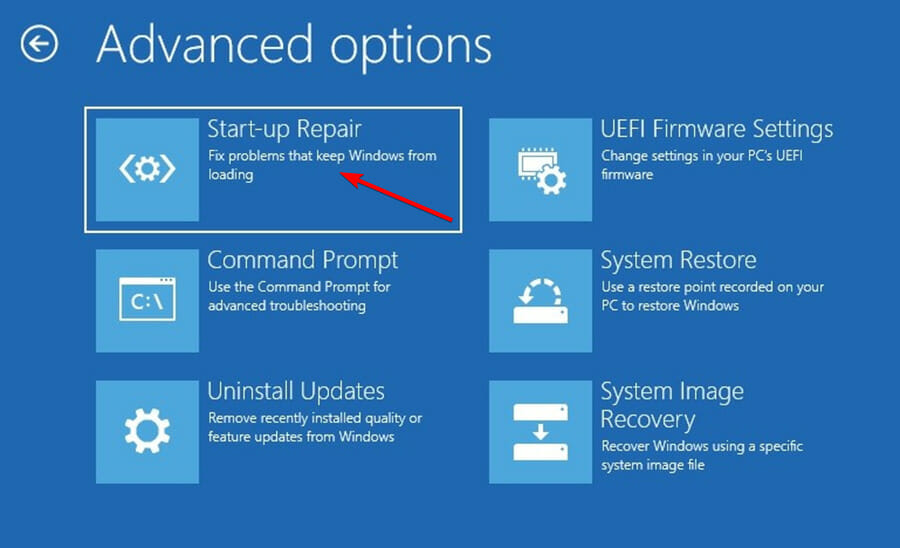
- Wait for some time until the diagnosing process is complete.
- Restart the PC and try again.
However, this is an important step for your Windows system, thus, besides the above action, we strongly suggest a powerful repair tool.
6. Restore Windows Registry
- Press the Windows key + I combination to open Settings.
- Select Update & Security.
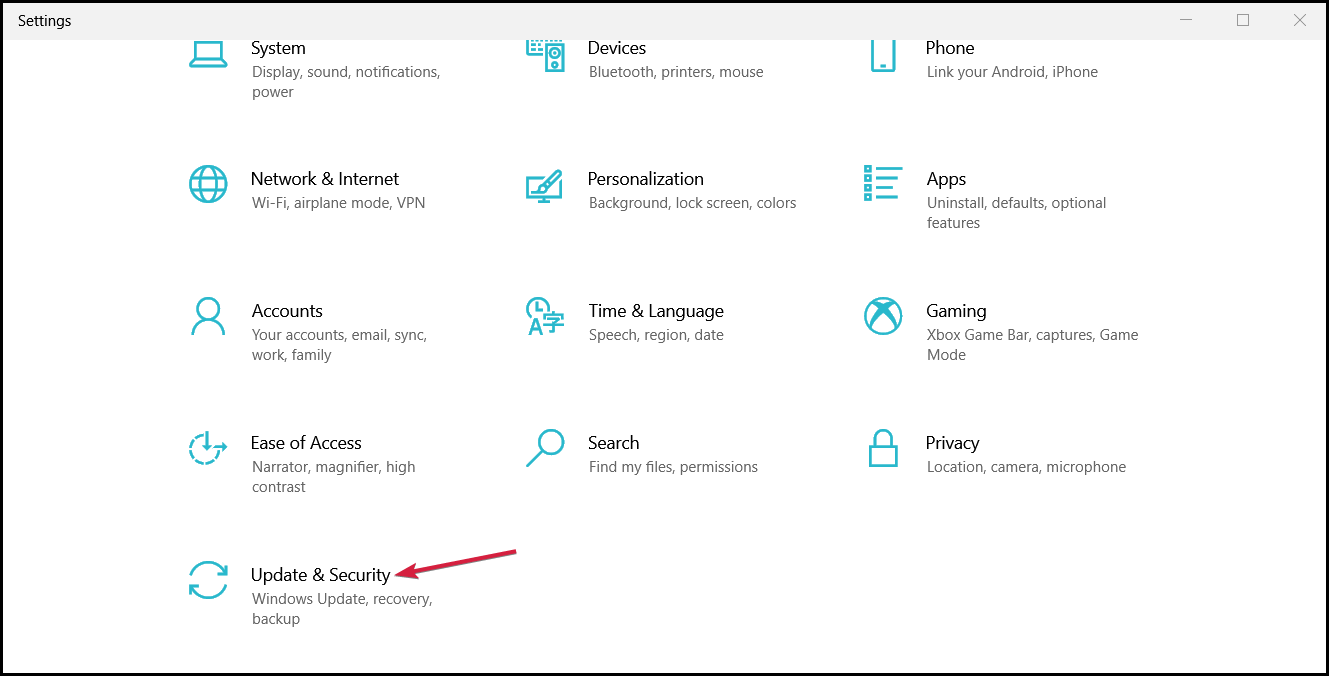
- Click on the Recovery option, and under the Advanced startup section, select Restart now.
- Select Troubleshoot after the machine reboots, then Advanced options.
- Choose Command Prompt.

- In Command Prompt, enter your Windows drive letter, then hit Enter.
- Confirm that you’re in the correct drive:
dir - If the letter you entered in step 7 was incorrect, return to this step and correct it.
- Type the script below, then hit Enter to go to the System32 folder.
cd d:\windows\system32 - Type the script below, then hit Enter to create a backup folder called configBak.
mkdir configBak - Copy and paste the script below, then hit Enter to back up the config folder.
copy config configBak - Type the script below, then hit Enter to enter the RegBack folder.
cd config\RegBack - Type the script below, then hit Enter to copy the data RegBack to config.
copy *...* - Confirm every operation by pressing Y and Enter.
- Close the Command Prompt window.
7. System Restore your device
- Click on Advanced options.
- Select the System Restore option from the menu.
- Follow the on-screen instruction and begin the Windows installation process.
- Now restart your PC and check whether the issue has been resolved.
If you are unable to boot Windows 11 on your device, it is recommended to boot your PC through the Windows installer DVD or USB drive.
If you’re getting a blue screen on startup, you might be able to fix the problem by performing a System Restore.
Here’s what to do if System Restore did not complete successfully in Windows. Despite the guide touching Windows 10 devices, it also works on the latest OS.
8. Hard Reboot Windows
- Press and hold the computer’s Power button for a couple of seconds; your device will go off automatically.
- Unplug the power cable from the charging port or the central processing unit (CPU) if some lights are still on.
- Wait a minute and use the Power button to switch on the computer again.
This is one of the easiest and simplest methods that you can use to try and resolve the automatic repair loop issue on Windows 11. It is switching your device off and turning it back on again.
9. Disable the Automatic Repair Tool
- Open the Windows boot troubleshooting menu.
- Select Advanced repair options and choose Troubleshoot.
- Click on Advanced options and select the Command Prompt.

- Type the following command and press Enter:
bcdedit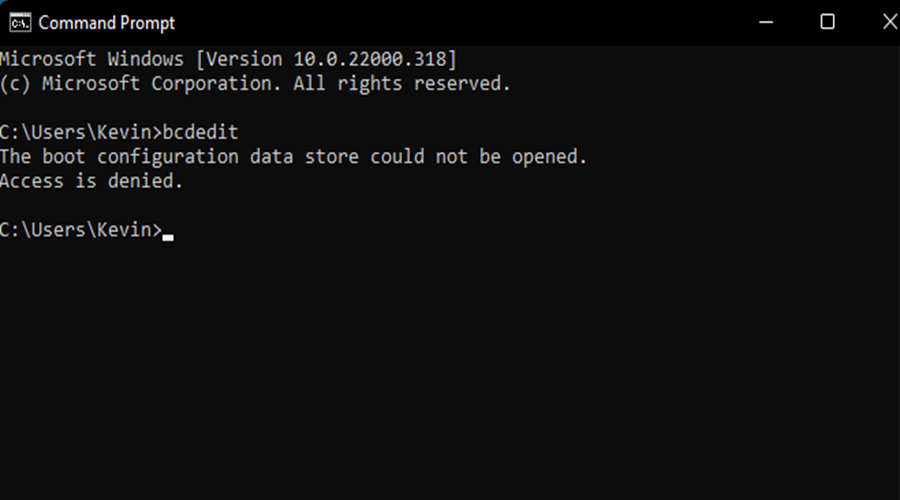
- Check the values for identifier and recoveryenabled. The identifier value should be set to default and recoveryenabled should be Yes.
- Then, key in the following command and press Enter:
bcdedit /set {default} recoveryenabled no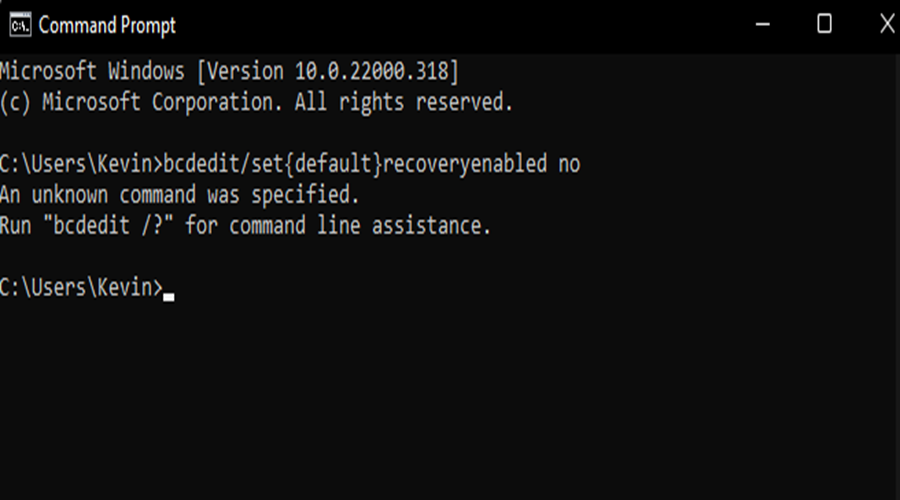
- This will disable the automatic boot repair. If the command doesn’t work, try using this command as an alternative and press Enter:
bcdedit /set {current} recoveryenabled no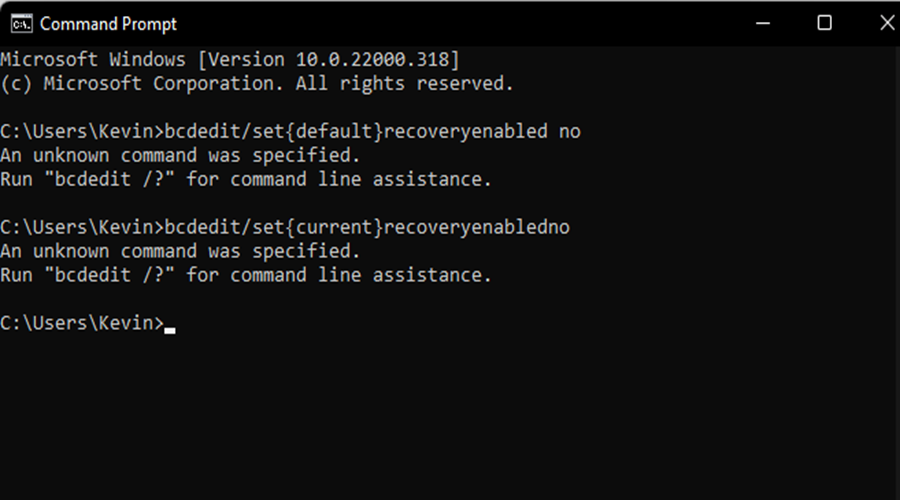
- Restart your device and check whether the problem has been resolved.
This method can only work for you if your Windows is functioning correctly. Disabling allows you to boot your device without the automatic loop in Windows 11.
You can also use this method to determine whether your Windows 11 has any problems.
10. Reinstall Windows
If the above methods have not worked, you will have to reinstall Windows 11 on your device. You can opt to reinstall it through the operating system.
In this case, please select the option to reinstall Windows 11 from cloud download or restore it locally.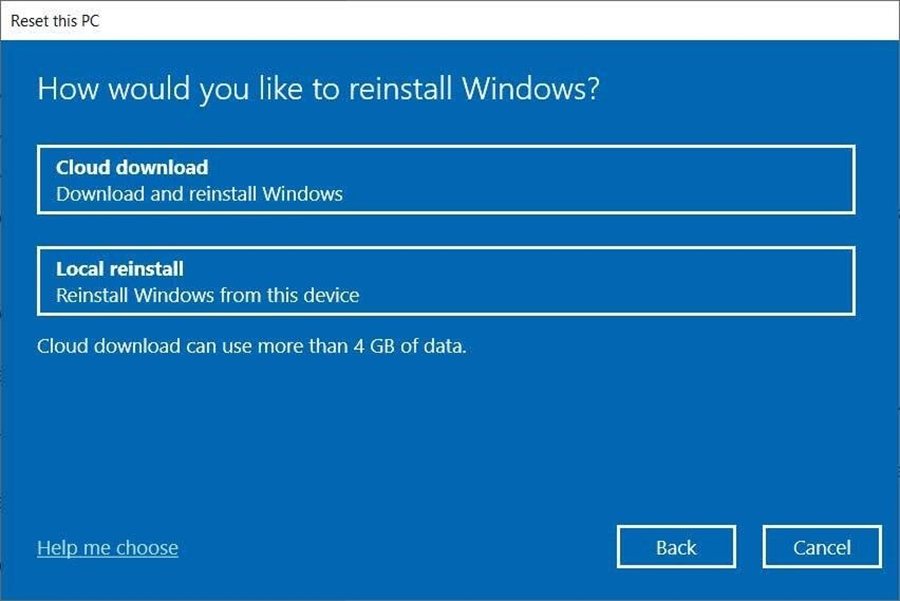
As you can see, there are a couple of plausible methods available that you can use to fix the automatic repair loop issue on your device.
11. Repair System Files with SFC and DISM
Corrupted system files are one of the leading causes of repair loops. Windows has built-in tools that can fix them.
- Boot into Advanced Startup Options by interrupting your PC’s boot process three times.
- Go to Troubleshoot > Advanced Options > Command Prompt.
- Type:
sfc /scannow- Press Enter.
- Once it finishes, also run:
DISM /Online /Cleanup-Image /RestoreHealth
Restart your PC and see if Windows boots normally.
12. Check and Repair Disk Errors
A failing hard drive or SSD can trigger the loop. Running a disk check can detect and fix problems.
- Open Command Prompt from Advanced Options.
- Enter:
chkdsk C: /f /r
- Press Enter and let the scan complete.
If errors are found and repaired, your PC should boot without looping again.
13. Fix Boot Configuration Data (BCD)
If the boot sector or boot loader is damaged, Windows 11 won’t start properly.
- In Command Prompt, type the following commands one by one:
bootrec /fixmbrbootrec /fixbootbootrec /scanosbootrec /rebuildbcd
- Restart your PC afterward.
This rebuilds the startup configuration so Windows can load normally.
14. Disable BitLocker (If Stuck on Recovery Screen)
Sometimes, encryption issues force Windows into recovery mode endlessly.
- From the BitLocker recovery screen, choose Skip this drive or enter your recovery key.
- Once inside Windows (or Command Prompt), disable BitLocker temporarily with:
manage-bde -off C:
This ensures the drive doesn’t block normal startup.
15. Update or Roll Back Drivers
A faulty driver update can also trigger the repair loop.
- Boot into Advanced Options > Device Manager.
- Roll back recent driver updates or uninstall drivers that were installed before the issue started.
If you can’t access Device Manager, you can also use Command Prompt to disable problematic drivers.
Is it possible to disable Automatic Repair on Windows 11?
Solution 9 in this guide gives you the steps to disable the Automatic Repair tool on your Windows 11 PC.
Instead of fixing, the automatic repair tool puts your PC in a boot loop. So, when you disable it, you can check if the Repair tool was the culprit or not.
We have presented you with basic methods to accomplish more complex ones that could threaten your operating system.
Which of the above fixes helped you bypass the automatic repair loop? Please share your thoughts with us in the comment section below.
Read our disclosure page to find out how can you help Windows Report sustain the editorial team. Read more


Improve this guide


User forum
2 messages