Access Denied Before Opening Files in This Location [Fix]
Find out what worked for other users
5 min. read
Updated on
Read our disclosure page to find out how can you help Windows Report sustain the editorial team Read more
Key notes
- The Access denied. Before opening files in this location error appears in SharePoint when trying to launch and edit files in the dedicated app.
- This problem is usually caused by misconfigured settings or a corrupt cache.
- To fix things, authenticate the sign-in, run the critical services, or use the correct path, amongst other solutions.
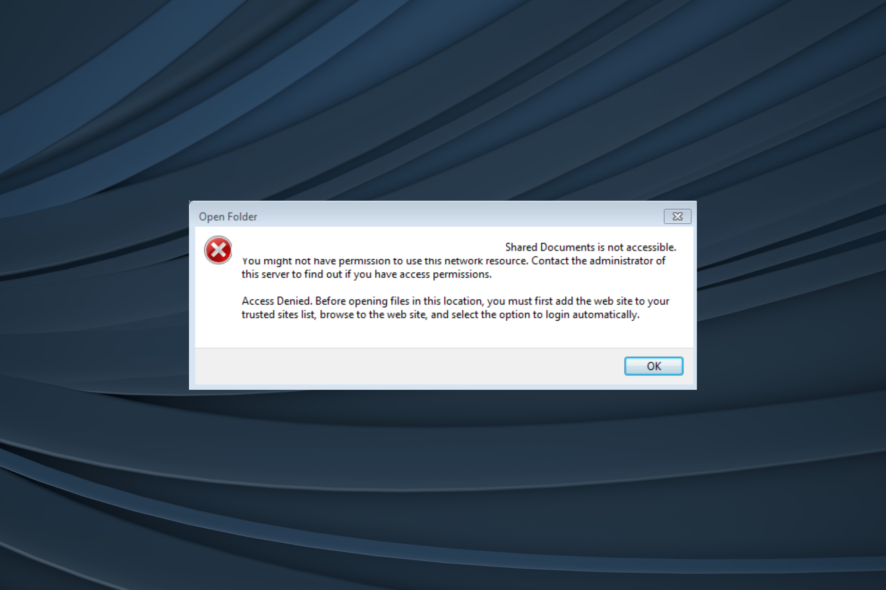
ERROR_FORMS_AUTH_REQUIRED error usually comes with Before opening files in this location, you must first add the website to your trusted sites list, browse to the website, and select the option to login automatically message.
It can cause problems with SharePoint. This is a system error, and today we’re going to show you how to fix it on Windows 10.
How do I fix SharePoint Access Denied?
1. Authenticate to Office 365
- Use Internet Explorer to sign into SharePoint online. Be sure to use your Office 365 login details.
- Once you enter your login information, check the Keep me signed in option and click on the Sign in button.
According to users, this problem occurs when using SharePoint Online with Office 365. Once you map a network drive to SharePoint, you have to occasionally connect to the SharePoint Online website.
After signing in with your Office account, open a document library in Explorer View and try to access the mapped network drive.
2. Add your SharePoint Online sites to Trusted sites
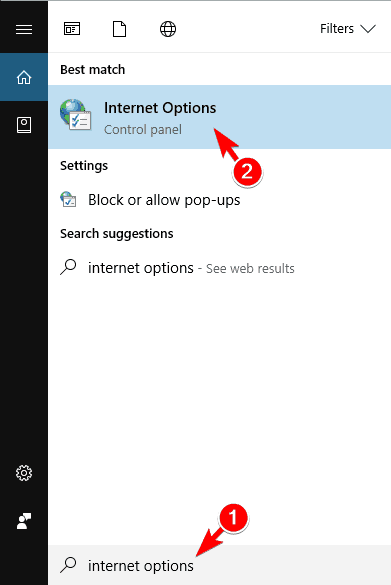
- Press Windows + S, enter Internet Options, and click on the relevant result.
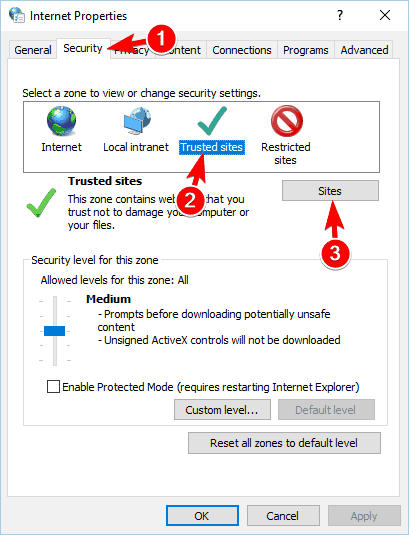
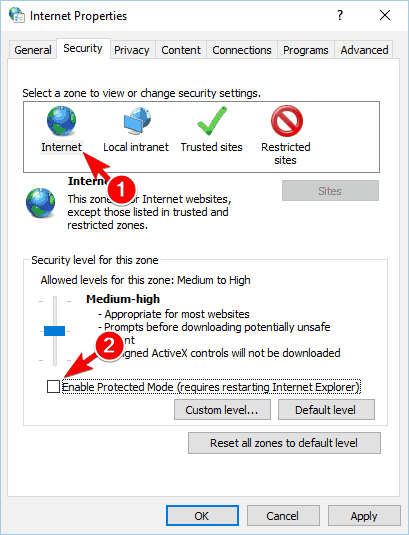
- Navigate to the Security tab, click on Trusted sites, and then click the Sites button.
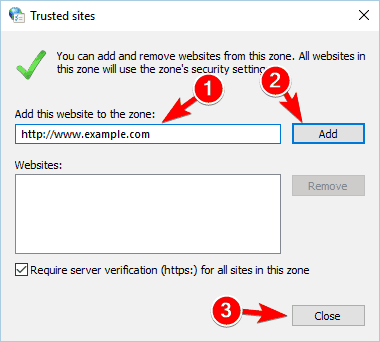
- Enter the URL of your SharePoint websites in the Add this website to the zone section and click the Add button. Once you’re done, click Close and OK to save changes.
- Some users recommend unchecking Enable Protected Mode for Internet Zone, so you might want to try that as well.
- Several users suggest adding the following entries to the Trusted zone:
- https://*.outlook.com
- https://*.sharepoint.com
- https://*.microsoftonline.com
- https://*.lync.com
- *.microsoftonline.com
- *.sharepoint.com
- *.outlook.com
- *.lync.com
After adding all your SharePoint websites to the trusted zone the Access denied. Before opening files in this location, you must first add the website to your trusted sites list, browse to the website, and select the option to login automatically error should be completely fixed.
3. Check the status of WebClient service
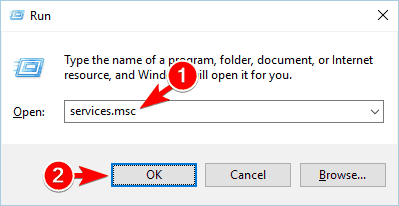
- Press Windows + R, enter services.msc, and click OK.
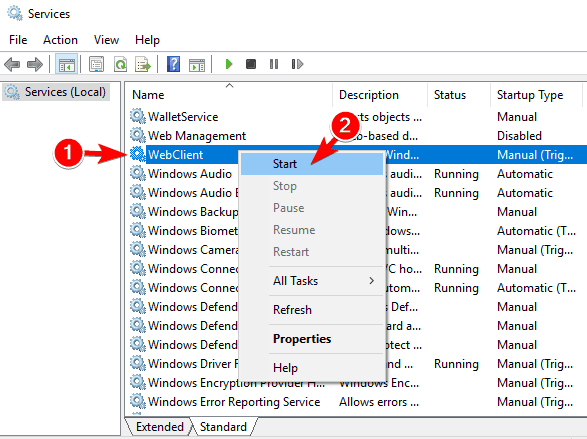
- Locate the WebClient service. Check the Status of this service. If the Status isn’t set to Running, right-click WebClient and choose Start from the menu.
- After starting this service, close the Services window.
According to users, in order to prevent this error from appearing, you need to keep the connection after you restart the computer. To do that, you need to make sure that the WebClient service is running.
4. Install the latest updates
- Press Windows + I to open the Settings app.
- Navigate to the Update & Security section.
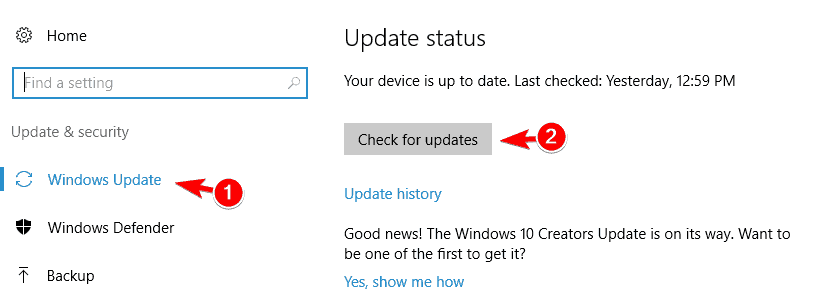
- Select Windows Update from the left pane and click on the Check for updates button.
- Windows will now check for any new updates. If updates are available, Windows will download and install them in the background.
Sometimes Access denied. Before opening files in this location, you must first add the web site to your trusted sites list, browse to the web site, and select the option to login automatically message can appear if your system is out of date.
Windows 10 has a few bugs and glitches, but Microsoft is working hard to fix them through Windows updates. In most cases, these updates are installed automatically in the background, but if you think that a certain update is missing, check for updates manually.
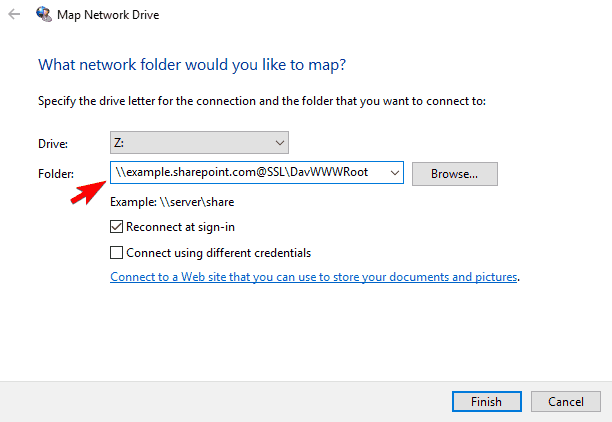
5. Use the correct path for the network drive
- Open Office 365 and your project. Click on Open with Explorer icon. The icon is hidden in the ribbon, so you might have to search for it.
- Click the address bar, and the location should change to example.sharepoint.com@SSLDavWWWRoot or something similar. Copy this path.
- Now try to map a network drive again, but be sure to use the same path from the previous step. In our example, it was example.sharepoint.com@SSLDavWWWRoot, but it will be different on your PC.
Several users reported this error while trying to map a network drive using File Explorer. According to them, they used the URL to the SharePoint website, and that caused this error to appear.
If you have the same problem, you need to use the correct path to the network drive.
After using the correct path, the problem should be fixed. This isn’t the best solution, and you’ll have to log in every time you restart your PC in order to access the network drive.
6. Allow users to run custom scripts
- Go to SharePoint Admin Center, and select Settings.
- Scroll down to the Custom Script area.
- Check Allow users to run custom script on personal sites and Allow users to run custom script on self-service created sites options.
After making these changes, the problem should be resolved. Keep in mind that it might take 24 hours for these changes to apply.
7. Delete Internet Explorer cache
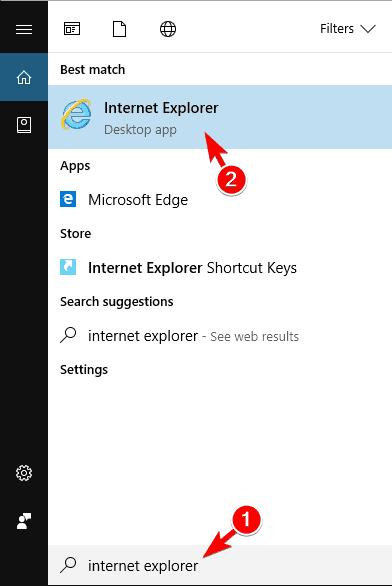
- Press Windows + S, enter Internet Explorer, and click on the relevant search result.
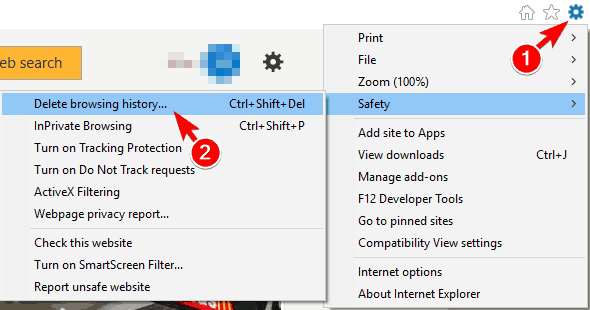
- Once Internet Explorer starts, click the gear icon in the top right corner and navigate to Safety, and click on Delete browsing history.
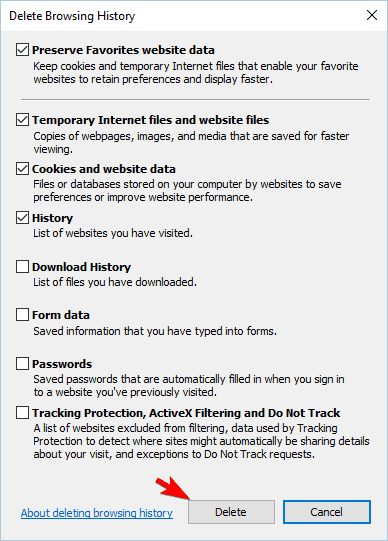
- Select Temporary Internet files, Cookies and website data, and History from the menu. Then, click the Delete button to delete the cache.
- After deleting the cache, restart your browser and check if the problem still persists.
Several users reported you can fix Access denied. Before opening files in this location, you must first add the website to your trusted sites list, browse to the website, and select the option to login automatically problem by clearing the Internet Explorer cache.
And once the error is fixed, do not forget to check some quick tips to increase the Internet speed.
Tell us which fix worked for you in the comments section.
User forum
0 messages