How to See When A Calendar Event was Created in Outlook
Explore the easiest methods to know the creation date
Key notes
- To see when a calendar event was created in Outlook, use the Hidden Field method or run a code in VBA.
- You can also add a Created column in a calendar folder to check the creation dates for all the events.

If you want to see when a calendar event was created in Outlook, this guide can help! We will explore two methods with step-by-step instructions in tracking event creation date.
Also, we will discuss steps to add a column named Created, which will help you see creation dates for all the calendar items on Outlook.
How can I tell when an Outlook invite was sent?
To know the date and time when an Outlook invite was sent, you can check the Sent Items folder; however, if the sent items are deleted, you can add a column named Created to the event list to get the details.
To do so, follow these steps:
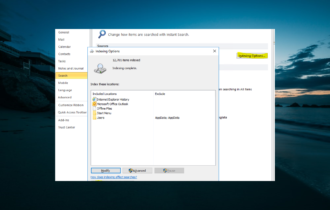
- On the Outlook main window, click the Calendar icon. Go to View, then Change View, and select List.

- Right-click on the toolbar, and select Field Chooser.

- On the Field Chooser window, select All Appointment fields from the drop-down list.

- Select Created and drag and drop it to the toolbar to add it.

If you want to copy an appointment to another day, we suggest you check this guide for simple instructions.
How do I see when a calendar event was created?
1. Use the hidden field method
1.1 Enable Developer mode
- On Outlook, go to File.

- Click Options to get the Outlook Options window.

- Select Customize Ribbon from the left pane, and click the check box next to Developer to select the option under the Main tabs.

- Click OK.
You can skip this step if you already have the Developer tab in the Ribbon.
1.2 Design a form
- On the Outlook main window, click the Calendar icon from the navigation pane. Go to the appointment or event, double-click it to open.

- On the appointment window, go to the Developer tab and select Design This Form.

- The window will get refreshed and will open with more options. Locate and click All Fields.
- Next, for Select from, choose the Date/Time fields option from the drop-down list.

- You will get all the information about the event, including Date Created, Duration, End, Modified, Recurrence Range End, Recurrence Range Start, Remind Beforehand and Start.

This way, you can access the hidden fields in Outlook and see when a calendar event was created in Outlook, along with other details.
2. Use the Outlook VBA tricks
- On the Outlook main window, click the Calendar icon from the navigation pane.
- Go to View, then Change View, and select List.
- Select the appointment or event whose creation date you want to know and click the Developer tab.
- Click the Visual Basic option to launch the Microsoft Visual Basic for Applications.

- Go to Insert, and click Module.

- A new module window will open, copy & paste the following code mentioned below and press F5 to run it. Once it’s run successfully, you will receive a dialog box saying the event’s creation date.

Public Sub ShowCreatedDate()

Dim oItem As Object
Set oItem = GetCurrentItem()
MsgBox "This item was created on " & oItem.CreationTime

End Sub

' ----- Function --------
Function GetCurrentItem() As Object
    Dim objApp As Outlook.Application

    Set objApp = Application
    On Error Resume Next
    Select Case TypeName(objApp.ActiveWindow)
        Case "Explorer"
            Set GetCurrentItem = objApp.ActiveExplorer.Selection.Item(1)
        Case "Inspector"
            Set GetCurrentItem = objApp.ActiveInspector.CurrentItem
    End Select

    Set objApp = Nothing
End Function
Select any events listed and use this Outlook VBA trick to know the creation date.
3. Add a Created column to all Calendar items
- On the Outlook main window, click the Calendar icon from the navigation pane.
- Go to the View tab, click Change View, and from the drop-down list, select Manage Views.

- On the Manage All Views window, select List, then click Modify.

- From the Advanced View Settings List window, click the Columns button.

- For Select available columns from, select All Appointment fields from the drop-down list.
- Under Available Columns, choose Created and click Add.

- The newly created column will appear in the box right to Add; you can click Move Up or Move Down to decide its position on the toolbar.
- Click OK to confirm.

- Go to the Calendar folder, click View, then Change View, and select List.
- You can now see the column indicating the creation date of all the events.

If you think the list has a lot of events and appointments that are of no use but can’t delete calendar events, then we recommend you check out this informative guide to find the solution.
How do I view calendar edit history in Outlook?
Outlook doesn’t come with an inbuilt to show the complete history of an appointment or event. However, you can add the Modified & Changed By column in the List view of your Calendar to track the changes. To do that, follow these steps:
- On the Outlook main window, click the Calendar icon from the navigation pane.
- Go to the View tab, click Change View, and from the drop-down list, select Manage Views.
- On the Manage All Views dialog box, select List, then click Modify.
- From the Advanced View Settings List window, click the Columns button.
- For Select available columns from drop-down list, choose All Appointment fields.
- Now go to Available Columns, select Modified and click Add.

- You will see Modified will appear under Show these columns in this order list.
- Next, choose All Mail fields from the drop-down menu for Select available columns from.
- Select Changed By and click Add.

- Click OK on all the open windows to confirm.

- Go to the Calendar folder, click View, then Change View, and select List.
Now, you can check the names of users who created the event and the modified date for all the Outlook events and appointments on the list.
You can add columns like All-Day Event, Subject field, and Recurrence Pattern to get other information.
So, these are methods you can use to see when a calendar event was created in Outlook when you open Calendar events in list view.
You can also use Outlook calendar insights to get relevant information based on the calendar data, which can help you manage work.
If you can’t create a new event in Outlook, we suggest you check out this quick guide to fix this problem and use the app seamlessly.
Please feel free to give us any information, tips, and your experience with the subject in the comments section below.
Read our disclosure page to find out how can you help Windows Report sustain the editorial team. Read more


Improve this guide


User forum
0 messages