Windows 11 Camera Settings: How to Access & Change Them
5 min. read
Updated on
Read our disclosure page to find out how can you help Windows Report sustain the editorial team. Read more
Key notes
- If you are new to Windows 11, this guide will help you change the camera settings for your webcam in the OS.
- There is a dedicated camera page inside Windows Settings that helps you tweak multiple camera settings.
- You can adjust brightness, contrast, video rotation, HDR, and even Eye contact features (if supported) for your webcam.
If you are setting up your workstation with your Windows 11 PC and want to change camera settings for a better video calling experience, then you are in the right place.
Unlike previous iterations, with Windows 11, Microsoft has included many settings that you can tweak and change based on your preference to get the best output from your Windows 11 PC. You may change the brightness contrast levels, set the rotation settings, enable or disable HDR for video, Eye contact for webcam settings, etc.
With Windows 11, Microsoft has added a dedicated camera page in the Settings app. Here, you will be able to change the camera settings and troubleshoot and fix problems with your webcam, if any issue exists.
There are some handy settings inside the camera settings page in Windows 11 that you can use to enhance your video calling experience. This is what we will be learning today in this guide. Let us check it out.
How do I change camera settings in Windows 11?
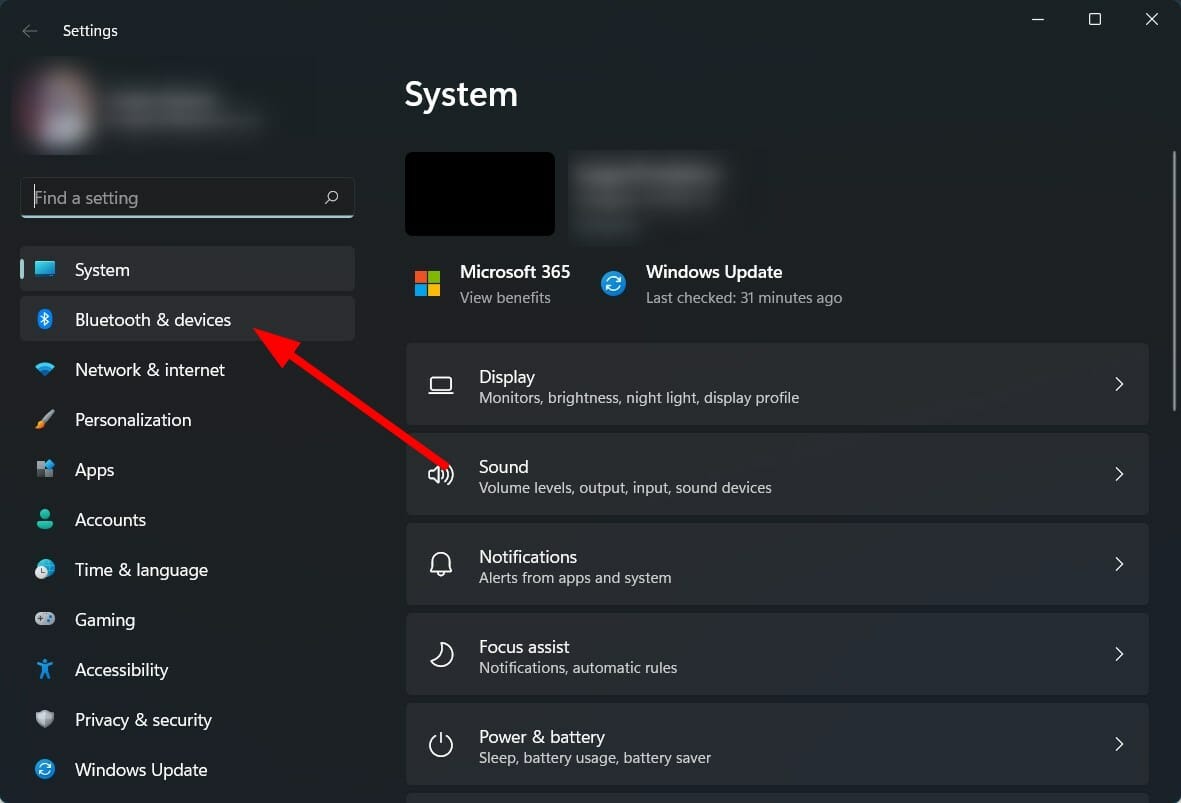
- Press Win + I to open the Settings page.
- Click on Bluetooth & devices.
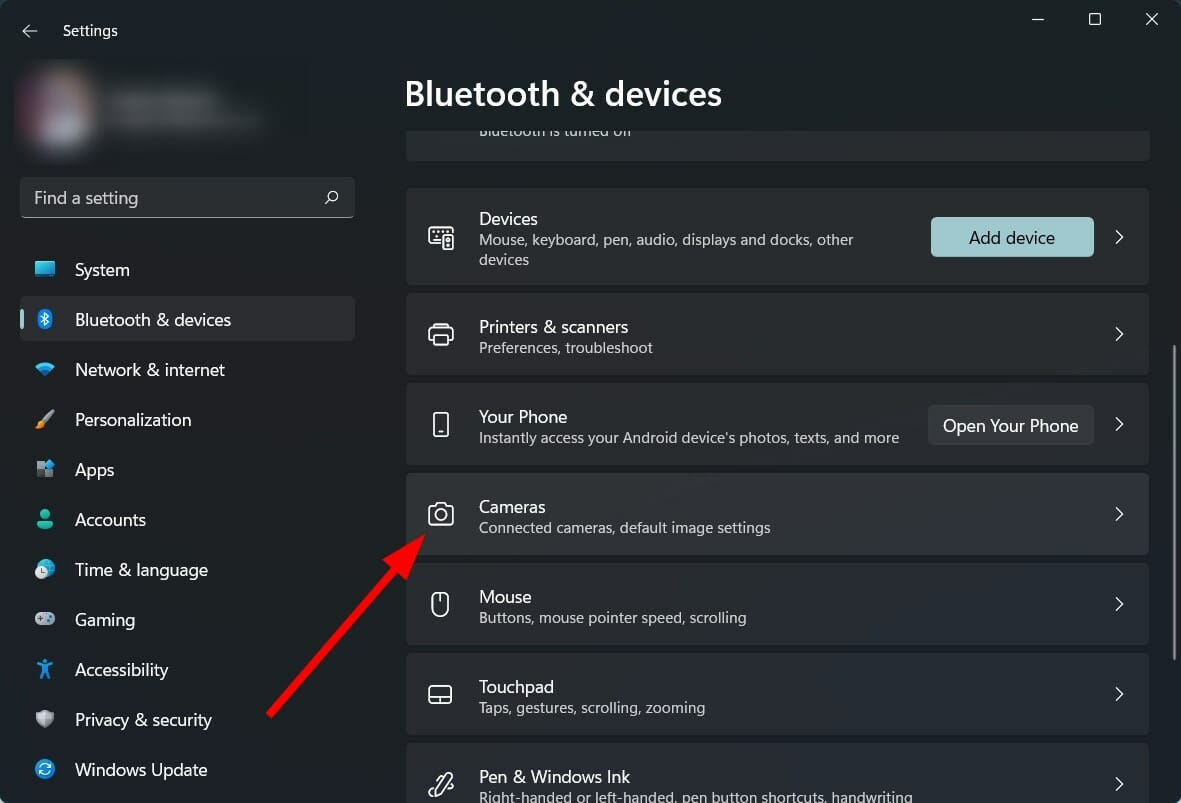
- On the right-side, select Camera.
- Select your web camera.
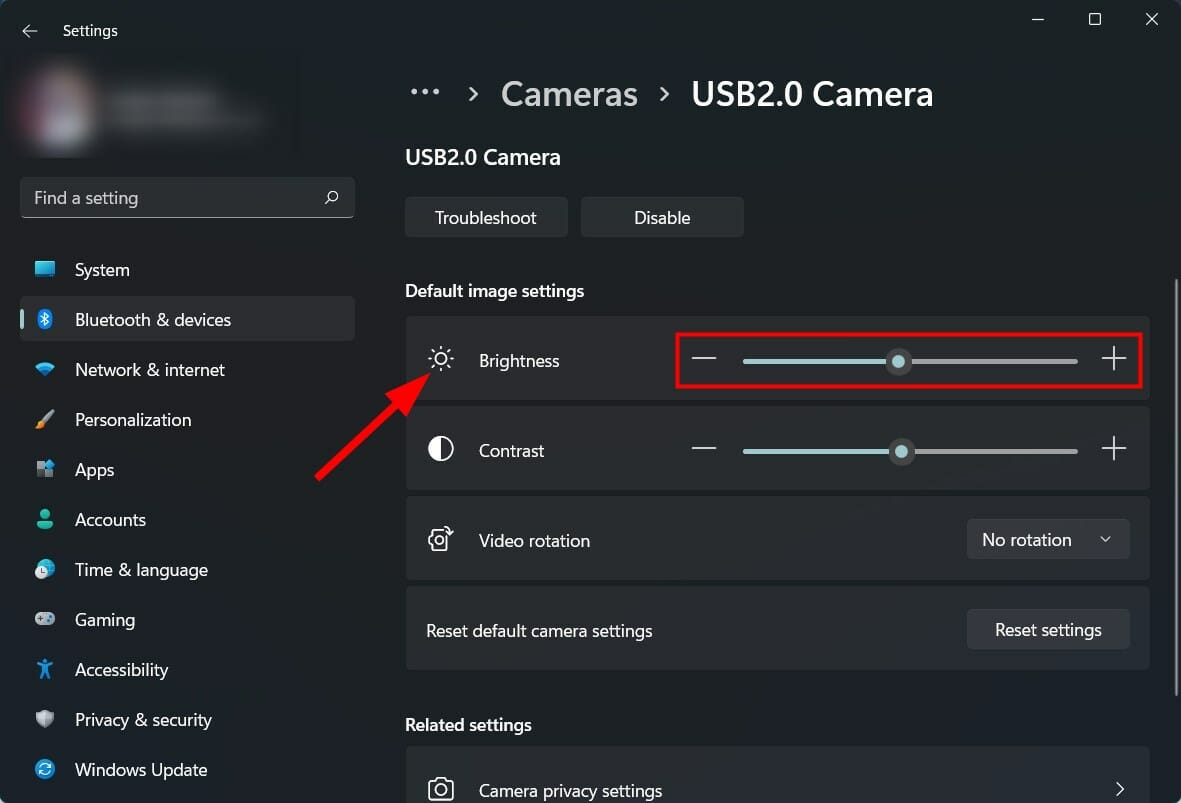
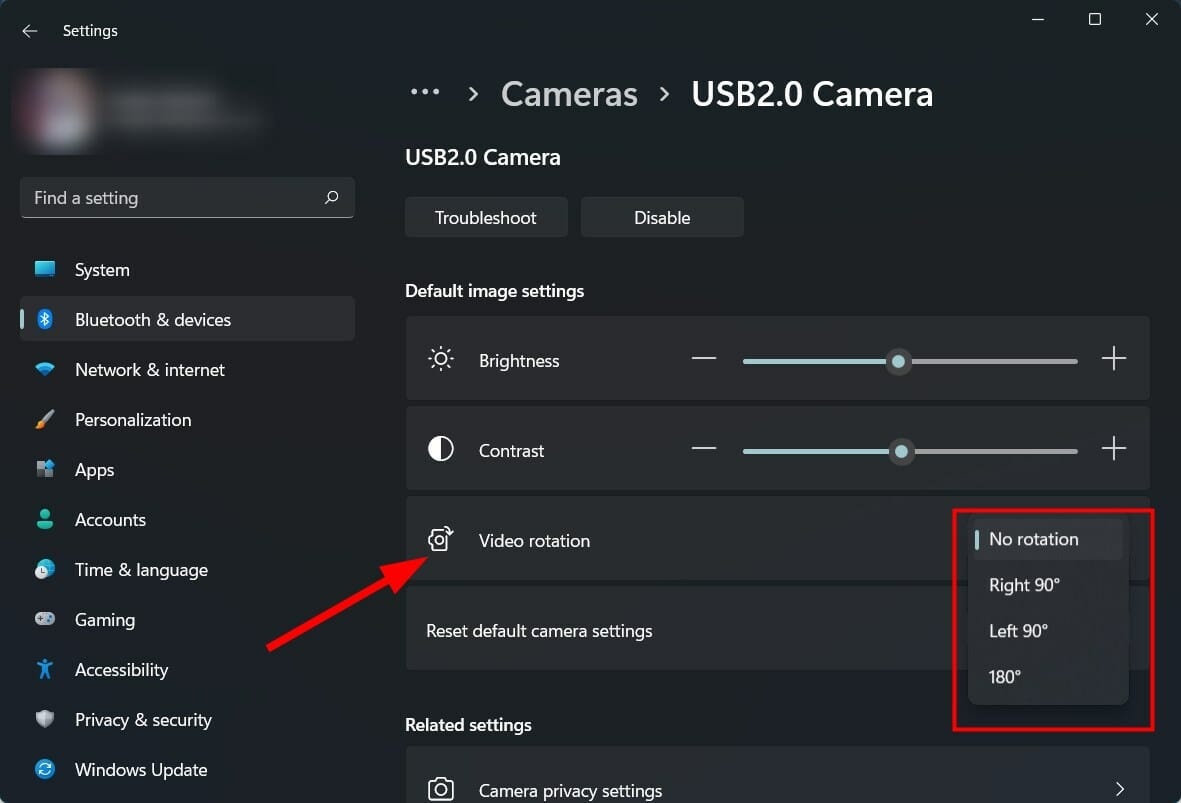
- Here you will find different camera settings that you can change:
– Brightness: Adjust the brightness slider to increase/decrease brightness levels for your webcam.
– Contrast: Adjust the contrast slider to increase/decrease contrast levels for your webcam.
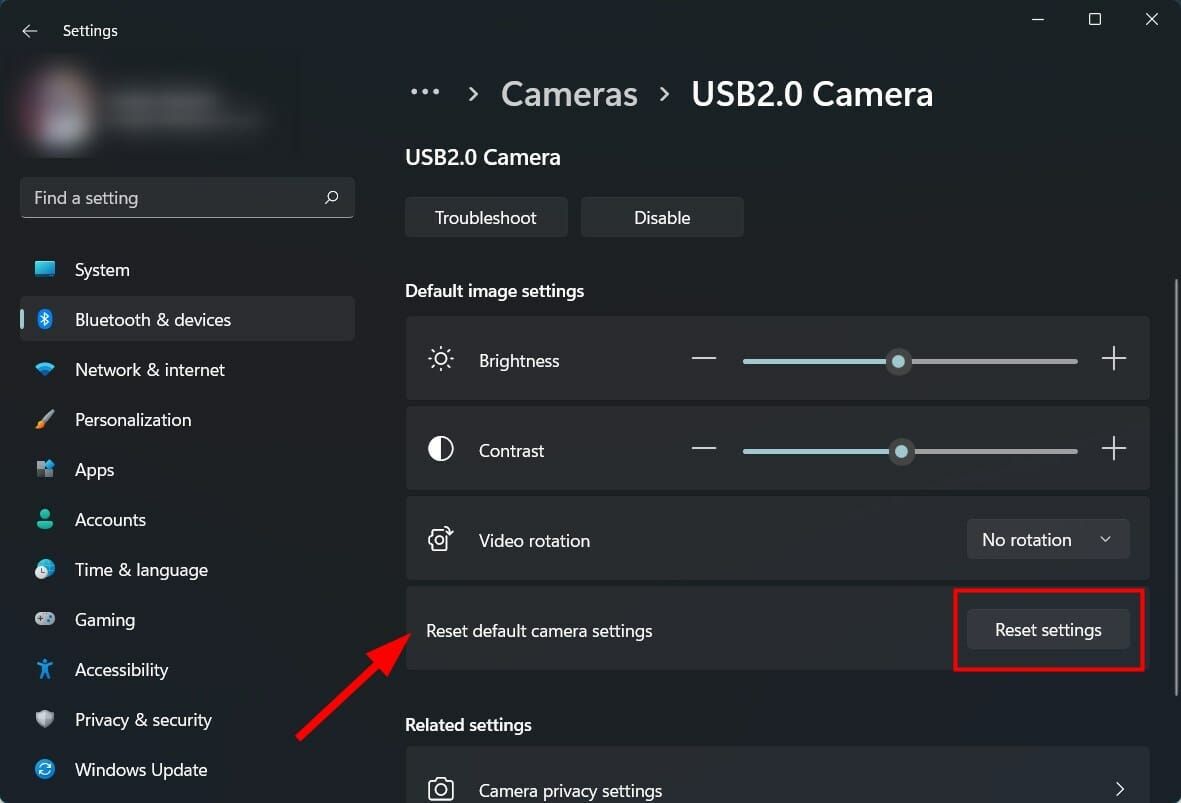
– Video rotation: Select to rotate videos by 90-degree right, 90-degree left or 180-degree (upside down). - If you think you have messed up the camera setting, then you can hit the Reset settings button next to Reset default camera settings option.
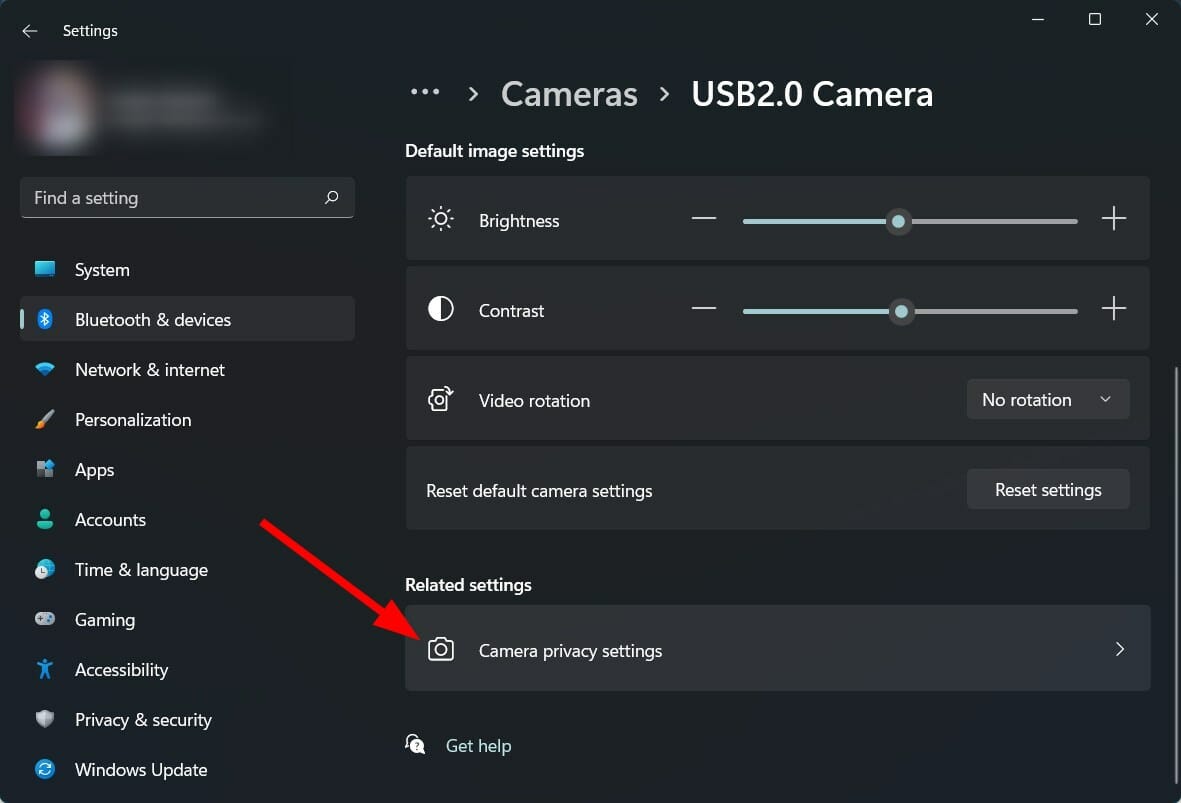
- To adjust camera privacy settings, click on Camera privacy settings.
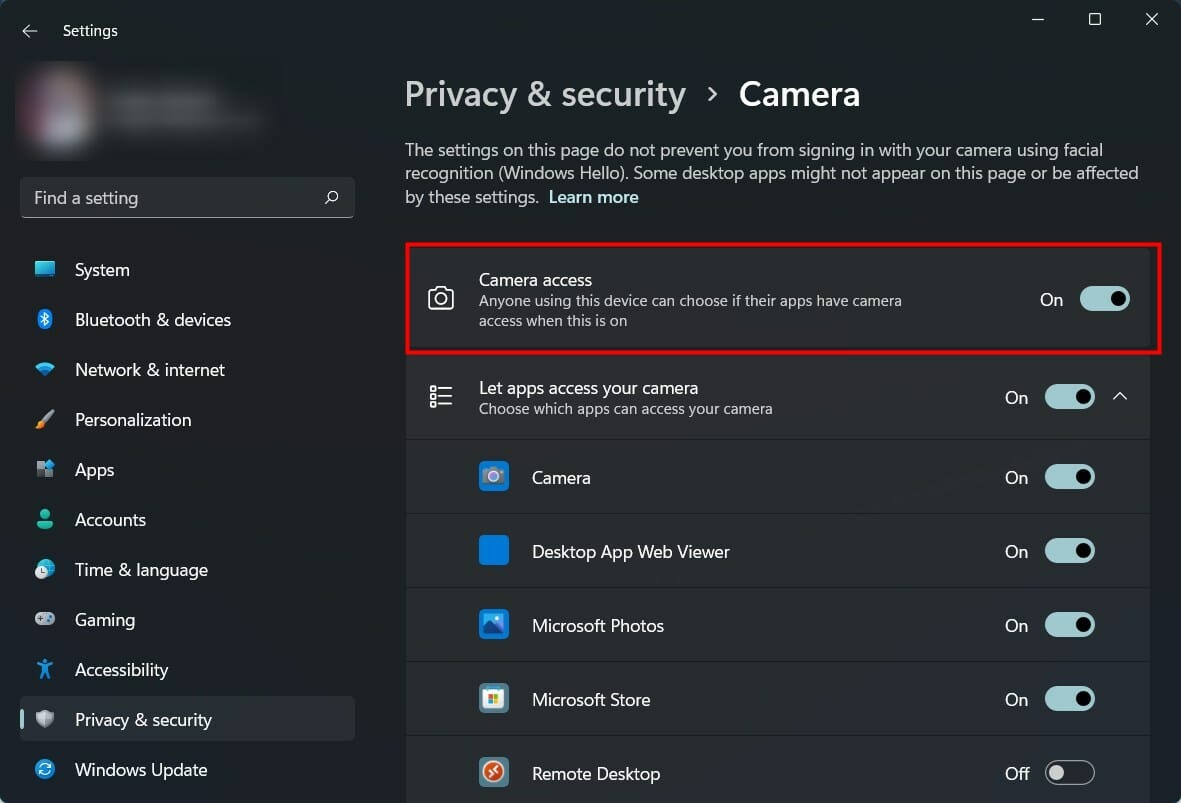
- Here you change settings for which apps have access to the camera.
If you have an external webcam or an internal webcam that supports HDR and Eye contact features, then the options will be available to you.
How can I improve the webcam quality in Windows 11?
If video calling is a major part of the work that you do, then having the best possible video camera settings is necessary for you.
You can follow the above steps to adjust the brightness, contrast, video rotation, HDR, or Eye contact features on your webcam.
However, there are a few tips that can improve the overall quality of your video calling experience, some of which also involve adjusting external factors.
➡ Keep your video calling app up to date
If you use Google Meet, Slack, or any other video calling app, then make sure to keep it up to date.
Updated video calling apps not only bring stability and fix multiple bugs present in the app, but they sometimes also bring better features for the webcam.
➡ Adjust surrounding lighting conditions
Light is essential if you are looking for optimal image quality. As better photos and videos are captured in the best lighting conditions, indoors as well, ensure abundant light is coming inside your room for better video calling quality.
There is no need to have an expensive setup to improve the lighting conditions, but having a good light source is very important.
➡ Don’t have a cluttered background
You should avoid using a patterned or cluttered background, as you should be the center of attention, not your background.
Clean out the items in your background and keep it simple. Also, avoid keeping things that would reflect light in your background.
➡ Adjust the screen resolution
If your webcam generates a 720p output resolution, and you see a distorted image of yourself, you can try lowering your screen resolution for better quality.
Open the screen resolution page and lower the quality or match your webcam’s resolution to get the best image quality.
➡ Keep your graphics drivers up to date
You can use Outbyte Driver Updater software to update all the drivers on your Windows 11 PC. It is an excellent and simple tool that will scan for all outdated drivers, show you the result, and prompt you to install all the updates.
Instead of going over to every driver’s website and downloading them, you can use Outbyte Driver Updater to update all drivers on your PC.
These tips apply to the externally connected webcam and the integrated webcam that comes with your laptop. Also, if you regularly attend video calls, learn how to disable auto brightness on the webcam.
The webcam camera software also plays a significant role in getting the best output from your webcam. There are multiple webcam software packages that you can check out on the Internet.
What can I do to enable the camera in Windows 11?
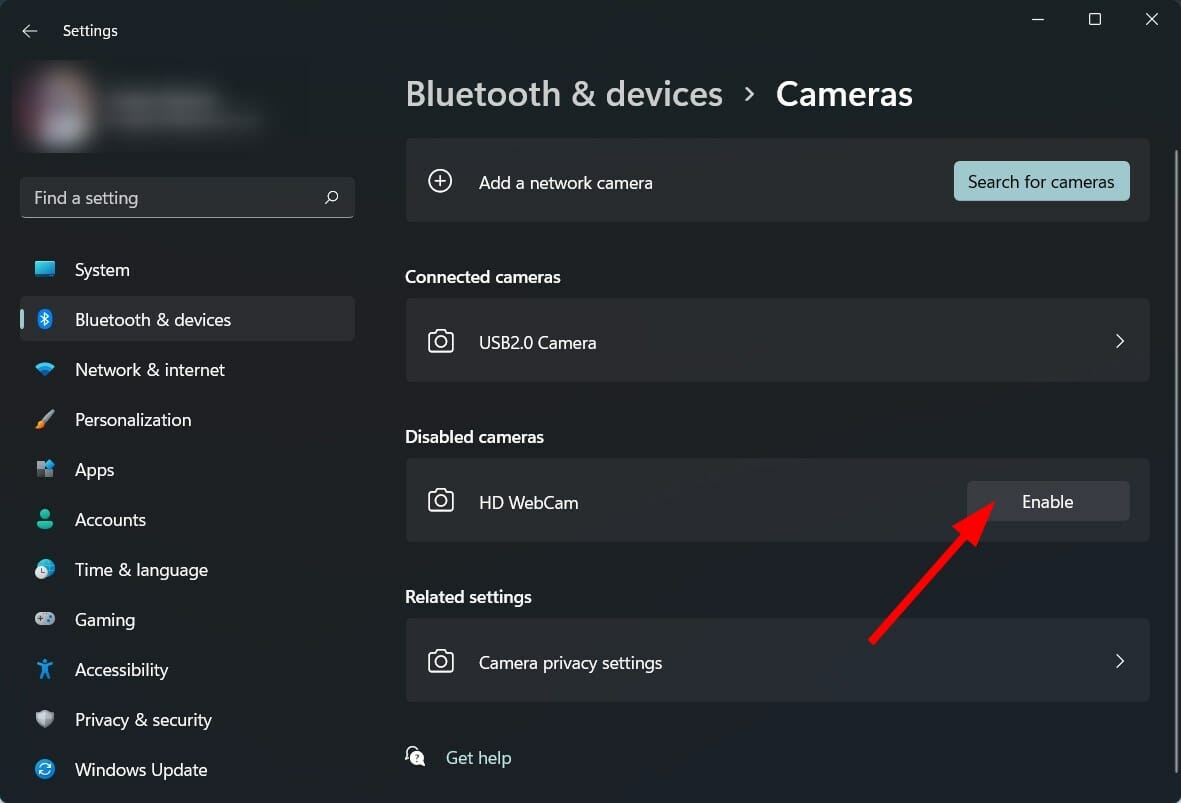
1. Using Settings
- Press Win + I to open the Settings page.
- Click on Bluetooth & devices.
- On the right-side, select Camera.
- Usually, once you connect the camera, it will be automatically enabled.
- However, if it isn’t showing up, under the Disabled cameras section, hit the Enable button for your camera.
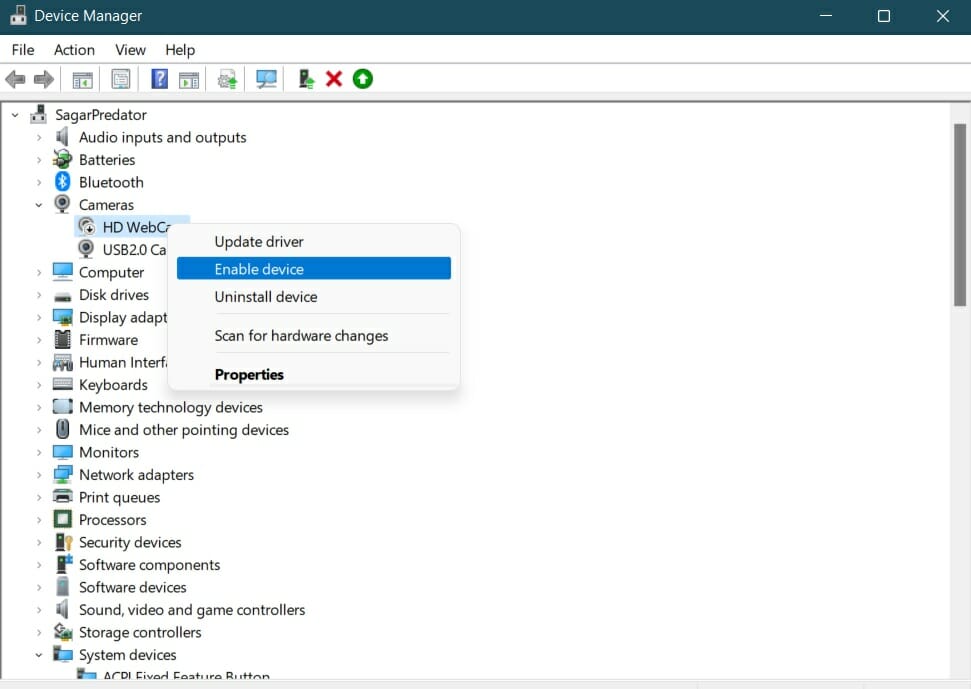
2. Use Device Manager
- Right click on the Start menu icon.
- Select Device Manager.
- Expand Cameras section.
- Right-click on your camera and select Enable device option.
- Click Yes.
While you may be fortunate enough that the webcam is running pretty smoothly, there are many users for whom the webcam does not work in Windows 11. Also, check how to fix a freezing camera in Windows.
In such a case, you can try giving all permissions, updating the camera driver, or resetting the camera app to fix the problem.
We also have a guide on the best Rocket League camera settings, so be sure to check it out if you’re a gamer.
Let us know in the comments below if this guide helped you with how to change camera settings in Windows 11 query.




User forum
0 messages