Can't install XAMPP software on PC [ULTIMATE GUIDE]
3 min. read
Updated on
Read our disclosure page to find out how can you help Windows Report sustain the editorial team Read more

XAMPP is a popular Apache distribution for Windows and other platforms. The software is easy is to install on a Windows computer as it has tons of resources on how to install the software.
However, some users have reported that they are getting some errors during the XAMPP installation. The full error reads Because of an activated user account Control on your system some functions of XAMPP are possibly restricted.
This is a common error and you can fix it by following the troubleshooting tips given in this article.
How to fix XAMPP Installation Error
1. Install XAMPP Outside of C: > Program Files
- Launch the XAMPP installer as admin.
- When the warning message appears, click OK.
- Now select the programs you want to install and click Next.
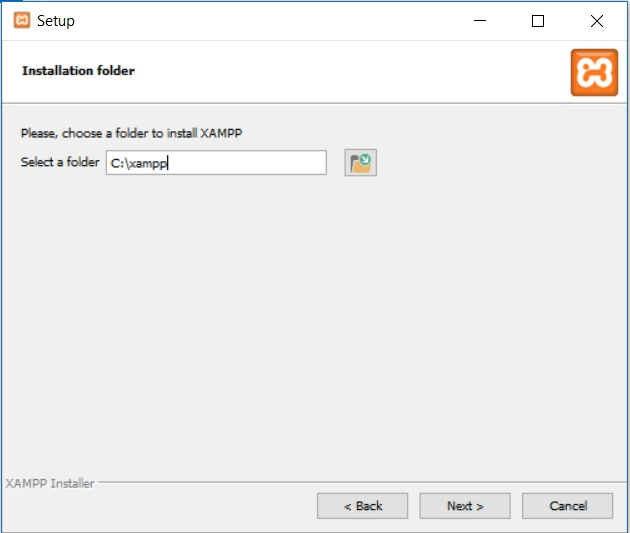
- XAMPP will now ask you to select the Installation folder. So, by default XAMPP will try to install the files in C:>Programs Files (x86) folder. You need to change it.
- So click on the Browse button and select C: as the installation folder. Or create a new folder (C:>XAMPP_Installation )and select it as the destination. Note that the folder should not be in inside the C:>Program Files (x86) folder.
- Click on Next to proceed with the installation. Now you should be able to install XAMPP without any error.
The issue here is that installing XAMPP in the program files folder will require UAC permission to run each time. So, by installing it outside the folder, you are avoiding the UAC issues with the software.
Note: If you are creating a custom folder, make sure that you don’t include any spaces between the name of the folder.
3. Disable UAC (User Account Control) ( Less Safe)
- Press Windows Key + R to open Run.
- In the Run dialog box, type control, and press OK to open the Control Panel.
- Click on System and Security.
- Next, click on Security and Maintenance.
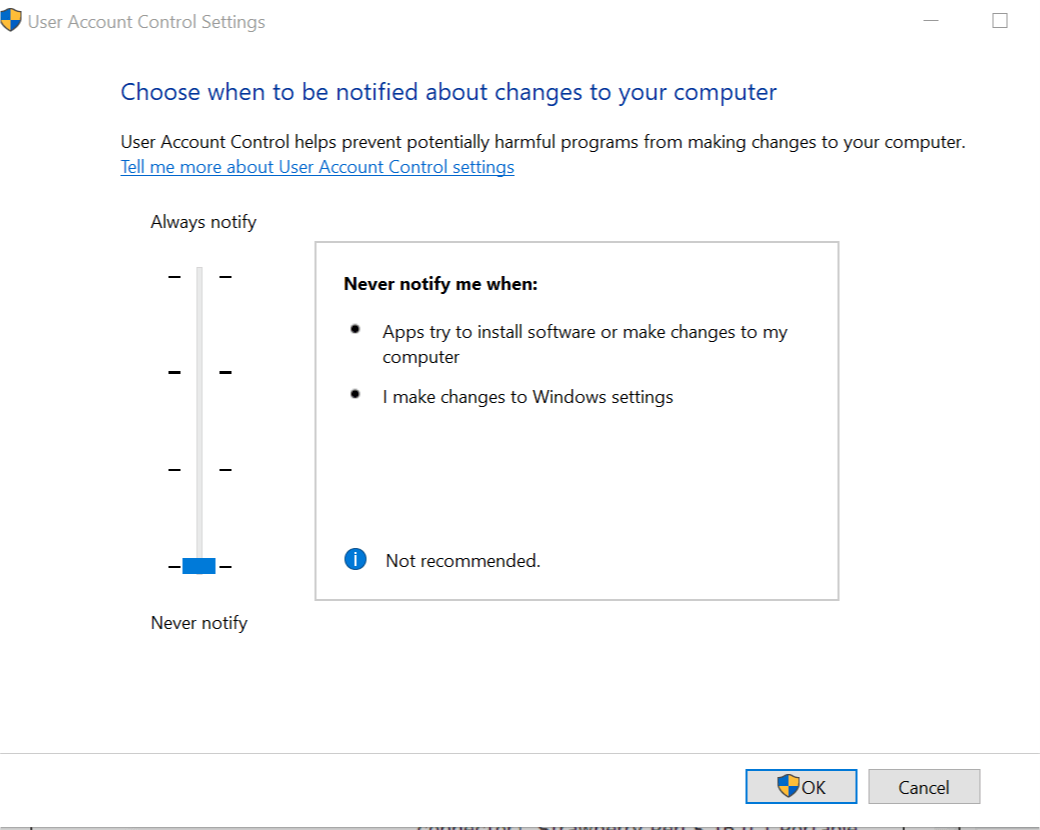
- From the left pane, click on “Change User Account Control settings”.
- In the UAC window, drag the slider to Never Notify and click OK to save the changes.
- If the UAC prompts you to allow changes, click Yes.
- Now try to run the XAMPP software installer and check if the error is resolved.
Note: Disabling UAC is not recommended by Microsoft as it exposes your computer to external threats. Only disable UAC if the other fixes did not resolve the issue.
4. Remove Old XAMPP Installation
- Press Windows Key + R to open Run.
- Type control and press OK.
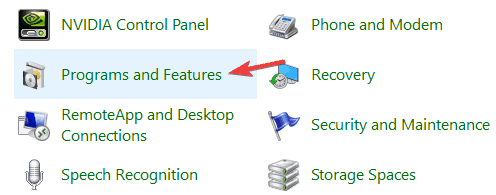
- In the Control Panel, go to Programs > Programs and Features.
- Select the XAMPP installation and click on Uninstall.
- Restart the system and run the XAMPP installer.
Follow the fixes given in this article and you should be able to install XAMPP without any errors.

