FIX: Computer Not Going to Sleep on Windows 10/11
6 min. read
Updated on
Read our disclosure page to find out how can you help Windows Report sustain the editorial team Read more
Key notes
- If your computer is not going to sleep, it will cause unnecessary power consumption.
- Since this issue might happen due to a system error, using a restoration tool will quickly fix it.
- Make sure you scan for viruses with the Windows Defender or a third-party antivirus tool.
- Also, removing peripheral devices will surely solve this PC Sleep Mode issue.
Even though everything considerably evolved in Windows over time, Sleep mode is still something that’s there and it will be for a long time.
Its main use is to shut down HDD and computer monitor after a specified period in order to prevent unnecessary power consumption.
But, what to do when your PC just won’t go to sleep on Windows 10? You’re at the right place to find out.
In this article, we’ll list all the possible solutions to fix this problem. Make sure to take follow them in the presented order.
What can I do if my Windows 10 PC won’t go into Sleep mode?
- Make sure the Sleep Mode is enabled
- Scan for viruses
- Remove peripheral devices
- Disable Hybrid Mode
- Change Advanced Power Settings
1. Make sure the Sleep Mode is enabled
- Press the Windows key + I to instantly open the Settings app.
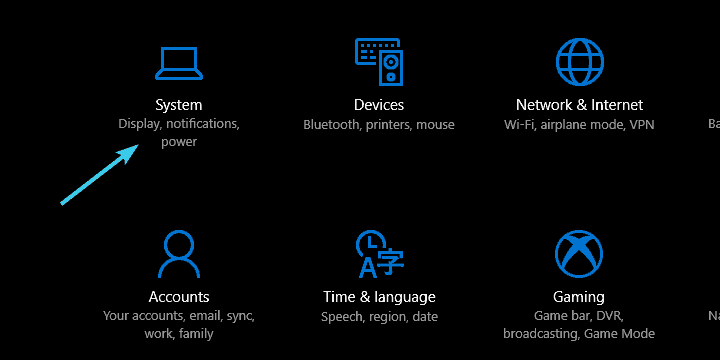
- Choose System.
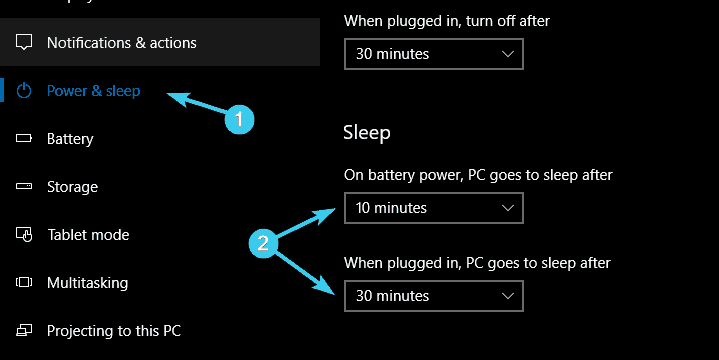
- Select Power & sleep from the left pane.
- Set preferred values under the Sleep section and exit.
Let’s start with the obvious and confirm that the Sleep Mode timeout is enabled in the first place. A lot of users are not even aware of certain, minor changes that are made after every system update.
So, if you updated Windows recently, make sure to check out your Power Plan settings. There’s a slight chance that something changed without your knowledge.
Since we know that there can be problems with the Settings app, we’ve created a useful guide dedicated to fixing the Settings app if it doesn’t open. Make sure to give it a read.
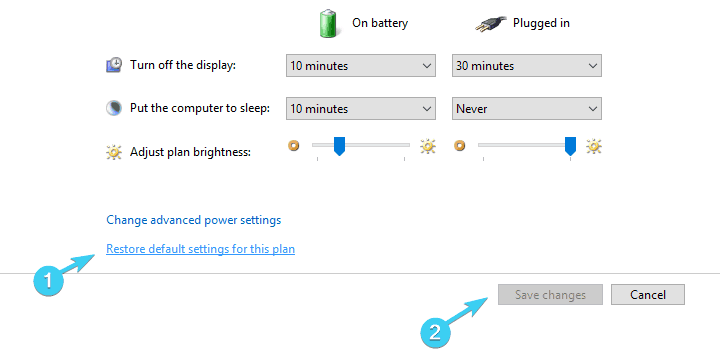
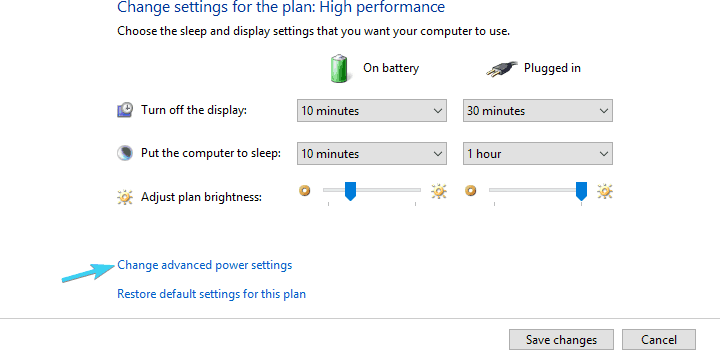
You can also restore Advanced Power Settings for the active Power Plan by following the steps below:
- Press Windows key + I to open Settings.
- Select System.
- Choose Power & sleep from the left pane.
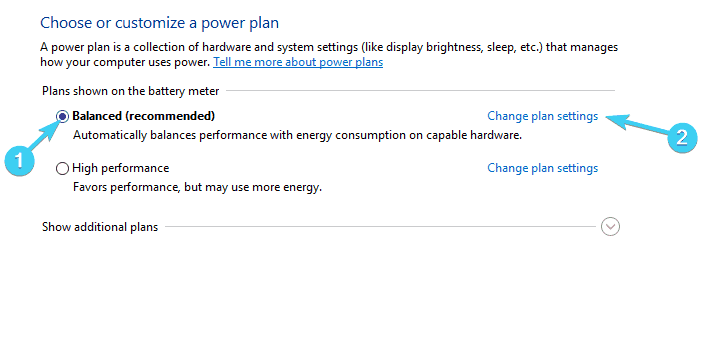
- Click on the Additional power settings in the top right corner.
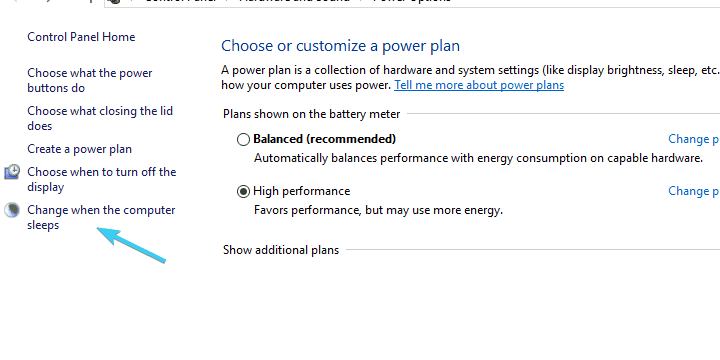
- Select Change when the computer sleeps.
- Now, click on Restore default settings for this plan.
- Save changes.
Can’t find your Power Plans? Here’s a neat guide about enabling Windows Power Plans if they are missing from your device.
2. Scan for viruses
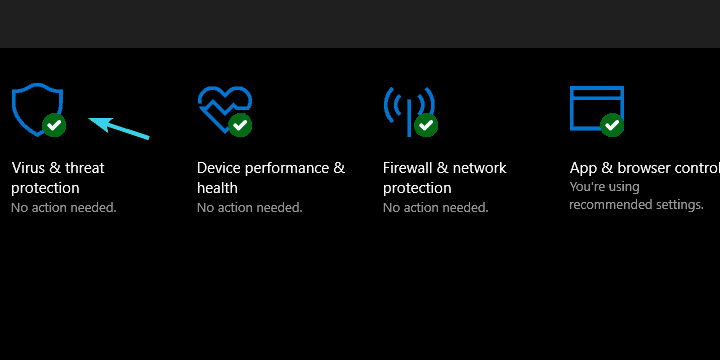
- Open Windows Defender from the Notification area.
- Select Virus & threat protection.
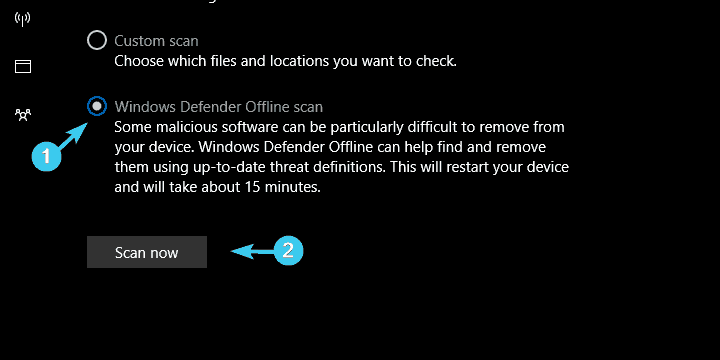
- Click on the Advanced scan section.
- Choose Windows Defender Offline Scan and then click on the Scan Now button.
- Your PC will restart and the scanning procedure will commence.
In addition, some users reported that malicious software such as malware was preventing their computer from going into Sleep or Hibernation.
Allegedly, if the computer is not going to sleep, there might be harmful software working in the background, mostly adware hidden within the Chrome browser.
In order to follow through with this step, you’ll need to perform a deep system scan with either a third-party antivirus from this awesome list or Windows Defender.
This will make sure the Sleep Mode issues aren’t caused by malware. Since the procedure varies on different third-party solutions, we made sure to show you how to perform the scan.
Need additional info on how to perform a full system scan directly from Windows Defender? Find out more in this dedicated guide.
3. Remove peripheral devices
Another valid reason behind a PC’s inability to go to sleep lies in peripheral devices. Some of them, like a mouse or keyboard, shouldn’t cause any issues. However, we can’t say the same for webcam, printer, or SD reader.
In addition, make sure to remove DVD from DVD-ROM in case it’s not in use. After you unplug peripheral devices, your problem should be resolved.
On the other hand, if you’re still stuck with an insomniac PC, make sure to continue with the steps below.
4. Disable Hybrid Mode
- Press Windows key + I to open Settings.
- Select System.
- Choose Power & sleep from the left pane.
- Click on Additional power settings in the top right corner.
- Select the preferred Power Plan you actively use and click on Change plan settings.
- In the next window, click on the Change advanced power settings.
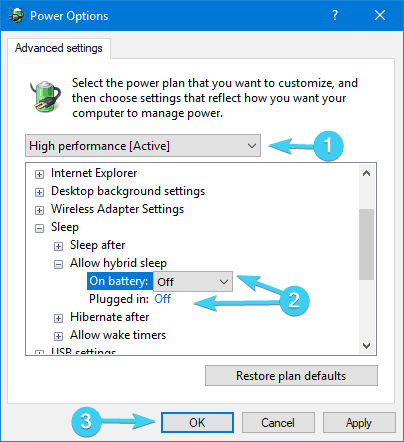
- In the tree menu, expand Sleep.
- Expand the Allow hybrid sleep and turn it OFF.
- Save changes.
The Hybrid Mode is, as the name itself says, the hybrid of Sleep and Hibernate power-saving modes. Its primary use is to resemble hibernation power saving traits while keeping the loading speed of the Sleep mode.
That sounds great but not every motherboard supports this technology. Meaning, if you’re using an older PC configuration and the Hybrid mode is enabled, there’s a high possibility that your PC won’t ever go to sleep.
In order to resolve this, an obvious solution is to disable Hybrid Mode and move from there. Finally, if none of these solutions helped you, there’s still one thing you can do.
5. Change Advanced Power Settings
- Press Windows key + I to open Settings.
- Select System.
- Choose Power & sleep from the left pane.
- Open Additional power settings from the top right corner.
- Select your preferred Power Plan and click on the Change plan settings.
- Click on the Change advanced power settings.
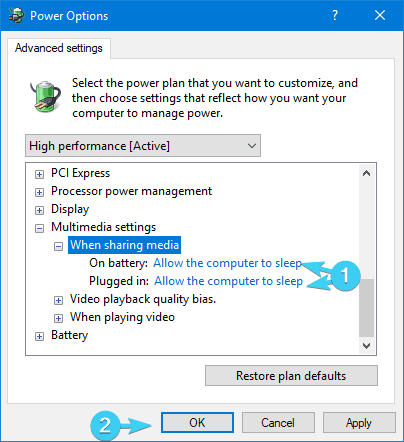
- Expand Multimedia settings.
- Set When sharing media option to Allow the computer to sleep.
- Confirm changes.
There are some minor things that are too often overlooked when it comes to Power Plans and their advanced settings. To be more precise, the Multimedia sharing option and Multimedia sharing that lies within.
This feature prevents PC to sleep when you stream something on your PC, e.g. YouTube videos. Since it’s enabled by default, we advise you to disable it and, hopefully, fix this problem once and for all.
If you’re uncertain how to do it, these steps should show you how:
With that, we can conclude this article. We certainly hope that it was a helpful read and that assisted you to finally put your PC to sleep.
Did your power icon disappear, leaving you unable to power off your PC? Here’s a useful guide dedicated to fixing the power icon if it disappeared from your device.
In case you have some dilemmas, feel free to tell us in the comments section below. We’ll make sure to provide you with additional tips.








User forum
2 messages