How to Customize The Quick Access Toolbar in Microsoft Word
Customize Microsoft Word's Quick Access Toolbar in no time
Key notes
- Microsoft Word is a highly customizable app designed for individual users' personalization.
- There’s a limit to the customization option for users, but you can also personalize the options available.
- You may Add or Remove commands from the Quick Access toolbar.

Microsoft Word allows users to create documents, edit, view, and share files with other users. However, it can take a while to get around working on the app which is why you should learn how to customize the Quick Access Toolbar on Word.
Also, users may be interested in our article about how to turn off auto numbering in Word.
What kind of customization can you do to toolbars?
Microsoft Word is highly customizable and allows users to personalize the interface to an extent. However, there’s a limit to the level of customization you can do on the app.
Furthermore, users use the customization features on Microsoft Word to tweak it to suit their needs. The toolbar contains a set of commands that are not affected or bound but the currently displayed tab on the ribbon. It allows you to move the toolbar to another location.
Another customization option you can do to the toolbar is to add buttons that represent the commands to the functions of the toolbar. Also, you can create shortcuts for the toolbar commands to hasten your work on the app.
Fortunately, any customization process initiated on the Quick Access Toolbar is not visible only in the document. It applies to the whole Word app, so you require not customize the Quick Access menu for each document or task.
How can I customize a Quick Access Toolbar in Microsoft Word?
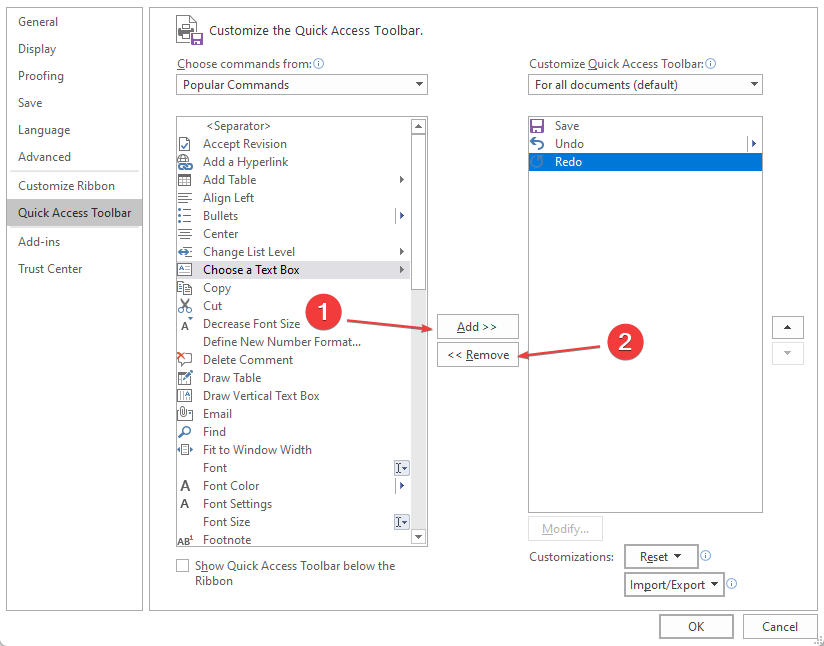
1. Add and remove commands from the Quick Access Toolbar menu
- Launch Microsoft Word on your PC.
- Click the down arrow button close to the top-right corner of the screen.
- From the commands on the Quick Access drop-down menu, check the commands you want to add and uncheck those to remove.

Another step for removing commands from the Quick Access Toolbar is:
- On the Quick Access Toolbar menu, right-click the command you want to remove.
- Select Remove from Quick Access Toolbar on the drop-down menu.
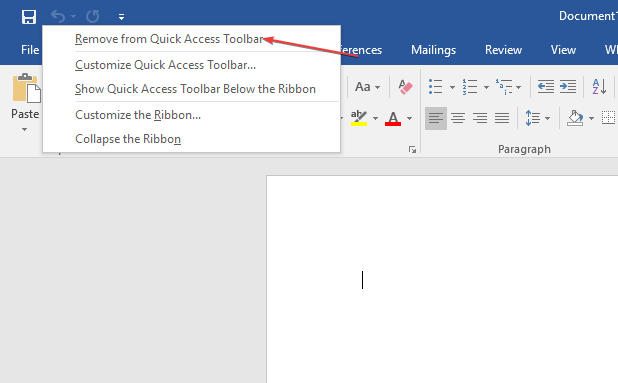
Adding or removing commands from the Quick Access Toolbar allows you to customize the menu. It lets you determine the functions you want to include or remove from the toolbar.
2. Add a command that’s not on the ribbon to the Quick Access Toolbar
- Launch Microsoft Word on your PC.
- Click the down arrow button close to the top-left corner of the screen. Click on Customize Quick Access Toolbar from the drop-down, then select More Commands.
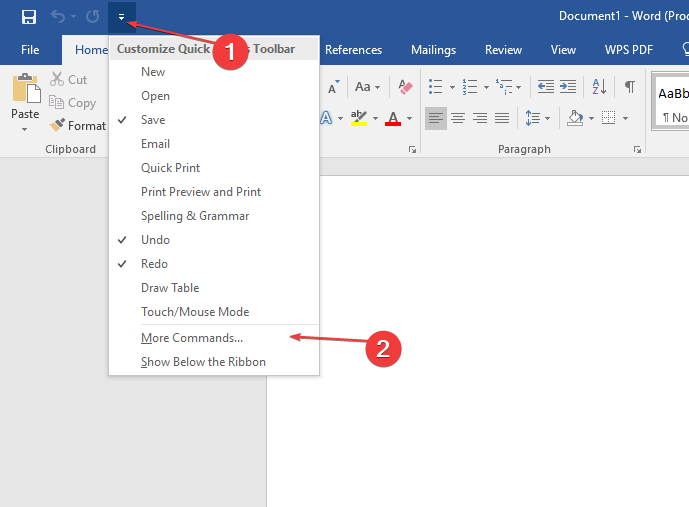
- Go to the Choose commands from list, select the command not in the Ribbon, then click the Add button.
Adding a command from the list will include it in the Quick Access Toolbar.
3. Change the arrangement of the commands
- Open Microsoft Word on your computer.
- Right-click the Quick Access Toolbar, then select Customize the Quick Access Toolbar from the drop-down menu.
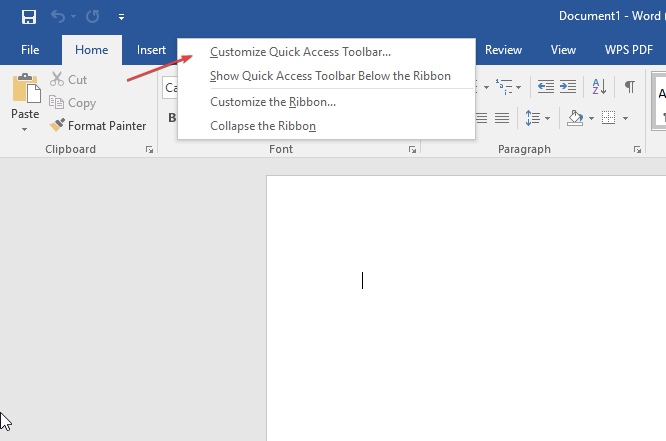
- Select the command you want to move. Click the arrow-up or down to change the position of the command.
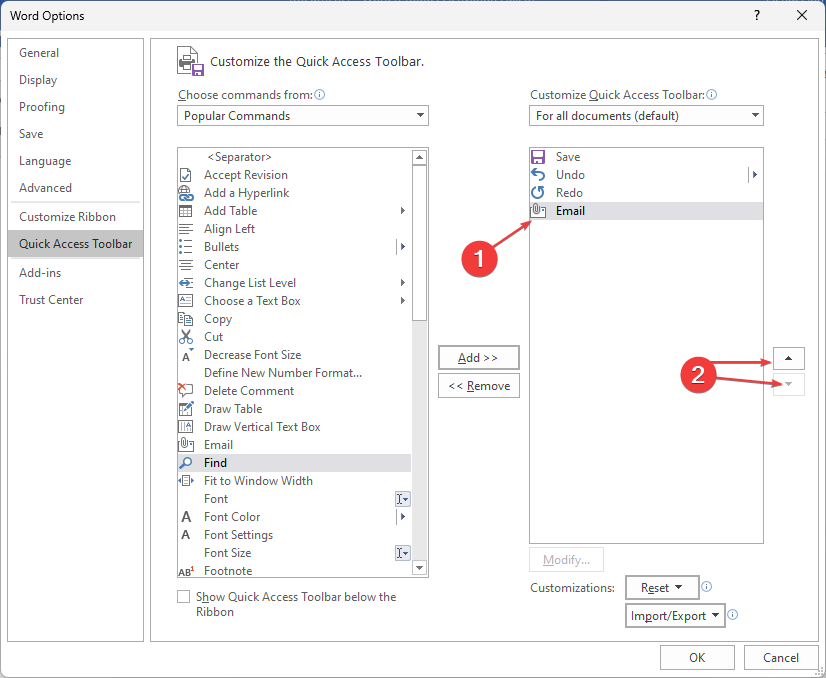
The Move up and Move down option allows you to arrange the commands in the Quick Access Toolbar as you please. Further, you can read how to fix Microsoft Word not working on Windows.
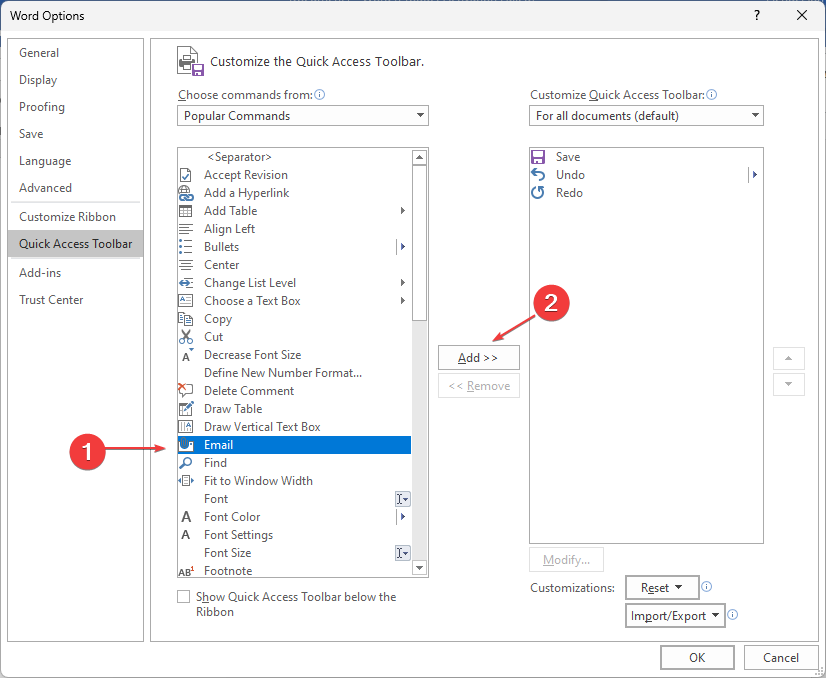
4. Use the Options command
- Launch Microsoft Word.
- Click on File in the top-left corner of the screen, click on Options, then Quick Access Toolbar.
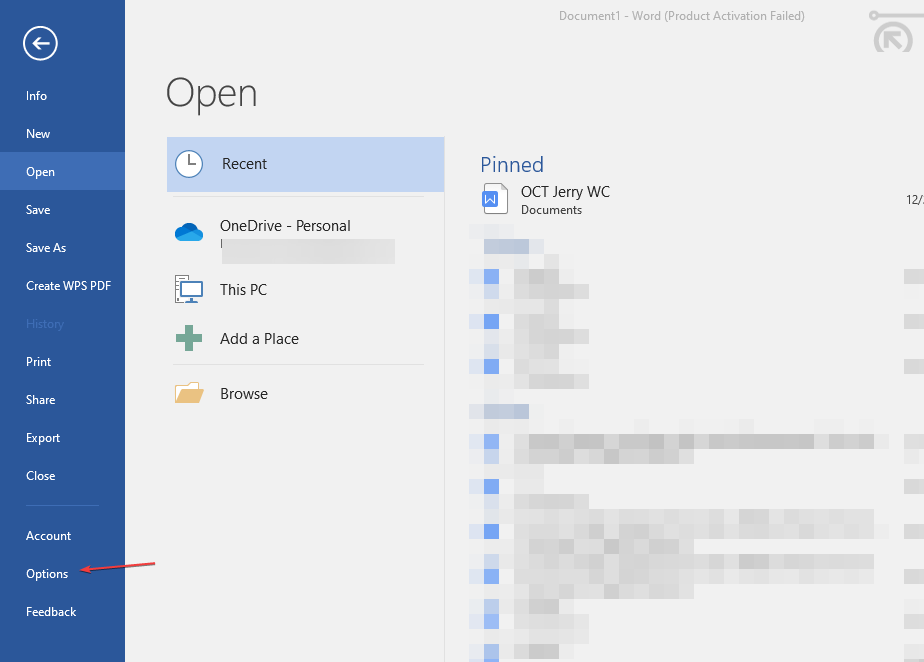
- Click the Add and Remove buttons to move items from the Customize the Access Toolbar list and the Choose command from list.
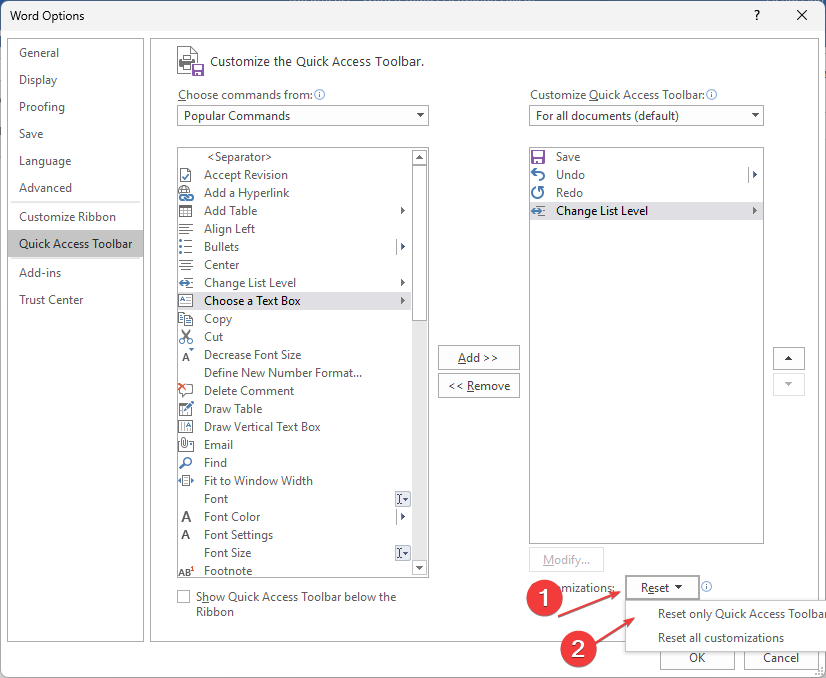
5. Reset to the default settings
- Open Microsoft Word on your computer.
- Right-click the Ribbon and Click on Customize Quick Access Toolbar from the drop-down.

- Select Reset, then tap Reset only Quick Access Toolbar.
6. Import/Export a customized Quick Access Toolbar
- Open Microsoft Word on your computer.
- Right-click the Ribbon and Click on Customize Quick Access Toolbar from the drop-down.
- Select the Import/Export option, then click on the Import customization file.
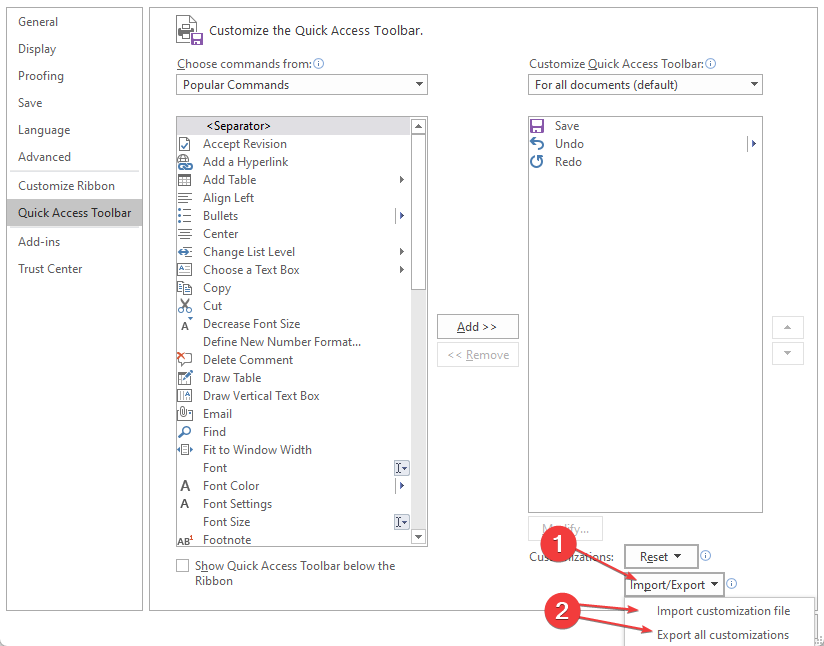
Importing or exporting customized Quick Access Toolbar allows you to have the same interface across your Microsoft Office apps.
Conclusively, you can check about fixing issues with removing text highlighting in Microsoft Word. Also, we have a detailed guide on fixing Word experiencing an error when opening the file error.
If this guide has been helpful, kindly drop a comment below.
Read our disclosure page to find out how can you help Windows Report sustain the editorial team. Read more


Improve this guide


User forum
0 messages