Defraggler is the Best Solution to Defrag Windows 10
5 min. read
Updated on
Read our disclosure page to find out how can you help Windows Report sustain the editorial team Read more

Defraggler is one of the best tools to use if you want to defrag your Windows 8 hard drive or even individual files. I’ve been using it on Windows 8.1, and you can read below what were my impressions
Piriform is a respected company in the software world, probably most known for having released such programs as CCleaner, which is now compatible with Windows 8.1. Piriform is one of the first companies to have released support for Windows 8 for its programs, and Defraggler was made compatible with Windows 8 at the end of January, 2012, even before Windows 8 was released.
The company has respected their schedule and when Windows 8.1 was released, they made Defraggler compatible with Windows 8.1 in version 2.16. But only these days did I install Defraggler as I seriously needed to optimize my Windows 8.1 computer. I’ve used WiseCleaner’s Wise Care 365 software and have also cleaned the Windows 8 registry, but a few more improvements needed to be made.
First of all, what makes Defraggler different than other software that can defragment your system is the fact that besides tweaking your hard drive, it can also defrag individual files. The version that I have used, as I’ve mentioned before, was Defraggler 2.16. Let’s have a quick look at its main features, improvements and what it can do for your computer:
- Organizes empty disk space to further prevent fragmentation
- Defragments your hard drive, an entire file, a folder, or a single file
- Defraggler uses the Windows safeguards to prevent data loss
- Defraggler is very lightweight, the installation file is only around 3MB
- Defraggler shows you an interactive drive map
- Quick Defrag mode
- Scheduled defragmentation
Using Defraggler to defrag Windows
Also, here are some of the latest improvements made to Defraggler – minimize to tray, right-click Move File to end of Drive feature, improvements to dree space calculation, fixed exclusions in df.exe, SSD drives are now handled correctly when drives are queued for defrag, improved drive map block calculation for very small drives, shortcuts are now correctly interpreted when calculating fragmentation levels, improved support for /minpercent parameter for df.exe.
With regards to the confusion surrounding SSDs and defragmentation, here’s what Martin Brinkmann from Ghacks explains:
There is still some confusion in regards to SSDs and defragmentation. The general consensus seems to be that you should not defragment Solid State Drives for two reasons: first because of the write operations that the operation causes, since it may impact a drive’s lifespan especially if it is an early generation drive. Second, because Solid State Drives can access data a lot faster than regular hard drives so that the performance gains are minimal at best. Running a Trim command or using the secure erase feature of the hard drive will improve performance by a much larger margin.
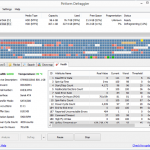
In Defraggler, look at the Media Type column to distinguish regular hard drives from Solid State Drives. It is still recommended to defrag platter-based hard drives whenever their fragmentation reaches a level that is affecting performance. Defraggler does not provide you with any recommendations, but if you spot two-digit fragmentation percentages, you should probably run a defrag on the drive in question.
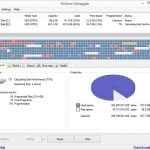
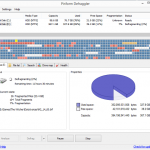
When you will first run Defraggler, an interactive map of your drive will be displayed. You will be able to do the following things – analyze, defrag, quick defrag, and also to defrag folders, files and advanced option as checking the drive for errors and defrag freespace. Before running the analyze, it will ask if you want to empty the recycle bin, which, in my case, was around 20 GB (ouch!). So make sure you’ve recovered all the files you might need.
The analysis will be very swift, and will let you know about your disk’s health. After that, you can choose to view the analyzed files or to benchmark a certain drive. On my computer the benchmark lasted for about five minutes. The Windows 8 disk defragmentation will take much more time, so make sure you can keep the computer open. The time estimate will decrease, though, so don’t be afraid. You can stop the process at any time if something unoccured happens.
After the defragmentation was finally completed, I can tell you that my Windows 8.1 laptop suddenly felt faster and snappier. Therefore, I suggest Defraggler as it seems to be, at least in my opinion, the best way do perform disk defragmentation in Windows 8 and Windows 8.1. Stay tuned as we will soon talk about the performance of Speccy and Recuva programs on Windows 8 and Windows 8.1. Let’s hope that some day we will also see a Defraggler app optimized for Windows 8 touch devices, as well.
Download Defraggler for Windows 8 and Windows 8.1
Defraggler alternatives in Windows 10
Even though Defraggler might be the best solution for many users, it is not the only defrag tool on the market. In case you encounter any problems while using it, especially on a Windows 10 device, you can switch to these options:
- Smart Defrag
- O&O Defrag
- Auslogics Disk Defrag
- Puran Defrag
- Disk Speedup
You can find more information about any of these defrag tools and download links in this dedicated article.
Tip: in order to boost your PC’s performance, you can also use a good registry cleaner and optimization tool. You can take a look at the best of them on this list.

User forum
0 messages