How to Disable BitLocker in Windows 10 [Quick Guide]
The fastest way to disable the Bitlocker is through Control Panel
Key notes
- There are many situations when you may need to disable your BitLocker.
- For those of you that don’t know how, here’s a step-by-step tutorial on how to do so.
Some users have been complaining about an issue regarding BitLocker encryption on Windows 10 devices, mainly, an incompatibility between a drive encrypted on Windows 7 and later used in a Windows 10 machine.
If you are experiencing this issue, then maybe this guide will give you the solution.
If you have not heard about BitLocker by now, and you want an extra layer of security for your Windows computer, then you should definitely do some research regarding what it can do and how it can protect your files.
But even with its advantages, Microsoft’s encryption feature has some issues when moving drives from Windows 7 computers to Windows 10.
We’ll consider the following scenario: you have been using BitLocker on a Windows 7 computer and you have recently bought a new Windows 10 computer and you want to install your old hard drive into the new tower.
When you try to access the encrypted partitions, Windows 10 advises you to turn off BitLocker or does not recognize your password.
There are a few ways around this problem, some being simpler than others, and it is up to you to determine which of them can be of use in your case.
BitLocker is a great way to protect your files, and in this article, we’re going to cover the following issues:
- Disable BitLocker Windows 10 – Disabling BitLocker is rather simple, and the disabling process is almost identical on Windows 10.
- Disable BitLocker command line, PowerShell – If you’re an advanced user, you can disable BitLocker using the command line. You can disable BitLocker with both PowerShell and Command Prompt, and in this article we’re going to show you how to do it.
- Completely remove BitLocker Windows 10 – BitLocker is a built-in feature of Windows, and while you can’t remove it, you can disable it and all its related services. By doing so you’ll permanently disable BitLocker on your PC.
- Disable BitLocker external hard drive, USB encryption, removable drive, USB drive – BitLocker also works with external drive and removable storage. If you want to disable BitLocker for your USB drive you can do so using any of our solutions.
- Disable BitLocker to update BIOS – Few users reported that they are unable to update their BIOS before disabling BitLocker. However, you should be able to disable BitLocker after reading this article.
- Disable BitLocker Windows 10 Group Policy – If you want, you can disable BitLocker simply by modifying your group policy. This method works for Windows 10.
Here’s how you disable BitLocker on Windows 10.
How do I disable BitLocker on Windows 10?
Quick Tip:
While Bitlocker may only be able to encrypt entire drives, there are situations when you don’t need that.
That being the case, if you need a tool that can encrypt only the data that you need, then give Folder Lock a try.
The program can also create encrypted backups as well, so recovery will be made easier.
Other than that, both BitLocker and Folder Lock are very similar since they both offer high levels of encryption, thus improving the security of whatever you have on your drives.
1. Disable BitLocker from Windows 10 Control Panel
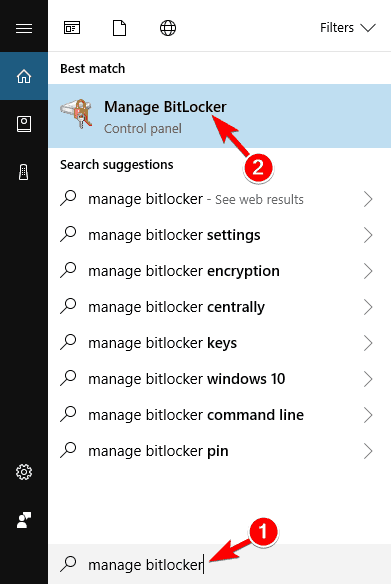
- Open the Search bar and type Manage BitLocker.
- Select the Manage BitLocker from the menu.
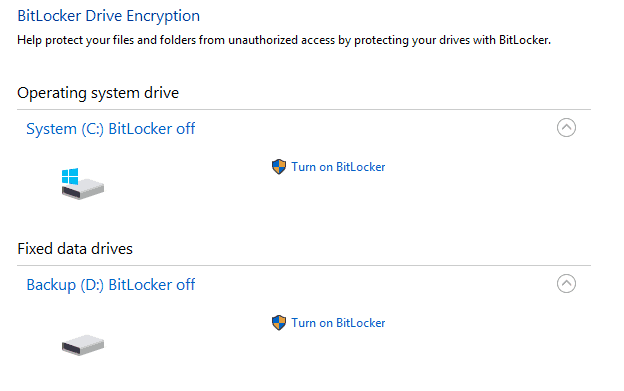
- This will open the BitLocker window, where you will see all your partitions and you can either select to suspend BitLocker or completely disable it.
- Select the option you want and follow the wizard.
Similarly to how you’d go about this problem in Windows 7, it might work to disable BitLocker from Control Panel, assuming you know your passkey and it still works.
After doing that, BitLocker should be permanently disabled for the selected drive.
2. Disable BitLocker from Windows 10 using the Local Group Policy Editor
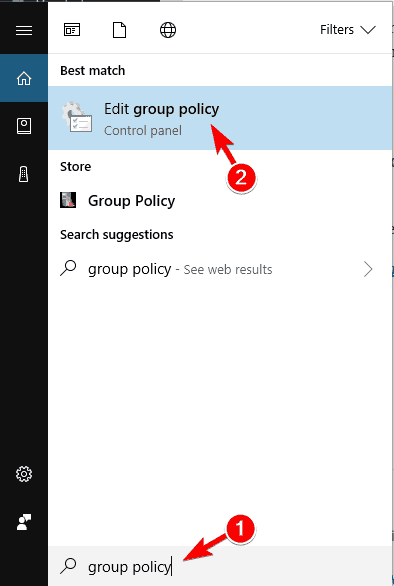
- Open the Search bar and type in Group Policy, then select Edit Group Policy from the menu.
- From here, navigate using the left-hand side menu to Computer Configuration -> Administrative Templates -> Windows Components – > BitLocker Drive Encryption -> Fixed Data Drives and select the Deny write access to fixed drives not protected by BitLocker option and double click it.
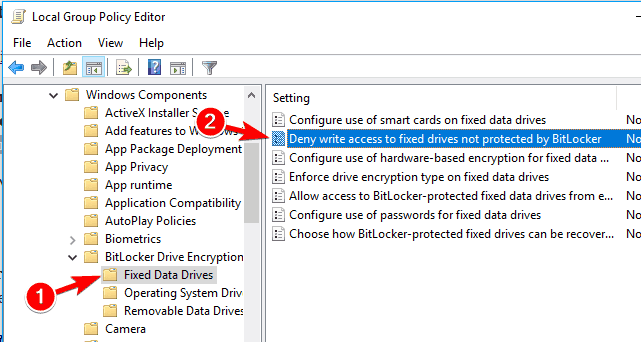
- Click Not Configured or Disabled, and click on Apply and OK to save changes.

If the first method is not a viable option for you, then using the Group Policy utility (GPO) might offer the solution.
After doing that, restart your PC and your problem should be resolved completely.
3. Use another PC to disable BitLocker

If both methods have failed, then all you’re left with is installing your encrypted hard drive back to a different computer and going through the methods once again.
In this scenario, method 1 will fix your problem and decrypt your drive, allowing you to use it in your Windows 10 PC.
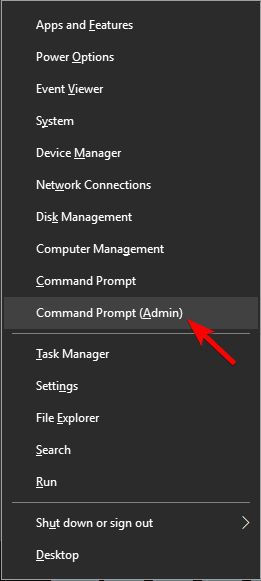
4. Use Command Prompt
- Open Command Prompt as administrator.
- To do that quickly press Windows Key + X to open Win + X menu and choose Command Prompt (Admin) from the menu.
- To do that quickly press Windows Key + X to open Win + X menu and choose Command Prompt (Admin) from the menu.
- When Command Prompt opens, enter the following command, and run it:
manage-bde -off X:
- Be sure to replace X with the actual hard drive letter.
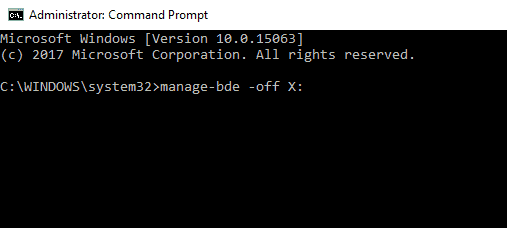
If you’re an advanced user, you can turn off BitLocker by using Command Prompt.
The decryption process will now start. Keep in mind that this process can take a while, so don’t interrupt it.
After the process is finished, your driver will be unlocked and BitLocker will be turned off for that drive.
As you can see, this is a quick and easy way to turn off Bitlocker, and if you’re familiar with Command Prompt, feel free to try this solution.
Working with Command Prompt will be like a walk in the park after you read this guide!
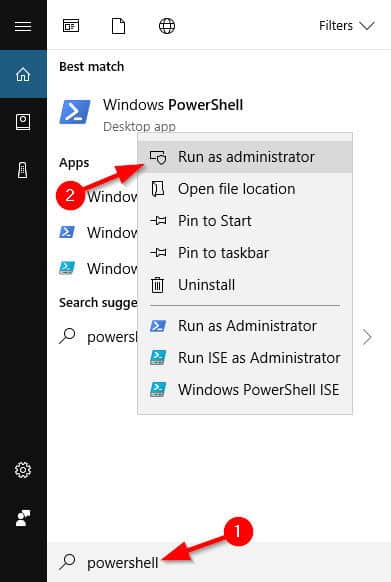
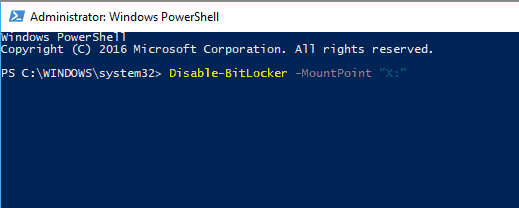
5. Use PowerShell
- Press Windows Key + S and enter Powershell.
- Right-click Windows PowerShell from the list of results and choose Run as administrator.
- When PowerShell opens, enter this command and press Enter to run it:
Disable-BitLocker -MountPoint "X:"- Before running the command, be sure to replace X with the letter that represents your hard drive partition.
You can also turn off BitLocker for all drives on your PC using PowerShell. To do that, follow these steps:
- Open PowerShell as administrator.
- Now run the following commands:
$BLV = Get-BitLockerVolumeDisable-BitLocker -MountPoint $BLV
If you prefer using command-line tools, you should know that you can turn off BitLocker for specific drive simply by using PowerShell.
By running these two commands you’ll get the list of encrypted volumes and decrypt them with a single command.
Keep in mind that the decryption process can take a while, so don’t interrupt it. Once the drive is decrypted, BitLocker will be turned off for that drive.
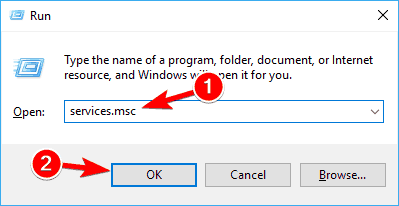
6. Disable BitLocker service
- Press Windows Key + R and enter services.msc.
- Press Enter or click on OK.
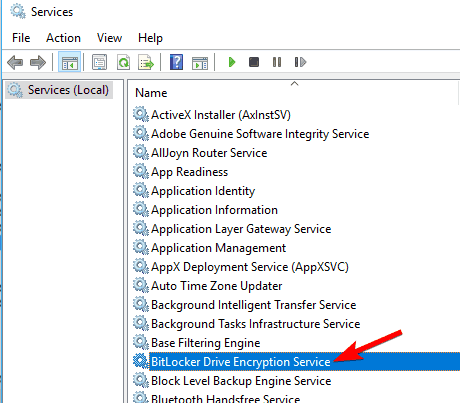
- When Services window opens, locate and double-click on BitLocker Drive Encryption Service.
- Set the Startup type to Disabled and click on Apply and OK to save changes.
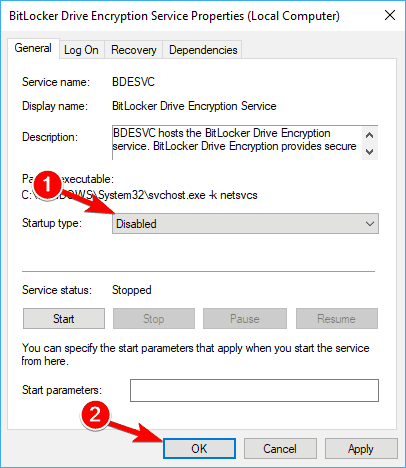
If you want to turn off BitLocker, you can do that by disabling its service.
After disabling the BitLocker service, BitLocker should be turned off on your device.
7. Turn off device encryption from the Settings app
- Open the Settings app. You can do that by pressing Windows Key + I shortcut.
- When the Settings app opens, navigate to the System section.

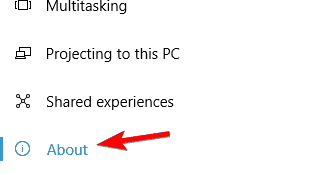
- In the left pane, select About.
- Now locate Device encryption section in the right pane and click on Turn off button.
- When the confirmation dialog appears, click on Turn off again.
If you want to turn off BitLocker, you’ll be pleased to hear that you can do that right from the Settings app. After doing that, BitLocker should be disabled on your PC.
For Windows 11 users, we have a special guide on how to turn off BitLocker on Windows 11, so don’t miss it.
BitLocker can be useful if you want to protect your files from unauthorized access, but if you don’t want to use this feature, you should be able to turn it off by using one of our solutions.
Read our disclosure page to find out how can you help Windows Report sustain the editorial team. Read more


Improve this guide


User forum
4 messages