Disable Fast Startup on Windows 11: How to Safely do it
Go through the pros & cons before changing the Fast Startup
Key notes
- Fast Startup is a handy Windows feature that reduces the booting time when you turn on the system.
- It is also known to cause problems but, thankfully, it can be easily disabled.
- You can disable the feature using the Control Panel and Command Prompt, among other methods in this guide.
Fast Startup, a critical feature in Windows, is unknown to most people. This is because it is usually enabled by default.
Users generally come across the concept when they want to speed up their PC, or encounter an error. Hence, we have dedicated this guide to help you understand Fast Startup and to disable it in Windows 11.
Should I disable fast Startup Windows 11?
The decision to disable or enable the Fast Startup feature on Windows 11 depends on what you use your PC for. It is usually advisable to keep the feature as it considerably increases your boot time.
However, the feature is known to cause issues at times. One of the main problems is issues with Windows updates. This happens when you completely shut down your PC to install an update.
But with the Fast Startup feature enabled, your PC will not shut down totally, and that affects the installation of the updates.
Also, you can experience issues with this feature if you use dual boot on your PC. This is because Windows locks your PC and overrides the dual boot. With this, your PC will always boot to Windows 11 automatically.
Finally, the Fast Startup feature can always lead to Blue Screen of Death errors. This is because your Windows kernel and drivers are stored in a session and are loaded in a hibernation file.
This hibernation file will be loaded into your PC on the next boot, thereby increasing the startup time. Unfortunately, loading the same kernel session every time can create mismatches between the original software components and the cache.
This can happen after updating your PC or drivers, leading to the dreaded BSOD. To round it up, if you are not facing any issues on your PC or using a dual boot, you might want to keep the Fast Startup feature.
How do I disable Fast Startup on Windows 11?
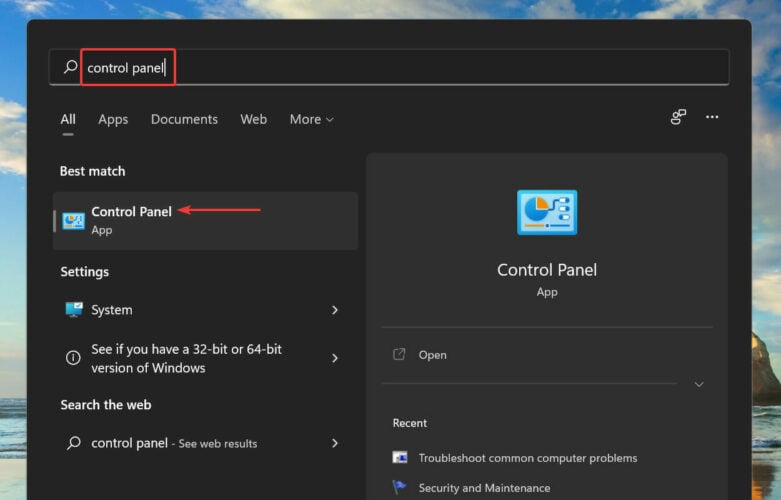
1. Press Windows + S to launch the Search menu.
2. Enter Control Panel in the text field at the top, and click on the relevant search result that appears. This will open the Control Panel app.

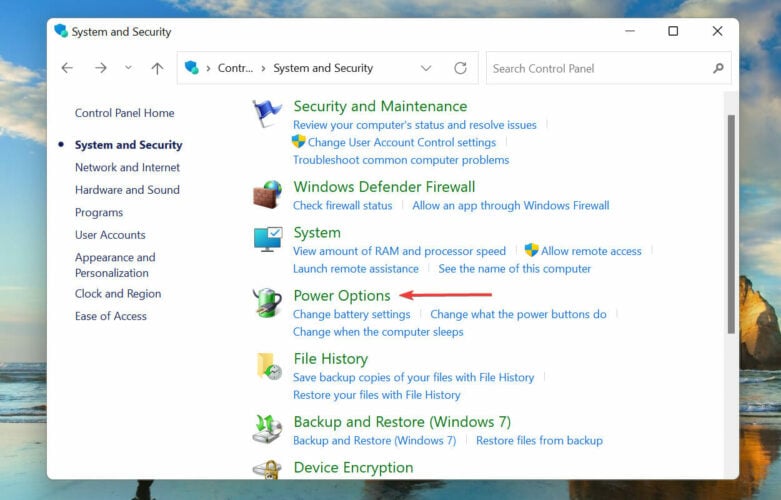
3. Click on System and Security.
4. Next, select Power Options.
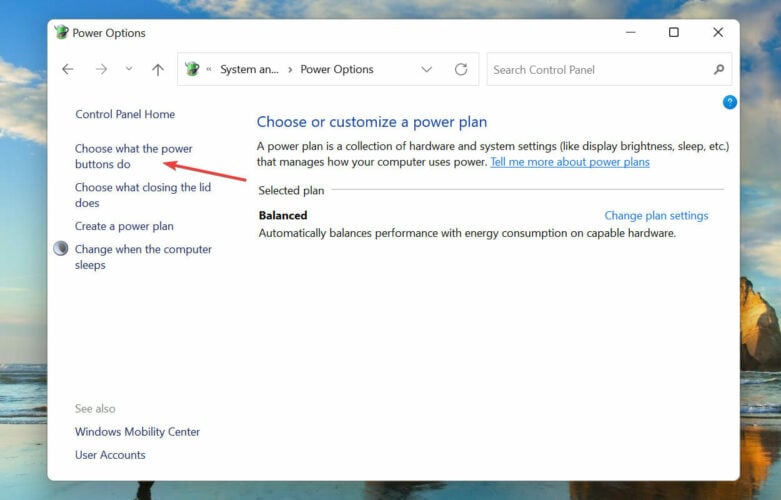
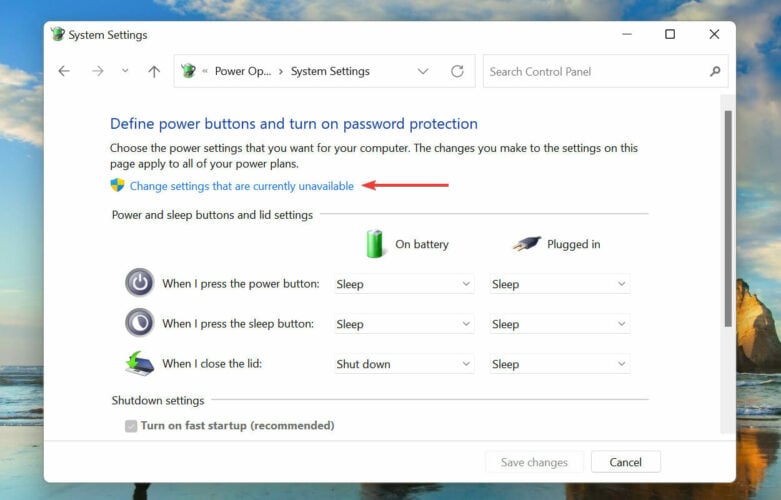
5. Click on Choose what the power buttons do from the list of options on the left.
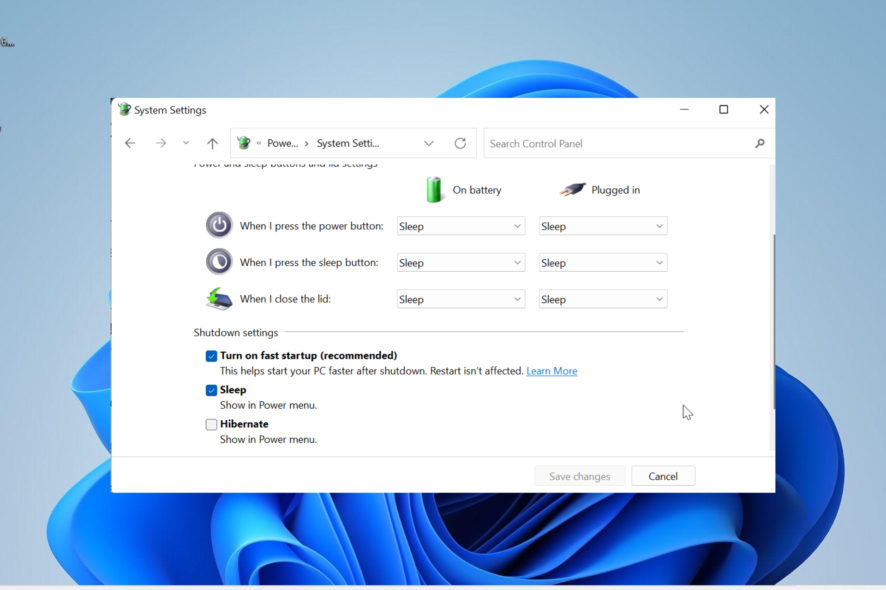
6. Press on Change settings that are currently unavailable.
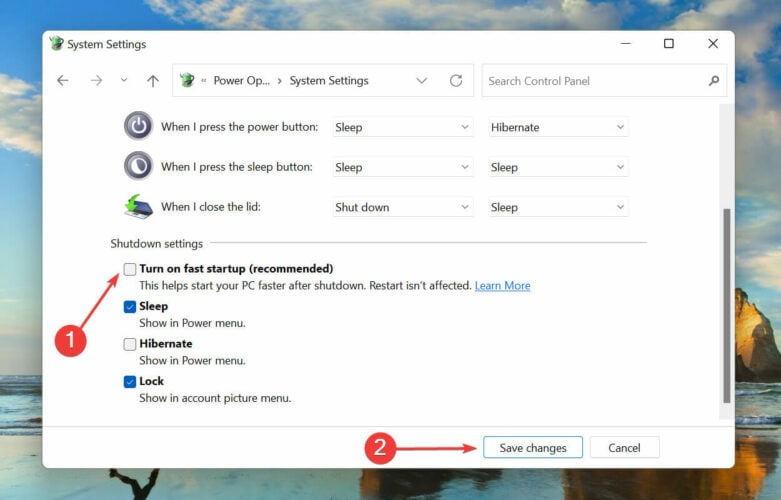
7. Now, untick the checkbox for Turn on fast startup and then click on Save changes.
8. The Fast Startup feature in Windows 11 will now be disabled.
1. Using the Control Panel

2. Use the Registry Editor
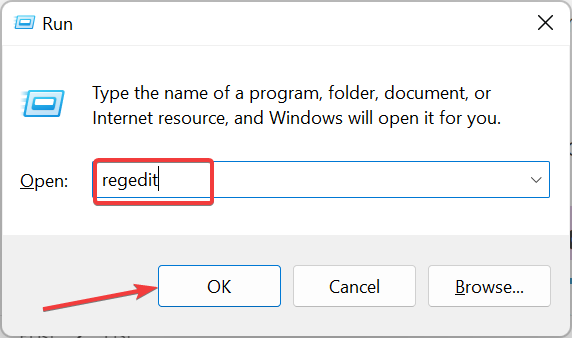
- Press the Windows key + R, type regedit, and click OK.

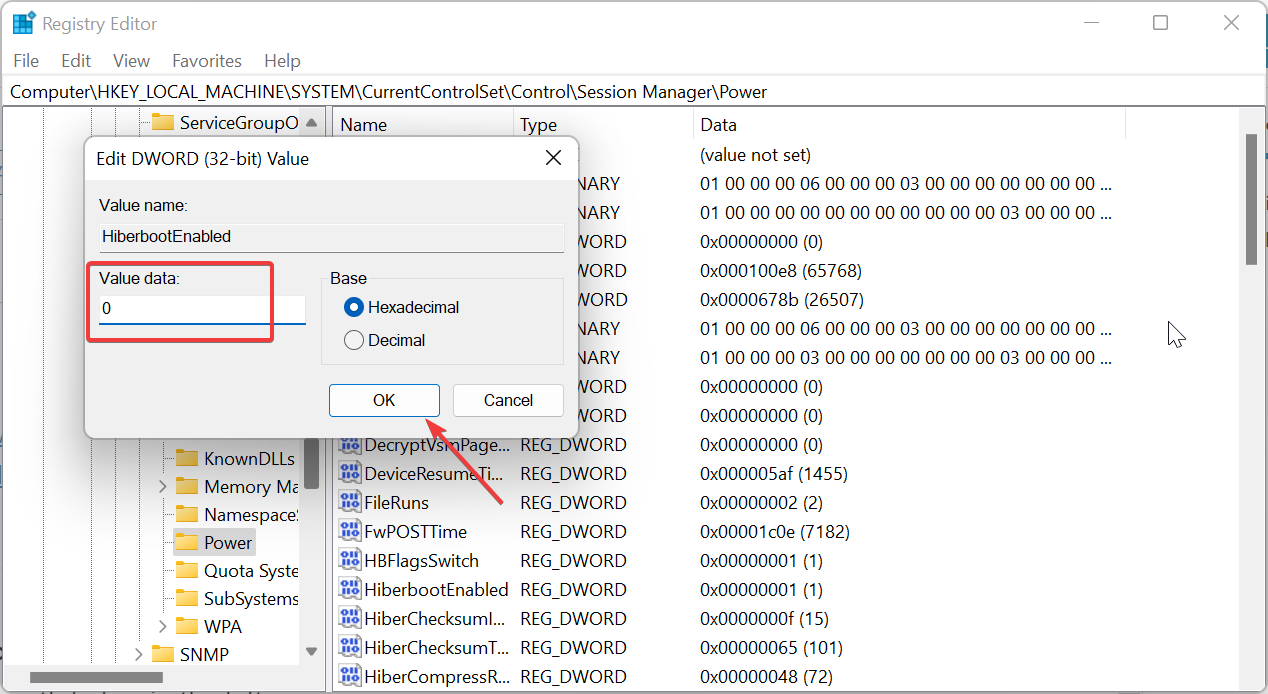
- Navigate to the path below in the left pane:
HKEY_LOCAL_MACHINE\SYSTEM\CurrentControlSet\Control\Session Manager\Power - Now, double-click the HiberbootEnabled option.

- Finally, set its Value data to 0 and click OK.

That is how you can disable the Fast Startup feature on Windows 11 using the Registry Editor. It must be stated that you need to be careful while making changes to your registry. So, make sure you follow the instructions above, as written.
3. Use the Group Policy Editor
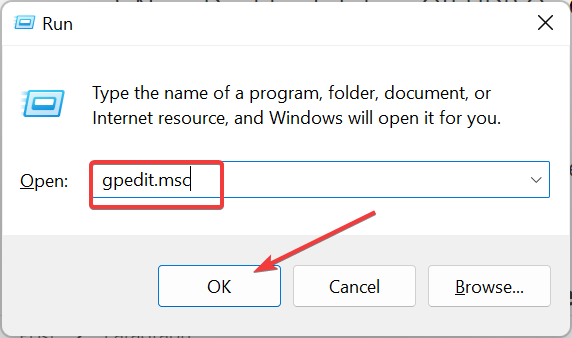
- Press the Windows key + R, type gpedit.msc, and click OK.
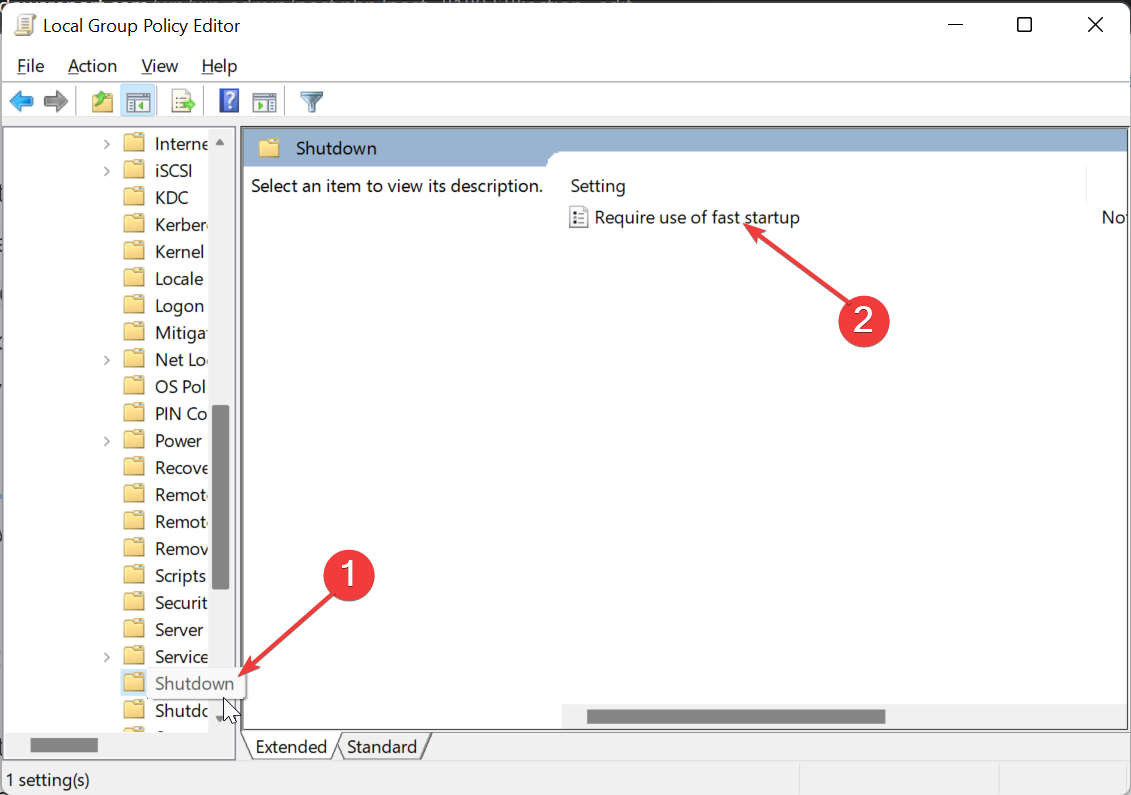
- Navigate to the path below in the left pane:
Computer Configuration > Administrative Templates > System > Shutdown - Now, double-click the Require use of fast startup option in the right pane.

- Finally, tick the Disabled radio button and click Apply, followed by OK.

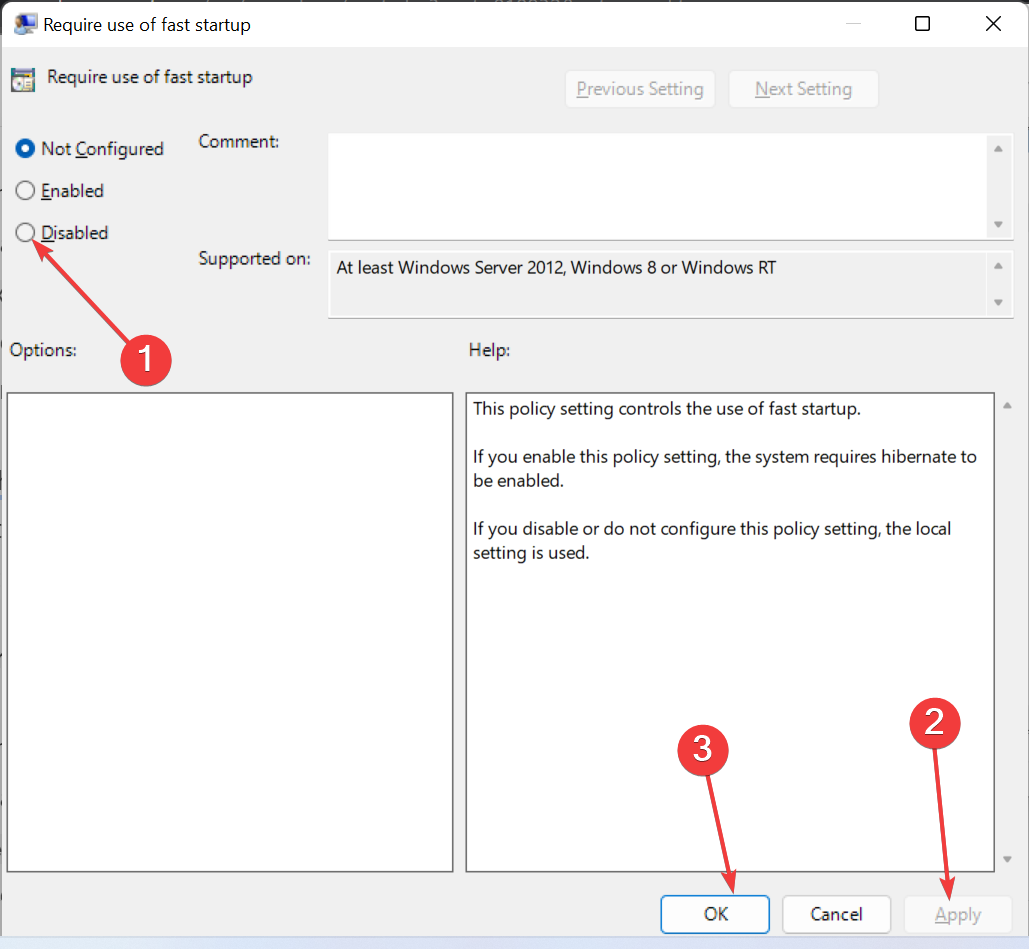
The steps above show you how you can quickly disable the Fast Startup feature on Windows 11 using the Local Group Policy Editor (GPO). After applying them, the feature will be disabled till you come back to enable it again.
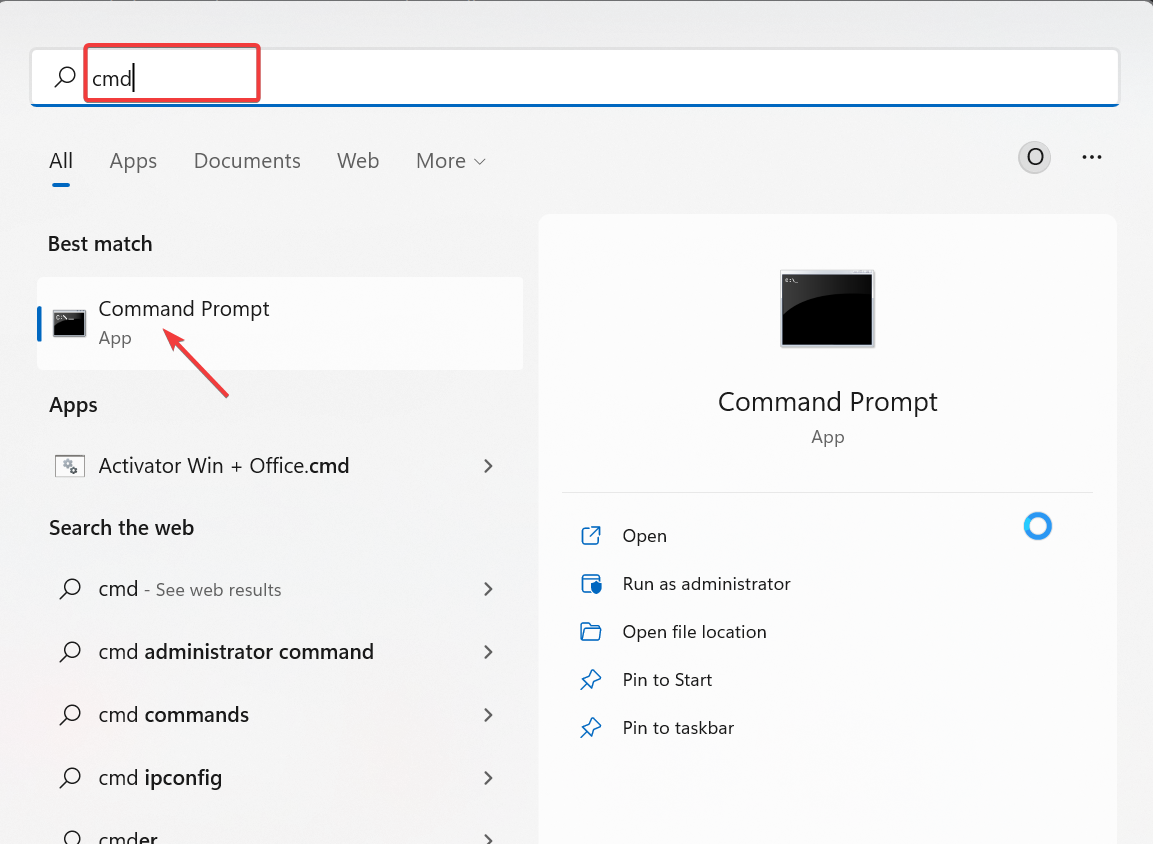
4. Use CMD
- Press the Windows key, type cmd, and select Run as administrator under Command Prompt.

- Now, type the command below and hit Enter:
Powercfg -h off
- Finally, wait for the command to finish running and close CMD.
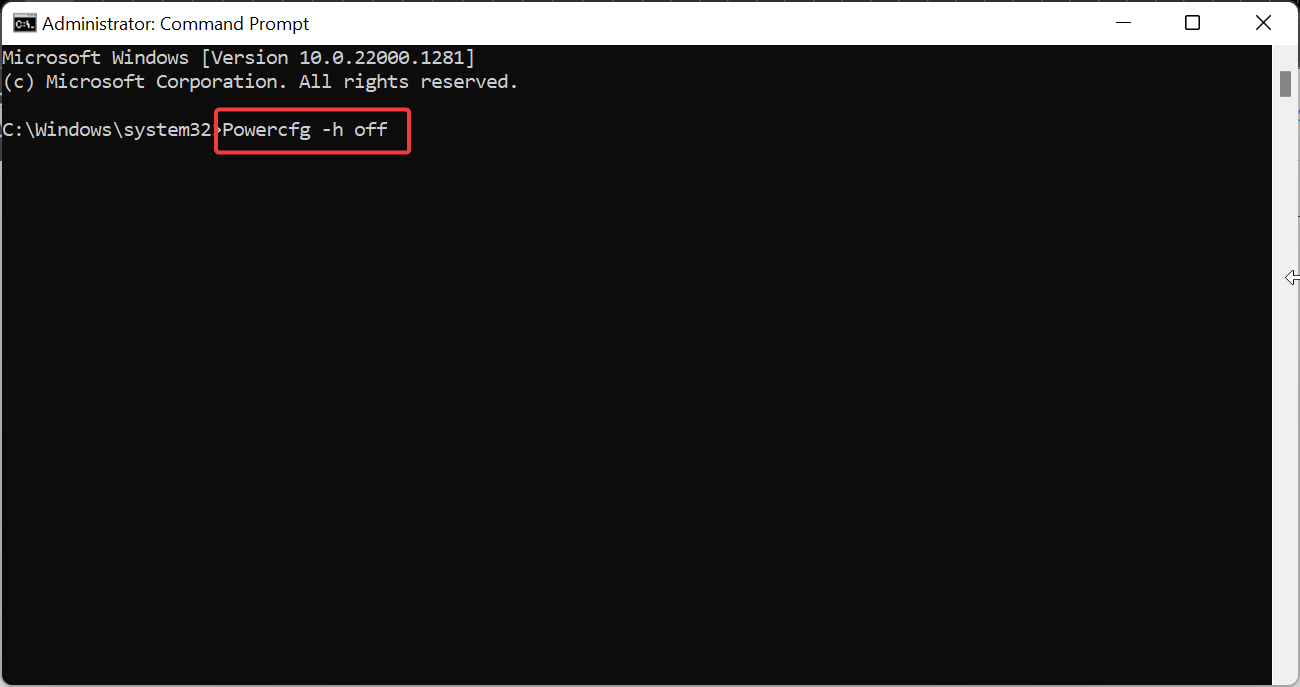
Finally, another method is to disable the Fast Startup feature on Windows 11 using CMD. This is the simplest and fastest of all the methods listed.
That’s all there is to Fast Startup and how you can disable it on Windows 11. In the above sections, we have shown the pros and cons of the feature and the decision to disable it or not should be easier now.
In case you are unable to disable Fast Startup, this detailed guide will help you force it through.
Feel free to tell us your experience with the feature in the comments below.
Read our disclosure page to find out how can you help Windows Report sustain the editorial team. Read more
Improve this guide


User forum
0 messages